How to Make Gelli Prints
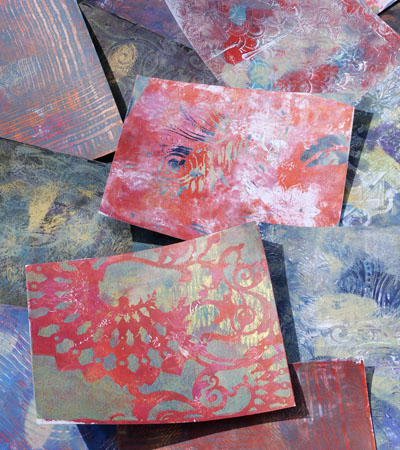
Today I wanted to share with you one of my favorite art techniques, how to make gelli prints. Gelli printing was a technique I used to struggle with until I took a class from a professional artist. She showed me that Gelli printing can not only be easy but also fun and relaxing. Gelli printing is my go to art activity when I want some creative self-care, especially in the moments where I’m not feeling very creative.
What is Gelli Printing?
What is Gelli printing? It is a type of monoprinting which is a form of printmaking that has lines or images that can only be made once. It differs from most printmaking as it does not really make multiple originals.
Gel printing was originally an art form known as the hectograph that was originally completed with dyes and gelatin. This technique has most recently been revived by Gelli Arts through the creation of the Gelli printing plate which is made of a mineral oil polymer material. This makes the plate reusable, sturdy and easy to use. You can find recipes online that can show you how to make your own gelatin plate. I have several Gelli Arts plates as I prefer the durability and ease of use.
My Journey into Gelli Printing
Making Gelli are prints is easy, but knowing a few tips, trick and techniques can help it be fun instead of frustrating. When I first purchased a Gelli plate, I looked online at a few videos and ended up feeling discouraged. They made it look so easy and I was struggling. I struggled with getting good prints, my Gelli plate was always a mess and I could not seem to get it to work for me. I ended up putting my plate away and did not touch it for a couple of years.
When I was attending a mixed media workshop, the teacher showed me techniques on how to make successful Gelli prints. It was amazing! Not only were my prints consistently good, but they had started to become the basis of my art. It was a turning point for me in my art. Mastering the Gelli plate changed what I incorporated into my art pieces.
The Tutorial(s)
I have created these 2 video tutorials to help you learn how to make Gelli prints. They are intentionally longer videos as I chose not to speed up any of the Gelli printing process.
The biggest frustration I had when I was learning was that the sped-up videos made it look so easy. The problem was that I did not learn much from them. I did not know how thick to apply my paint, how to get an even spread of paint or how to extend my paint correctly. I also did not learn the most important thing, how not to damage my Gelli plate.
To make these videos useful, I thought about how I felt as an artist trying to learn this technique for the first time. I wanted to make these videos as helpful as possible.
Gelli Plate Printing Basics
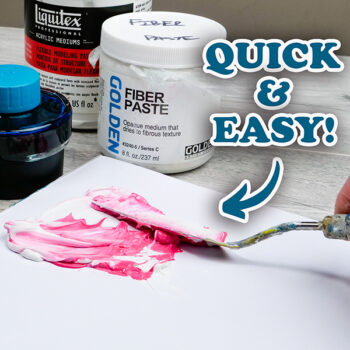
In the first video on Gelli Plate Printing Basics using Stencils, Stamps and Mark Making Tools, I demonstrate some of the basic techniques for gelli printing. This includes how much paint to apply to the plate, how to use paint extenders and how not to damage your Gelli plate. I show you how to make multiple single prints of different values and how to make marks on your plate with stencils, stamps and mark making tools. This video is the foundation in how to make gelli prints and how to easily make successful prints.
Gelli Plate Printing with Multiple Layers
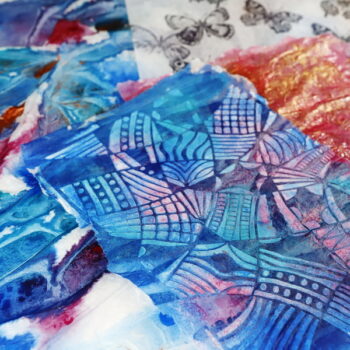
In my second video, Gelli Plate Printing with Multiple Layers, I continued from the first video to add additional layers to my first monoprints. This video focuses on how to effectively add the second layer to your prints without covering up too much of the original layer of paint. Through use of negative space and stencils, bubble wrap, stamps, embossing folders you can add additional interest to your prints and come up with some great surprises.
Project Supply List
- Gelli Art Gelli Printing Plate 8” x 10”
- Cardstock: Staples 90lb White Cardstock, Black Cardstock
- Pebeo Studio Acrylics: Cerulean Blue, Iridescent Precious Gold, Lemon Cadmium Yellow Hue, Prussian Blue Hue, Cadmium Green Hue, Iridescent Copper and Buff Titanium
- Dylusions Paint: Postbox Red and Pomegranate Seed
- Cheep Paint: Magenta, Crimson and Permanent Violet
- Stamps: Joesphine Kimberling for Impress Large Block Flower Stamp and Pointsetta Stamp
- Stencils: Stencil Girl Stitch a Circle, Tim Holtz Latticework, Rebecca Baer Fanfare, Leaves Stencil, Flourish Masks, and Handmade Stencils using Cricut Cutting Machine
- Mark making Tools: Bubble Wrap, Comb Plastic Tools, Spellbinders Embossing Folder
- Other Materials: Golden Retarder, Distress Sprayer , Plastic Palette Knife, Mark Making Tools, Brayer, Hand Sanitizer, Microfibre Cloth, Distress Sprayer
Any Questions?
I would love to hear if you have found these videos useful. If you have, please feel free to leave a comment below or contact me directly. Let me know if you have any questions, I would love to know how I can help you find some creative self-care this week.


