Creating Art Journal Textures with Gelli Prints
I love creating textures in my art journal and Gelli prints are a great starting point for adding depth in any project. I’ve been experimenting with ways to add textures on my Gelli prints so that they pop on my journal pages. Today’s art journal page covers several easy techniques for altering gel prints with a variety of mediums and tools.
Hop-A-Long Studio is reader-supported. When you buy through links on our site, we may earn an affiliate commission at no cost to you. Learn more.
Creating Shapes
Lately I have been enamored with simple shapes in my art journal projects like circles and rectangles. I recently discovered the Helix Circle Maker and I have been adding circles to many of my projects. As gel print patterns already have beautiful textures, the use of strong geometric shapes complements these textures and patterns well.
Project Inspiration
As with every project, I always start with a thought or inspiration. This project was focused on the idea of simplifying and choosing creative play. I can often get wrapped up in a project’s execution that I don’t take the time to play, to experiment, and to try different things.
By choosing simple shapes, this simplifies our design and opens us up to adding more textures and pattern to our projects. I find instead of falling into judgement of my art or the process, this can help me explore new ideas that come from creative play.
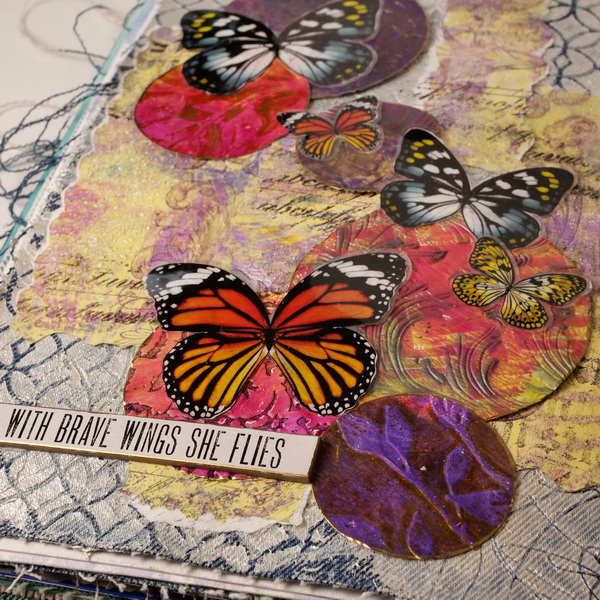
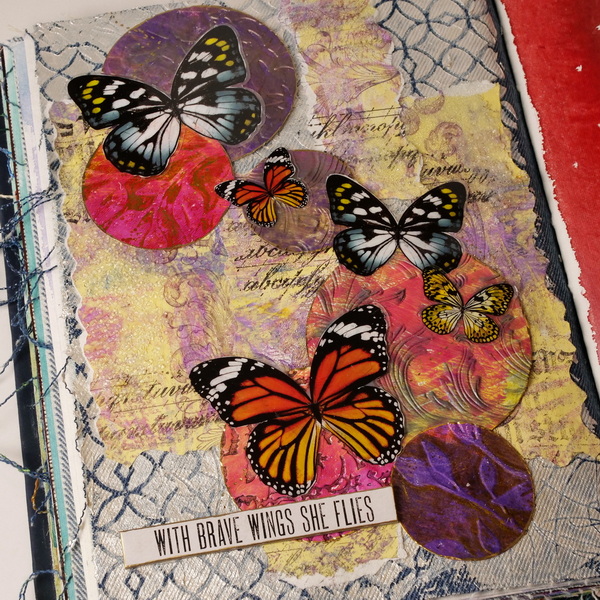
As a complement to the basic shapes, I chose detailed images as the focal point for this journal page. The simple shapes of the background allowed the focal butterfly images to really pop on the page.
I love the use of butterflies in my work as they are a reminder of rebirth and change. It reminds me to enjoy the moment and the process of learning. To move past judgement of myself to self-acceptance and find creative expression through the artistic process.
Art Journal Texture Techniques
Textures with Stencil Butters
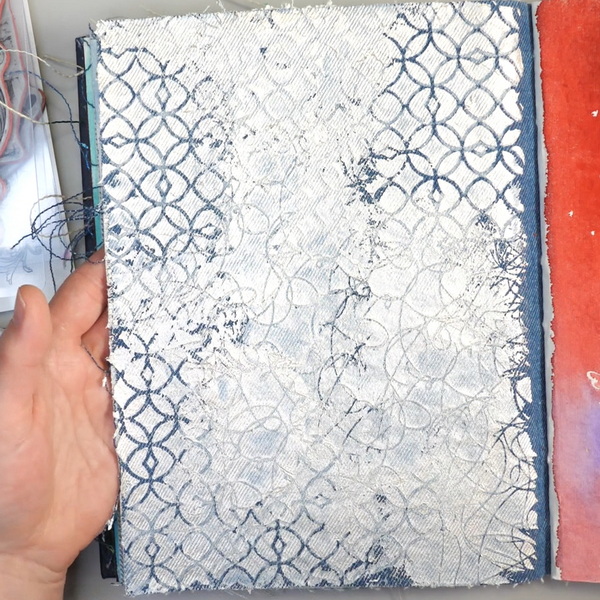
Start with your favorite surface. For this page I chose to use a denim page in my Dina Wakley Blue Media Journal. Using Pearl White Stencil Butter with a stencil, spread the stencil butter through the stencil using a palette knife. If you are working on untreated canvas, denim or a porous surface, you will need to add a thicker layer of paste to cover the surface. You can choose to add a large stencil that will fit the page, or you can overlap stencil images like I did.
By using smaller stencils, you can overlap patterns which creates randomness in the design. You can even press the stencil back into the paste to leave additional impressions.
Gelli Print Textures
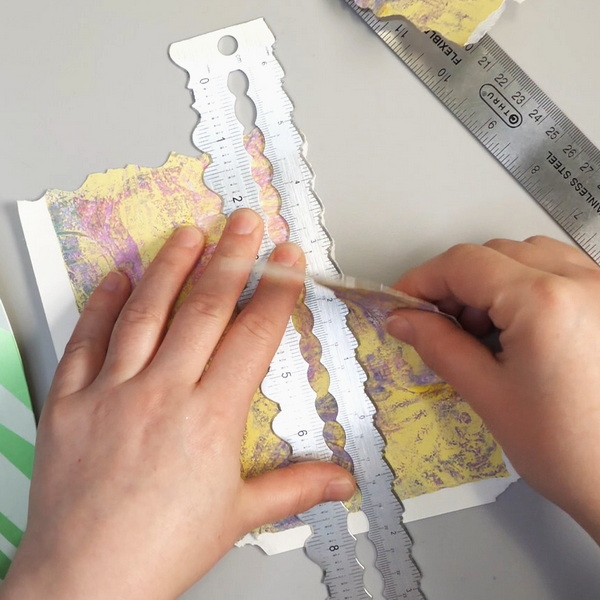
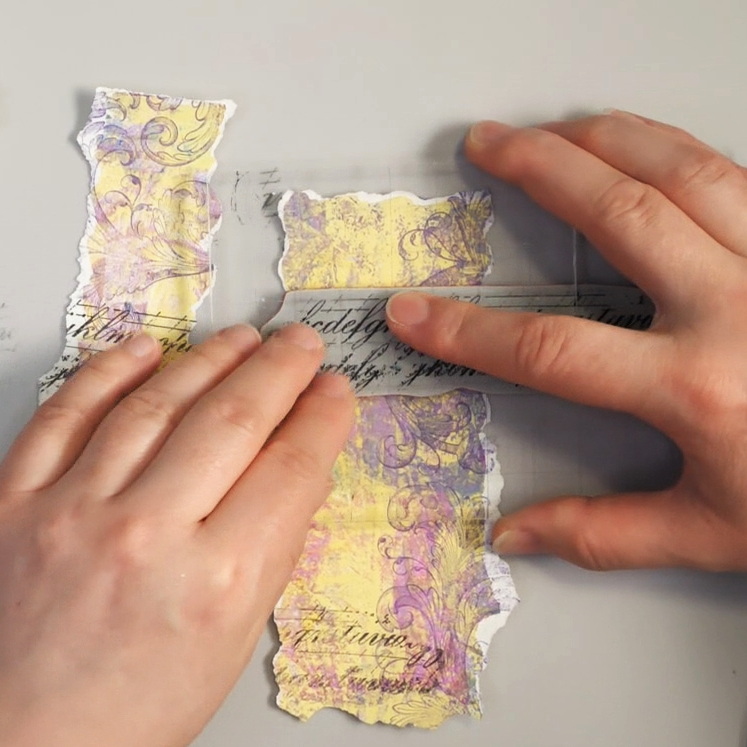
Choose your favorite gel print patterns and tear the pieces into thin rectangles. If you want precise edges, you can use a paper cutter to cut up the paper instead of tearing
For an organic torn look, use a straight edge or a decorative tearing ruler to tear up the gel print. Use a gel print with more subtle pattern without bold images. By choosing a less busy pattern, this allows us to add more texture to the gelli print without losing the pattern.
When I tore my paper, I didn’t care if the paper was perfectly square. It was intentional choice to create an organic feel to the composition.
Creating Texture with Stamps
Choose several of your favorite stamps and archival ink. For this page I used both Jet Black and Villainous Potion archival ink for stamping my images. Stamp random images onto the gel prints to create additional texture and pattern to the prints. You can use both first, second and third values for this step.
Make sure to use an archival ink (oil based) or Staz-On ink (solvent based) for this step. Both an oil and solvent-based ink will dry on the acrylic paint making sure that you get a crisp image that dries completely.
Creating Textures with Gel Mediums
I love gel mediums for the beautiful textures they can create on a surface. For these prints, we are not going to tint the gels but apply them on in their natural state. They will dry clear adding beautiful textures and shine but will not take away from the prints.
To add gel texture to the gelli prints, add a small amount in areas of the prints with a palette knife. Vary the amount of each paste to be added, overlapping them in places to add interesting texture combinations.
Textured Gel Mediums
I used 3 of my favorite gel mediums for adding texture to the gel prints: Crackle Paste, Glass Bead Gel, and Granular Gel.
There are both clear, opaque, and colored crackle pastes available. Make sure to use the clear crackle paste for this project. When crackle paste fully dries, you will start seeing the cracks on the surface. For large cracks, apply the medium thickly. For small, tiny cracks, apply a small, thin layer of the medium.
Glass Bead Gel is a gel with very fine glass beads mixed into the medium. This gel will go on a bit thicker as the gel will generally go on at least 1 or 2 beads thick. It adds a beautiful shimmer to any surface.
Granular Gel has larger, irregular granular pieces in the gel medium. This gel will go on thicker than the other two gels. It will be a bit harder to apply due to the larger granular pieces in the medium.
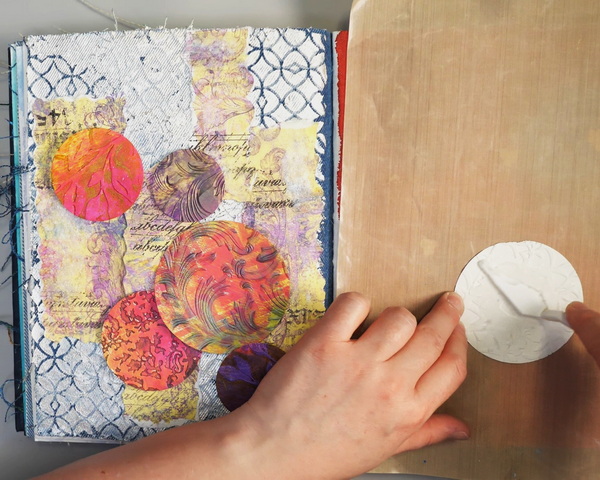
Making Circles
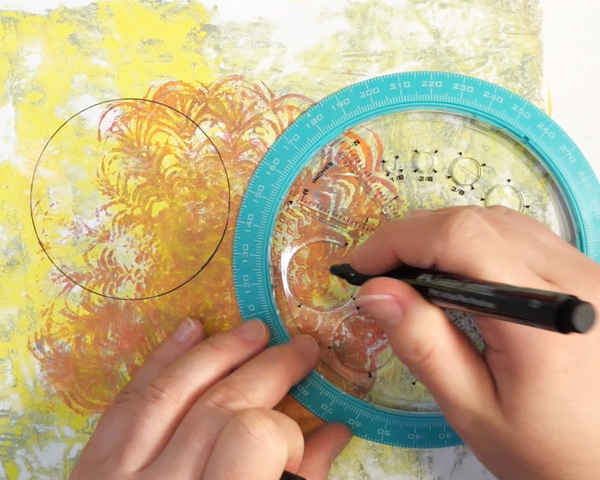
I have been using circles a lot in my art journal pages the last few weeks. Circles make for very dynamic images in an art journal page. My gelli print circles were created using the Sizzix Tim Holtz Vagabond die cutting machine and circle dies.
If you do not own a circle die or a die cutting machine, there is an inexpensive tool that can help you easily create circle shapes. The Helix Circle and Angle Maker that is very easy tool for drawing circular shapes. These shapes can then easily be cut out with scissors. For the full tutorial on circle tools, check back next week!
Adding Dimensional Textures to the Circles
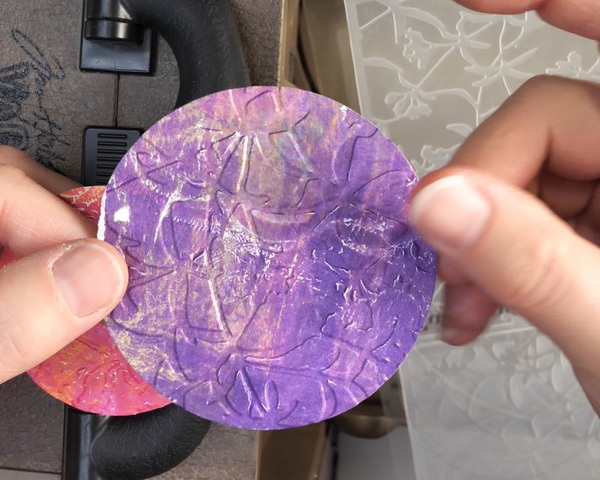
I wanted to create dimensional texture to the gelli print circles using both embossing folders and 3D texture fade embossing folders. These folders are extremely easy to use with a die cutting machine to dry emboss beautiful textures to the surface of the gel prints.
You can easily emboss the images by placing them in the embossing folder, sandwiching the embossing folder between cutting plates and running this through a die cut machine. This will create beautiful embossed textures to the circles.
Emboss Using Paint and Inks
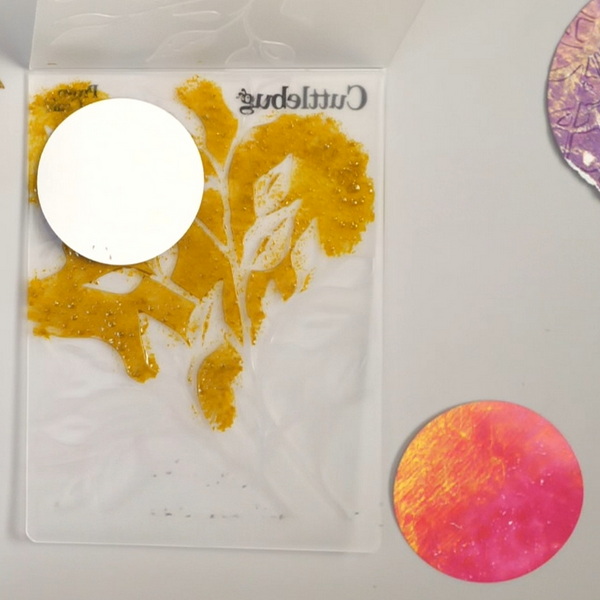
You can also create a variation of this technique using acrylic paint or archival ink. Add paint or ink to the embossing folder, add your images on top of the paint and run them through a die cutting machine. The paint and ink will transfer to the raised or lowered areas. This adds both dimension and color to the circles.
Adding Waxes to the Circles
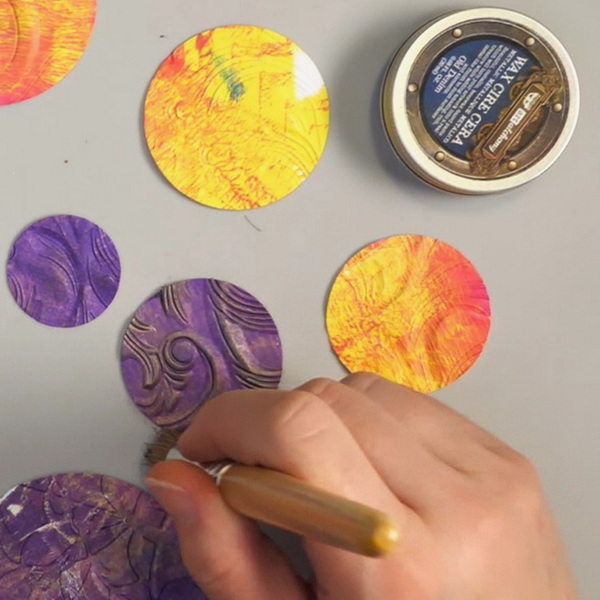
After the circles have been embossed, you can choose to leave them with a subtle pattern. But I like to pull the pattern out more on the surface. Using a variety of Art Alchemy Metallique Waxes create intense color and shimmer that will dry easily on the acrylic paint.
Using a stencil brush, add a bit of the wax to a non-stick surface. Swirl a bit of wax into the bristle of the brushes. Lightly touch the raised areas of the embossing. This will create beautiful highlights on the surface and will make the embossing more obvious.
Assembling the Journal Page
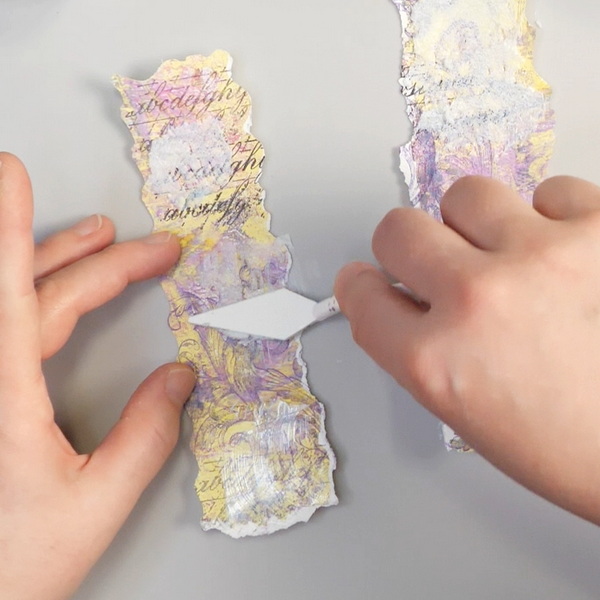
Once the rectangle and circle gelli prints have fully dried, use an extra heavy gel to add them to your page. The best way to add the extra heavy gel is using a palette knife and spreading a bit of gel to the back of each print. The extra heavy gel will make sure that the gel prints adhere properly to the uneven textured surface.
For this technique I purposely chose not to use a decoupage or collage technique, which means that I am not adding a layer of gel medium on top. This allows the texture of each layer stands out more instead of the layers becoming embedded in the page as they are with collage.
Altering Butterflies

I purposely chose a strong focal image for this page using the Ideology Transparent Wings collection. As the wings of the butterflies are transparent, I added white paint with a paint pen to make them opaque. This way the butterflies stand out more as the focal image on the page.
Final Touches
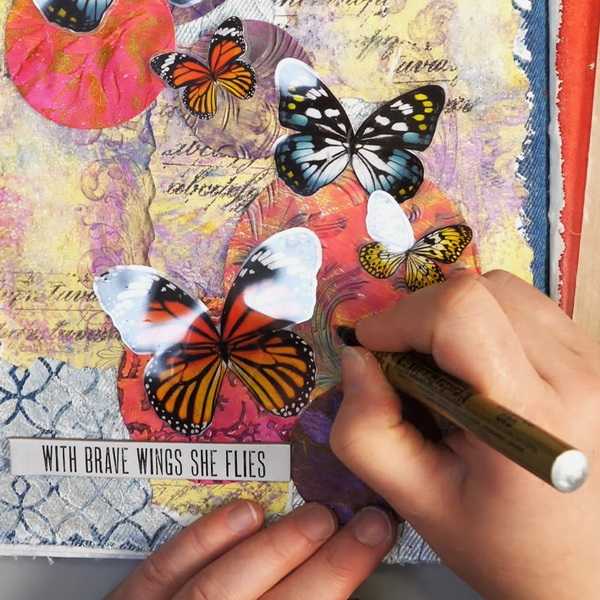
As with every page, there are always a few final touches to be added. Using a gold pen, I added in mark making and outlined the circles to pull out the images a bit more from the background. I finished up by adding the quote “With brave wings she flies.” I thought it was the perfect quote to finish up this page.
Questions?
Any questions on the art journal gelli print texture techniques that I shared today? I would love to hear what you think of these techniques! Please leave a comment below and I would love to start a conversation with you!
I hope that you take time for personal self-care this week and this gives you some ideas on how to use your Gelli prints in your next art journal project!
Project Supply List
Dina Wakley Media Blue Journal 8 x 10
TCW Pearl White Stencil Butter
Tim Holtz Stencil THS072 Doodle
Tim Holtz Stencil THS019 Lattice Work
Gelli Prints
Karen Foster Designs Ripping Ruler
Tim Holtz Archival Ink Villanous Potion
Stamper’s Anonymous Stamp Set CMS400 Baroque
Stamper’s Anonymous Stamp Set CMS397 Faded Type
Sizzix Tim Holtz Vagabond 2
Sizzix Tim Holtz Texture Fade Embossing Folders
Cuttlebug Embossing Folders
Sizzix Tim Holtz Texture Fade Embossing Folder Swirls
Art Alchemy Metallique Wax Old Denim
Art Alchemy Metallique Wax Brushed Iron
Art Alchemy Metallique Wax Bronze Age
Tim Holtz Distress Paint Tarnished Brass
Pentouch Gold Ceramic Paint Pen
Stamperia Clear Crackle Paste