Feeling Stuck? How to Use Gel Prints in Your Art Journal Projects
Do you ever stare at your stack of gel prints wondering how to use those gel prints in your projects? You’re not alone. It can be overwhelming to take the beautiful prints you’ve made and figure out how to incorporate them into your journal.
Today I’ll share with you one way that I like using gel prints in my art journal and how easy it is to add gel prints into your projects.
Hop-A-Long Studio is reader-supported. When you buy through links on our site, we may earn an affiliate commission at no cost to you. Learn more.
Adding Gel Prints to the Art Journal
There are so many ways of adding gel prints to your art journal. You can tear them up for collage, or layer them onto you journal page in interesting ways; the possibilities are endless. Today I’m sharing the simplest way to add gel prints to the art journal.
Gel Printing Backgrounds

Cut your paper to the size of your journal page and adhere it onto the page with Art Glitter glue. This is the simplest ways of adding gel prints to your art journal. It creates a colorful and patterned background in which other layers can be added on top.
When adding your page, you can choose to add glue underneath the paper to adhere it, this will leave the top with the gel print finish. Or you can use a collage technique and add a layer of gel or matte medium to the top of the gel print.
When should you add a layer of gel on top? When you are planning on using a lot of wet mediums for the additional layers. The gel will protect the paper and keep the page from wrinkling or getting bumpy.
Adding Layers with Distress Oxide Ink
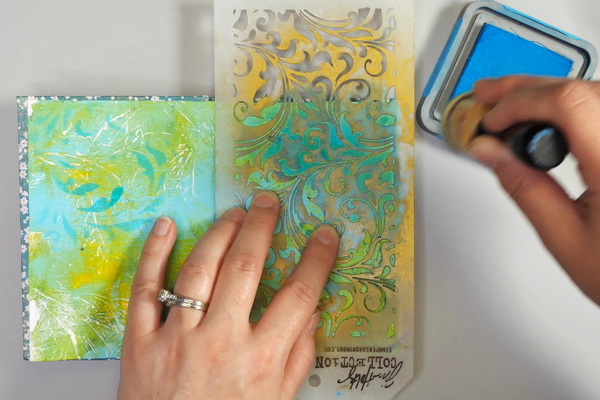
You may want to add additional layers to the page before adding your focal imagery. For this project I added flourishes using the Tim Holtz Flourish stencil and Tim Holtz Distress Oxide Blue Lagoon ink. Using a mini blending tool and domed foam, add the ink through the stencil.
Be aware that not all inks will work on acrylic. Distress oxide inks are formulated to allow the ink to dry onto the surface. Be aware that this is a slow drying ink. I suggest using a heat tool to speed up this process.
For stamping on acrylic surfaces, I also suggest using Staz-On solvent ink and oil-based Archival ink. These inks will take longer to dry on acrylic than on a porous paper surface, but they will dry on an acrylic surface.
Adding Layers with Archival Ink
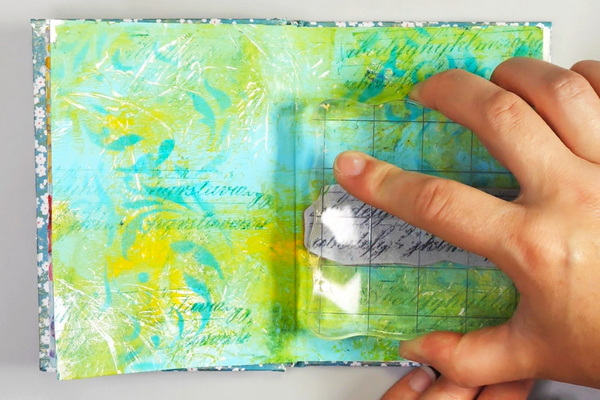
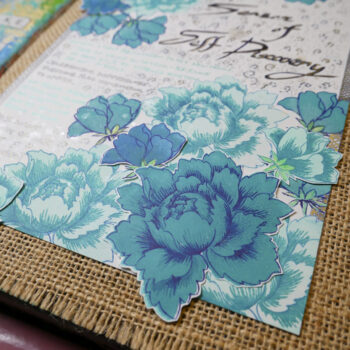
Because I love layers, I continued to add stamped images with Stamper’s Anonymous Faded Type cursive stamp and Evergreen Bough Archival ink. I stamped using not just the first, but the second and third values onto the page.
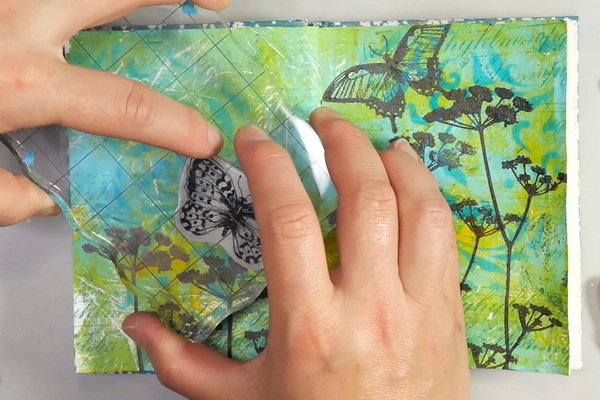
To create strong contrast to my images, I created groups of flowers and butterflies using Tim Holtz Flutter and Wildflower stamps and Jet Black Archival Ink.
Adding Watercolor to Gel Prints
Adding watercolor to gel prints may seem unusual, but watercolor will fully dry on acrylic paint. Just be aware that the watercolor will stick to the surface but won’t absorb into the surface like watercolor paper.
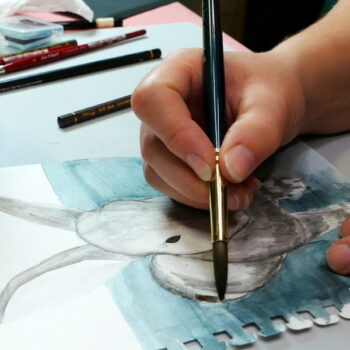
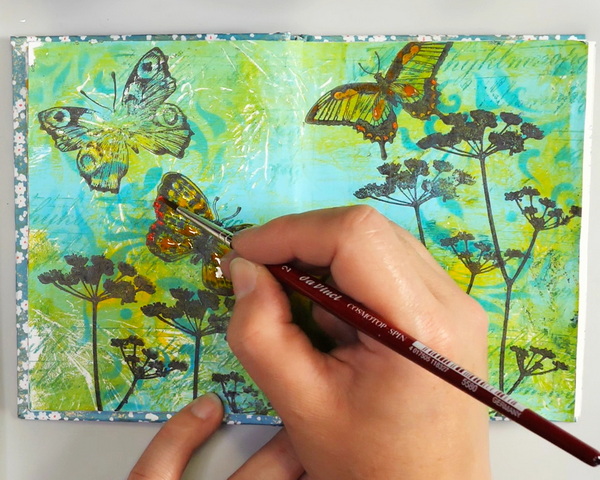
To create harmony, choose a few colors from your background print to add to your butterflies. I chose to pull out yellow from the gel print background. Using a Size 2 daVinci Cosmotop Spin watercolor brush I added Mission Lemon Yellow and Cotman Cadmium Yellow Hue as the main color of my butterflies.
To help the butterflies stand out from the background, I also blended in Mission Permanent Deep Red to the edges of the butterfly wings. When the red mixed with the yellow this also created a variety of orange tones.
The final touch of color was Cotman Burnt Umber watercolor added to the butterfly bodies.
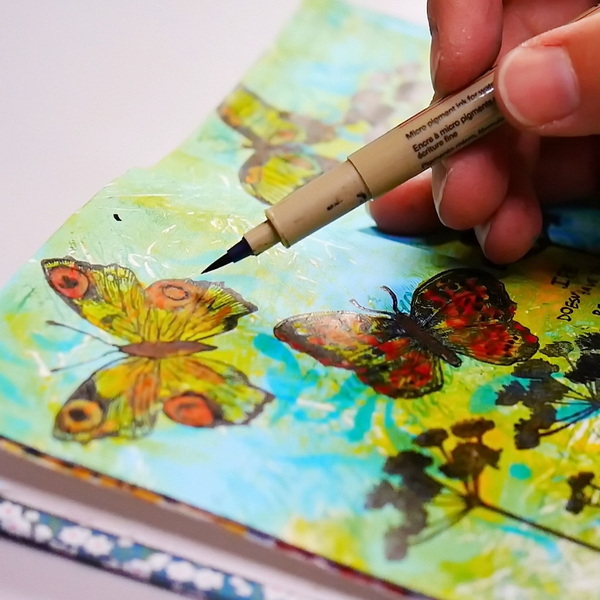
Fixing Stamping Errors
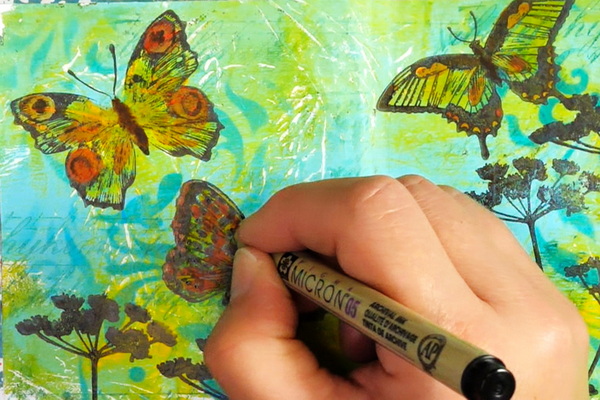
Because I was stamping on an uneven surface, I ended up with a few stamping errors. Using my 0.1 and 0.3mm Sakura Pigma Micron Black pens, I filled in the areas that were missing ink.
For some of the wildflower areas, the color was darker than the original archival ink. To help the tones blend more closely, when the ink was still wet, I dabbed into the surface with a paper towel. This lightens the ink and helps create a better match to the stamped images.
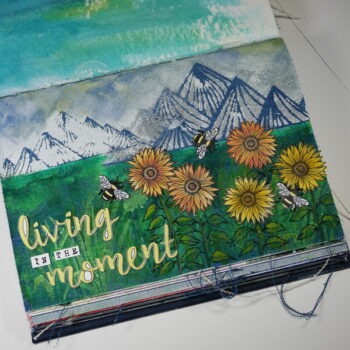
Adding Journaling

As with every page that I do, I love to add thoughts and journaling. My thought for this week is:
Life doesn’t have to be rainbows and butterflies to be good.
This came from a couple of questions that I’ve been asking myself lately.
What expectations do we put on ourselves? What expectations from others do we live out in obligation?
I’ve been thinking a lot about performance and how often we perform in our lives. When people ask how we are, are we honest? Or do we say “I’m good” even though we are struggling inside?
I’ve been musing about how we can find authenticity in our lives. Do we sell out on ourselves because of people’s expectations? In my life I’ve become more aware that I so often sell out on myself to make other people happy, to keep the peace, even though I’m feeling frustrated on the inside.
My challenge to myself, and perhaps you can relate to this, is finding ways to be true to ourselves and be truly honest. Instead of replying with everything is awesome, perhaps it’s time to say how we are truly feeling. It could be, “I’m ok, but I am having some struggles.”
Of course, you do have to be careful who you do this with. Preferably it’s with people who know and care for you. This is a great place to practice good boundaries and true honesty. Then from there, it’s figuring out how to be authentic with people that might not like your authenticity.
This page is meant to remind me and challenge me to find more balance in my life. To be more honest and truthful. This also gives us permission not to be perfect and not to be “on” all the time. It takes practice. But showing ourselves compassion and being honest is one of the best things we can do for ourselves.
Questions?
I hope that you’ve enjoyed this simple page showing you how to use gel prints in your art journal. My hope is that this has also given you an art journal prompt to explore authenticity. If you have any questions or comments about anything I’ve shared today, please leave a comment below. I hope that this will inspire you to work in your art journal and take time for creative self-care this week!
Project Supply List
Handmade Art Journal Using Strathmore 200 Watercolor Paper
Gelli Prints
Art Glitter Glue
Tim Holtz THS-032 Flourish Stencil
Tim Holtz Distress Oxide Ink Mermaid Lagoon
Ranger Mini Ink Blending Tool
Mini Blending Tool Domed Foam
Tim Holtz Stamper’s Anonymous Faded Type Script Stamp
Tim Holtz Archival Ink Evergreen Bough
Ranger Jet Black Archival Ink
Stamper’s Anonymous Flutter Stamp Set
Stamper’s Anonymous Wildflower Stamp Set
Stamping Block
Daniel Smith Extra Fine Watercolors New Gamboge
Mission Watercolor Lemon Yellow & Permanent Deep Red
Winsor & Newton Cotman Watercolors: Cadmium Red Pale Hue, Burnt Umber
daVinci Cosmotop Spin Watercolor Brush
Sakura Pigma Micron Pens