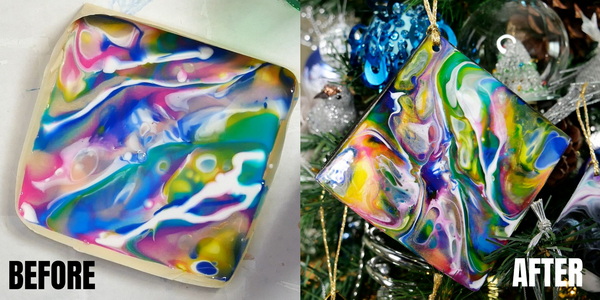
Easy and Beautiful Acrylic Paint Pouring Holiday Ornaments
Have you ever tried making holiday ornaments using acrylic paint pouring techniques? This medium may seem messy, but today I’ll show you how to get beautiful results with a controlled pour. This makes these stunning ornaments easy to make and requires a lot less clean up.
Why Pouring Medium?
I love pouring medium because of the glossy effect of the paint and the beautiful depth of color that you can get in your designs. It isn’t an easily controllable medium, so it lends itself better to abstract pieces and designs. This makes it perfect for holiday ornaments.
I’ve recently been teaching a lot of paint pouring and had a lot of medium to use up. When this happens, I try to find a clever way to incorporate it into other projects. Today I’ll share with you a few of my favorite techniques and how to create successful ornaments with an acrylic paint pour.
Hop-A-Long Studio is reader-supported. When you buy through links on our site, we may earn an affiliate commission at no cost to you. Learn more.
Choosing a Surface
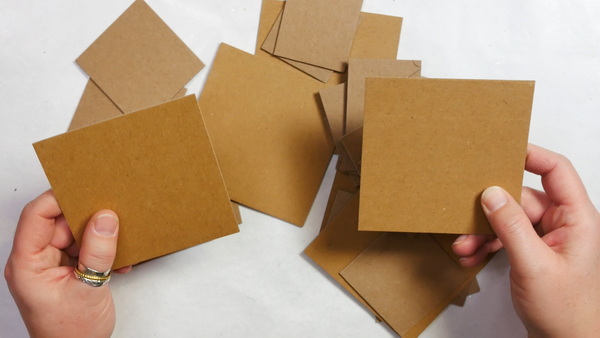
Usually when I do acrylic paint pouring pieces, I’m using a sturdy cradled birch board or a canvas with at least a 1/2” edge. Today we’re going to be playing with pouring medium on chipboard. I’m using a 50pt chipboard for this project as it will be stronger and won’t warp as we work. But it will still require some prep before we can add our pouring medium on top.

Make your own albums, frames, displays, covers, backs, boxes, and containers. 100 pack of 8.5" x 11" single thickness chipboard.

MDF boards are a great choice if you are looking for a product thicker than chipboard. This MDF Board pack has 8 pieces measuring 11 inches wide by 14 inches long by 1/4 inch thick.
Both sides have machined, smooth unfinished surfaces with precision-cut straight, sanded edges. Each board is sturdy and has some weight to it
Prepping the Chipboard
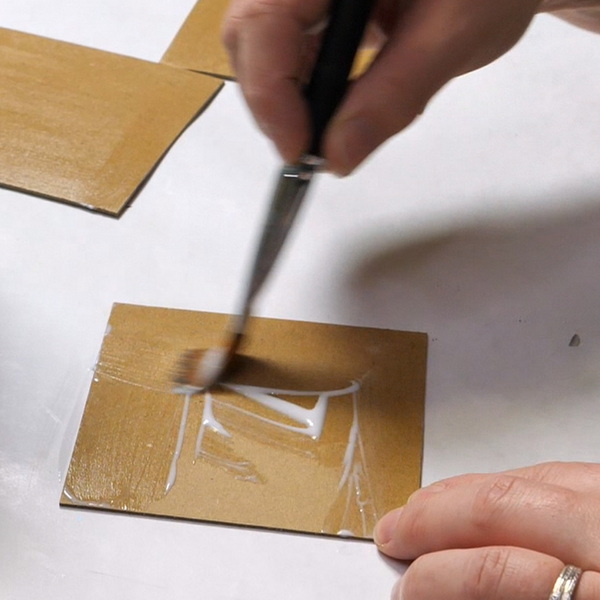
To prep the chipboard, start by brushing a layer of matte medium onto the pieces. You want to seal both sides of the chipboard. When you add the matte medium, it seals the chipboard and makes it stronger. This prevents the pouring medium from seeping into the chipboard, which can cause it to warp.

Creates a matte, non-reflecting finish when added to acrylic colors. Lightweight, non-toxic; Opaque when wet, translucent when dry.
Adding Gesso
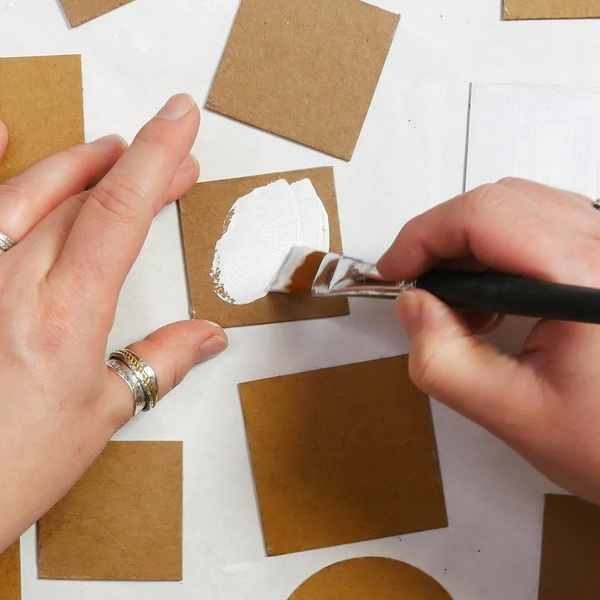
When working with acrylic paint pouring, I like to start with a white surface. Add a layer of white gesso to the chipboard pieces before adding any medium on top.
This creates tooth on the chipboard, which helps the pouring medium stick to the chipboard more evenly. By adding white gesso, this will make the colors in the acrylic paint pouring brighter. Without the white base, the colors will look muddy due to the brown color of the chipboard.

A ready-mixed painting ground, Liquitex Acrylic Gesso primes surfaces and adds the right level of tooth for optimum color stability, adhesion, and absorbency.
Taping Your Chipboard Pieces
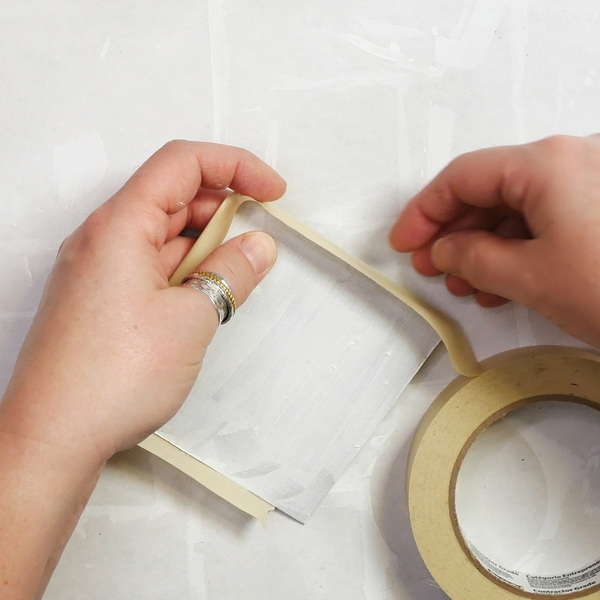
To keep the mess down and to create a more controlled acrylic paint pour, add masking tape around the edges of your chipboard. You want to create a continuous taping around the chipboard that is 2 layers thick. By adding tape to the back of the chipboard and bending it up, you’re creating a “dish” for the pouring medium to sit in.
When you tape your chipboard, this will give you a thicker, more detailed pour with a lot less waste. This will also make cleanup a lot easier.

Adding Pouring Medium
When choosing a pouring medium, I recommend Liquitex Pouring Medium. This is the thickest paint pouring medium and gives you the best results and working time. It is the most expensive, but worth the extra investment.
If you’re on a budget, the other brand I use is Demco pouring medium. This medium isn’t as thick and isn’t quite as nice as the Liquitex, but the price point is much more reasonable. I tend to use the Demco in my art classes when price point matters. For my own personal pieces, I prefer to use the Liquitex Pouring Medium.

Liquitex Effects Pouring Medium creates even puddles, poured sheets, and flowing applications of color without crazing or cracking. The paint film dries without holding bubbles. It retains its appearance when dry.
The one pouring medium that I wouldn’t recommend is the Artist Loft Pouring Medium. Where the Demco and Liquitex have a consistency of maple syrup, the Artist Loft Pouring Medium has the consistency of water. I have tried this pouring medium and had very poor results.
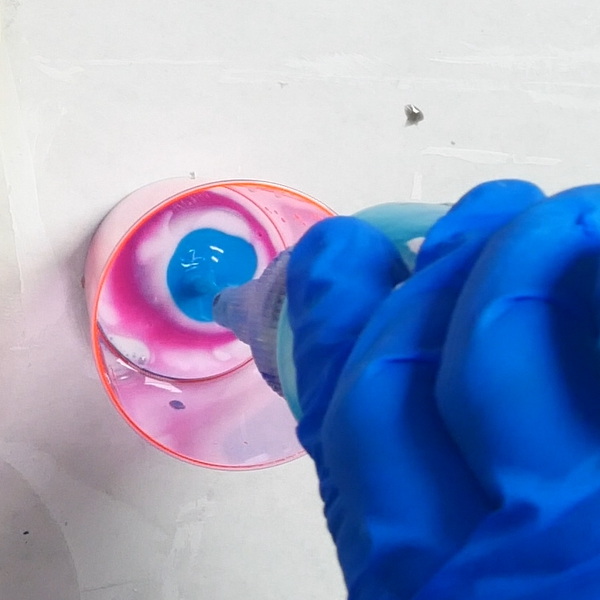
Tinting the Pouring Medium
Some pouring mediums may come pre-tinted, like the Demco pouring medium. I personally like to purchase the pouring medium as a clear medium and tint it myself. This is a more economical way of using pouring medium as you can mix the right amount of whatever color you prefer.
To tint pouring medium, add a high-quality pigment paint or acrylic ink to the pouring medium. If you are using professional paints, you’ll only need about 5-10% paint to pouring medium to get the color you want. If you are using craft paint or paints with very little pigment load, you will need to add a lot more paint to get the color you’re hoping for.
My favorite professional paints are the Golden Acrylics. If you are on a budget, try the Amsterdam Acrylics, they are a student grade paint with a great pigment load which works well for acrylic paint pouring.

- Single-pigment colors for brilliant, precise color mixing
- Smooth, pourable texture for glazing, layering, and detail
- Includes Titanium White and Carbon Black for value and tone control

Proudly crafted in the Netherlands, these acrylic paints are value priced and easy to use, making them an excellent choice for the beginning or intermediate artist.
Make sure to stir slowly when you are combining the paint with the pouring medium. If you stir too quickly you can create air bubbles in your medium that are difficult to get rid of later.
Choosing a Container
You can choose to mix small amounts of paint in disposable shot glasses or you can mix your paint in a bottle with a fine nozzle. Using a bottle will give you finer control than with a shot glass.
I tend to first mix my paint in a 18oz solo cup. If I have leftover paint, it gets decanted into plastic bottles to be used at another time.

Package comes with 100 cups in total. Each is in capacity of 1oz. Top diameter: 1.57", bottom diameter: 1.1", and height: 1.57". Perfect for craft projects where you're dealing with high flow mediums.

- High-quality plastic red party cups.
- Made BPA Free.
- Single-use cups designed for hassle-free cleanup.
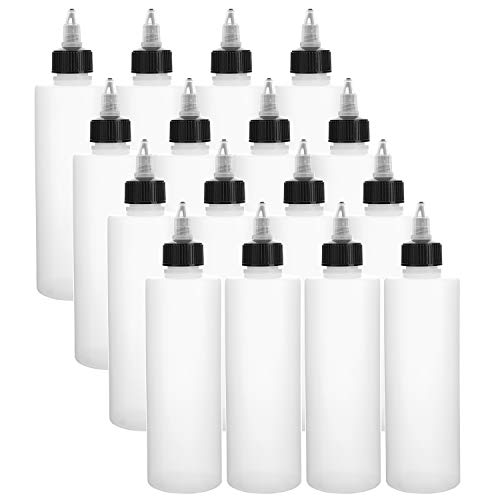
- Durable LDPE Plastic: Made from sturdy yet squeezable LDPE plastic for leak-free dispensing.
- Twist Top Caps: Allow for easy dispensing and precise application with twist-to-open and close caps.
If stored with airtight caps and at room temperature, the medium will last a very long time. I have pouring medium that is 5-7 years old that I am still using for projects. Most of the paint that I’m using today is at least 5 years old and works as well as the day that I originally mixed it.
Making Your First Paint Pour
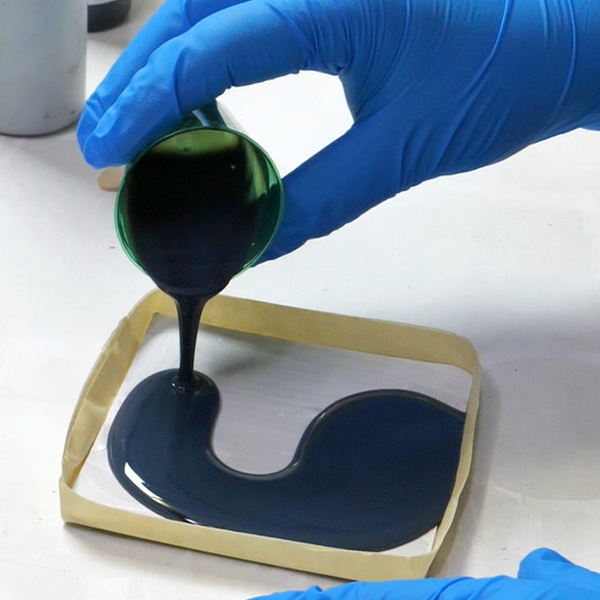
For this first pour, I’m keeping the design very simple. Add black pouring medium to the chipboard and spread it evenly across the chipboard by moving and tilting the chipboard. Add stripes of blue and silver paint to add definition.
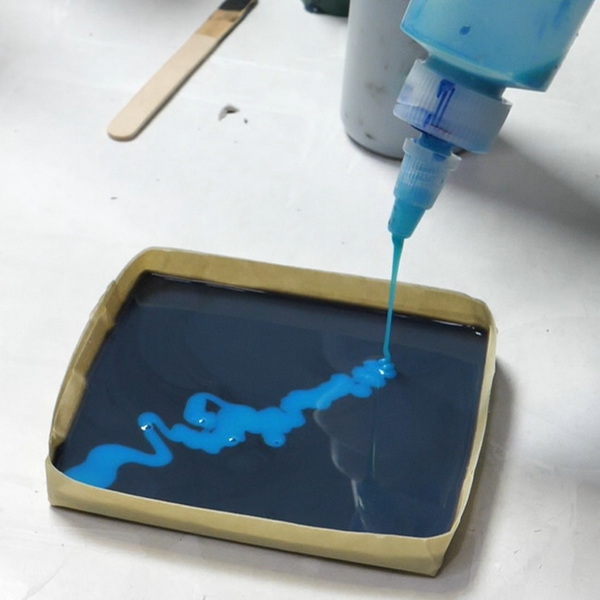
When you first start working with pouring medium, you’ll notice that it has the consistency of maple syrup. This means that it will pour out, but you can have a lot of fun tilting your canvas and angling it. This will give you some pretty amazing results.
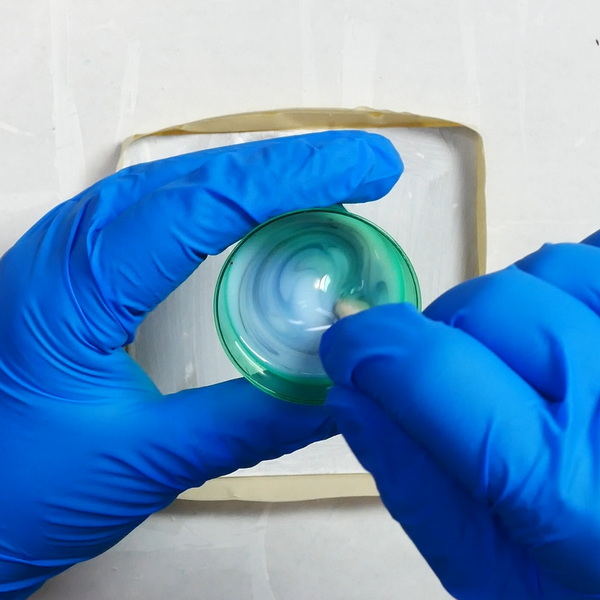
You can also choose to have more control over your acrylic paint pour by using a bamboo skewer to move your paint around as I am in the photo below.
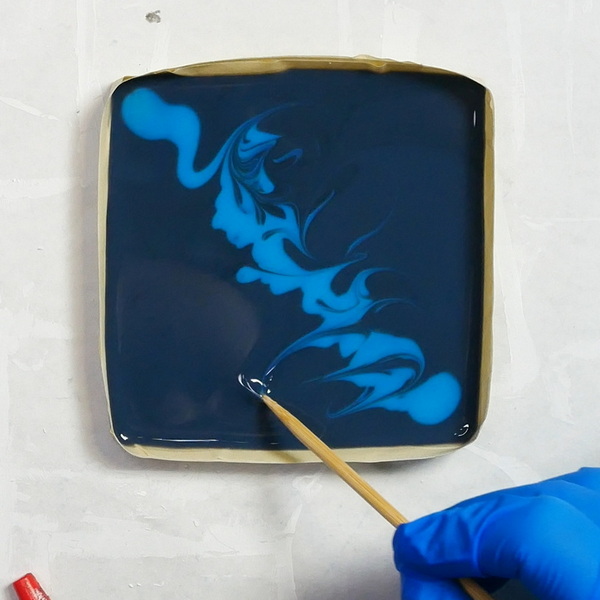
You can add in some more colors, play with the design, then add in more color. For this paint pour, I used stainless steel, cerulean blue, and white to create some beautiful color mixes on this project.
Adding in Oil Based Products
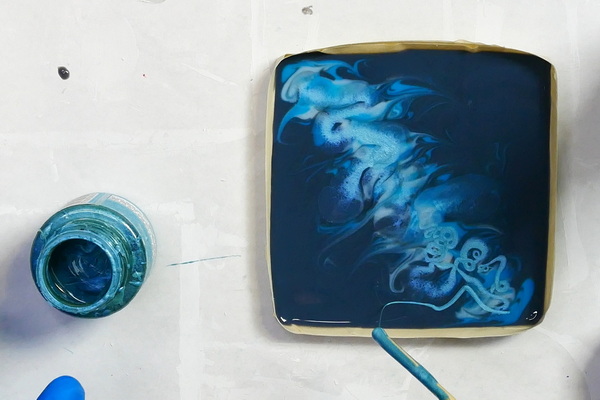
One thing I love to use in acrylic paint pours is Pebeo Fantasy Moon or Pebeo Fantasy Prisme paints. These are an oil-based paint that works beautifully with pouring medium and creates a really interesting result on your chipboard ornament.
I added just a few drops of the Pebeo Fantasy Moon Turquoise to the pour, and it was amazing how much it spread in just a few minutes. This is a challenging medium to work with because the results aren’t easily controlled, but it makes for beautiful texture and adds a unique look to the holiday ornaments.

- Reactive liquid paints that dry to a hammered effect
- Apply to porous and non-porous surfaces
- Alkyd oil-based
- Iridescent finish

- Reactive liquid paints that dry to a honeycomb texture
- Ideal for jewelry, crafts, and decorative arts
- Alkyd oil-based
- Opalescent finish
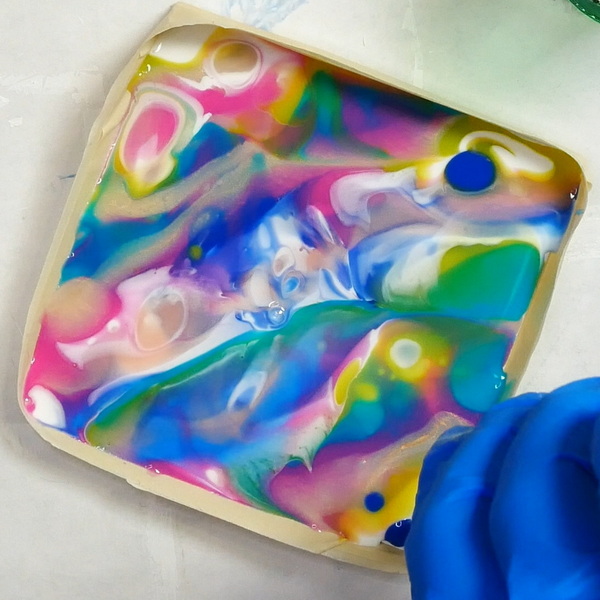
Creating a Dirty Pour
A dirty pour, or one cup pour, is when you add in all your paints in the same cup before adding them onto the canvas. One of the unique things about pouring medium is that you can add in paints together in layers and instead of turning into a mess, it instead turns into a beautiful painting.
When creating a dirty pour, keep in mind how much paint you want to add to the surface. For this pour, I created layers using 5 colors, but instead of adding all the color at once, I alternated between blue, dark blue, silver, white, and black. This makes for a more interesting dirty pour and creates unique layers of colors and color mixes.
Before adding the dirty pour to the surface, I like to start by adding a layer of black or white pouring medium. This seems to help the dirty pour move more easily and lets you manipulate it the paint in a smoother way.

I love to tilt and play with my paint when using a dirty pour. There’s so much interesting texture on the surface making it fun to play with.

Adding in Mixed Media Objects
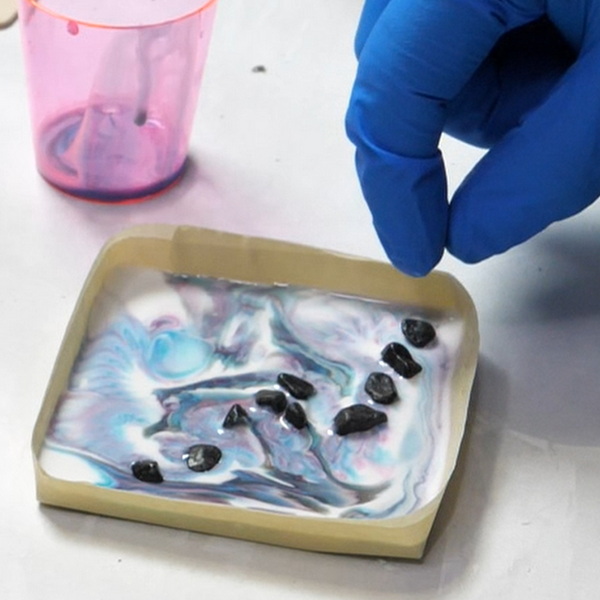
I didn’t have a strong direction for my dirty pour, so after manipulating it a bit, I added in other elements to the pour. One of my favorite objects is aquarium gravel. I love the look that the shiny rocks give to the pieces. Just add them in while the acrylic is still wet, and they will set firmly into the piece.
To finish off this piece, I added in some more pouring medium around the rocks so that there was a strong focal area on this ornament.

Natural Stones are smooth in appearance, fade resistant and long lasting beauty. Add these to your art and other creative projects for natural texture.
What Other Objects Can You Add?
You don’t have to stick with aquarium rocks. You can also create unique ornaments using jewels, fibers or any other found object. The ornaments below are 2 examples of using objects in the acrylic paint pours.
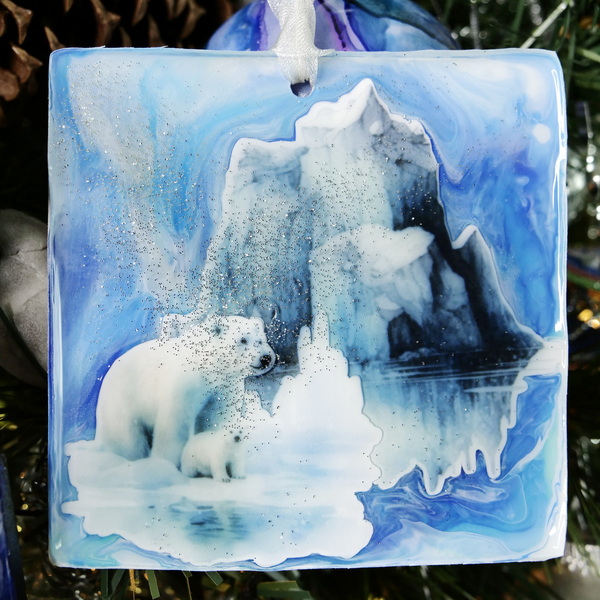
This example is done using paper ephemera, which I pushed into the surface of the pouring medium. As the paper was wet on only one side, it started to curl. Over time it straightened out and laid flat.
A paper crafting company designing and creating products that inspire and excite the creative community!
Use nadine15 at checkout to get 15% off of your first order!
To finish off this piece, after the first layer of pouring medium is mostly set, add in a layer of clear pouring medium to the surface. This seals in the paper and gives the ornament a more cohesive look. You can add a small sprinkle of glitter to create a frostier and snowier look to the piece.
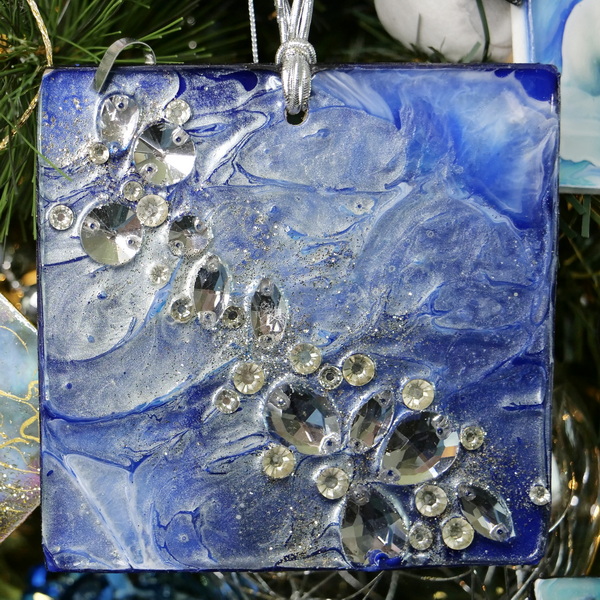
This example was done with glass jewels. After I had completed the paint pour design, including adding in some Pebeo Fantasty Prisme oil medium, I added in the jewels and let it the ornament dry.
Working in Layers
We can also work in a lot of little layers with many different colors to create unique and beautiful piece. With this piece, I was attempting to build up layers of color across the ornament in lines. But as with every paint pouring piece, these works of art tend to have a life of their own. Instead of perfectly straight lines, as the paint mixed and mingled, I ended up creating some unique shapes. I just went with the flow. In the end I created a beautiful and unique layered piece.
Acrylic Paint Pouring Tips
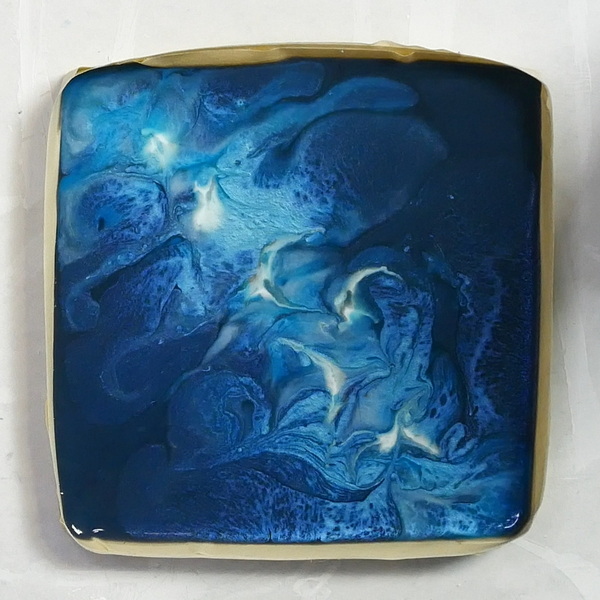
You will notice that as you work certain colors will rise to the surface while other ones disappear or be less noticeable as you create. This is due to the weight of the pigments. As a rule, the lighter colors will stay on the top, the darker colors will fall. The Pebeo Fantasy oil-based products will always stay on top, due to the nature of the medium.
Change in Color
The colors I started with are quite a bit lighter than the colors of the pouring medium when dry. This is due to the nature of the paint pouring medium. The medium is cloudy in the container but will dry clear. This means that dark greys will become black, that light pinks may become red. Don’t feel the need to get the pouring medium to the exact color that you’re ending up with, it’s not necessary. It’s always a fun surprise to see what colors and design you end up with after everything is fully cured.
Curing the Pouring Medium
Depending on your climate, it may take 1-4 days for your paint pouring medium to fully cure. I find that after 12-24 hours I can touch the medium, but it won’t be dry all the way through. I tend to leave my acrylic paint pouring pieces 3-5 days before removing the tape. This way I know that I won’t gouge the medium accidentally if it’s soft and not fully cured.
Finishing Off the Ornaments
Removing the Tape
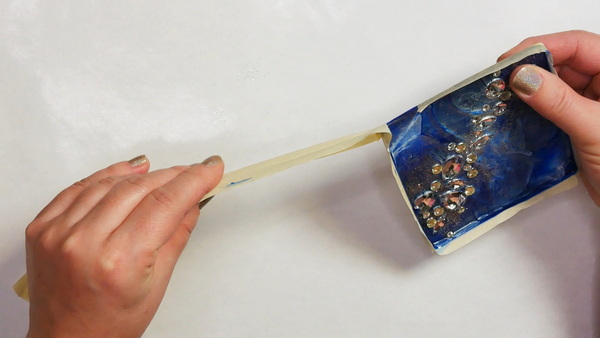
When removing the tape, if you find that the paint pouring medium is sticking to the tape and not the chipboard, the acrylic paint pour is not fully set. Every medium and every climate is slightly different. So generally, after 3 days I’ll test the tape on my paint pour. It usually comes off easily. Carefully remove it and you should have a nice edge to your ornament.
Cleaning up the Edges
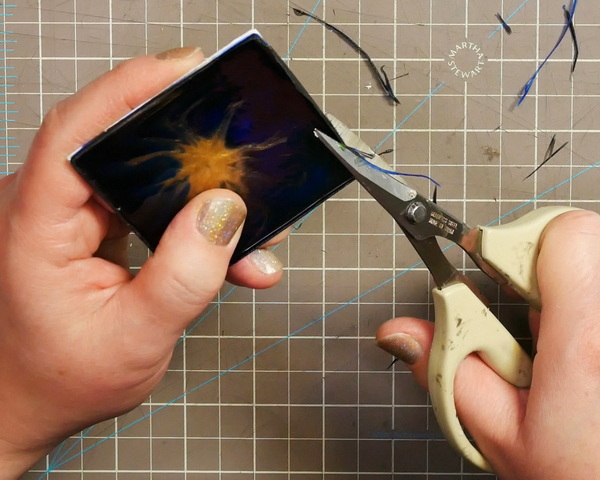
You’ll end up with some uneven edges on your ornaments. The easiest way to remove these is to use a set of scissors and gently trim the edges. The trimmed acrylic pouring medium edges will be a bit duller, but I don’t find it very noticeable. I prefer to have a nice clean edge to my projects.
Painting the Edges and Back
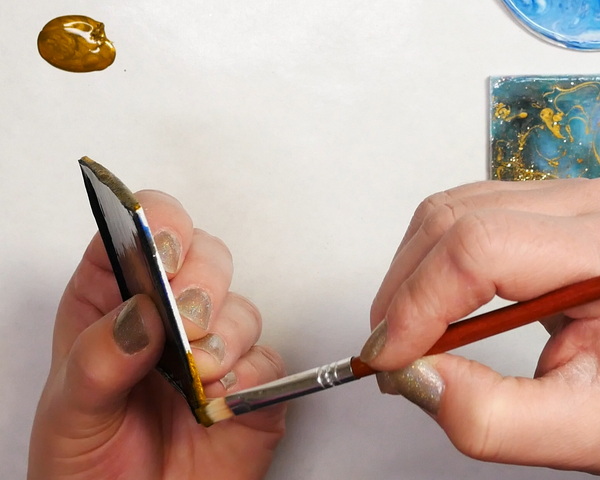
I like to use black or metallic paints, like silver or gold, to paint the edges and back of the ornaments. This way any tears to the chipboard by the tape and any white areas along the edges will be covered up.
I like to pick out a color from the ornament to use for the edges and back of the ornament.
Adding a Ribbon
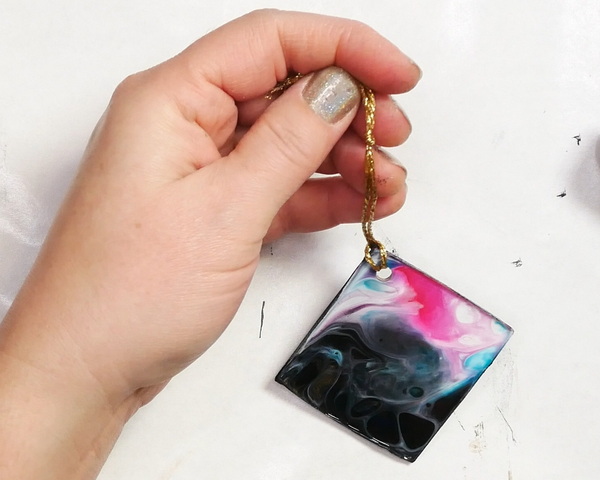
To finish off this ornament, we need to add a hole in which to string a ribbon. The nice thing about pouring medium as it is acrylic, you can easily add a hole into your paint pour with a hole punch. I would suggest a robust hole punch like the Crop-A-Dile. I’ve had this tool for years. It works as an eyelet setter but also doubles as a very robust hole punch.
When adding a ribbon, I like to match the ornament using ribbon in my stash. I tend to save ribbons from packaging that comes in handy for projects like this. I used gold twine I had saved, some sari ribbon, and ribbon that I had purchased. Thread it through the ornament and tie and knot. You can either single or double knot it depends on your desired look.
- RIBBON SIZE ➤The width of gold ribbon is 1/4 inch, and the length is 25 yards.
- HQ MATERIALS ➤The silk fabric ribbon is made from 100% high quality polyester.
- DETAIL DESIGN ➤The thin satin ribbon has stitched both edges to prevent fraying.

Sparkling Twine String: The twine string has vibrant, colorfast colors that retain their luster for a long time. Available in 4 colors: Gold, silver, red and green
Questions?
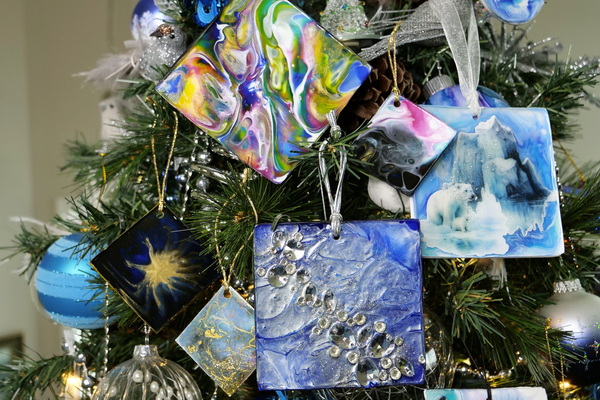
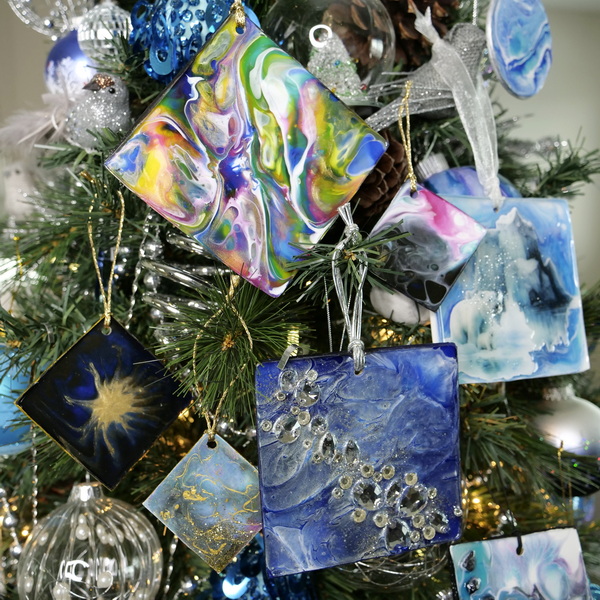
At this point, I feel like the paint pouring has enough presence of its own. If you wanted to, you could add in other ribbons or embellishments to these holiday ornaments. But you can see that once they are completed, you end up with unique ornaments that will look beautiful on your Christmas tree or as a Christmas gift.
I hope that you have enjoyed this project and have learned a new way to incorporate pouring medium into your projects. This technique is generally a lot less messy than many others out there. If you’ve never tried this medium before, I hope that you give it a try over the holiday season! If you have any questions, please leave a comment below, I’d love to start a conversation with you!
Project Supply List
Make your own albums, frames, displays, covers, backs, boxes, and containers. 100 pack of 8.5" x 11" single thickness chipboard.
MDF boards are a great choice if you are looking for a product thicker than chipboard. This MDF Board pack has 8 pieces measuring 11 inches wide by 14 inches long by 1/4 inch thick.
Both sides have machined, smooth unfinished surfaces with precision-cut straight, sanded edges. Each board is sturdy and has some weight to it
Creates a matte, non-reflecting finish when added to acrylic colors. Lightweight, non-toxic; Opaque when wet, translucent when dry.
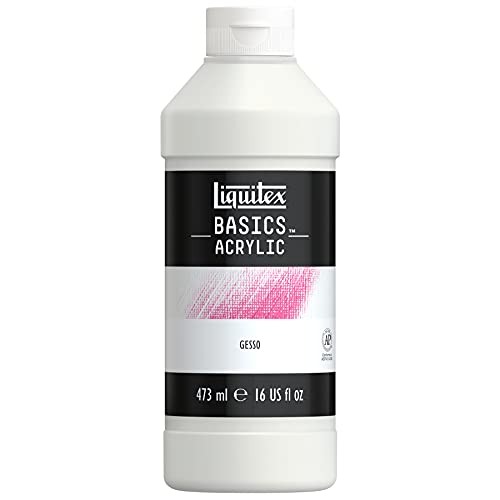
Liquitex Basics Acrylic Gesso is formulated to produce a smooth, absorbent, finely textured ground for painting on most porous surfaces, including canvas, paper, fabric, wood, or plaster.
Scotch Greener Masking Tape for Production Painting 2050 is made with paper from sustainably managed forests and regenerating latex harvested from rubber trees.
Liquitex Effects Pouring Medium creates even puddles, poured sheets, and flowing applications of color without crazing or cracking. The paint film dries without holding bubbles. It retains its appearance when dry.
- Single-pigment colors for brilliant, precise color mixing
- Smooth, pourable texture for glazing, layering, and detail
- Includes Titanium White and Carbon Black for value and tone control
Proudly crafted in the Netherlands, these acrylic paints are value priced and easy to use, making them an excellent choice for the beginning or intermediate artist.
Package comes with 100 cups in total. Each is in capacity of 1oz. Top diameter: 1.57", bottom diameter: 1.1", and height: 1.57". Perfect for craft projects where you're dealing with high flow mediums.
- High-quality plastic red party cups.
- Made BPA Free.
- Single-use cups designed for hassle-free cleanup.
- Durable LDPE Plastic: Made from sturdy yet squeezable LDPE plastic for leak-free dispensing.
- Twist Top Caps: Allow for easy dispensing and precise application with twist-to-open and close caps.

- Professional quality
- Comparable pigment load to Golden Heavy Body Acrylics
- 100% acrylic emulsion; no fillers, dyes, or opacifiers
- Intense, permanent colors with a smooth, fluid consistency
- Reactive liquid paints that dry to a hammered effect
- Apply to porous and non-porous surfaces
- Alkyd oil-based
- Iridescent finish
- Reactive liquid paints that dry to a honeycomb texture
- Ideal for jewelry, crafts, and decorative arts
- Alkyd oil-based
- Opalescent finish
Natural Stones are smooth in appearance, fade resistant and long lasting beauty. Add these to your art and other creative projects for natural texture.

Holographic and iridescent extra fine glitter is made of high quality grade pigments compliant to safety standards and is non-toxic. Set of 45 glitter colors will make a great addition to any arts and crafts collection.

You're going to feel just like an expert when you're cutting the smallest of details with the Cutter Bee Scissors by EK Success. These un"bee"lievable compact scissors will have you feeling like a queen bee when you swarm right into your fine detail or fussy cutting projects.
Ideal for spraying, brushing, and staining. Excellent for fabric application. Result offers fine dispersion, high tinting strength, durability and flexibility.
- RIBBON SIZE ➤The width of gold ribbon is 1/4 inch, and the length is 25 yards.
- HQ MATERIALS ➤The silk fabric ribbon is made from 100% high quality polyester.
- DETAIL DESIGN ➤The thin satin ribbon has stitched both edges to prevent fraying.
Sparkling Twine String: The twine string has vibrant, colorfast colors that retain their luster for a long time. Available in 4 colors: Gold, silver, red and green

Dr. Ph. Martin's Bombay India inks offer powerful color in a convenient dropper-stopper glass bottle. These highly pigmented India inks not only remain lightfast and permanent but are also totally waterproof when dry.
A paper crafting company designing and creating products that inspire and excite the creative community!
Use nadine15 at checkout to get 15% off of your first order!

Dr. Ph. Martin's Bombay India inks offer powerful color in a convenient dropper-stopper glass bottle. These highly pigmented India inks not only remain lightfast and permanent but are also totally waterproof when dry.
The Real Value art brushes are ideal for all types of art-making from acrylic and watercolor paintings to painting with oils and tempera.

- Professional quality
- Comparable pigment load to Golden Heavy Body Acrylics
- 100% acrylic emulsion; no fillers, dyes, or opacifiers
- Intense, permanent colors with a smooth, fluid consistency

- Professional quality
- Comparable pigment load to Golden Heavy Body Acrylics
- 100% acrylic emulsion; no fillers, dyes, or opacifiers
- Intense, permanent colors with a smooth, fluid consistency

- Professional quality
- Comparable pigment load to Golden Heavy Body Acrylics
- 100% acrylic emulsion; no fillers, dyes, or opacifiers
- Intense, permanent colors with a smooth, fluid consistency

- Professional quality
- Comparable pigment load to Golden Heavy Body Acrylics
- 100% acrylic emulsion; no fillers, dyes, or opacifiers
- Intense, permanent colors with a smooth, fluid consistency

A very strong tinting blue turquoise that reveals cool gem tones in glazing. PROFESSIONAL QUALITY colors combine the durability of acrylics with the versatility of ink, great for drawing, staining, dripping, pouring, calligraphy, color washes and spraying.

Ideal for spraying, brushing, and staining. Excellent for fabric application. Result offers fine dispersion, high tinting strength, durability and flexibility.

- Professional quality
- Comparable pigment load to Golden Heavy Body Acrylics
- 100% acrylic emulsion; no fillers, dyes, or opacifiers
- Intense, permanent colors with a smooth, fluid consistency

Premium hobby knife set is equipped with 10 different exacto blades. There are three types of blades, curved blades are suitable for carving curved lines; oblique fine point knife blades are fit for detail carving; flat blades are suitable for chiseling, removing excess material

Made of 5-layer PVC material, the white hardness PVC in the middle help to prevent cutting through. Special finish reseals surface cuts, providing a continually smooth surface for all cutting projects.

This popular tool is all-inclusive for punching and setting eyelets and other embellishments. You'll be able to easily punch through materials like paper, cardstock, book board, thin tin, leather, plastic, acrylic, and so much more.
These 4.5-inch wooden popsicle sticks are ideal for a variety of applications, including crafts.

The shish kabob skewers are made of natural bamboo and sterilized by high temperature. Let's proudly say 'No' to disposable plastics skewers, because bamboo is renewable.

Shapes and Sizes: Sharp Water Drop, Reticular Oval, Reticular Horse Eyes, Sharp Horse Eyes, Plane Heart Shape, Reticular Plum Blossom, Reticular Square, Reticular Circle, Sharp Circle, Plane Circle