The Art of Self-Discovery: An Art Journaling Project
As part of my weekly rejuvenation time, I pulled out my art journal to do some reflecting. I was thinking back to the article I wrote last week on Self-Discovery and wanted to record some of the things that I want to remember about this season and these moments.
Why Art Journaling?
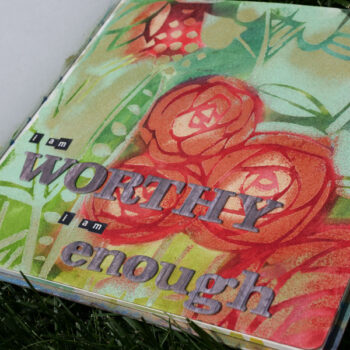
My journal not only lets me get my feelings down and helps me to be able to move past them, but also provides an opportunity to remember the important things and the important lessons. As I flip through my journal, each page brings me back to the emotions and the feelings that I had at the time when I did that piece of art.
I believe it’s important not to just show the good times but also the difficult times in art journalling. I have some pages that come from a very dark place. The colors are muted and you can sense the depth of emotion through the art. I also have pages celebrating the breakthroughs and the great moments in life and those pages feel very lively and bright.
The art journal is an important medium for me to be able to get my thoughts out on a page. It lets me be able to leave them there and not judge them but record them so that I can reflect back on my journey. I love books because they allow a private place to express and reflect; you can choose to share it with others or it can be your personal journey.
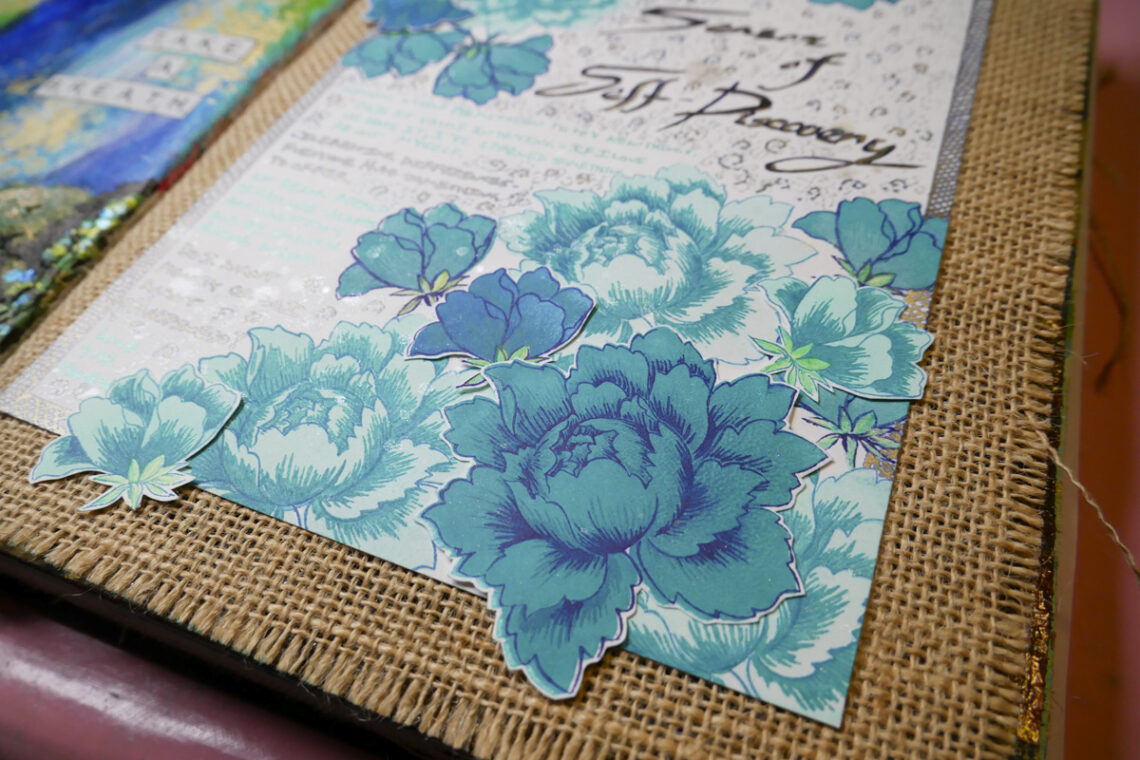
Season of Self-Discovery
The project that I did this week was about the Season of Self-Discovery. I found some fun flower stamps that I’ve had for a long time but haven’t used in a while. When I think of self-discovery, I think of growth. Because I enjoy gardening, the idea of growth brings the image of a beautiful summer garden filled with flowering plants. I like the idea that we are becoming more beautiful as we learn who we are and what we value.
Supply List
- Surfaces: Dina Wakley Ranger Media Journal 8” x 10”, Crafter’s Companion Ultra Smooth Premium White Cardstock.
- Inks: Colorbox Petal Point Pigment Inkpads Aurora and Mosaic using colors Seaglass, Turquoise, Harbor and Midnight.
- Sprays: Tattered Angels Glimmer Mist Pearl.
- Colored Pencils: Derwent Colorsoft Green and Light Green, Pablo Caran d’Ache Lime Green and Peacock Green.
- Pens: Sakura Gelly Roll Gold Shadow Blue-Gold, Black Gold and Sakura Gelly Roll Metallic Silver and Green. Lamy Safari Fountain Pen with 1.5mm Nib with Diamine Steel Blue Ink.
- Stamping Tool: Memory Misti Precision Stamping Platform.
- Stamps: Altenew Peony Bouquet Stamp Set.
- Glue: Unique Creative Gem Hi-Tak Glue, Zots Large Glue Dots.
Project Instructions
Step 1: Cut smooth white cardstock to 8” by 5 ¾ “or to whatever size that will fit in your journal with a ¾ inch border around the edges.
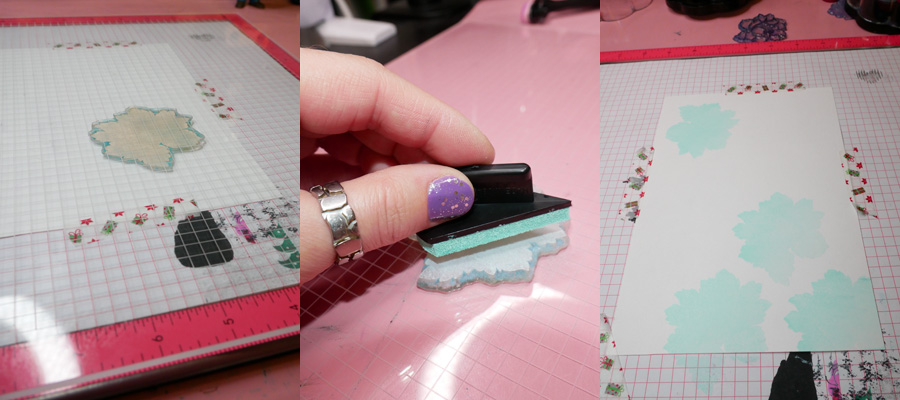
Step 2: Using washi tape, secure paper onto stamping platform. Decide on the placement of your stamps for the first layer of flowers for this project. I was using Altanew stamps for this project which are multi-layer stamps. I love the depth the Altanew stamps provide. Using the Misti Stamping Platform, stamp the solid layer stamp in multiple areas in the bottom right and top left corners using the Seaglass pigment ink. Make sure to leave spaces between them to make room for additional images for the second layer.
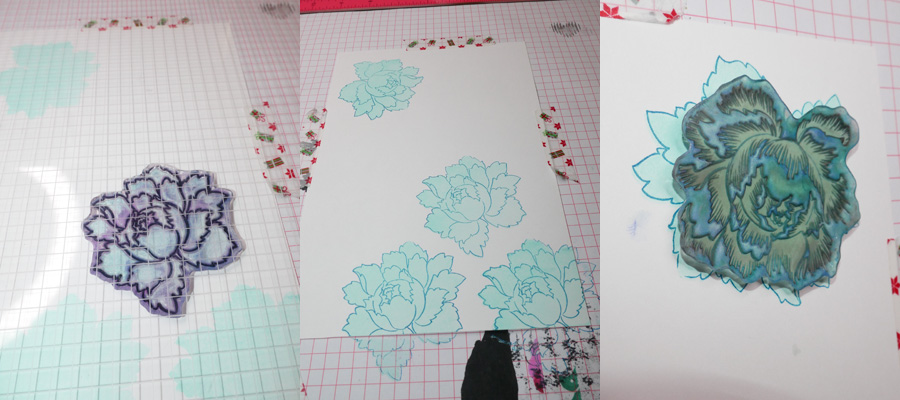
Step 3: After completing the solid layer stamp, stamp the outline stamp next, using Harbor pigment ink. Using the Misti allows correct positioning and adding additional stamping if the impression doesn’t transfer solidly. Continue to stamp with the next detail shading stamp in Turquoise and finish with Harbor for the final detail stamp.
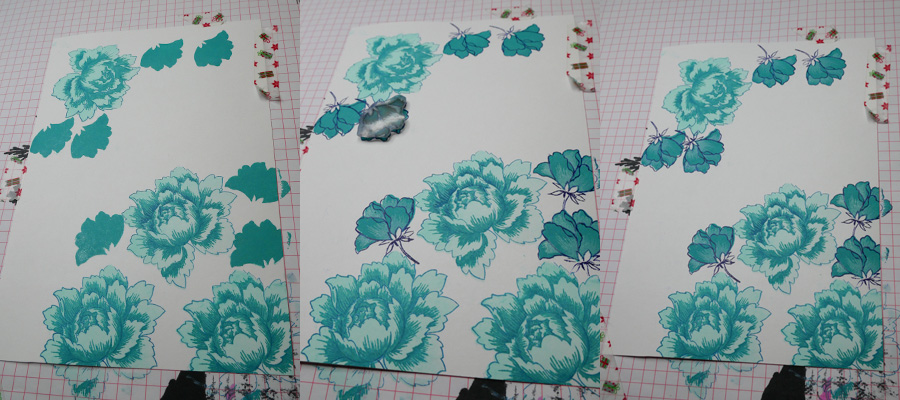
Step 4: To make it look less uniform, add in the small flowers following a similar process, using the solid, outline and then detail stamp using Turquoise, Midnight and Seaglass. As the stems of the small flowers do not have color in them, use pencil crayon colors green, light green, lime green and peacock green to fill in the stems. Heat set the images to prevent smudging.
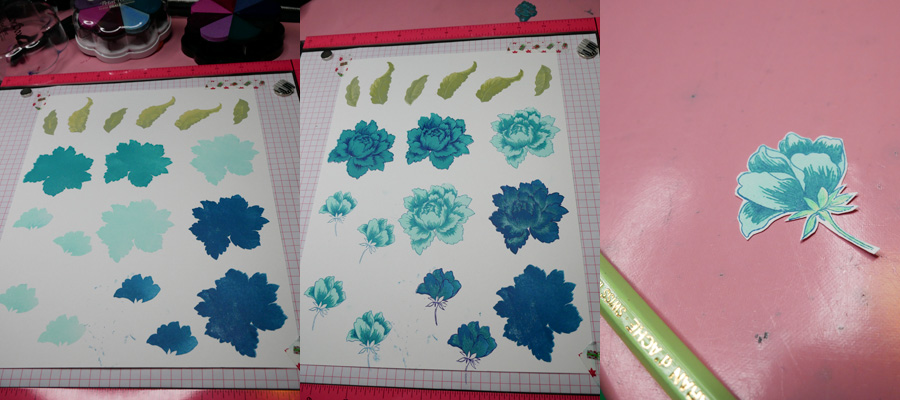
Step 5: For the second layer of stamping, take a full sheet of paper and stamp additional images. Use the same inks but in different color combinations. For the darkest flowers use Harbor for solid layer, Midnight for detail layer, Turquoise for first shading layer and Seaglass for second shading layer. For the medium color flowers, use Turquoise for solid layer, Midnight for detail layer, Harbour for first shading layer and Midnight for second shading layer. For the light teal flowers use Seaglass for solid layer, Harbour for detail layer, Turquoise for first shading layer and Harbour for second shading layer. For the stems, use pencil crayons again to color. Heat set the images to prevent smudging.

Step 6: Cut out all the images using sharp scissors, leave a small white border around them if desired. I like a slight border as it allows the images to pop from the background a bit.
Step 7: Position the second layer of images going off the page in areas to add interest. Once the order is decided on, take a photo of the positioning to ensure that you attach them in the correct order. Using glue dots, attach the flowers to the page.
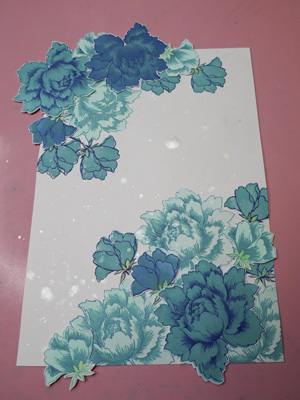
Step 8: Using Glimmer Mist Pearl spray, drop droplets of spray on top of the images to add interest and a bit of texture. Use a heat gun to dry.
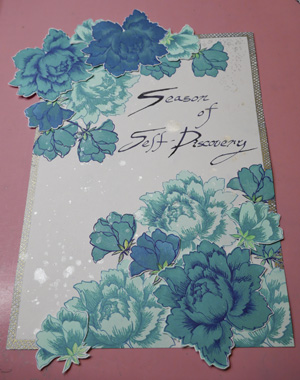
Step 9: Using Sakura Gelly pen Blue-Gold, make a 1/8” border around the edges of the paper and add cross hatching to add interest to the border.

Step 10: Add in lettering using the Lamy Safari fountain pen and highlight with Sakura Black-Gold pen. If the highlighting overwhelms the title, add in additional lettering with the fountain pen.
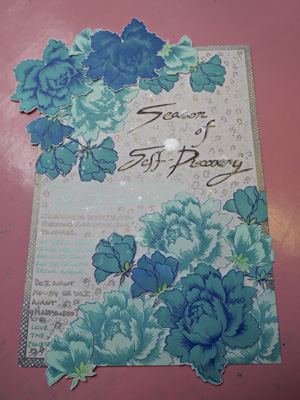
Step 11: Add in journaling and fill in white areas with doodling. I used Sakura pens Blue-Gold and Green for journaling and Blue-Gold and Metallic Silver to add in little swirls in and around the journaling.
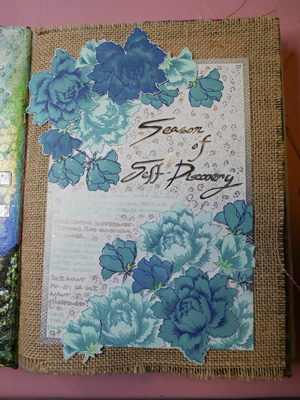
Step 12: Once dry, using Hi-Tak glue, adhere the paper to the burlap backing of the journal- make sure that you have parchment paper or a silicone mat behind it to make sure that it doesn’t stick the journaling pages behind it as the glue seeps through the burlap a bit.
I hope that this project provides some inspiration and that you are able to find time for self-care this week. If you have any questions or comments, please comment below or contact me directly.