Use Your Scraps to Make Stunning Holiday Cards
After completing a project do you find that you have a lot of scraps and leftover pieces that you just can’t part with? You’re not alone. So what do we do with these pieces? Do we throw them out? Or file them away never to be seen again?
There is a third option. We can take these pieces and create stunning holiday cards with them. Even if you only have small scraps, these leftover pieces can make unique collage holiday cards that your loved ones will treasure.
Hop-A-Long Studio is reader-supported. When you buy through links on our site, we may earn an affiliate commission at no cost to you. Learn more.
Start with a Card Base
I often get asked if I create my designs on the folded card or if I use a separate piece of paper. I like creating on separate pieces of cardstock. If I make a mistake or choose to change my composition this allows me to change my design without wasting a card or envelope. Today I’m using 140lb Canson watercolor paper which is strong. This makes sure that your card won’t buckle even when wet mediums are added to it.
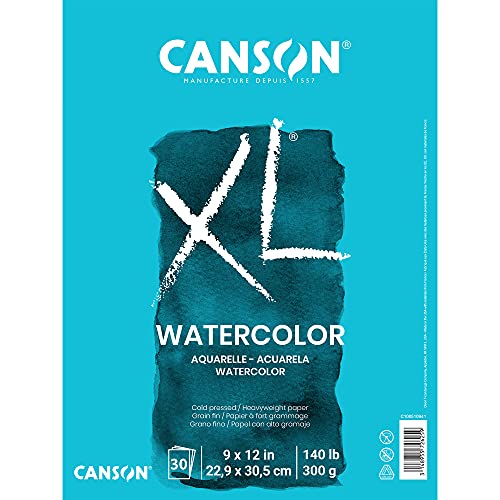
Designed to appeal to students, Canson XL pads contain more sheets at a comparable or better price than other value pads in the marketplace.
I also tend to get glue, ink, or some other random products on my clean cards if I use a folded card. I like to wait until my supplies are put away and my surface is clean, this tends to keep my handmade cards looking beautifully clean and professional.
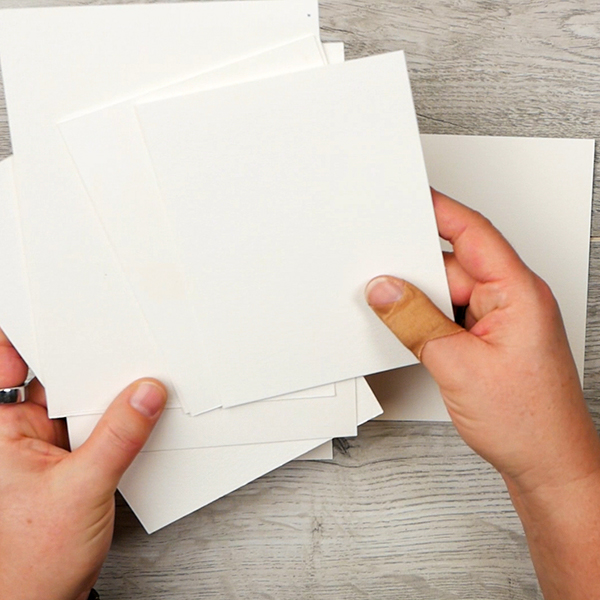
Today I’m creating with A2 cards that measure 4 ¼” by 5 ½”. I tend to use Ohuhu brand cards and envelopes. They come with sturdy cardstock and because it is available in sets of 100, this makes the the price very reasonable.

Each pack consists of 100 pcs of 8.5 x 5.5 scored cardstock sheets (4.25 x 5.5 when folded) and 100 A2 self-seal envelopes, perfect for DIY greeting cards.
Using Your Paper Scraps
I always have lots of paper scraps leftover from projects. Some of these are gel prints that I have left over from my art journal projects. Some of these scraps are part of beautiful paper collections that already coordinate.
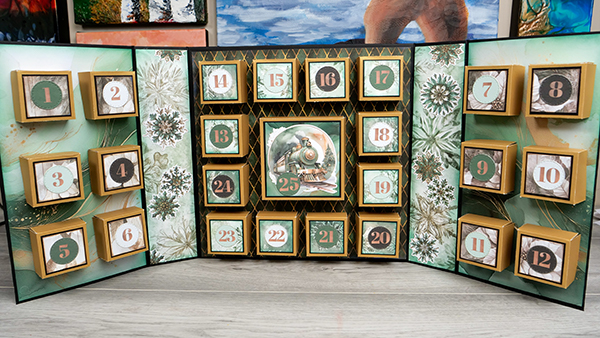
The paper scraps I’m using today are from the Golden Evergreen paper collection from Simply Stated Design. In September I made a beautiful advent calendar designed by Sieanna Day using this collection.
I love using these papers, but I ended up with a lot of thin and long leftover pieces. I couldn’t bear to throw them out, so they ended up being the perfect scraps for creating these holiday cards.
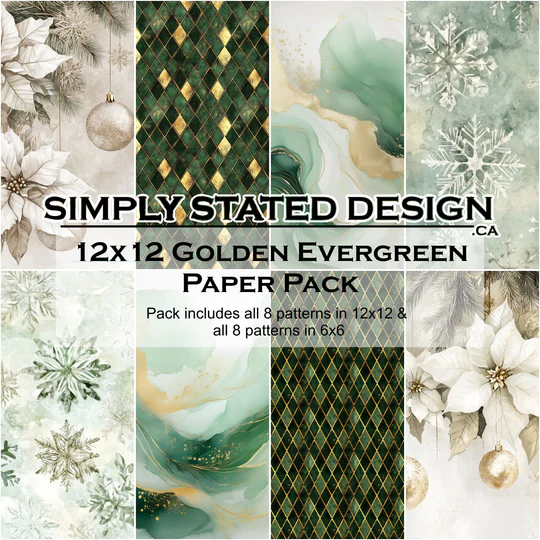
Collection of coordinating single sided patterned papers printed on high quality 80lb cardstock OR high quality gloss paper.
Use nadine15 at checkout to get 15% off of your first order!
Working with Random Papers
When working with random gel prints or other papers, I tend to decide if I want to create a contasting color scheme (like red and green) or something more analogous (like blues and greens).
They don’t necessarily have to be matching, and this is where repetition can be our friend. If we have multiple pieces from the same paper, this can create cohesion in our holiday card design.

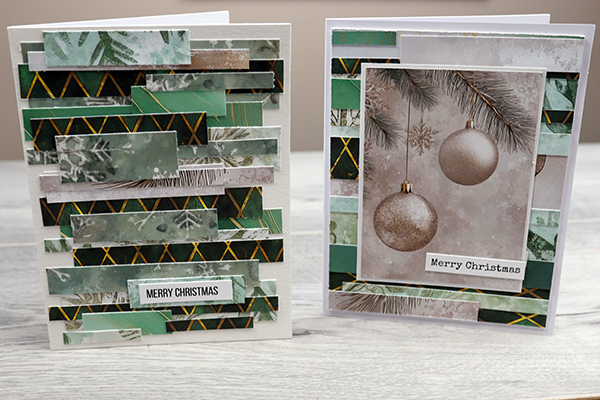
Abstract Card Design
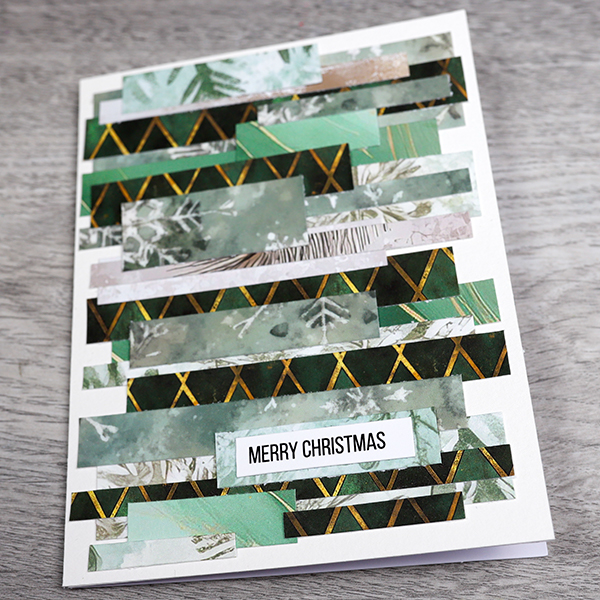
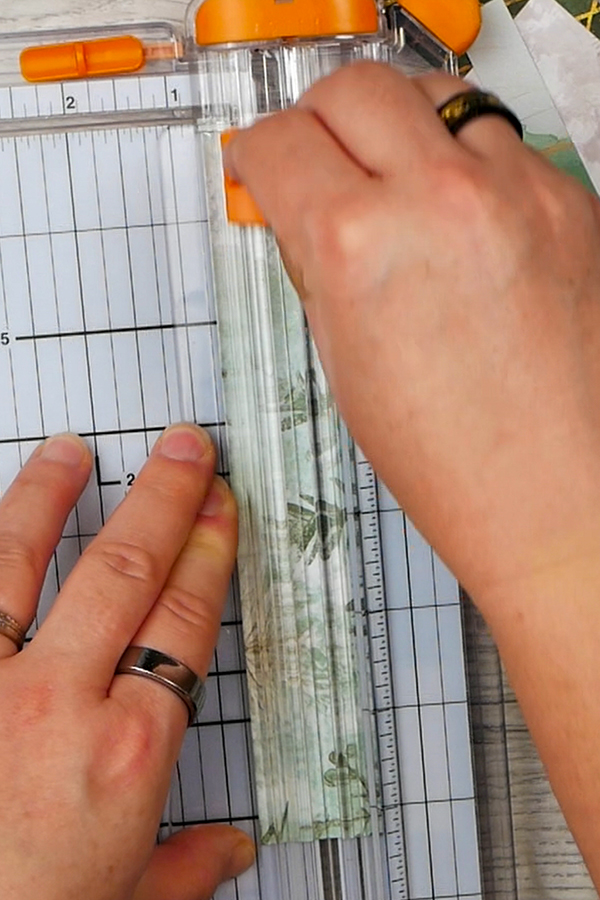
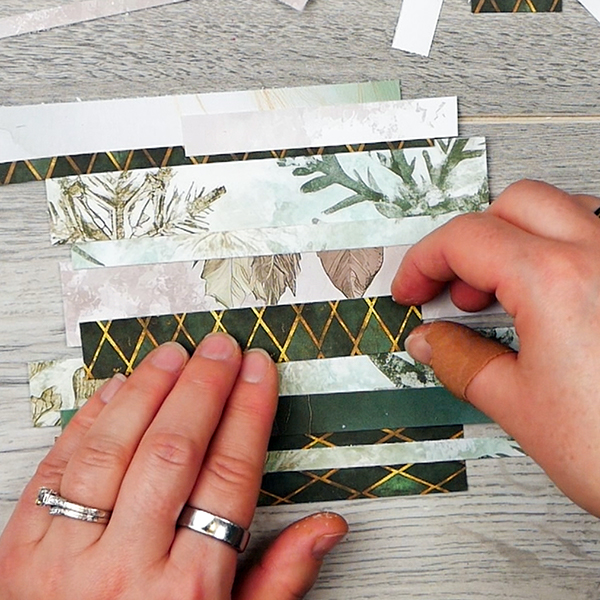
For this abstract holiday card design, I’m cutting up my papers into thin strips. These range from ½” to 1/16” thick. Once I’ve cut them up, I like to use a set of scissors to trim the length of the pieces to fit my card.
As I’m working on a 4 ¼” by 5 ½” card base, I try to adjust the height and width of my pieces accordingly. For example, you don’t want a 2” piece of paper on a card that’s 4 ¼” high.
Designing with Paper Scraps
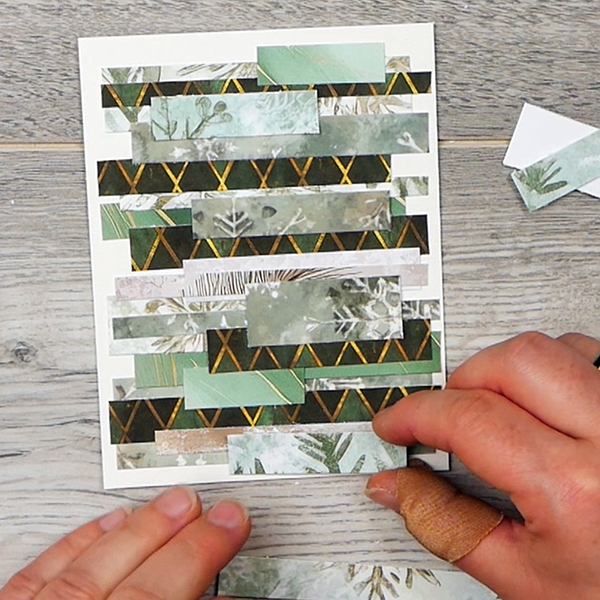
For this card, we don’t want the paper to go all the way to the edges. We’re keeping a small, uneven border of white around the card base.
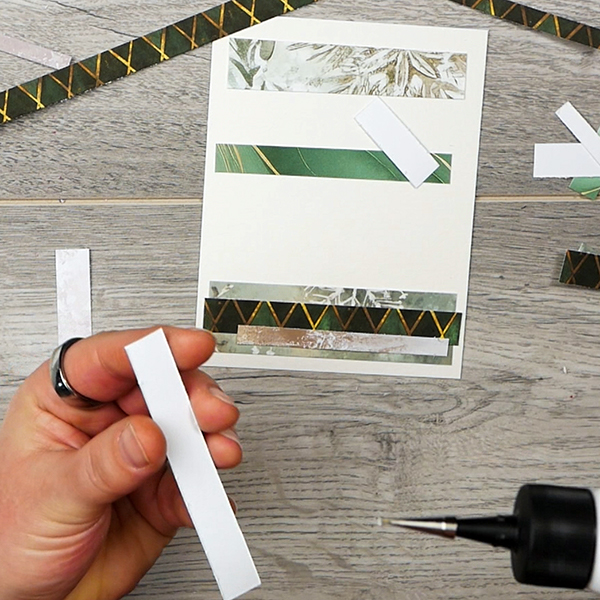
Start with adding some larger and smaller pieces to the card. I tend to start gluing in a random, intuitive manner, adjusting and adding pieces as I go.

I purposely layer these pieces, looking for contrasting patterns and sizes to add interest and variety to the holiday card.
Adding in the Final Touches
After we’ve glued down that first layer with Art Glitter glue, it’s important to take a step back and look at what we’ve created. You may be very happy with your design, or you might want to add in a few more pieces.
This is where I play around with the length and height of the pieces, adding in tiny thin pieces and larger chunky pieces to create texture and contrast. We’re looking to create variation and interest to the card making it more dynamic.
Finishing with a Holiday Sentiment
I love to create and print my own holiday sentiments, the one shown below is part of a PDF digital file available in my shop.
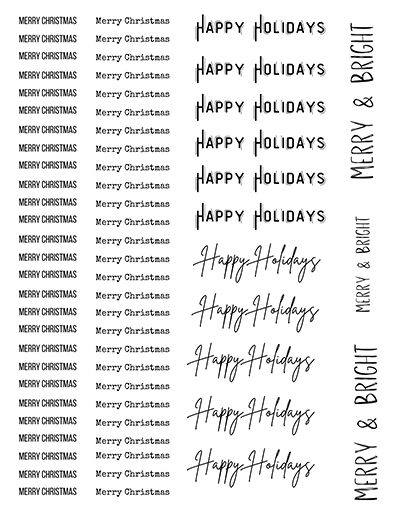
I could have used a large sentiment on this holiday card but I didn’t want to take away from the design.

Instead, I used a small typewriter-style font and added it onto the layers. As you can see, this doesn’t take away from the overall design.

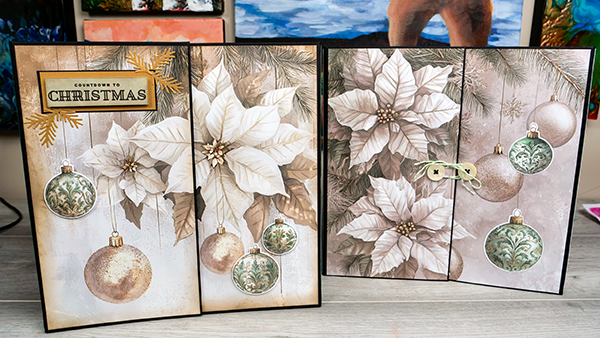
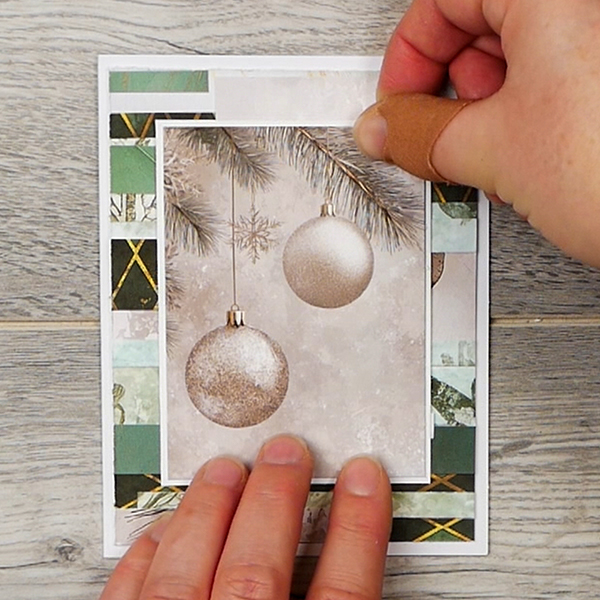
Layered Background Holiday Card
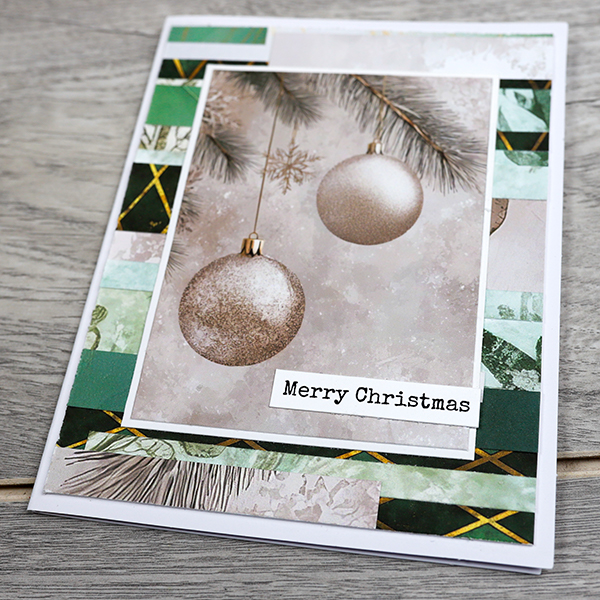
The layered background holiday card is an iteration of the card above. Using the same basic technique, cut your papers into strips. Instead of cutting them individually and staggering the length, we will glue them down past the edges of the paper with your favorite glue.
For this design, I made less layers on the background as we are going to have a focal image. Once you’ve glued down all your paper pieces, use shears to cut around the edges to clean up the card.
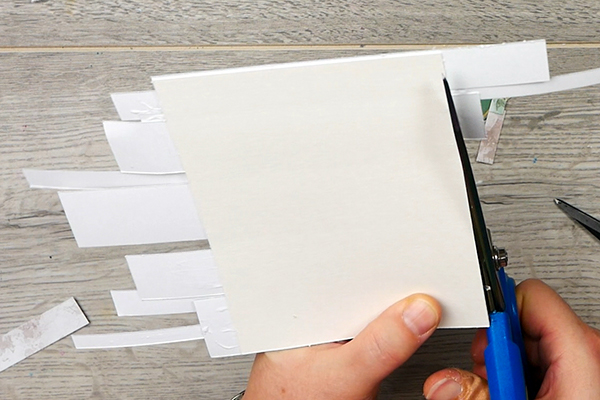
I like to have a border on my cards and the card back I am using is 4 ¼” by 5 ½”. Using a paper cutter, I cut to 4” by 5 ¼” to create a ¼” border on this card.

Choosing Your Focal Image
From here, if you have some leftover matching ephemera images that you want to use, they will look beautiful on this card. In my case, I purposely wanted to use leftover pieces of patterned paper. Going through my scraps, I found a 4” by 3” piece that would work perfectly for a focal image.

Adding a Frame to the Focal Image
Using a piece of white cardstock cut the paper to 3” by 4”. This will create more contrast between the background layer and the focal image.
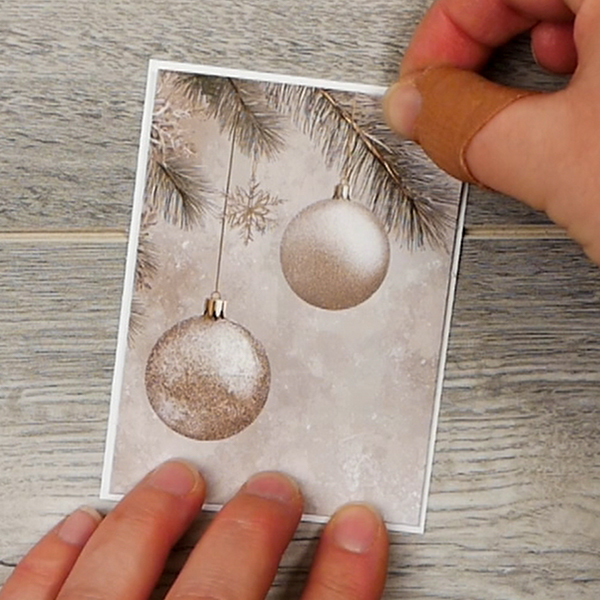
Cut your patterned paper to 2 7/8” by 3 7/8” to create a small 1/16” border. Adhere these two together using Art Glitter glue then glue it to the patterned paper collage base.
Adding in a Sentiment

Add in your favorite sentiment to your holiday card. Using the same PDF file, I chose another small sentiment in white as I didn’t want to take away from the patterned paper. Glue this completed piece onto your card back and you have another easy and fun holiday card!
Adding Mixed Media to these Holiday Cards
I’m purposely keeping these holiday card designs very simple this week. But you can challenge yourself with these card designs and bring them up a notch!
Ink the Edges
If you’re looking for more contrast with your paper strips, ink the edges with a matching green color, this will give more shading and variation, making these designs pop.
Adding Metallic Watercolor
Try using a small brush and metallic watercolor to add shine to the sentiments, holiday ornaments, and paper strips.
Add in Glitter Glue or Gems
You can always add a few drops of glitter glue and gems to add in a few shiny touches to these holiday cards.
Always remember, there’s options for making these cards even more incredible. It just depends on how much time you want to spend on them!
Looking for More Inspiration?
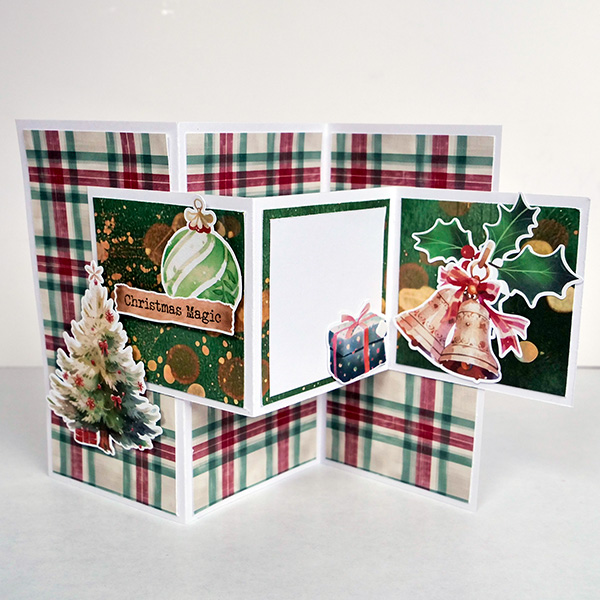
If you’re looking for more inspiration for holiday cards, check out this card project from last year. This Z-fold card is a great dimensional card. If you want to wow someone this holiday season with an extra special card this a great design to try!
Holiday Card Course
I’ve also just released a new card making course using gel prints. If you’re looking for a unique set of digital papers, this is the course for you! You’ll receive a set of PDF gel print papers, the sentiments used in this project, plus other digital images that can be easily printed and colored.
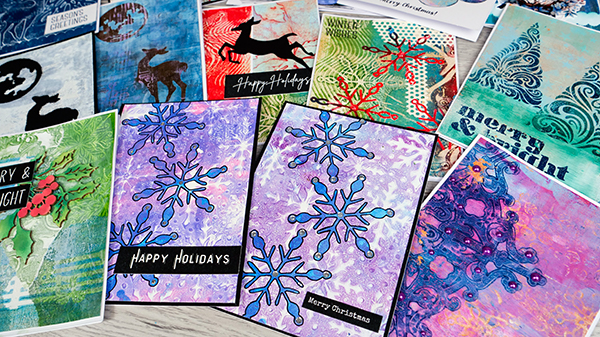
You’ll also receive 10 holiday card designs that are easy to make and fun to create. Make sure that you check out my shop for all the details!
Project Supply List
Collection of coordinating single sided patterned papers printed on high quality 80lb cardstock OR high quality gloss paper.
Use nadine15 at checkout to get 15% off of your first order!
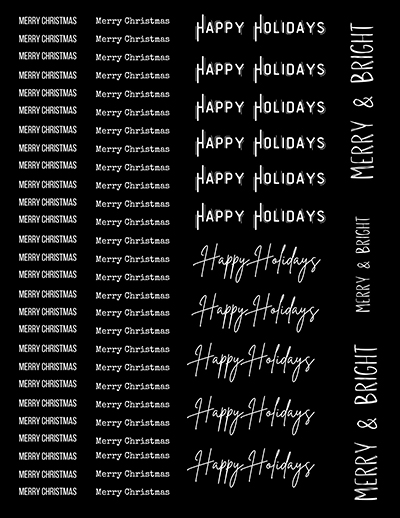
Are you looking for easy ways to make sentiments for your holiday cards? This collection has a variety of sentiments in black and white, perfect for any card project!

Ideal for cutting a wide variety of crafting materials including paper, photos, scrapbook pages or specialty materials. Cutter comes with a lifetime warranty.

You're going to feel just like an expert when you're cutting the smallest of details with the Cutter Bee Scissors by EK Success. These un"bee"lievable compact scissors will have you feeling like a queen bee when you swarm right into your fine detail or fussy cutting projects.
Each pack consists of 100 pcs of 8.5 x 5.5 scored cardstock sheets (4.25 x 5.5 when folded) and 100 A2 self-seal envelopes, perfect for DIY greeting cards.

Art Glitter Glue is permanent and dries clear and adheres to a variety of surfaces. It's water based and acid free. Make sure to close lid to avoid drying of glitter glue. Bundle comes with one bottle of 8oz, one bottle of 2 oz and a metal tip for easy application.
Designed to appeal to students, Canson XL pads contain more sheets at a comparable or better price than other value pads in the marketplace.

HARP DURABLE STAINLESS STEEL BLADES: Forging press manufacturing process enables high-density steel that makes 3 times harder than ordinary stainless steel, precision-ground offer a lasting sharp edge that cuts all the way to the tip.


You May Also Like
Gel Print Collage Techniques You’ll Love

Wet on Wet Watercolor Technique