Easy Glass Painting Techniques with Pebeo Vitrea 160
Are you interested in using your painting skills not only in the journal but also with home décor projects? Glass painting can be a great way to vary your creative practice and make beautiful and useful gifts. Lately I’ve been experimenting with glass paint and am very impressed with the pieces I’ve created. But there are a few techniques to make sure that you get the best results with your glass paint.
Hop-A-Long Studio is reader-supported. When you buy through links on our site, we may earn an affiliate commission at no cost to you. Learn more.
Pebeo Vitrea 160 Glass Paints
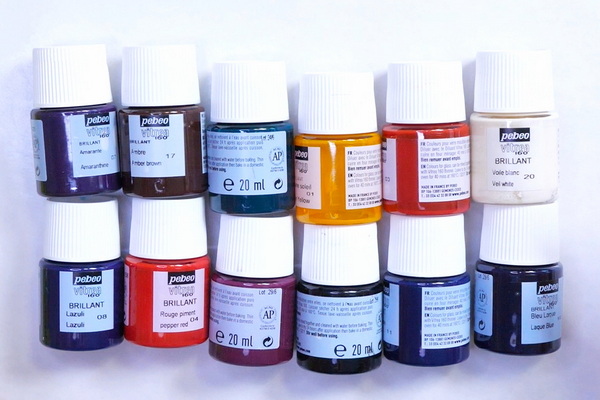
For painting glass, I like using Pebeo Vitrea 160 glass paint. These are vibrant and glossy water-based paints. They clean up very easily with water and won’t damage your brushes. The Pebeo Vitrea 160 glass paint is readily available and is a fun way to play around with glass painting without investing too much money into materials. For today’s project, I’m using the Pebeo Vitrea 160 Exploration set. This set gives you 12 colors to play with and provides you enough paint for several projects.
Another great feature of the Vitrea water-based glass paint is to seal your piece to make it washable, all you need to do is heat it in an oven. This is a very easy and forgiving medium if you want to dabble with something different.

Developed to mimic the look of genuine stained or colored glass, Pebeo Vitrea 160 Glass Paint is part of a new generation of thermo-hardening, waterbased, non-toxic paints specially designed for use on glass.
Painting Wine Glasses
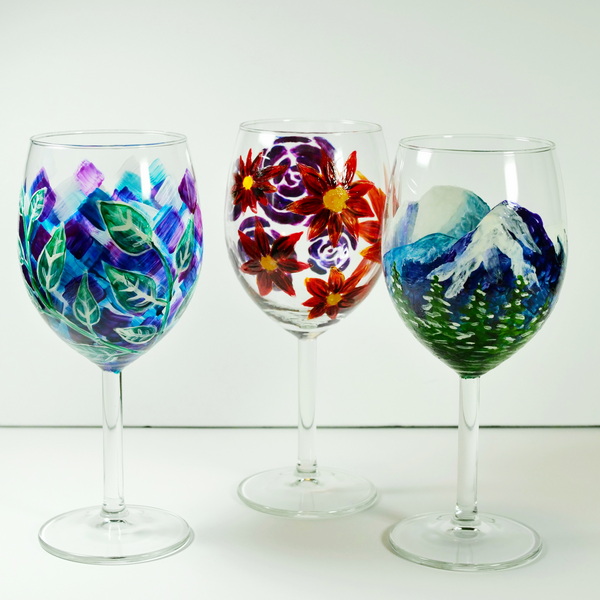
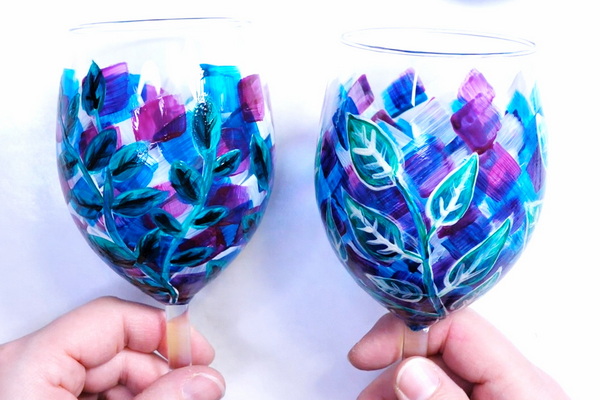
In today’s project I’ll be painting a wine glass. I painted 3 wine glasses in my testing process to see the different effects and layers I could create with the Pebeo Vitrea 160 paint.
For today’s tutorial, I will stick with a simple background with leaf designs. This is a simple pattern that will show you how you can create multiple layers with this beautiful glass paint.
Painting Background Color Layers onto Glass
Start by adding your paint into a porcelain palette that has individual wells. The Vitrea 160 paint has a lot of flow, with a similar consistency to fluid acrylic paint. I would suggest adding a small amount of paint to your palette. Adding too much paint may mean it will start thickening and drying out before you’ve applied it to your project.
Adding Your Base Color: Vitrea 160 Veil White
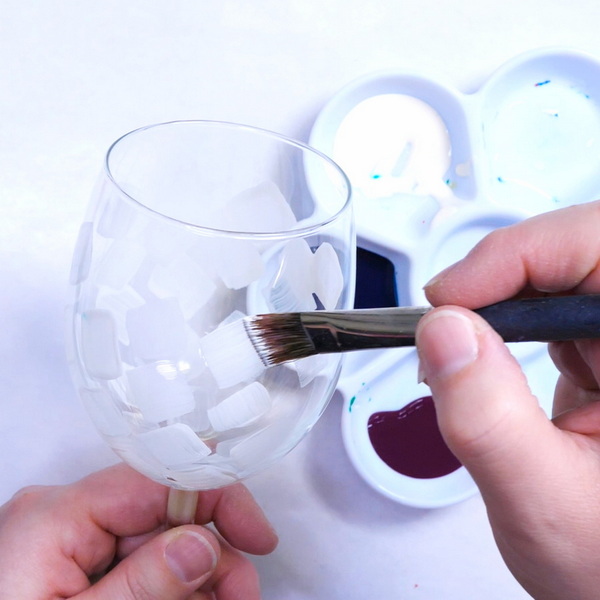
Start with the Veil White glass paint and a flat ½ inch brush. Add square brush marks randomly to the surface of the glass. Around the bottom of the wine glass, closer to the stem, I concentrated the squares of color. As I moved up the glass, I left more space between the squares. Your square shapes don’t have to be perfect, it’s just a fun way of creating background shapes.
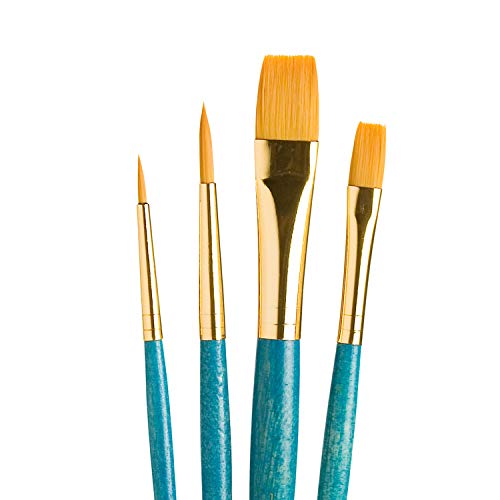
The Real Value art brushes are ideal for all types of art-making from acrylic and watercolor paintings to painting with oils and tempera.
The challenge with glass paint is getting an even coat, as it doesn’t always want to go onto the surface evenly. This is the nature of the paint that I found a bit challenging. The outer bristles of my flat brush generally carried more paint. Which can leave stronger lines of paint on the outer part of the squares.
Try adding thinner coats of paint instead of a thicker coat of paint. You can always add more layers to create a solid color, but you can’t remove the globs or drips of paint later. If you’re finding you’re picking up too much paint, dab your paintbrush lightly against the well of the palette. This helps even out the paint in the brush.
If you are struggling with this, you can always use the Pebeo Vitrea 160 Glass Paint Thinner. This will thin the paint without losing durability in the finished project but will make it easier to apply. I would not dilute this paint with water as it may not set properly during curing.

Developed to mimic the look of genuine stained or colored glass, Pebeo Vitrea 160 Glass Paint is part of a new generation of thermo-hardening, waterbased, non-toxic paints specially designed for use on glass.
Adding Your Second Background Color: Vitrea 160 Turquoise
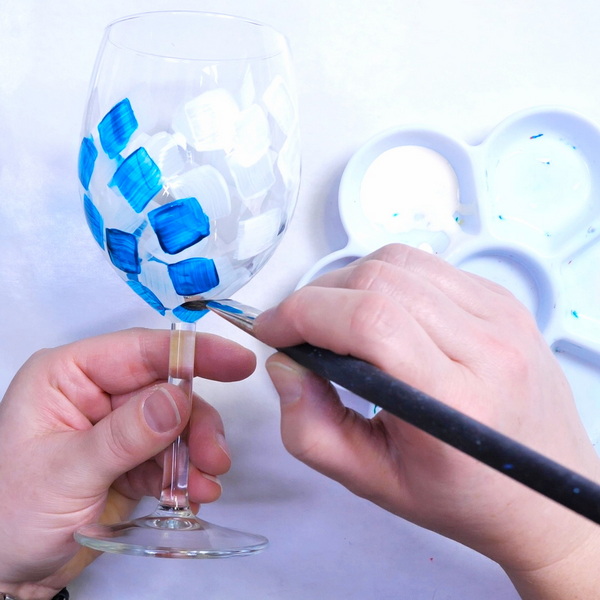
If you’ve added a thin layer of Veil White, the first layer of paint that you applied should be dry. Add in square brush marks of Vitrea 160 turquoise paint. Overlap some of the white areas with the blue and continue to add the squares in a random fashion along the wine glass.

Developed to mimic the look of genuine stained or colored glass, Pebeo Vitrea 160 Glass Paint is part of a new generation of thermo-hardening, waterbased, non-toxic paints specially designed for use on glass.
Adding the Third Background Color: Vitrea 160 Bengal Pink
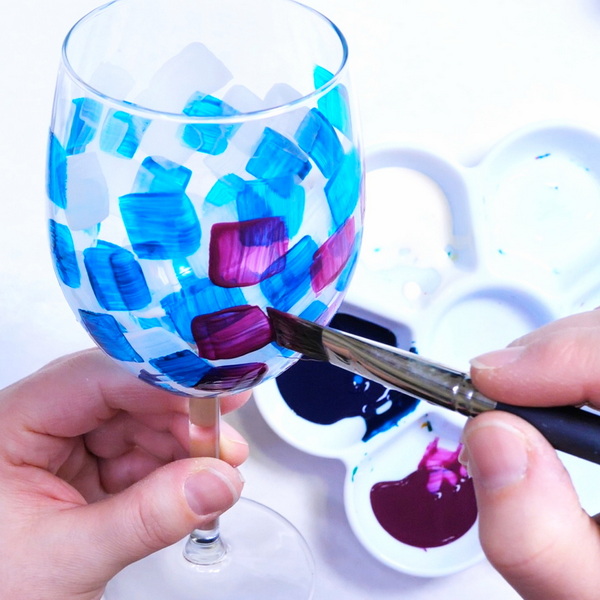
After the other layers are dry to the touch, add the Vitrea 160 Bengal Pink in square brush marks on top of the Veil White and Turquoise glass paint. I added less of the Bengal Pink glass paint than the turquoise and white paint. By varying the color, this creates more interest in the design and makes it less uniform.

Developed to mimic the look of genuine stained or colored glass, Pebeo Vitrea 160 Glass Paint is part of a new generation of thermo-hardening, waterbased, non-toxic paints specially designed for use on glass.
Tips for Creating Backgrounds on Wine Glasses
Expect to Have Brush Strokes
Embrace the brush strokes. If you are looking to have less brush strokes, you will need to add a lot more layers to try to remove the strokes or use the Vitrea 160 glass thinner. But it may not be possible to remove them altogether from your project. I purposely created a more painterly look on this wine glass. Embracing the texture of the paint and letting the brush strokes be part of the design.
Painting Mistakes can be Corrected
If you find that you are unhappy with your design, use a piece of wet paper towel to remove the paint. Until the paint is cured during the heating process, it’s not permanent. The drier the paint, the harder it will be to remove. But if you find that you made an error when you’re painting or you don’t like the direction something is going in, just wipe it off the surface and try again.
Don’t Paint to the Top of the Glass
I would avoid painting to the top of the glass as I am unsure how non-toxic the paint is. Also, it’s nice having some variation in the design, so I tend to create designs that don’t go to the top of the glass. This is a safety practice that I use in all art pieces that may come in contact with food or beverages.
Adding a Detailed Design to the Background
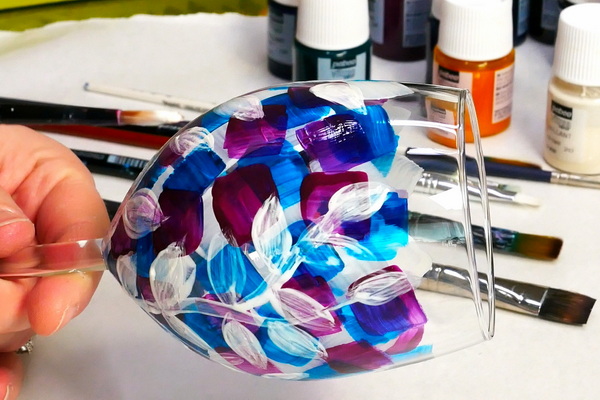
To create a detailed design on the background, I like to start by creating the shape with the Pebeo Veil White glass paint. This helps pops the design from the background and prevents darker colors for disappearing into the background.
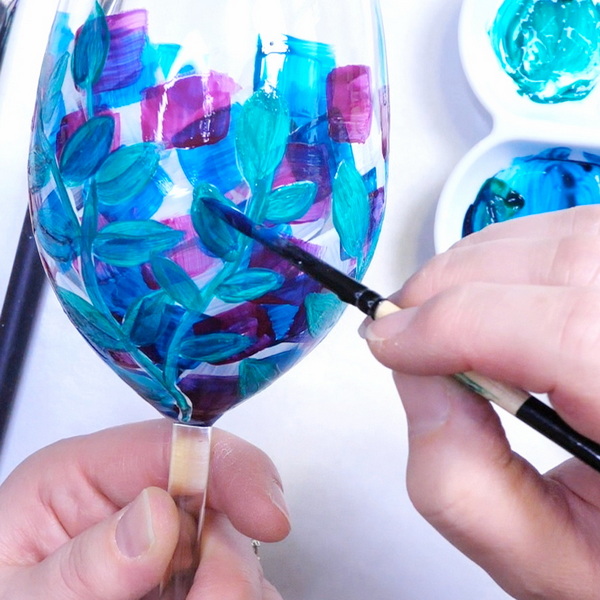
Using a liner brush, add a thin line of Veil White in a soft, curved line. This is your main branch. Add leaf outline shapes to the design. These can easily be created by making two arcs that join at the tip, then painting in the middle area. If you feel like the layer of white paint is too transparent, add another layer of Veil White glass paint to make it more opaque.
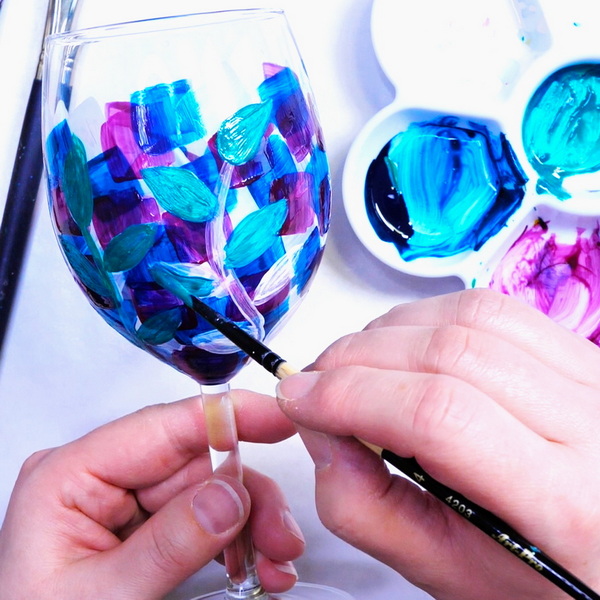
Once the paint has dried, add green paint to the leaves and stems. For this color mix I used Veil White, Oriental Green and a touch of Turquoise. By using a little bit of turquoise, this adds color harmony to the wine glass.

Developed to mimic the look of genuine stained or colored glass, Pebeo Vitrea 160 Glass Paint is part of a new generation of thermo-hardening, waterbased, non-toxic paints specially designed for use on glass.
Depending on the design you’d like to achieve, you can cover up all of the white paint, or use it as an outline on the wine glass. To create an outline, just paint the green to the inside of the white creating an outline.
You can also choose to color the entire leaf green and use shadows and highlights in the next step to define the leaves.
Adding Highlights and Shadows
After adding one layer of green and letting it dry, add more turquoise to your color mix to create a darker green. This can be added to the bottom of the leaves to create shadows.
You can also add Veil White glass paint to your green mix to create a lighter green that can work to highlight the leaves.
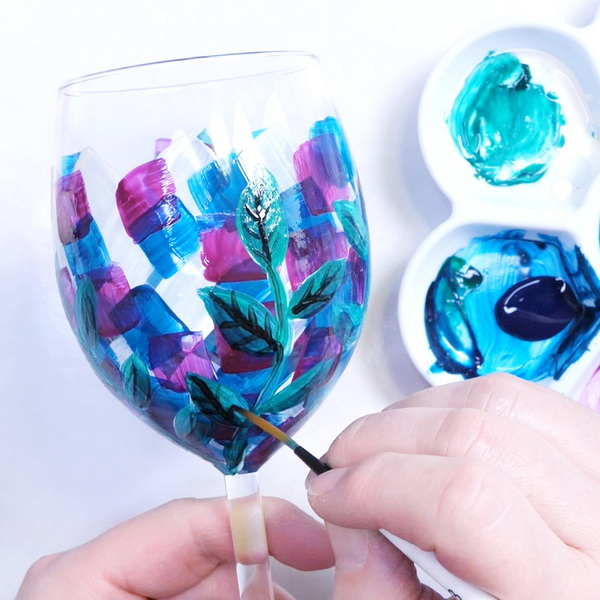
Once you’re happy with the color mix, you can use Veil White or Ink Black paint to create margins in the leaves.

Developed to mimic the look of genuine stained or colored glass, Pebeo Vitrea 160 Glass Paint is part of a new generation of thermo-hardening, waterbased, non-toxic paints specially designed for use on glass.
Tips for Adding Detailed Designs
Using Round Brushes for the Details
I generally like to paint with flat brushes when glass painting. But using a liner brush and round brushes is much easier to create details on the wine glass. The round brushes are easier to control and by varying the pressure of the stroke, this is a great way to create subtle, organic strokes to your piece.

Rigger brush is also known as a liner or script brush. This brush set includes 6 different sizes: #000 #00 #0 #1 #2 #3.
If you find creating details difficult with brushes, this glass paint comes in Vitrea 160 paint markers and Vitrea 160 glass paint outliners. The outliners are a thick paint like puff paint that are meant for strong outlines and stained-glass effects. These are great options if you are uncomfortable using a brush.
Specially designed for use on glassware, Pebeo Vitrea 160 Outliners are ideal for achieving a stained glass look or creating dimensional relief effects when combined with Vitrea 160 Glass Paint.

Vitrea 160 Markers are paint markers that can be used, together with Pebeo's Vitrea 160 paints, on glassware, vases, lamps, and window surfaces. The medium-sized round tip makes writing, drawing, outlining, and highlighting a breeze.
Building with Layers
The key to this technique is building up the paint using thin layers. You can’t glop on heavy layers of paint and expect good results.
I found the best results was to add a layer of paint, let it dry and then add another layer on top. You’ll know the paint is dry if you can paint on top of it without removing the layer below. Usually by the time I painted around the entire wine glass, the area I started was already dry and read for the next coat of paint.
Sealing and Curing the Paint
Before you can set the paint, it is recommended that you leave the project for 24 hours to dry. I left my wine glass for 36 hours before I set it. You want to make sure that the paint is fully dry on the surface before setting it.
Because of the properties of the Vitrea 160 paint, you don’t need to add a sealant to the wine glass. To cure the Vitrea 160 paint, bake in a kitchen oven at 160C or 325F for 40 minutes. After that, it will be ready for use and can be washed without damaging the design.
Make sure to preheat your oven before you add in your glass piece. I’ve seen advice online where people say to add it to a cold oven, but I would not recommend it. As the oven warms up, it will use as much heat as possible to get up to temperature. This might damage the glass or ruin the glass paint.
Let the oven preheat and get up to temperature before adding your glass project. I added my wine glass to a pan so that it would set level in the oven. You may get a slight smell from the oven as the paint is curing. Once it has been baked for 40 minutes, pull it out of the oven to cool. It will be very hot when you initially remove it, so let it sit for a while before handling it.
Color Change
You may notice a little bit of color change to the surface of your glass. I found that the lighter colors darkened a bit more than the darker paint colors. But I did notice that it became slightly more transparent allowing the glass to shine through slightly.
Smoothing of Layers
If you are unhappy with the brush marks, I did notice that they softened slightly and became less noticeable after curing the glass in the oven. I would not rely on this during the creation of your piece. But it might be something that you’ll discover after heat setting the glass.
Any Questions?
Any questions about how to use these Pebeo Vitrea 160 glass paints and how they can be incorporated onto your projects? This paint does work differently than acrylic paints. But with a bit of practice you’ll be able to get great results glass painting. Take the time to experiment with shapes and designs. If you have any questions about this medium, please leave a comment below. I would love to answer any questions that you might have!

Project Supply List
Developed to mimic the look of genuine stained or colored glass, Pebeo Vitrea 160 Glass Paint is part of a new generation of thermo-hardening, waterbased, non-toxic paints specially designed for use on glass.

Developed to mimic the look of genuine stained or colored glass, Pebeo Vitrea 160 Glass Paint is part of a new generation of thermo-hardening, waterbased, non-toxic paints specially designed for use on glass.
Developed to mimic the look of genuine stained or colored glass, Pebeo Vitrea 160 Glass Paint is part of a new generation of thermo-hardening, waterbased, non-toxic paints specially designed for use on glass.
Vitrea 160 Markers are paint markers that can be used, together with Pebeo's Vitrea 160 paints, on glassware, vases, lamps, and window surfaces. The medium-sized round tip makes writing, drawing, outlining, and highlighting a breeze.
Developed to mimic the look of genuine stained or colored glass, Pebeo Vitrea 160 Glass Paint is part of a new generation of thermo-hardening, waterbased, non-toxic paints specially designed for use on glass.
Developed to mimic the look of genuine stained or colored glass, Pebeo Vitrea 160 Glass Paint is part of a new generation of thermo-hardening, waterbased, non-toxic paints specially designed for use on glass.
Developed to mimic the look of genuine stained or colored glass, Pebeo Vitrea 160 Glass Paint is part of a new generation of thermo-hardening, waterbased, non-toxic paints specially designed for use on glass.
Specially designed for use on glassware, Pebeo Vitrea 160 Outliners are ideal for achieving a stained glass look or creating dimensional relief effects when combined with Vitrea 160 Glass Paint.
Developed to mimic the look of genuine stained or colored glass, Pebeo Vitrea 160 Glass Paint is part of a new generation of thermo-hardening, waterbased, non-toxic paints specially designed for use on glass.

This ceramic paint palette is made from premium handle glazed pure white porcelain. Ceramic palette with light, portable, super durable, double thickness and so on.
The Real Value art brushes are ideal for all types of art-making from acrylic and watercolor paintings to painting with oils and tempera.
Rigger brush is also known as a liner or script brush. This brush set includes 6 different sizes: #000 #00 #0 #1 #2 #3.