How to Paint Flowers with a Toilet Paper Roll
Are you looking for easy ways to paint flowers in your art journal? A toilet paper roll is the perfect tool for creating beautiful flower or dandelion images in your art journal. In this article I’m going to show you this fun and easy technique!
Toilet paper rolls are great because we all have them on hand. It’s also a great way to repurpose things for our art journal projects.
Hop-A-Long Studio is reader-supported. When you buy through links on our site, we may earn an affiliate commission at no cost to you. Learn more.
How to Use a Toilet Paper Roll with Acrylic Paint
You may have used toilet paper rolls for stamping into paint and making circles on your art journal pages. This is a great use for them but it’s not the only use for toilet paper rolls. Today we’ll be cutting up a toilet paper roll to create a custom stamping tool to make flowers.
Making a Flower Stamping Tool

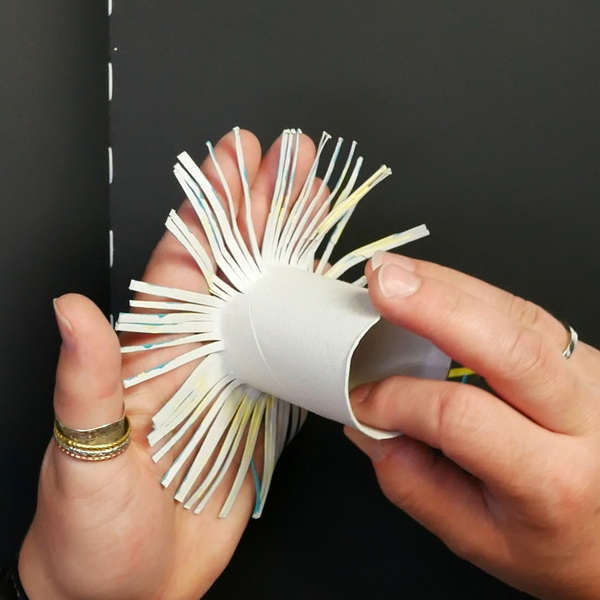
To make the flower stamping tool, you’ll need to create cuts in a toilet paper roll. Starting at one opening of the roll, cut lengthwise into the roll to the halfway point. I like to have my cuts quite close together, about 1/8” apart. Continue to add cuts around the entire circumference of the toilet paper roll.
Try to make the length of these cuts uniform. This will give you a flatter stamping tool and will create better results. If you find it hard to cut consistently, use a pencil to mark a line around the circumference of the toilet paper roll to use as a cutting guide. Don’t cut all the way to the top or your roll will fall apart!
Fold out the cut side of the toilet paper roll so that it makes a wide circular shape. If you have uniform cuts, when you press down on the toilet paper roll, the “handle” should lie flat onto the surface.
How thick or thin you make your cuts is up to you. I find that I generally get better results making fine cuts over larger cuts. It depends on the look that you want to create.
Adding Acrylic Paint to the Flower Stamping Tool
To get the best results painting flower shapes, you’ll want to use a fluid acrylic paint, or you’ll need to water down heavy body acrylic paint. The key with this technique is having a thin layer of paint on the stamping tool. This creates more defined shapes.
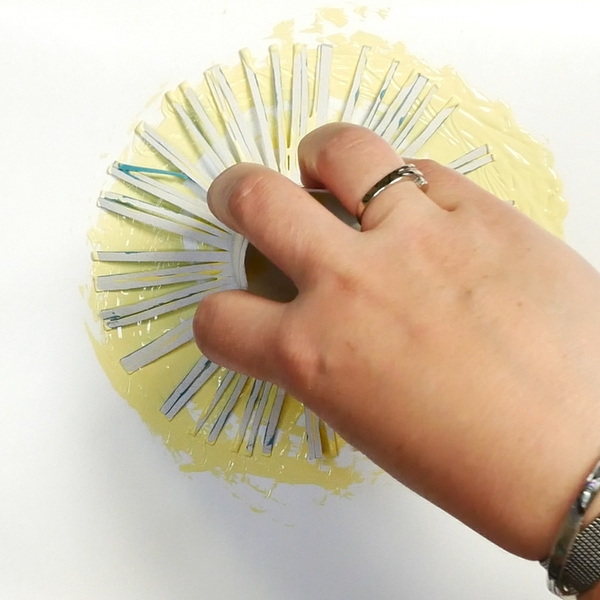
For today’s project I’m using Paper Artsy Acrylic Paint Fresco Finish. It’s a fluid, pigmented craft paint which means that it’ll create beautiful color and will be easy to work with. Start by adding a circle of this paint onto your palette paper. This makes it easier to spread onto the stamp tool.
Dab and twist your toilet paper stamping tool into the paint. You don’t want heavy globs of paint on your tool but are looking to create a thin layer of acrylic paint. Don’t be too worried about getting even coverage of acrylic paint on the tool. The uneven paint creates a bit more abstraction to the flower shape.
Creating the Flowers
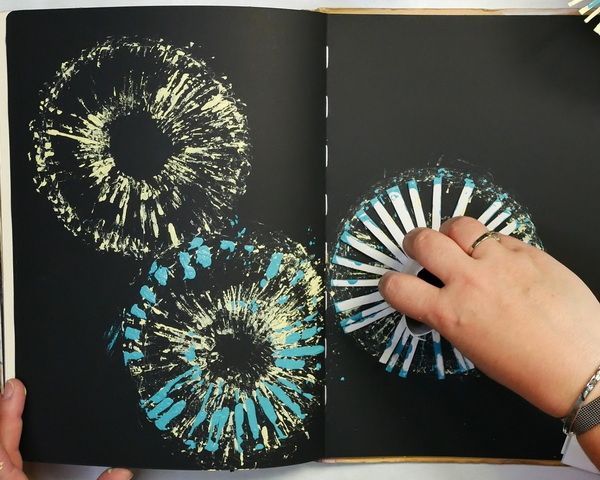
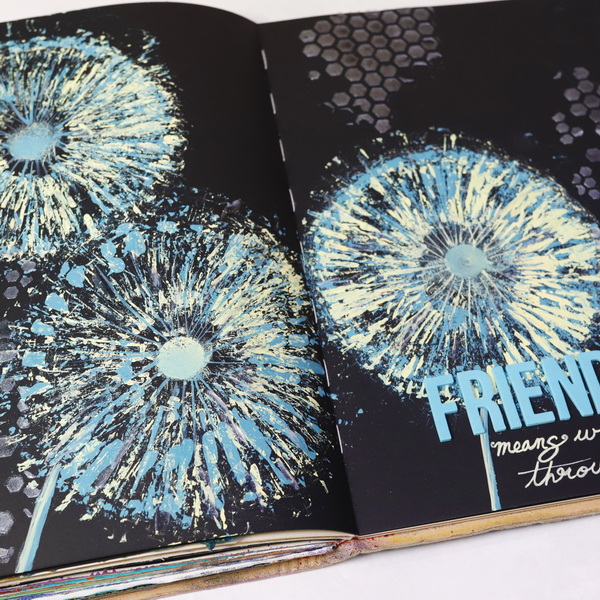
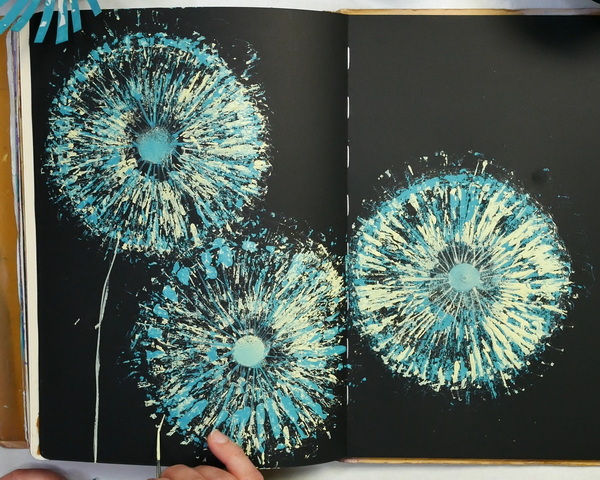
Gently press the flower tool onto your surface. For this project, I’m using black mixed media paper in my Dylusions Classic Journal, but white paper will also work just fine. You want to stamp onto the surface, lift the tool, twist it slightly, and apply it again to the surface. You want to create a circular shape but depending on how much distance you leave between the stamping, this will give you a unique flower shape.
Continue stamping until most of the acrylic paint on the stamp is applied. This is how you will get the fine details on the flowers. Too much heavy paint will create a smeary and less detailed flower shape.
If you want a more defined outer edge to your flower shape, when you apply the stamping tool, keep it on the surface and twist. This will give a stronger, more defined outline. It depends on what look you want to produce.
You can use any colors for this project, but I chose to use Paper Artsy Lemon Meringue and Paper Artsy Calypso Chalk Acrylic Paint. If you find that you have too much of one color, alternate to the other color and continue stamping. You can create airy or solid flowers depending on how many layers of stamping you add.
Creating the Flower Centers

At this point, you can make the decision to make your flower a dandelion or a flower. If you want to create a dandelion, you’ll want to create a small solid center. If you want to create a flower shape, add in a larger center that leaves no blank spaces.
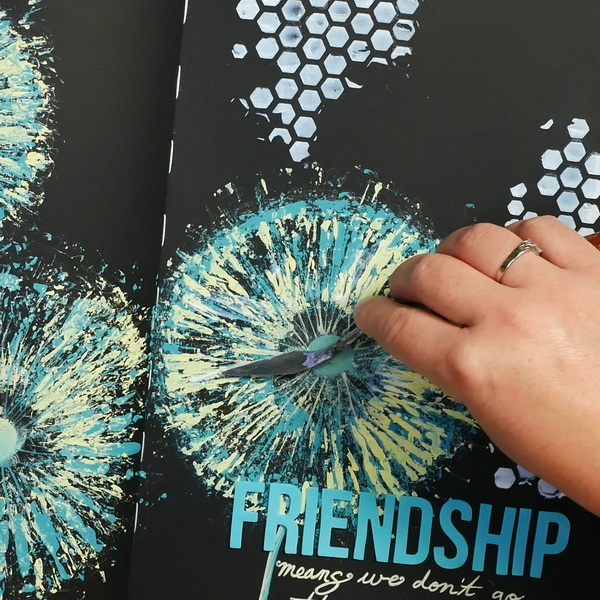
For this example, I wanted to show you how to create a dandelion center. Using a small ½” round sponge, add paint to the center of the flower. You can add a lot of paint to create a solid, vibrant center or you can tap it on in a larger circle to make it softer.
If you don’t have a round sponge, you can use any round tool to make a circle. A bottle cap, a pencil or some other round object can be used for a stamping tool.
If you want to create a flower, you can choose to use contrasting colors to make the flower centers. For a dandelion I like to use the same color palette, but for a flower, you can create centers of almost any color.
Adding in Flower Details
At this point you can leave the flower (or dandelion) as it is. But this is also an opportunity to add small details to your flowers.
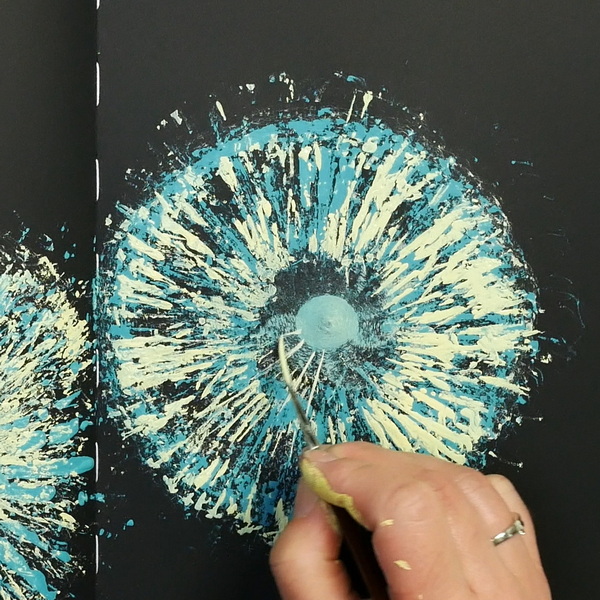
For the dandelions, I like to use a liner paint brush with thinned paint to add small lines from the center to the outer flower. You can choose to keep these lines short, to just touch the outer flower, or you can create longer strokes into the flower.
You can also add in stems to the flowers using a liner brush. Using both the Calypso and Lemon Meringue paint, add thin lines of paint to create stems.
The key with using a liner brush is to keep light pressure. I will also use my full arm to move my brush instead of just my hand. By making a flicking motion as I move the paintbrush, this helps me get very fine lines.
If you’re not comfortable with a paint brush, you could always use a paint pen for this step instead.
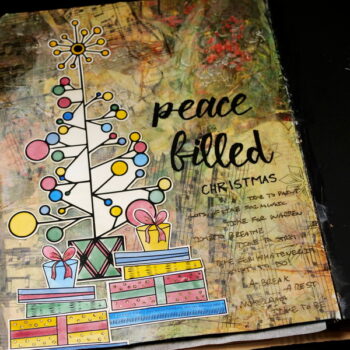
Adding in Journaling
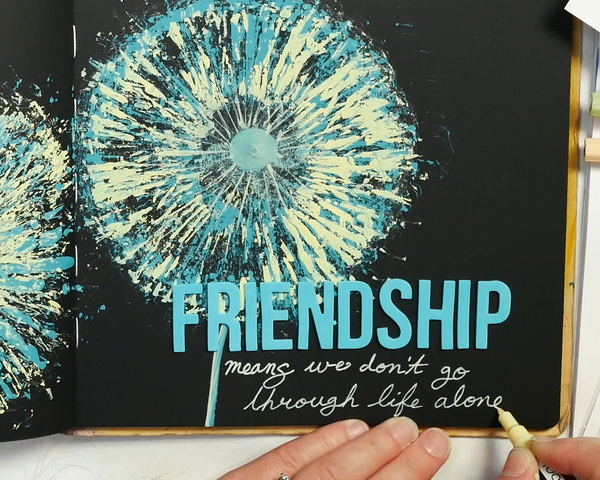
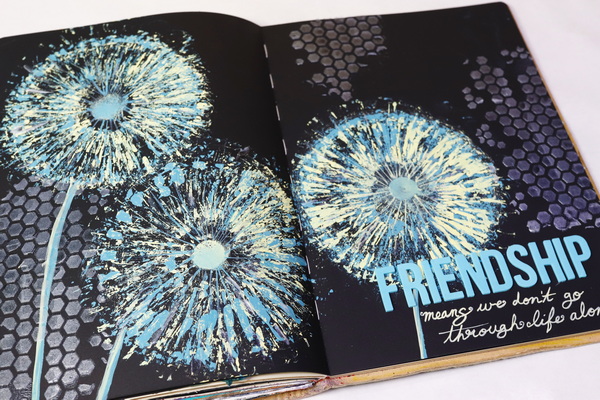
I’m using a combination of paint pens and Thickers alphabet stickers for adding in my journaling. I like using Thickers to create bold and bright titles quickly. They also add dimension to my art journal pages. When adding alphabet stamps or stickers, always add the stickers from right to left, this way you’ll make sure that you don’t run out of room on your page.
For the rest of the journaling, I’m using my new favorite set of paint pens: the Tooli Art Pastel Paint Pens. They come in a range of beautiful pastel colors that work beautifully on black paper. If you’re looking for an inexpensive paint pen, check out this article where I share with you my favourite inexpensive paint pens.
The Importance of Friendship
I have just come out of a great weekend catching up with some of my close friends and was reflecting on how important friendship is to our lives.
The quote I am adding to my art journal this week is:
Friendship means that we don’t go through life alone.
Nadine Milton
Friendship and community are important, but what does it add to our lives? Our friends can be a sounding board for us. They listen and take the time to know how we’re really feeling. They can keep us on track and can help us stay grounded. I find that sometimes I get caught up in my own life and circumstances. Being able to share my experiences with a friend can often bring new perspective.
So often we can be hard on ourselves and can be our biggest critics. But by having great friends around us can remind us of our strengths and can keep us balanced in life. They know us and love us. This creates a space where we can share our feelings and find encouragement. Life feels a lot less hard when we have friends to help us along the way.
This page is meant to be a reflection of the gratitude that I have for my friendships. It’s also a reminder that even when I’m struggling through life, I’m not alone. And most importantly, I don’t have to go through life alone.
My Challenge to You
My challenge to you is to reach out to a friend or go make a new friend. If you’re feeling isolated and lonely, reaching out to a friend can be the best thing to do, even if you don’t feel like it. Usually, the times I don’t feel like it is when I need friendship the most. I’m always surprised when I leave those conversations how much better I feel! You never know what conversation you might have and how it can be a help and encouragement to both you and the other person.
Interested in Adding Texture?
At this point, I’m very happy with this layout, but I thought it would be fun to add some interesting texture to the page. When we’re using mediums, we might think that we need to color them or use them as opaque layers. But gels and mediums can also create beautiful translucent layers and textures on our projects.
For this example, I’m using Golden Semi-Gloss Regular Gel because it creates texture and volume but will dry clear. Add few scoops of medium onto your palette and mix it with Liquitex Iridescent Medium. The Iridescent Medium creates shine but doesn’t add color or opacity to the gel.
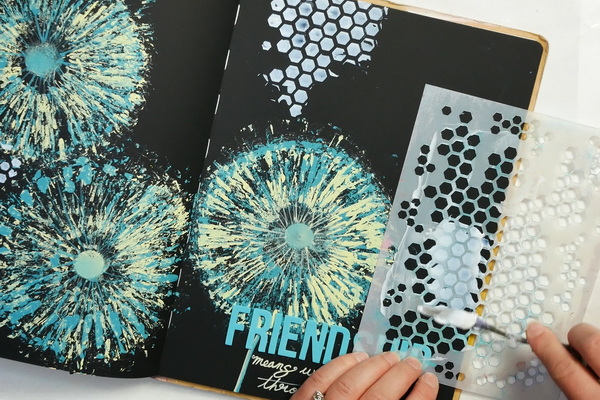
Add a thin layer through a stencil in spots around the journal page. I’m using Wild Whisper Designs Honeycomb stencil as this simple geometric shape won’t take away from the focal images on the layout.
You can also choose to go over some of the painted areas with the gel. As it is translucent, it’ll add texture and not cover up the color. If you have some leftover paste, you can also add some texture to the flowers with your palette knife. This creates beautiful shine and texture to the page.
Leave the gel medium to air dry for best results.
Lessons Learned About Gel Mediums
Once this page dried, I realized that I should have used a glossy gel instead of a semi-gloss gel when working on black. I generally don’t use glossy gel in my art journal because the glossy mediums sometimes make your pages stick together. But the mattifying agent in semi- gloss or matte gel mediums to make them matte creates cloudiness on black paper.
I ended up with a page where the texture areas had cloudiness instead of being translucent. I still like this page, but we aware of what is in your gels when using it on your black journal pages.
Any Questions?
Any questions about how to paint flowers with a toilet paper roll? Have you ever tried a technique like this before? I’d love to hear what you think of this project and any questions you may have. Please leave a comment below, I’d love to start a conversation with you!
Project Supplies
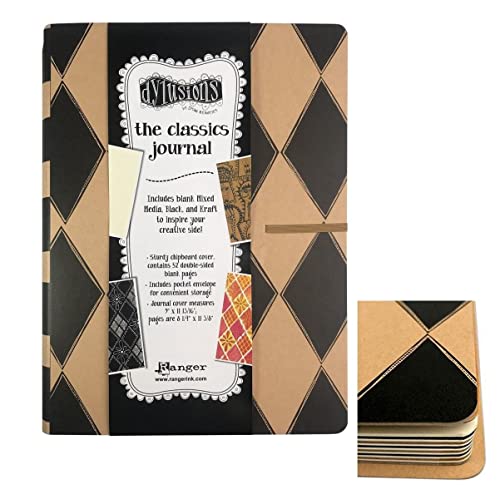
When you need somewhere to create and preserve your artwork, look no further than this Dylusions Classics Journal from Ranger Ink, designed by Dyan Reaveley. This journal includes 52 double-sided pages, 28 mixed media, 12 black and 12 Kraft pages, all waiting for your inspiration.

You're going to feel just like an expert when you're cutting the smallest of details with the Cutter Bee Scissors by EK Success. These un"bee"lievable compact scissors will have you feeling like a queen bee when you swarm right into your fine detail or fussy cutting projects.
PaperArtsy Fresco Finish Paint – Calypso [FF162] – Opaque
from: Joggles.com, Inc
PaperArtsy Fresco Finish Paint – Lemon Meringue [FF142] – Opaque
from: Joggles.com, Inc
Richeson Disposable Palette Paper Pad – 9′ x 12′, 50 Sheets
from: Blick Art Materials

A 5-piece premium quality stainless steel artist palette knife set with sturdy comfort-grip wooden handles. Set includes the essential shapes and sizes needed for most types of palette knife techniques and painting applications.


Rigger brush is also known as a liner or script brush. This brush set includes 6 different sizes: #000 #00 #0 #1 #2 #3.

Perfect for adventurous artists, this water pot expands on site then collapses for transport. It's also easy to clean and store. Ridges around the rim keep brush handles separated and organized while you're painting.

Regular Gel Semi-Gloss is a translucent medium with a consistency similar to Heavy Body paints. Use for extending colors, altering sheen, increasing translucency and adhering collage elements.


As part of the Special Color Series, you get 24 unique and pretty assorted pastel colors that you’re sure to love.
Extra fine 0.77 mm nylon tip makes fine detailed strokes ideal for drawing, outlining, or making fine mandala dots. The valve-action tip is engineered to keep it’s shape and not fray over time so you can continue to get good details in your artwork.