Show Your New Years Intention with Pan Pastels
Are you looking to start a creative habit this year? I love January as it’s a time to explore some of the materials in my art room that I haven’t used in a while and play with some new ideas. Today I’m pulling out my Pan Pastels to show you some fun and easy techniques that anyone can do!
Hop-A-Long Studio is reader-supported. When you buy through links on our site, we may earn an affiliate commission at no cost to you. Learn more.
What are Pan Pastels?

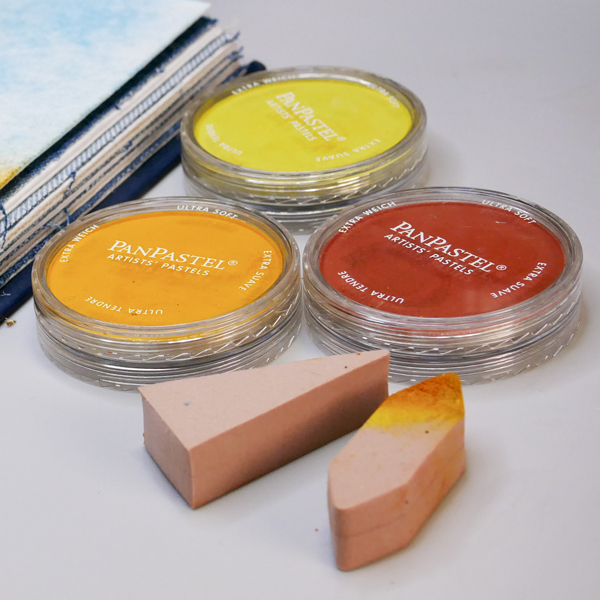
I’ve shared about Pan Pastels before, but if you’re not familiar with these cute little pans, they are pastel pigment in a round cake form. This is different from pastel pencils or square chalk formats that you’re probably familiar with. Pan Pastels open unique options for creativity and these also allow you to add large blocks of color to your pieces quickly and easily.
Just make sure that you don’t confuse these with oil pastels! Oil pastels are their own special medium and won’t work the same way as the dry pastels that we are using today.

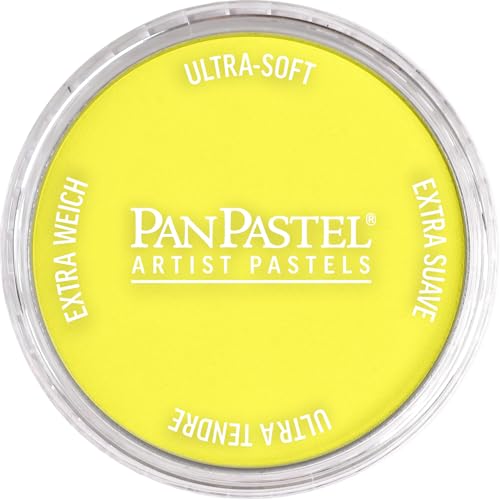
Here are genuine artists’ quality pastels — the softest in the world — uniquely packaged in stacking and interlocking jars. The packaging protects the colors, thus reducing damage and waste. PanPastels were specially developed so that artists could lift, apply, and control pastel color, just like true painting.
What if I don’t have Pan Pastels?
If you don’t own Pan Pastels, but have a rectangle (chalk) pastel, use a cloth or makeup sponge to pick up the color to apply to your surface. This will give you a similar effect, you just won’t be able to work quite as quickly as you would with Pan Pastels.
Pan Pastel Blending Tools
The Pan Pastel brand has a large variety of blending tools called Sofft tools that work beautifully with their pastels. These foam tools are stiff and help with effortless blending. You can purchase Sofft Tools in a variety of shapes and sizes.
The downside of these tools is that they are quite expensive. I do have a set of them for my own personal projects, but when I teach Pan Pastels to groups of students, I tend to use disposable makeup applicators and makeup sponges.
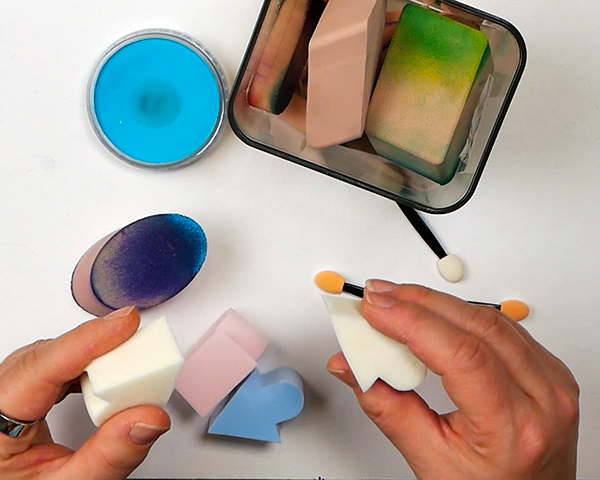
These makeup tools don’t absorb too much of the pigment and give a similar result at a fraction of the price. It’s a good alternative to Sofft blending tools especially if you’re budget constrained.
For today’s project, I’m going to use makeup sponges and applicators. If you’re curious to see how they work and what results you can get from them, make sure to keep reading!

For use with PanPastels and waterbased media, this set includes seven Sofft tools, including a No. 3 oval knife, five No. 3 oval covers, a sponge bar, and an angle slice round.

Makeup applicators are great for blending Pan Pastels, applying paint through stencils and many other mixed media techniques.
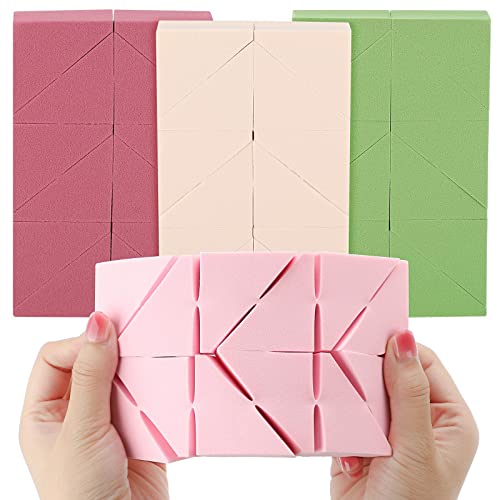
Make up sponges works well for Pan Pastel application and for using acrylic paint through stencils.

50 Pcs eyeshadow brushes are packaged in a safe and clean bag, easy to carry, and affordable.
These are great for blending Pan Pastels on any surface!
Pan Pastels in the Art Journal
You might be wondering if you can use Pan Pastels in your art journal without your pages smearing. Yes, you absolutely can! I’ll be sharing not only how to use them in an art journal, but how to seal them properly.
Choosing An Intention
Before we get into the process, it’s good to start with the “why” for our project, or our intention. I often get asked how I come up with my ideas and how do I know what to create.
Often I’ll start with a medium (like Pan Pastels) and have a topic in mind. Today I’m focusing on the new year and what my intention for the year will be.
Why I Don’t Make New Year’s Resolutions
I don’t make new year’s resolutions because they are not useful to me. But reflecting on the year and making plans for the coming year is important to me. Instead of making a resolution that is impossible to follow, over the last few years I came up with a system of setting goals and intentions that helps me stay focused throughout the year.
I evaluate the things that are important to me (my values), prioritize them and from there make a few specific goals for the year. From these goals, I come up with my intention for the year. I ask myself this question: “If I could go through life with one thought or intention that would make the next 12 months amazing, what would it be?”
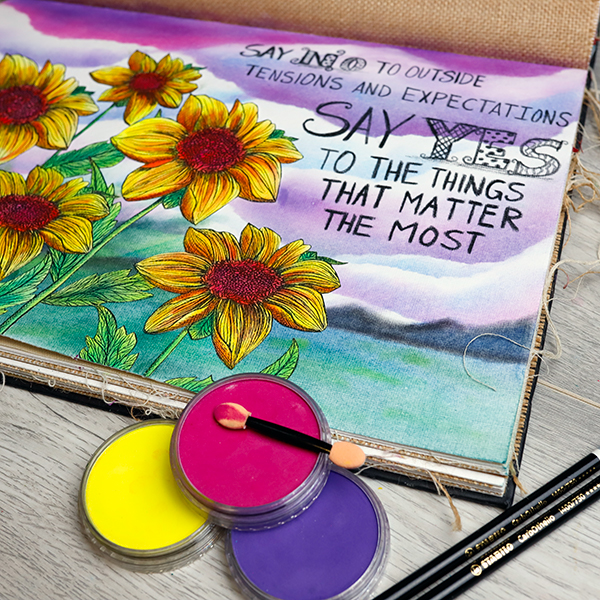
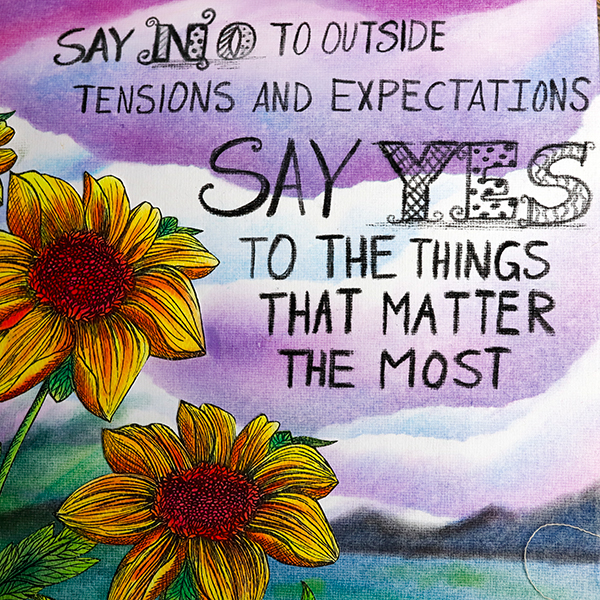
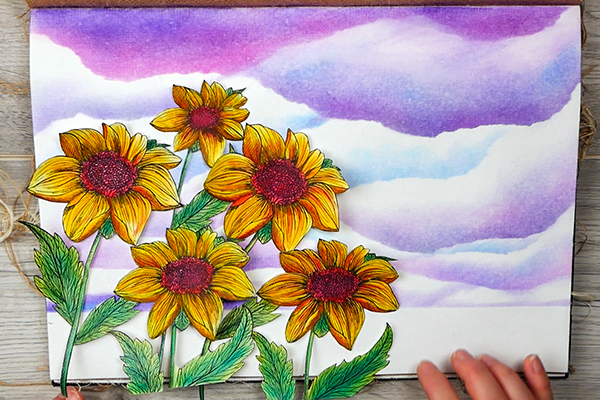
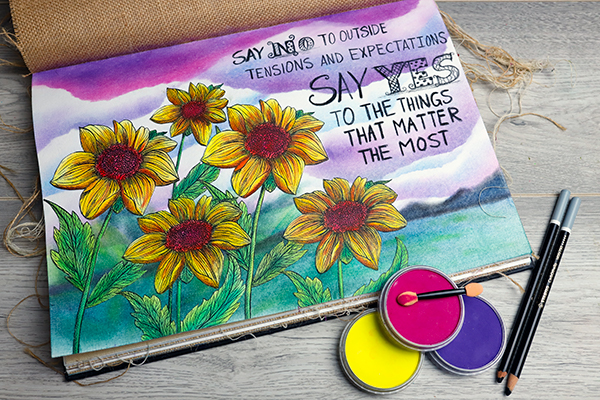
My intention for this year is the purpose and my “why” behind this page. After looking at my goals and values, this is the intention I decided on for this year.
Say no to outside tensions and expectations. Say yes to the things that matter the most.
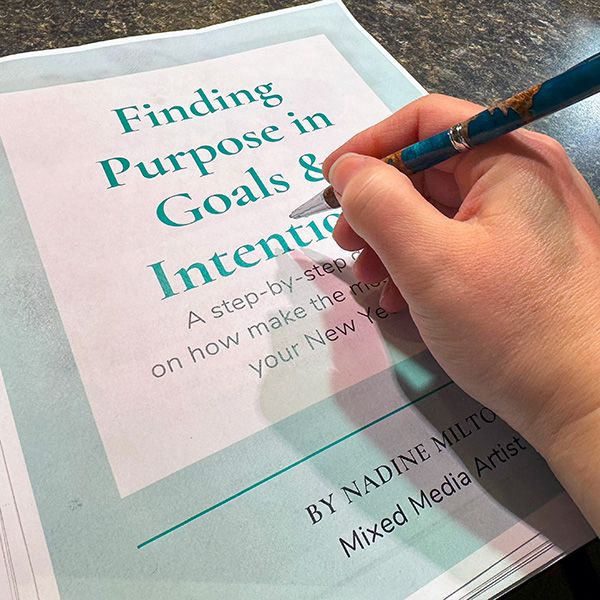
If you’d like a copy of the system I use, you can find my e-book Finding Purpose in Goals & Intentions, for purchase in my shop. If you’d like to go deeper and create a mixed media canvas in which to display your intention, check out the Canvas of Intentions course that includes both the e-book and the mixed media canvas project.
Tired of the usual New Year's resolutions? Let’s focus on setting a meaningful intention for the year!
Join me for a fun, mixed media class where we’ll explore how to start the year on the right foot, using personal expression to bring your intentions to life on canvas.
Tired of the usual New Year's resolutions? Let’s focus on setting a meaningful intention for the year! Learn how you your values, goals and intentions intersect to make sure you have the best year yet!
This 22 page e-book includes worksheets to help you define your goals and intentions for the year.
Pan Pastel Clouds
The first step of today’s project is to create simple clouds with our Pan Pastels. I originally learned this technique from Kathie MacDuff and it was such an amazing and easy technique I just had to share it!
Start with a Piece of Copy Paper
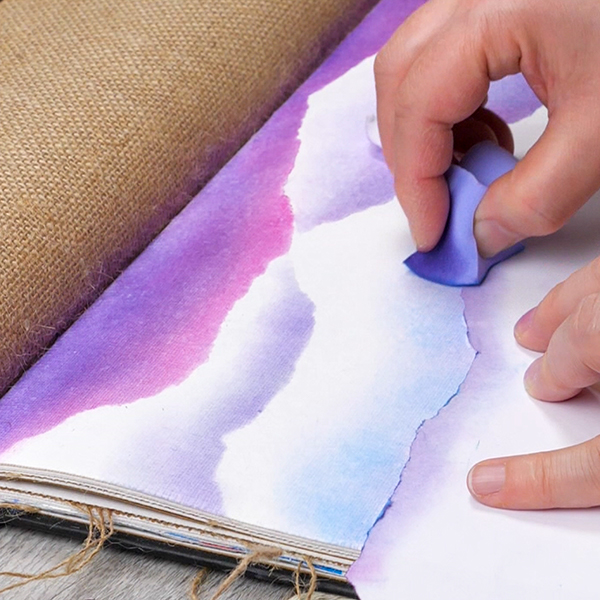
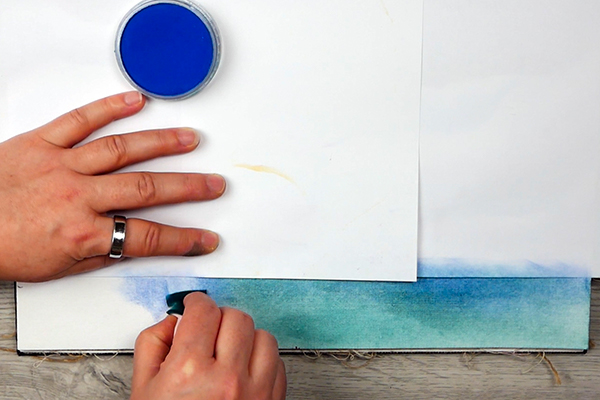
Start with a piece of copy paper and tear it unevenly. This should create a soft, curving, uneven shape. This is your mask to create your cloud shape. I am working in a large journal, so I need 2 pieces of paper, but depending on your journal size, you may only need one.

Start at the top of your piece and place your paper shape where you want the first layer of clouds. Make sure to work from the top to the bottom of your journal to prevent smearing. Using a combination of Magenta and Violet Pan Pastel and an applicator, blend a light layer of Pan Pastel along the paper edge and up to the top of your page.
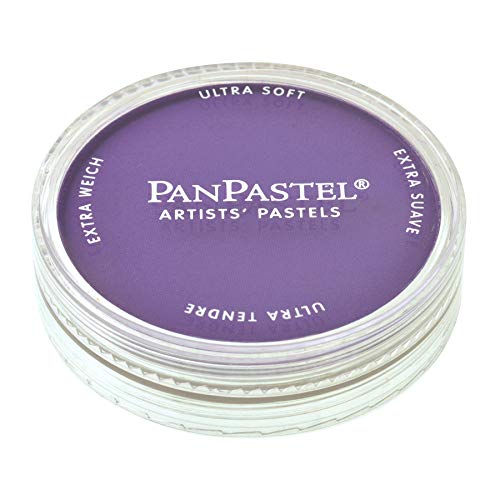
PanPastel Artists’ Pastels are pigment-rich, professional-grade soft pastels in a stackable pan format. Each contains 0.3 oz—about 35% more material than the average pastel stick—giving you easy access to intense, ultra-soft color that’s easy to lift, blend, layer without overfilling your surface’s tooth.

PanPastel Artists’ Pastels are pigment-rich, professional-grade soft pastels in a stackable pan format. Each contains 0.3 oz—about 35% more material than the average pastel stick—giving you easy access to intense, ultra-soft color that’s easy to lift, blend, layer without overfilling your surface’s tooth.
Blending Your Next Layer of Pan Pastel
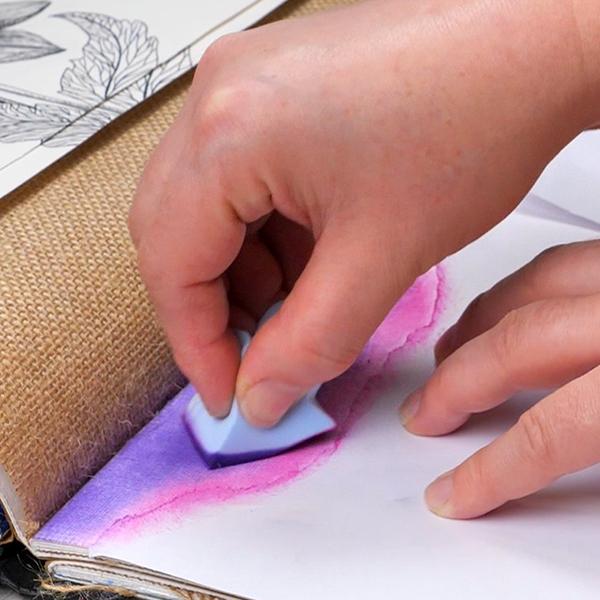
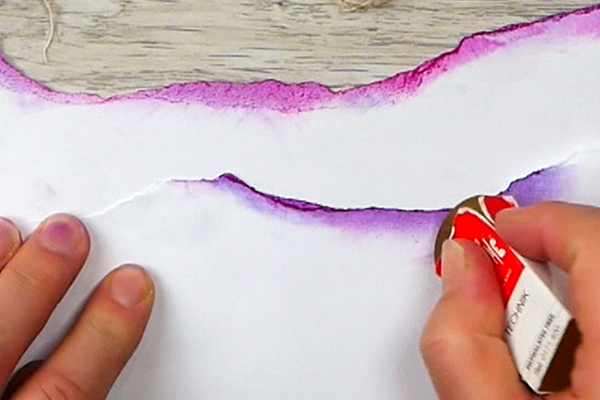
Once you finished blending color in the first section, lift the copy paper up. Then move it further down the page and add your next layer of Pan Pastel. Make sure to change the orientation, or even flip your paper mask over.
If you have Pan Pastel on your paper mask, before you flip it over, use an eraser to remove the excess Pan Pastel so that it doesn’t transfer onto your white surface. If you do make mistakes, Pan Pastel can be removed with an eraser. This makes them an easy and forgiving medium to use.
Continue to add the Pan Pastel starting at where you have laid the copy paper and work up to the previous color, making sure to leave some white areas. We’re blending from dark to light, this is what gives you the look of abstract and loose clouds.
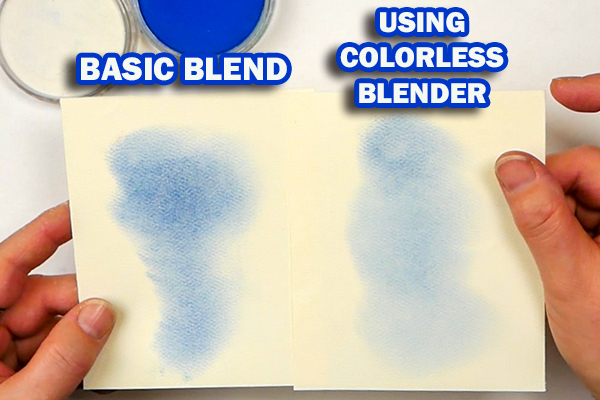
Colorless Blender
If you’re having a hard time getting a smooth color blend on white, try using colorless blender. This is a great product that does not have color but can help lighten and smooth the Pan Pastel color giving you a beautiful blend.

PanPastel Artists’ Pastels are pigment-rich, professional-grade soft pastels in a stackable pan format. Each contains 0.3 oz—about 35% more material than the average pastel stick—giving you easy access to intense, ultra-soft color that’s easy to lift, blend, layer without overfilling your surface’s tooth.
Add More Layers of Clouds
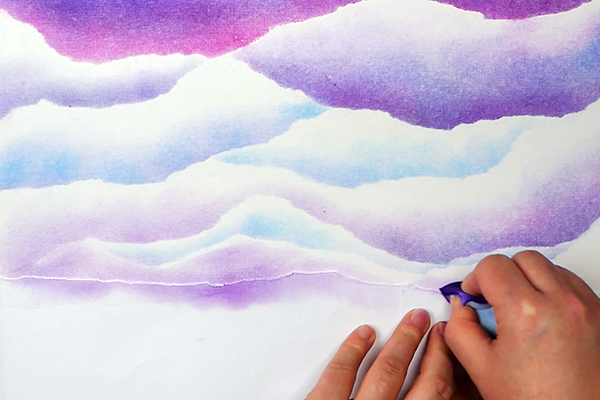
Continue down the paper using this technique. To vary the clouds, tilt, stagger and flip the orientation of the paper to make every cloud unique. It’s amazing what you can do with just one torn piece of paper!
Adding a Horizon Line
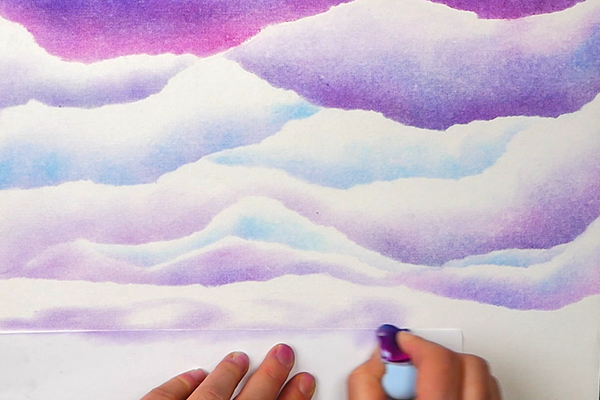
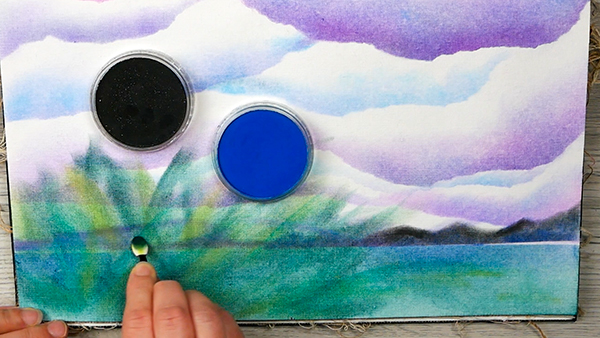
For this page you might want to create an entire background of clouds, but I wanted to create a landscape and a horizon line on this page.
Add a clean piece of paper across the page to where you want your clouds to end and add Pan Pastel up to the paper line. I like to freehand some small clouds near the horizon line with one of the small makeup applicators.
Blending Tips for Pan Pastels
1. Use Pan Pastel Colorless Blender
It’s great to blend and build colors of Pan Pastel sealing between layers. But for this project, we’re looking to complete the project in one layer. To get a seamless blend, this is where the colorless blender comes into play.
The Pan Pastel colorless blender works like an extender. This helps you get great blends without getting harsh lines. It also helps lighten the color as you blend it, so if you’re working with a darker color of Pan Pastel and don’t have a lighter color, by using just a little bit of pigment with the colorless blender, this will help you to achieve lighter colors.
This can be a way to help your colors go further and be a bit more versatile. I only have 20 colors out of the 147 colors of Pan Pastels and I can create a variety of values and blends with just a few colors and the colorless blender.
Especially if you are new to Pan Pastels, this blending medium can make all the difference in how smooth a blend you can create.
2. Don’t Apply too Much Pressure
If you are new to Pan Pastels and using makeup sponges instead of the Sofft tools, you’ll need to be very light with your pressure. This is how to get consistent results without any hard edges.
3. Don’t Add too Much Medium at Once
One mistake I used to make was to add too much Pan Pastel to the paper at one time. All you need to do is gently tap your blending tool into the pastel. Don’t rub it in or create a lot of dust and crumbles. If you do, you’re using too much medium!
The intention with these Pan Pastels is to work in layers and build color. If you’re getting a lot of dust and crumbs of Pan Pastels, you’re overloading your application tool.
4. Work from Top to Bottom
Watch where your hands are as you work. Oils in your hands that can transfer onto the paper which can affect how the Pan Pastel absorbs into the paper. You also want to make sure that you don’t smear what you’ve just created. I like to use a piece of copy paper under my hand as I work. This way I don’t transfer oils from my hand onto the page or smear my piece.
Printing Your Focal Image
I’m using my HP Color LaserJet Pro MFP 4301dw printer with Strathmore 400 Series Pastel Paper to print my focal image. This laser printer was an investment but perfect for my studio. This printer prints on pastel paper, watercolor paper, cardstock, vellum and acetate making it very versatile for getting high quality images.
If you don’t have a printer that will let you print on heavier papers, check out this article on how to transfer images onto a surface.
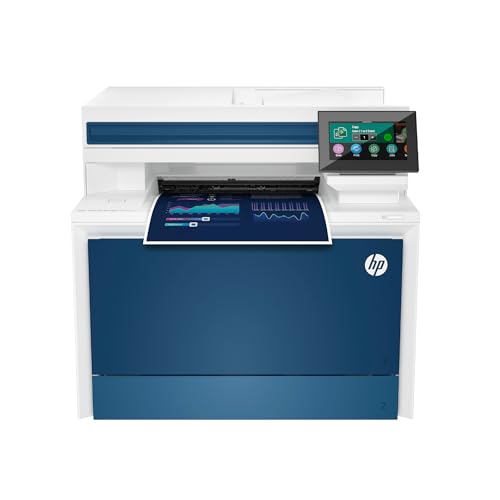
If you're an artist looking for a versatile laser printer, this is the one for you! This printer will print on acetate, watercolor paper, pastel paper and heavy cardstock.
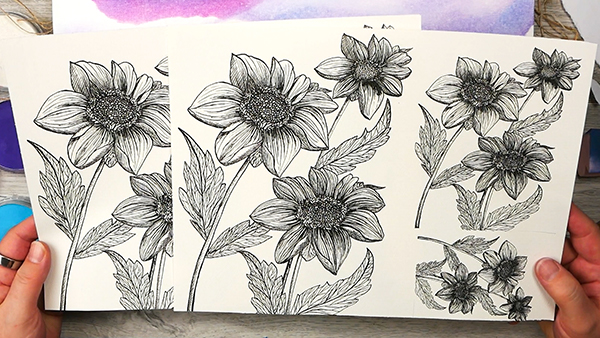
Choosing a Focal Image
You can draw your own image or print a black and white image to color with Pan Pastel.
The dahlia I’m using today is part of a botanical collection that I have available in my store. These are high quality scans of original drawings created by me. This digital PDF file can be downloaded and printed. I have provided images in multiple sizes for easy printing.
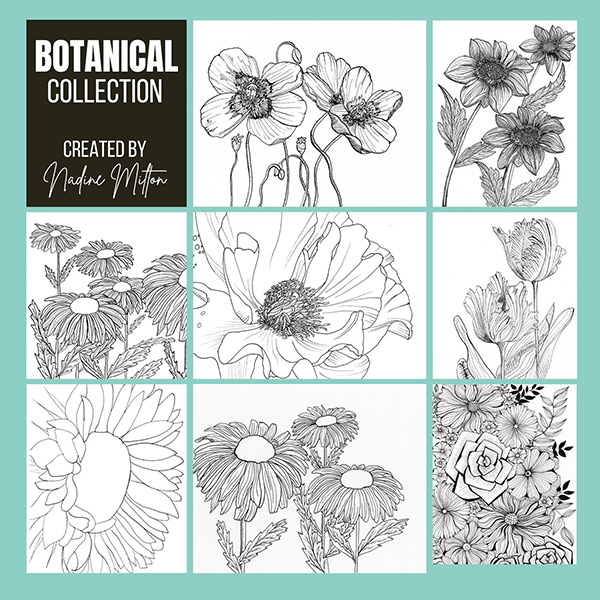
Are you searching for the perfect images for your next art journaling project? These exquisite botanical illustrations are an ideal addition to any creative endeavor!
Adding Pan Pastels to Your Focal Image
Be aware that when you use Pan Pastels on a focal image, it can lighten the black printed areas. I like to work with a small makeup applicator and very little Pan Pastel to create soft color blends.
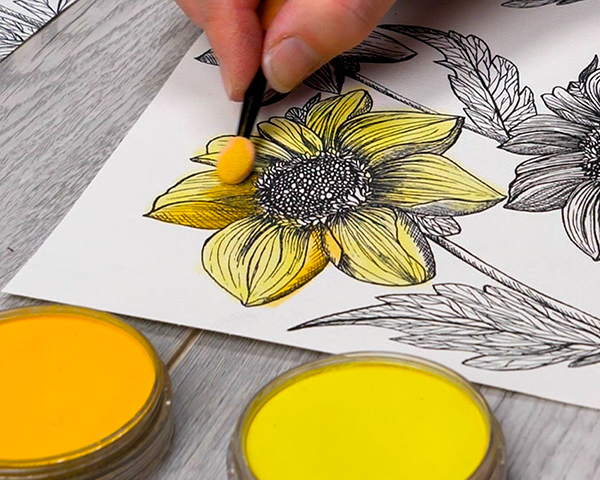
For this dahlia, I started with Hansa yellow adding a soft blend, then coming in to darken some areas with Diarylide Yellow. I added a bit more Hansa Yellow in spots to blend the color together.
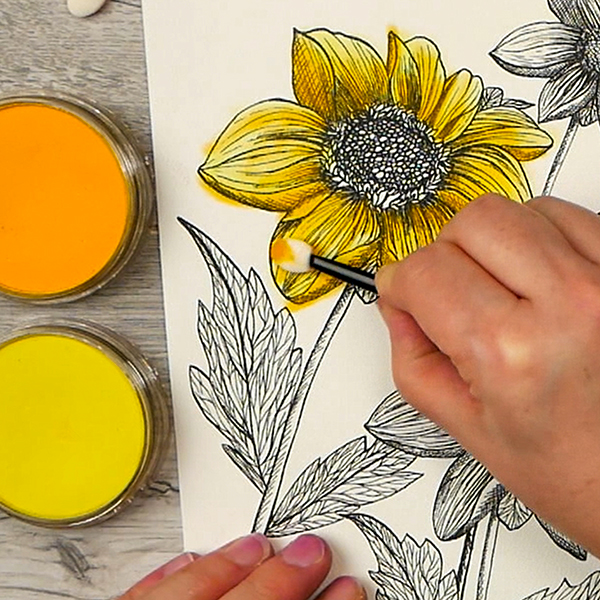
To create a few more highlights, I added a very thin layer of Permanent Red to places to make the images pop.
For the flower centers, start with a layer of Magenta across the center of the image.
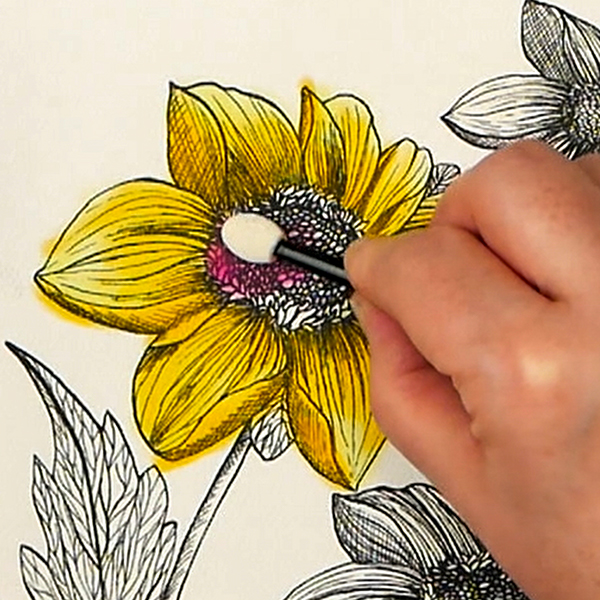
Use Permanent Red on the edges of the image, then add in some small areas of permanent red overtop of the magenta.
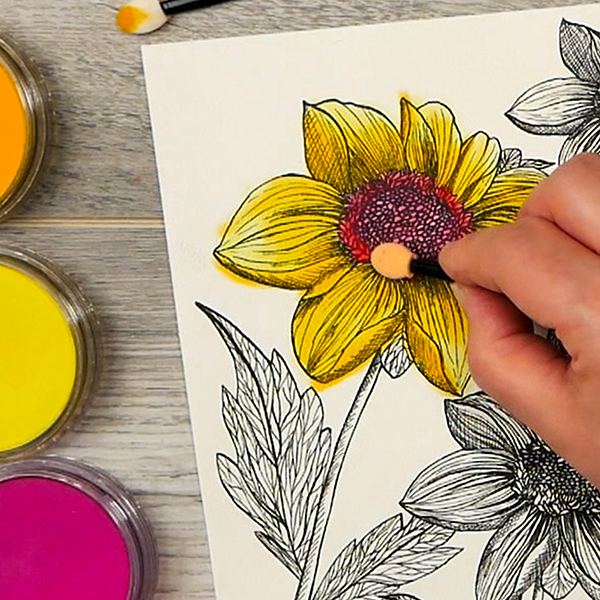
I chose the magenta as it is a color I used for the clouds. This helps create harmony in the page.
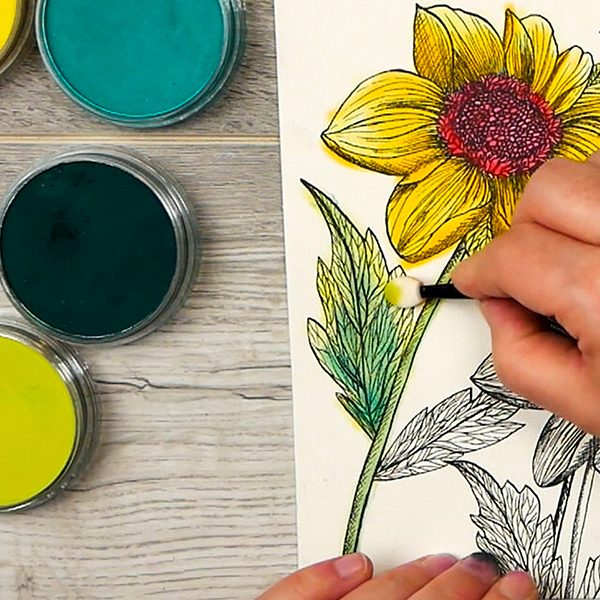
Coloring the Leaves and Stem
For the leaves and stem start with your lightest color and add it to the entire area. I was using Bright Yellow Green for this first layer.
Add a bit of Phthalo Green Extra Dark to the cross hatched areas on the stem and into the center of the leaves.
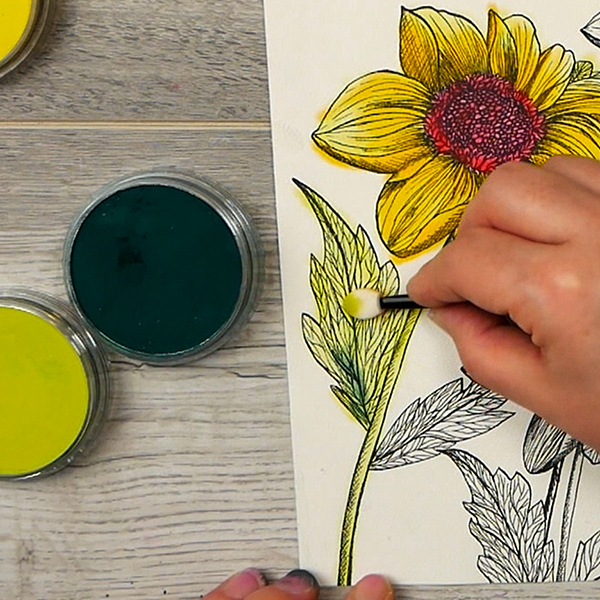
Using just a touch of the Phthalo Green, add this between the Yellow Green and Dark Green and blend the color together. If you feel like it might be getting too dark, add a layer of Yellow Green to lighten up the leaf.
Use this technique to color all the flowers you’ll be using as focal images. Before we cut these out, we need to seal the Pan Pastel so they don’t smear.
Sealing Your Piece
My favorite pastel fixative is Spectra Fix and is the only one that I can wholeheartedly recommend. I’ve tried a few different fixatives and this is by far the best option.
In the past I’ve tried Krylon Workable Fixative and wasn’t impressed with the results. Not only did it darken the colors, the fixative left spots on the page.
Spectra Fix
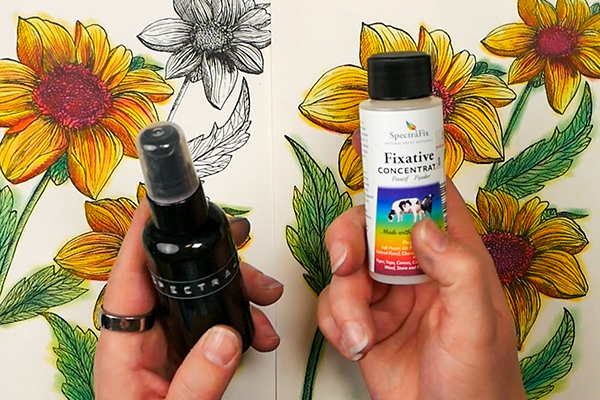
Spectra Fix has the bonus of being non-toxic, it doesn’t have a strong smell (compared to other fixatives) and it doesn’t darken your pastel colors. Its main ingredients are casein and alcohol. If you’re like me and are sensitive to milk products, just wear a mask while you spray.
Make sure to spray 6-12 inches above your project and the spray should come out as a fine mist. If you are having a hard time getting access to the pre-mixed spray, purchase the concentrate. All you need to do is mix it with vodka and put it in a spray bottle. I find optical glass cleaner bottles work well because they have a very fine spray.

This is the fixative you've been waiting for!
Non-toxic, workable, and fully archival, SpectraFix is a casein-based fixative that utilizes milk protein and grain alcohol to hold and protect your media without dulling or darkening colors. Because it's all-natural and odor-free , you can spray your project indoors while you work — no more odors, unhealthy fumes, or long waits outdoors!
Tips for Good Results When Sealing Pan Pastels
When you’re sealing your piece, don’t spray too much at one time! Add a thin layer, let it dry, then repeat. If you get too heavy handed and completely saturate the paper, your Pan Pastels will run. Always works in thin layers. You’ll know your piece is sealed when no color comes up on your hand when you press it into your piece.
Adding in the Foreground
I like to test fit my flowers onto the page to decide on a composition. This also helps me to determine which colors are best to use in the foreground area of the page.
To help create color harmony, start with a later of Ultramarine Blue, then mixed in some Phthalo Green Extra Dark.
By bringing in some darker blues first, this ties in with the clouds and creates a nice mix of colors. Add in highlights using Bright Yellow Green and Phthalo green.
To help the flowers feel like a natural part of the scene, add in some loose grasses or bush shapes in behind the flowers. They don’t have to be detailed, this helps break up the horizon line a bit.
My final touch was to add in some small hills or mountains in the distance. I found by softening the horizon line it made this page feel more natural.
Gluing Your Focal Images
After you’re happy with the colors you’ve added, use your favorite glue to add in your focal images. I’m using Art Glitter Glue as it gives me some working time and is easy to apply.

This is an industrial strength, non-toxic, and water-based adhesive designed for glitter and paper applications. This adhesive is also strong enough to bond items such as cardboard, metal, wood, canvas, plastic, glass, and more. This glue is acid free and safe to use for any of your paper crafting projects.
Adding Your Intention
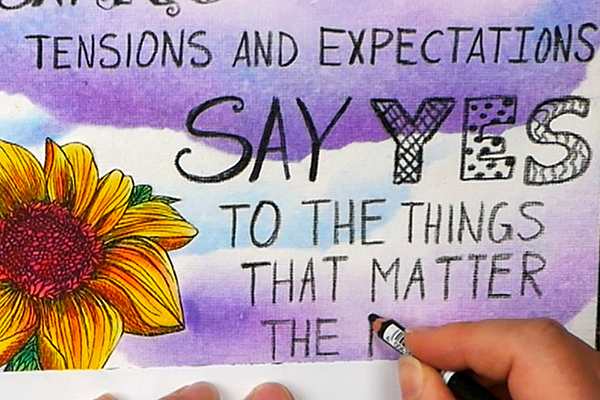
When working with Pan Pastel, I avoid using paint pens or watercolor markers on the surface. Even though the pastel is sealed, the felt tips of the pens can pull the pastel into it and this can ruin your pens.
Since I’ve been using pastels for the other aspects of this project, I pulled out my Stabilo CarbOthello black pastel pencil to add in my intention. In this case, I used a couple of different fonts, but you can also choose to stamp your letters or type them out. There’s many ways you can add words to your project.

These German-made pencils are world famous for their quality, lightfast pigments. Their opaque, water-soluble colors blend beautifully and erase easily. The large-diameter lead can make broad strokes or be sharpened to a fine point for details and lettering.
Questions?
I hope that this project not only gives you ideas of how to use your Pan Pastels, but how your intention can be a great jumping off point for creating a unique art journal page. Some pages are about art, other ones are about the journaling, but sometimes they can be both! I’d love to know what you think about this project- you can always leave a comment below!
Project Supply List
Make up sponges works well for Pan Pastel application and for using acrylic paint through stencils.
50 Pcs eyeshadow brushes are packaged in a safe and clean bag, easy to carry, and affordable.
These are great for blending Pan Pastels on any surface!
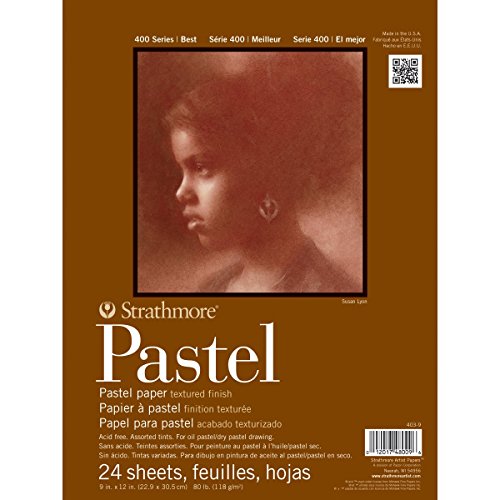
The textured finish and subtle colors make this paper an ideal background for hard, soft, and oil pastels, as well as a wide variety of drawing media.
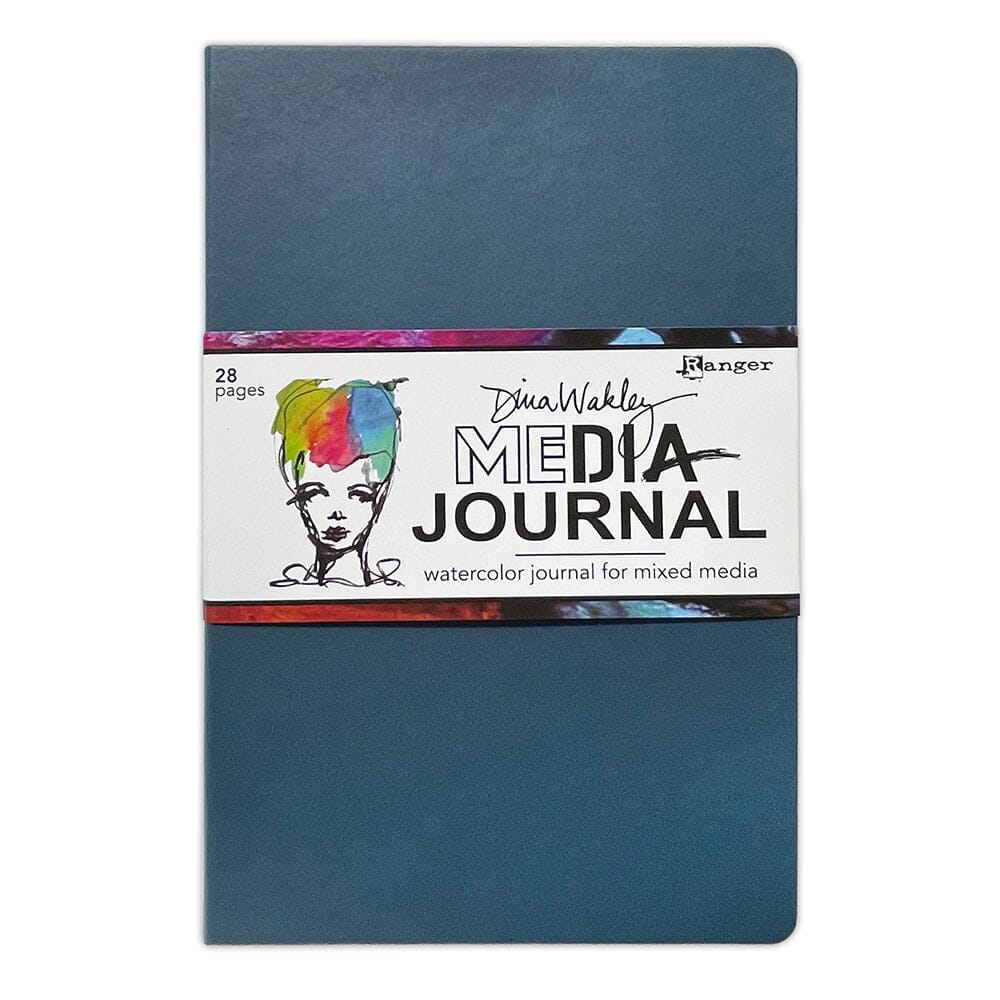
The Dina Wakley Media Watercolor Journal features a gorgeous blue cover and 28 pages of heavyweight watercolor paper. It’s a durable and versatile space to explore your creativity.
PanPastel Artists’ Pastels are pigment-rich, professional-grade soft pastels in a stackable pan format. Each contains 0.3 oz—about 35% more material than the average pastel stick—giving you easy access to intense, ultra-soft color that’s easy to lift, blend, layer without overfilling your surface’s tooth.
PanPastel Artists’ Pastels are pigment-rich, professional-grade soft pastels in a stackable pan format. Each contains 0.3 oz—about 35% more material than the average pastel stick—giving you easy access to intense, ultra-soft color that’s easy to lift, blend, layer without overfilling your surface’s tooth.

PanPastel Artists’ Pastels are pigment-rich, professional-grade soft pastels in a stackable pan format. Each contains 0.3 oz—about 35% more material than the average pastel stick—giving you easy access to intense, ultra-soft color that’s easy to lift, blend, layer without overfilling your surface’s tooth.

PanPastel Artists’ Pastels are pigment-rich, professional-grade soft pastels in a stackable pan format. Each contains 0.3 oz—about 35% more material than the average pastel stick—giving you easy access to intense, ultra-soft color that’s easy to lift, blend, layer without overfilling your surface’s tooth.
PanPastel Artists’ Pastels are pigment-rich, professional-grade soft pastels in a stackable pan format. Each contains 0.3 oz—about 35% more material than the average pastel stick—giving you easy access to intense, ultra-soft color that’s easy to lift, blend, layer without overfilling your surface’s tooth.

PanPastel Artists’ Pastels are pigment-rich, professional-grade soft pastels in a stackable pan format. Each contains 0.3 oz—about 35% more material than the average pastel stick—giving you easy access to intense, ultra-soft color that’s easy to lift, blend, layer without overfilling your surface’s tooth.

PanPastel Artists’ Pastels are pigment-rich, professional-grade soft pastels in a stackable pan format. Each contains 0.3 oz—about 35% more material than the average pastel stick—giving you easy access to intense, ultra-soft color that’s easy to lift, blend, layer without overfilling your surface’s tooth.

PanPastel Artists’ Pastels are pigment-rich, professional-grade soft pastels in a stackable pan format. Each contains 0.3 oz—about 35% more material than the average pastel stick—giving you easy access to intense, ultra-soft color that’s easy to lift, blend, layer without overfilling your surface’s tooth.
PanPastel Artists’ Pastels are pigment-rich, professional-grade soft pastels in a stackable pan format. Each contains 0.3 oz—about 35% more material than the average pastel stick—giving you easy access to intense, ultra-soft color that’s easy to lift, blend, layer without overfilling your surface’s tooth.

PanPastel Artists’ Pastels are pigment-rich, professional-grade soft pastels in a stackable pan format. Each contains 0.3 oz—about 35% more material than the average pastel stick—giving you easy access to intense, ultra-soft color that’s easy to lift, blend, layer without overfilling your surface’s tooth.

PanPastel Artists’ Pastels are pigment-rich, professional-grade soft pastels in a stackable pan format. Each contains 0.3 oz—about 35% more material than the average pastel stick—giving you easy access to intense, ultra-soft color that’s easy to lift, blend, layer without overfilling your surface’s tooth.
These German-made pencils are world famous for their quality, lightfast pigments. Their opaque, water-soluble colors blend beautifully and erase easily. The large-diameter lead can make broad strokes or be sharpened to a fine point for details and lettering.
This is the fixative you've been waiting for!
Non-toxic, workable, and fully archival, SpectraFix is a casein-based fixative that utilizes milk protein and grain alcohol to hold and protect your media without dulling or darkening colors. Because it's all-natural and odor-free , you can spray your project indoors while you work — no more odors, unhealthy fumes, or long waits outdoors!

1 ream (500 sheets total) of 8.5 x 11 inch white copier and printer paper. Acid-free to prevent yellowing. Smooth 20 pound weight paper for consistent ink and toner distribution; dries quickly and resists paper jams.
High quality latex-free eraser removes lead easily and cleanly with very little pressure.

Art Glitter Glue is permanent and dries clear and adheres to a variety of surfaces. It's water based and acid free. Make sure to close lid to avoid drying of glitter glue. Bundle comes with one bottle of 8oz, one bottle of 2 oz and a metal tip for easy application.

You're going to feel just like an expert when you're cutting the smallest of details with the Cutter Bee Scissors by EK Success. These un"bee"lievable compact scissors will have you feeling like a queen bee when you swarm right into your fine detail or fussy cutting projects.
Are you searching for the perfect images for your next art journaling project? These exquisite botanical illustrations are an ideal addition to any creative endeavor!


You May Also Like
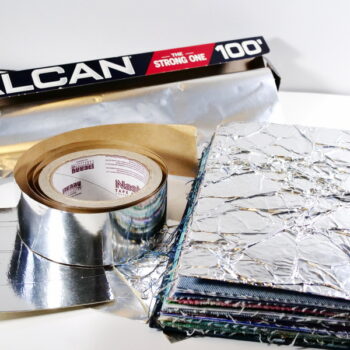
Easy Foil Alternatives for Cards and Art Journal Pages
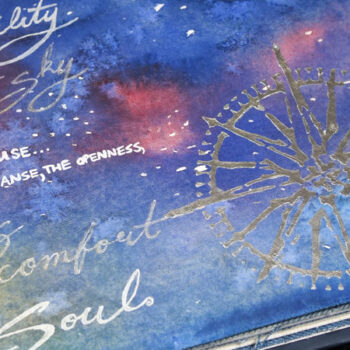
How to Paint a Night Sky
