3 Unique Ways to Use Stencils and Masks
Are you looking for unique ways to use stencils and masks in your art journal? Today I’ll be talking about the difference between stencils and masks and how we can use them in our art journal projects.
Hop-A-Long Studio is reader-supported. When you buy through links on our site, we may earn an affiliate commission at no cost to you. Learn more.
What’s the Difference Between Stencils and Masks?
If you’ve never used stencils and masks together, it can be confusing to know what the difference is. The Stencil Girl Wildflowers Botanical stencil that I’m using today is sold with the mask and stencil together. If you can find stencils that have both the stencil and masks, they work well together and opens up a whole range of creative possibilities!
The difference between stencils and masks is that when paint is added, the stencil shows the positive image (the flower). When you use a mask, you’ll be applying paint around the mask (the negative space around the image). When you pull up the mask, then you will see the flower image as a space.
Using Stencils and Masks in the Art Journal
The beauty about purchasing stencils that have the stencil and mask together is that you can use these positive and negative images together on one project. This allows you to create layers or use each piece of the set separately.
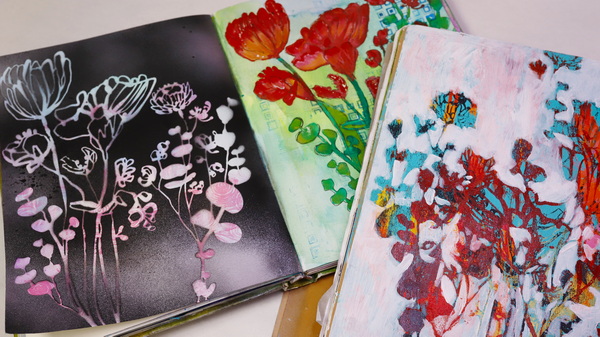
Today I’m sharing with you 3 projects with unique techniques for using both stencils and masks in your art journal.
Painting Around the Mask
This first technique, painting around the mask, is a beautiful and simple way to add images in your art journal.
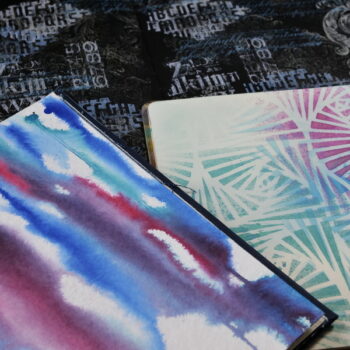
Preparing the Background
You can start with a plain background, but with this technique I like to start with a page that already has texture and color on it. My page has stamped texture from cleaning a roller stamp onto my journal page. To create more color, I used my favorite metallic watercolors from Stoneground and Beam Paints. This creates a background with some fun imagery and color to add a mask on top of.
If you don’t know how to add texture or color to your art journal background, check out this article: Intimidated by the Blank Page? 5 Acrylic Background Techniques for the Art Journal
Adding Color
Add the flower masks to your art journal page. As the Wildflowers Botanical stencil has several beautiful flower masks, you can choose one mask or use several of the images. I chose the 2 large masks and overlapped them onto my page creating a group of flowers. Using your favorite acrylic paint and a makeup sponge, add color around the mask.
My Favorite Spray Paints
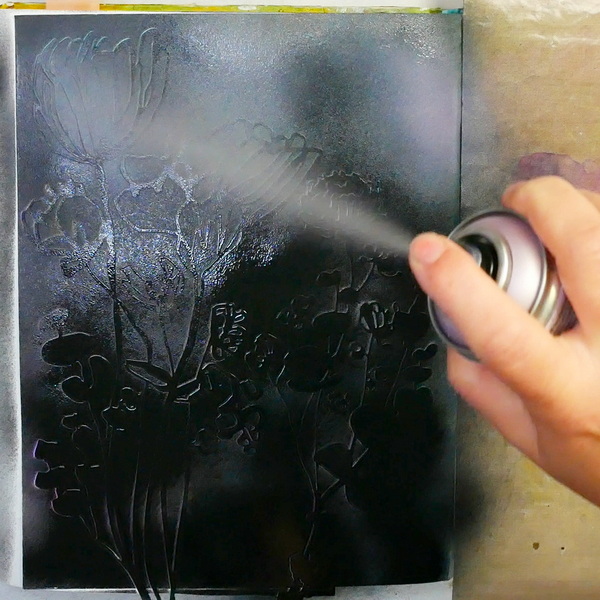
My favorite paint to use for this project is Pebeo Acrylic Spray Paint. As the masks are thin, using a spray paint or spray ink will prevent the image from moving as you work. I love the Pebeo spray paints because I can add solid color quickly and this allows me to work intuitively. Just make sure that you shake them for 2 minutes before you add them to your project to get the best results!
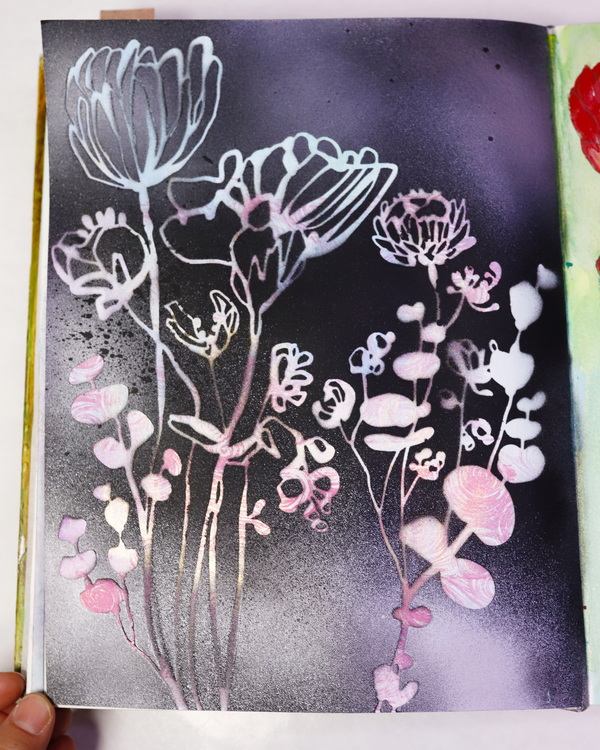
Start by adding a layer of black spray paint to the surface. Be aware that you will get overspray from the paint. Protect the areas around the surface and even the next journal page to keep your journal tidy. You can choose to stick to one color, use a range of colors for an ombre effect or use a contrasting color like I did. I love lilac paint and because these spray paints are opaque, you can layer light and dark colors together very easily.
Take the masks off the page and let the paint dry. From here you can decide if you like it as is or where you might want to go next. You could look at altering the background with doodling, drawing, or stamping. If you want the images to have stronger edges, you can outline the edges with a Posca White Paint Marker like I did in my test project. But this time, because I like the texture in the flowers, I plan to leave it as is.
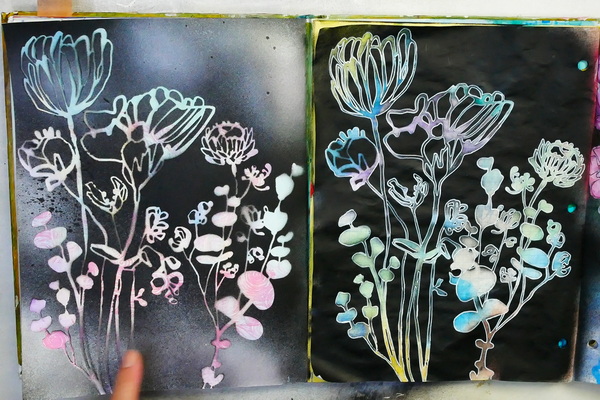
Remember, you don’t always have to finish a page and it doesn’t always need to be complicated. You can leave it and come back to it, or just enjoy the page for what it is. The masking technique is effective and simple, and it’s nice to have simple art journal pages sometimes.
Using the Mask Stencil as a Stamp
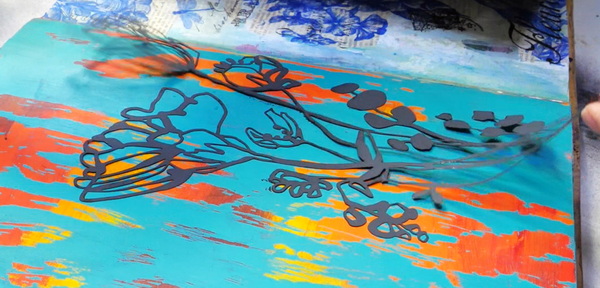
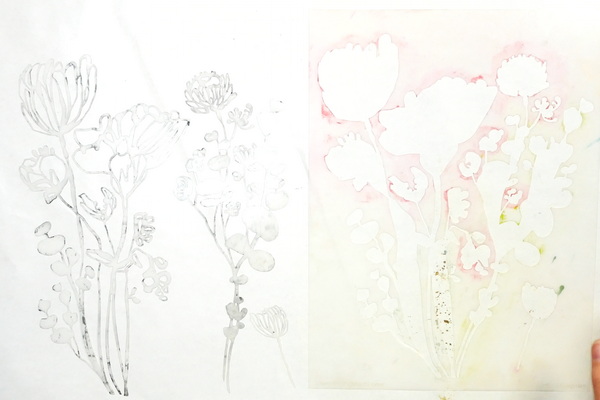
In the first project, as soon as I pulled up the mask images, I turned them over to add them to another art journal page. Instead of wasting all the beautiful paint that you have on the mask, you can always use it on another project. To make sure that you get a good paint transfer, add a scrap piece of paper or microfiber towel on top and rub. This will make sure that you have a good “stamp” from your mask image.
Testing this Technique on Different Papers
When I tested this technique, I was using paper with watercolor paint on the surface. I had a great transfer the first time. For this video and article, I chose an art journal page that already had an acrylic paint resist technique on it. I found that this technique will give you a better result on a watercolor surface over the painted surface, as the paint absorbs more easily into the surface.
Adding a Second and Third Image
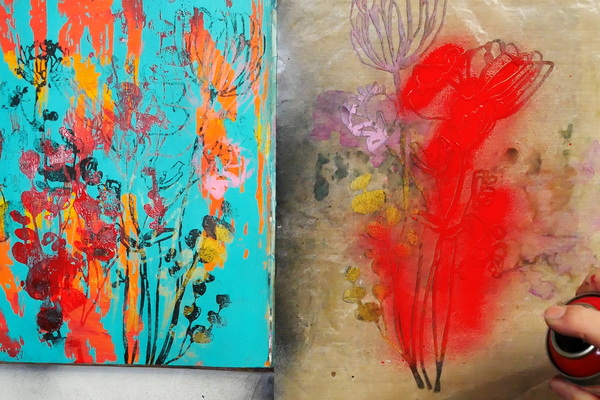
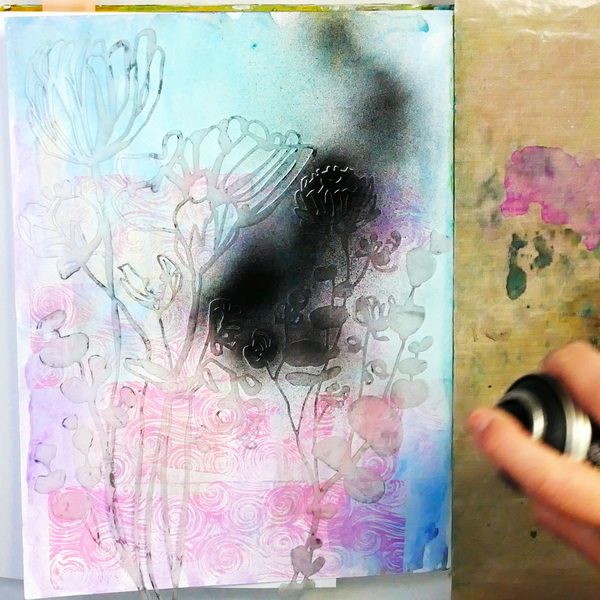
Because my first printing wasn’t super bold and clear (partially because I was talking and this let the paint dry on the mask), I decided to add some more images. I added more paint to the mask using a sponge and acrylic paint and stamped it onto the page. The effect was more subtle than I hoped for, and this is where I should have stopped stamping. But instead, I continued to add layers. Honestly, sometimes it’s just better to quit while you’re ahead!
Choosing a Surface
With this project, I started with the wrong surface. I chose a surface which I had been testing acrylic resists which meant that wasn’t going to take paint as well. My advice to you is to start with a surface that will absorb paint easily. If you apply paint and add the mask quickly to your surface, you should get a good result.
But if you end up where I am, where you have too many indistinct flowers, this doesn’t have to be a messy or bad page. If I had started with a lighter background, this could have been another layer to a project that I could have finished off with more layers and focal images.
But for this project, I wanted to show you how you can take images that are messy or disappearing and turn them into a beautiful art journal page.
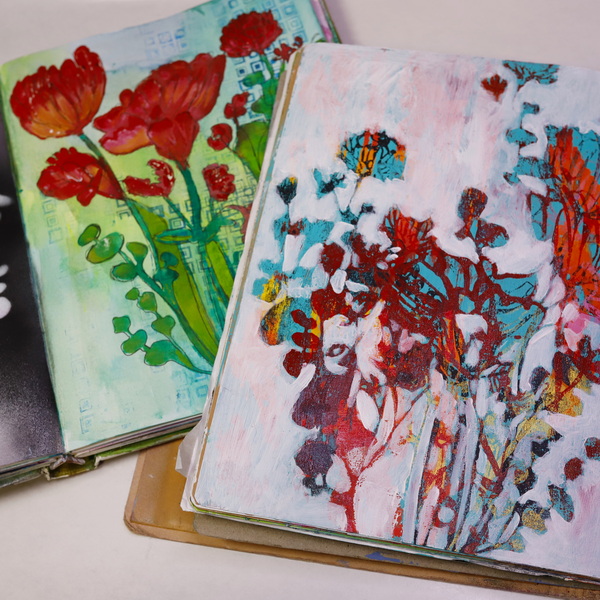
Defining Objects by Negative Painting
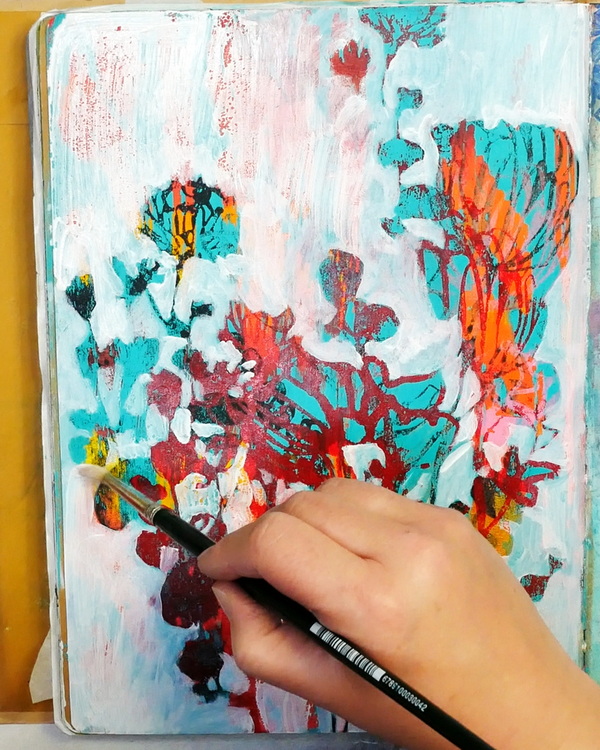
One of my favorite things to do when I feel like my images are falling to the background is to use negative painting to refine the image. When you negative paint, you are painting around the image that you want to define. Take watered down white paint and paint around the leaves and flowers that you want to highlight on the page. Some lines and images I left out by painting over them, while others I defined. How much you leave in or take out is up to you.
I like to water down the Liquitex white paint as I complete this step because it allows some of the color beneath to peek through. Having the blue and orange tones peek through the background as I added in definition felt like an interesting aspect to this art journal page.
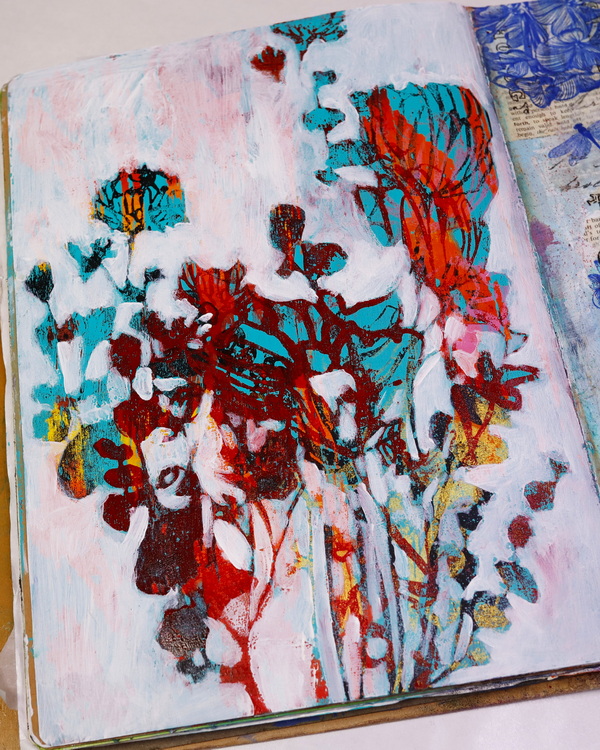
This is my favorite of these 3 projects because of the happy mistake that it’s created. I purposely chose not to color in the flowers as I wanted some of the bold orange and teal colors to come through. You can take this piece in a lot of different directions, but I’ll be leaving it just as it is. At some point I may come back and add in a quote or journaling if I feel inspired. Just because you have “finished” a page, it doesn’t necessarily need to be finished. You can always add to it later.
Using Stencils and Masks Together
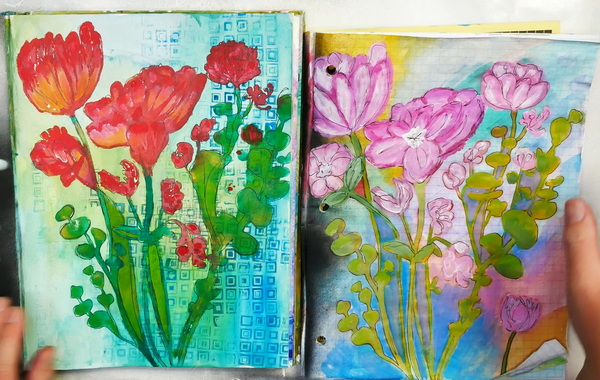
With this mask and stencil set, it’s easy to add the positive and negative elements together. This page started with another background that includes stamped images and watercolor paint.
Adding a Base Layer with the Stencil
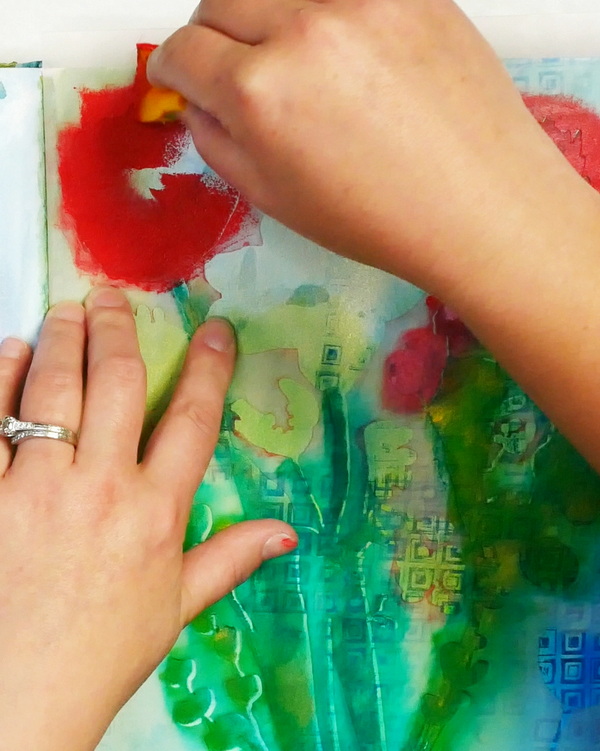
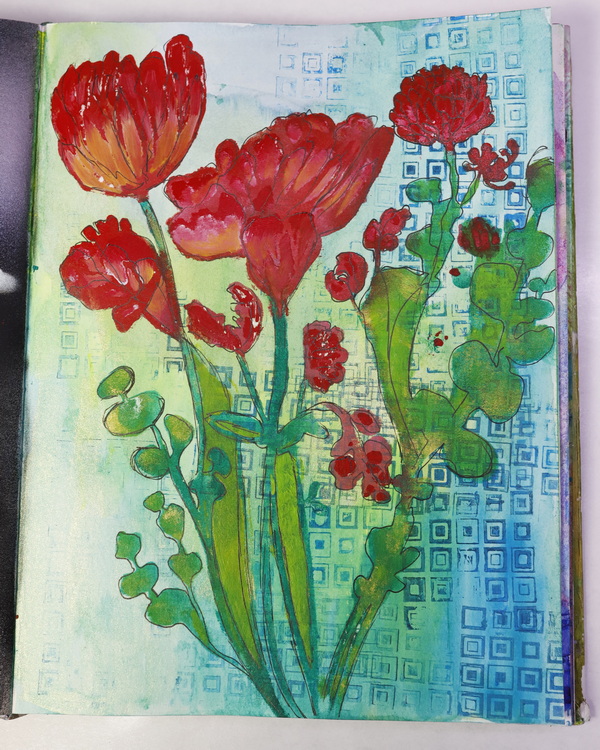
Place the stencil (that will show the positive image) on the page, use a sponge and acrylic paint to apply color. This will create a base layer of color that we’ll be building on.
I love adding greens and golds to the leafy areas. I used a combination of Pebeo Phthalocyanine Green and Amsterdam Yellowish Green acrylic paint to the leaves and highlights with Pebeo gold paint. For the flower heads, I used Liquitex Cadmium Red Medium with a bit of Amsterdam Quinacridone Rose Light to add texture to the floral areas.
Adding the Mask Image
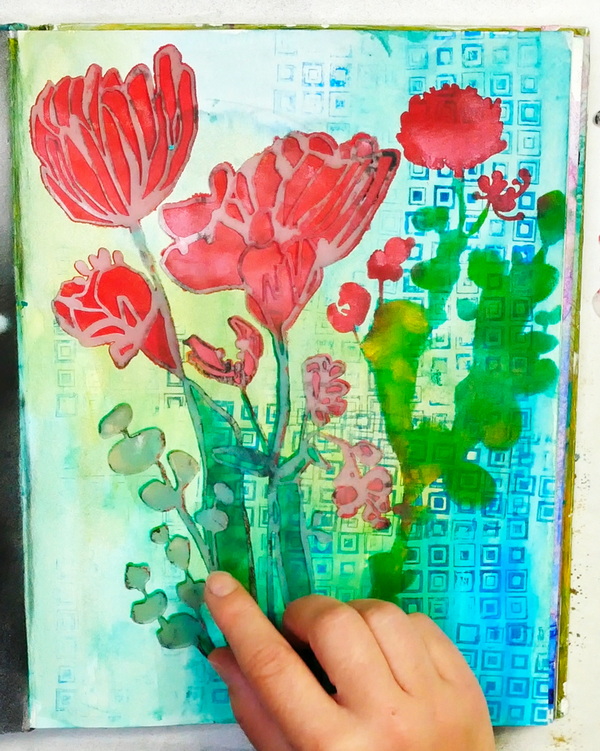
After the paint has dried, add the mask floral on top. Using acrylic paint and a brush, dab in details and shaded color to the flower heads. As the red I applied was quite dark, using red and white paint I used these colors together to lighten the surface.
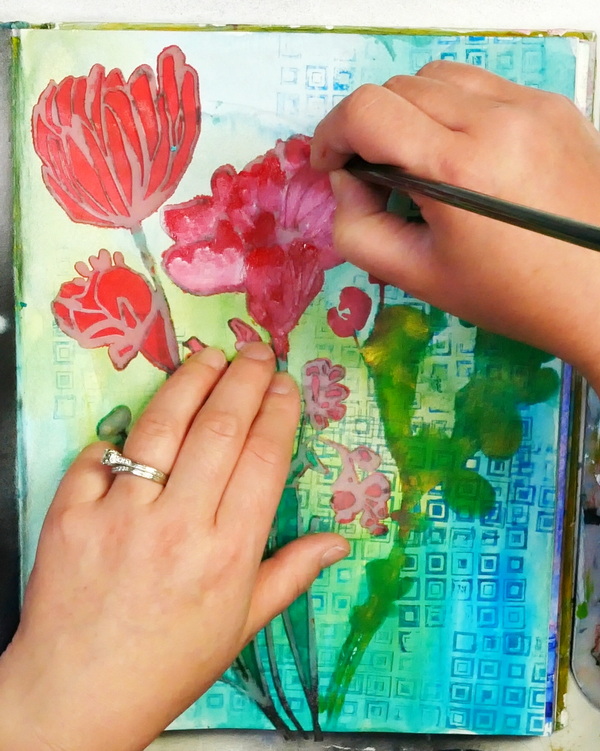
You can also make the choice to stick to one main color or blend in a variety of colors. I chose to add in some yellow to the white to create details at the bottom of the flowers. You can blend these colors together while the acrylic paint is still wet to create beautiful color combinations.
Using red and white paint, apply details to the flowers. You can also try mixing in yellow with white to add in soft and bright color to the bottom of the flowers. You can blend these together while wet to create a range of subtle colors on the page.
Adding in Final Details
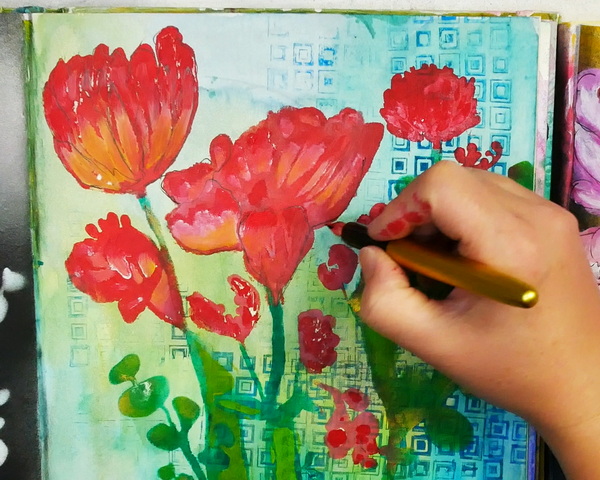
You can decide to leave your flowers loose and soft, or you can add in some more details while still creating a looser feel. I love using my Plaisir Fountain Pen and carbon ink to sketch in detail around the page. When working on paint, it’s a sturdy pen to use that won’t clog or ruin if your paint isn’t completely dry.
Any Questions?
There’s many fun and easy ways that you can use masks and stencils together. I love when they come in sets because it opens up so many more creative possibilities! Let me know if you have any questions or are inspired by and of the techniques that I shared today. Leave a comment below, I’d love to start a conversation with you!
Project Supply List
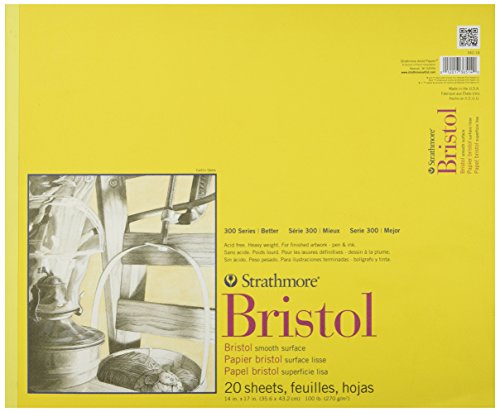
- Stiff, heavyweight sheets for final artwork
- Available in Smooth and Vellum surfaces
- 100 lb / 270 gsm
- Acid-free
Pebeo High Viscosity Acrylics – Gold, 250 ml, Tube
from: Blick Art Materials

Pebeo High Viscosity Acrylics – Red Ochre, 100 ml tube
from: Blick Art Materials
Amsterdam – Quinacridone Rose Light, 120 ml Tube
from: Blick Art Materials
Amsterdam – Yellowish Green, 120 ml Tube
from: Blick Art Materials
Liquitex Basics Acrylic Colors were developed for students and artists who require dependable quality at an economical price. Each color is uniquely formulated to bring out the maximum brilliance and clarity of the individual pigment.
- Stiff, heavyweight sheets for final artwork
- Available in Smooth and Vellum surfaces
- 100 lb / 270 gsm
- Acid-free

Makeup applicators are great for blending Pan Pastels, applying paint through stencils and many other mixed media techniques.

Richeson Disposable Palette Paper Pad – 9′ x 12′, 50 Sheets
from: Blick Art Materials


- A professional alternative to Liquitex Cadmium Soft Body colors
- Same tint strength, brightness, opacity, and flow of traditional cadmiums


- Affordable entry-level pens with an elevated aluminum body
- Ultra-smooth, beginner-friendly steel nib
- Patented cap design keeps ink fresh
- Silky, scratch-resistant finish

Waterproof carbon ink cartridges for the Platinum Plaisir Fountain Pen.

Princeton Snap! White Taklon Brush Set – Short Handle, Set of 4
from: Blick Art Materials