Amazing Alcohol Ink Cards Using Hardware Store Foil
Are you looking for alternative surfaces to use alcohol inks on? Yupo isn’t the only surface that you can use for alcohol inks. There are so many ways to create beautiful alcohol ink cards using hardware store foil and other household items.
Hop-A-Long Studio is reader-supported. When you buy through links on our site, we may earn an affiliate commission at no cost to you. Learn more.
Using Foil Tape and Aluminum Foil for Cards
If you haven’t seen last week’s post, I shared how you can make beautiful card bases using aluminum foil and metal ducting tape. To see how to make these foil backgrounds, visit this article.
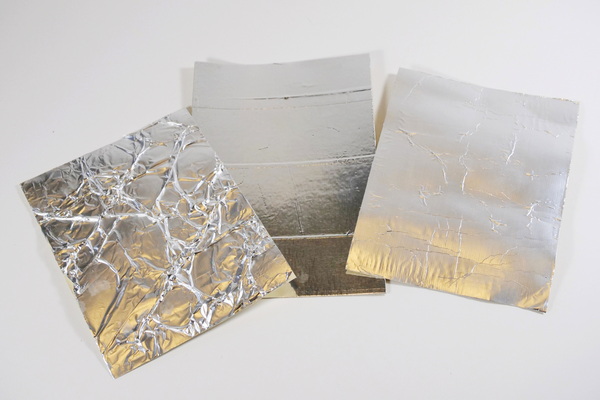
Once you have applied metal ducting tape or aluminum foil to 110lb cardstock, you are ready to start altering the foil. You can use the foil backgrounds as is, use an embossing machine and embossing plates, or use a stylus to create your own unique backgrounds. This gives you many different options for creating beautiful cards.
These same techniques can be created on metallic cardstock, but this is a more expensive option. Because I love to make metallic backgrounds, I tend to stick to aluminum foil and metallic tape for my projects.
Dry Embossing with Folders
Embossing folders are great way to create raised and textured images on journal pages and cards. The tin tape and aluminum foil work great with embossing folders. The combination of the metallic surface and the strength of the cardstock gives crisp and detailed images.
To emboss with an embossing folder, you’ll need an embossing or die cutting machine such as the Tim Holtz Vagabond 2 or the Sizzix Big Shot Switch. By adding the foil paper to the embossing folder and pressing it through the machine, this creates raised and embossed images.

The Big Shot Switch Plus in White from Sizzix features electric cutting, auto-reverse, and a 9" platform - all wrapped in a sleek, modern design. Includes dies, an embossing folder, and cutting pads to get you started. Compatible in the US and Canada only.
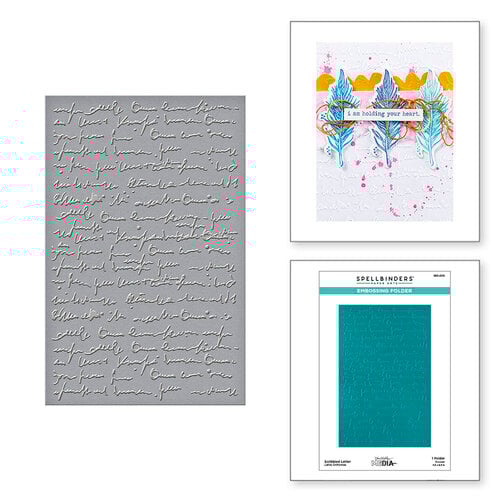
Let your background do the talking with the Scribbled Letter 2D Embossing Folder from Spellbinders and Dina Wakley Media. This embossing folder adds effortless texture and visual interest to any card front or journal page.
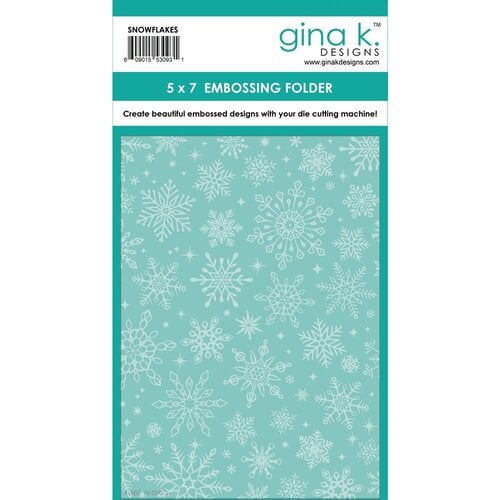
This 5" x 7" embossing folder, Snowflakes, is from Gina K Designs. This folder features a variety of sizes of snowflakes. This folder is compatible with leading die cutting machines (sold separately).
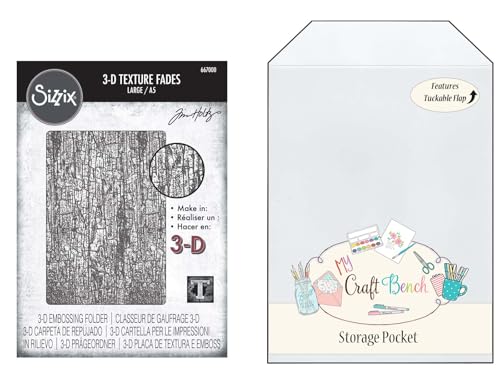
Give your papercrafts a distressed edge with the Cracked Large 3-D Texture Fades Embossing Folder from the Tim Holtz Vault!
Differences Between Foils
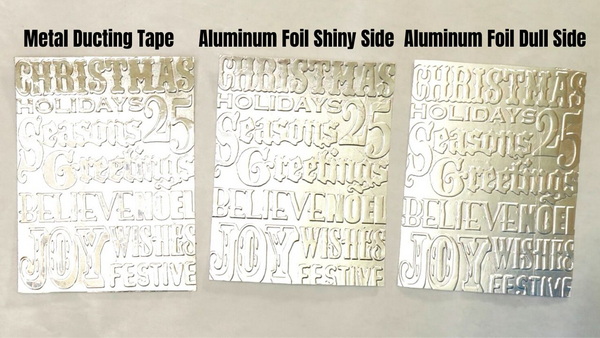
When using aluminum foil and ducting tape with your embossing folders, each gives a slightly different result. The metallic tape gives the most crisp image. The aluminum foil, both the dull and shiny side, also gives a very good image. The image is just slightly less crisp than the metal tape image.
Make sure that you are adding the aluminum foil or metal tape to heavy cardstock before embossing. I find using a lightweight paper (65-80 lb) with foil through an embossing folder creates wavy and uneven results. With 110lb cardstock, you end up with a stiff embossed image that can be used in a card or art journal page.

Creating Textures Without an Embossing Folder
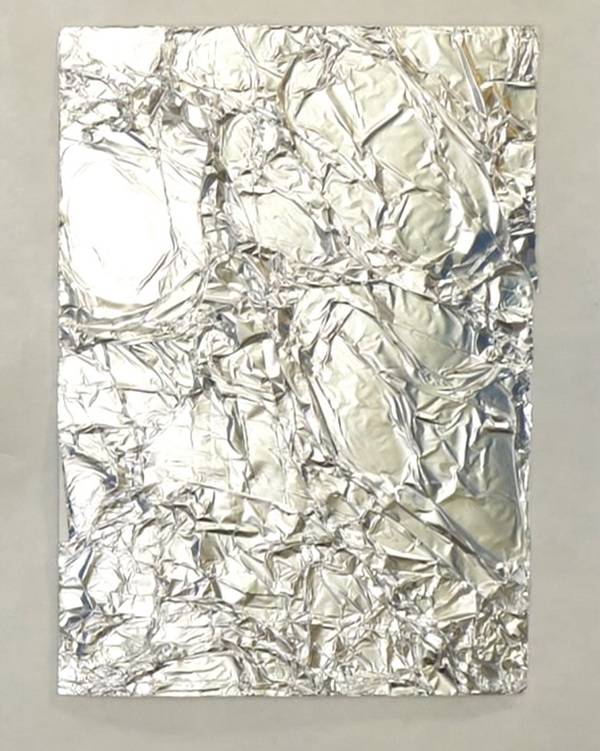
To create textures without an embossing folder, you can crinkle the aluminum foil to create texture before gluing it to the paper. (Please see the previous article for more details.) The other option is to use a stylus to trace or doodle to make your own images.
Using a Stylus
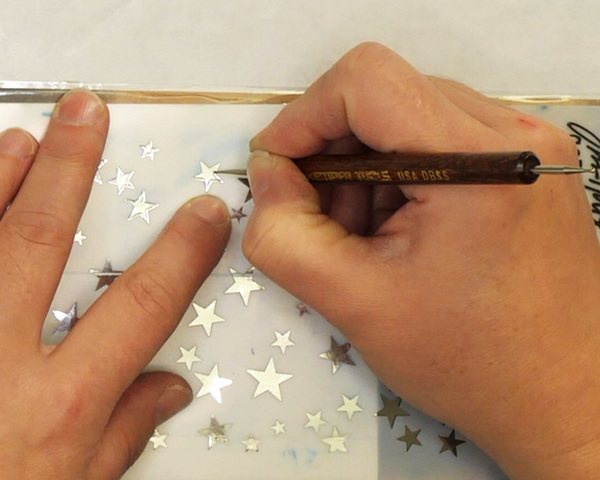
When using a stylus, the effect is quite different. Instead of having a raised image, the image is pressed into the paper. You can use a stencil as a guide to outline images, or you can add your own doodles or designs to the foil.
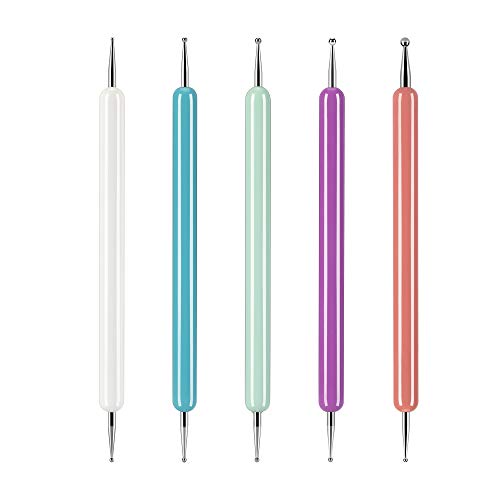
The embossing stylus set have total 10 ball ends, 5 different diameters (1.0/1.5/2.0/2.5/3.0 mm). Rounded tip protects the paper from cutting and tearing, double-ended metal ball makes the tracing stylus convenient to use when making art nails or craft projects.
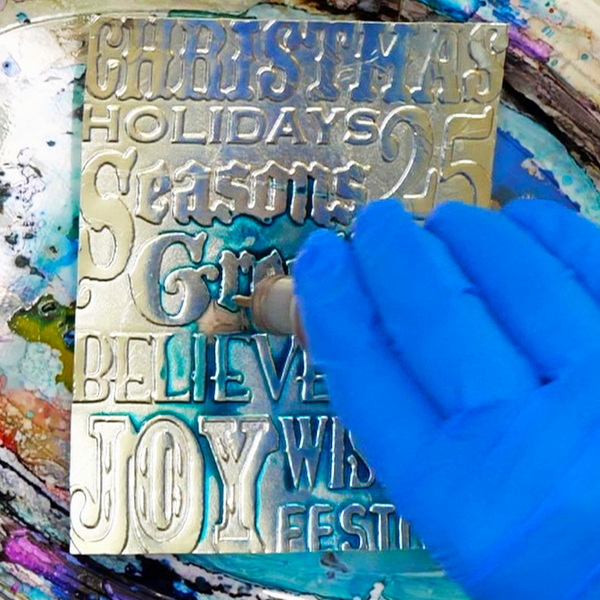
Adding Alcohol Inks to Foil
Adding alcohol inks to foil reacts differently than Yupo and other non-paper surfaces. Every surface is different. A little experimentation and practice is needed to get consistent results with your alcohol ink projects.
Color Intensity
Yupo is white or translucent while the foil has a strong metallic finish. This gives the alcohol inks a very different look when added to foil. Where the white Yupo shows off the colors in a true manner, the foil can overwhelm the lighter colors. Which is why I recommend using darker colors when working on foil. The lighter colors will be hard to see and will dry extremely transparently.
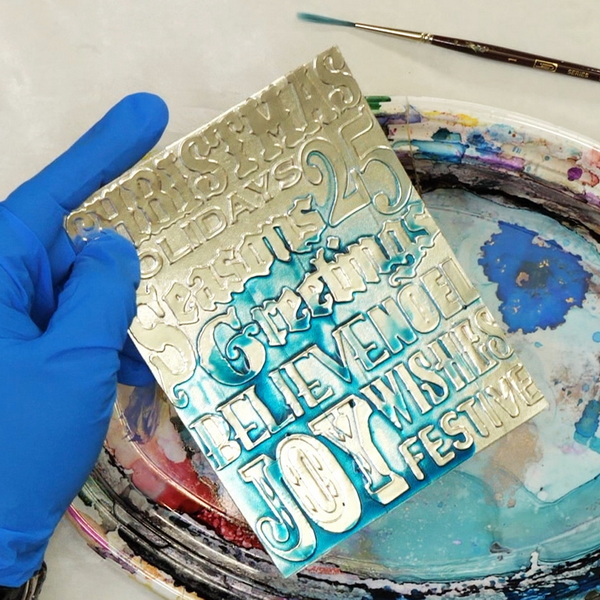
I tend to use my mid-value and dark inks for foil backgrounds. Add a drop or two of alcohol ink to your embossed surface. You will see that the ink will move around on the surface, but I like to thin out the ink with 99% isopropyl alcohol. This lightens the ink slightly and helps it move more smoothly across the foil. The ink will fill in most of the depressed areas of the embossed image and will also flow into some of the lifted areas.

These bottles are perfect for fluid paints, glue, and isopropyl alcohol. The precision tips make it easy to control wet mediums when working in your art space.

For alcohol ink projects, 99% isopropyl alcohol will give you the best results every time!
Continue to add colors to the surface by adding a few more drops of alcohol ink. These inks will mix and blend with the colors already on the surface. I mostly stick to primary colors or complementary colors to get good color mixes and prevent brown, muddy areas.
Removing Color
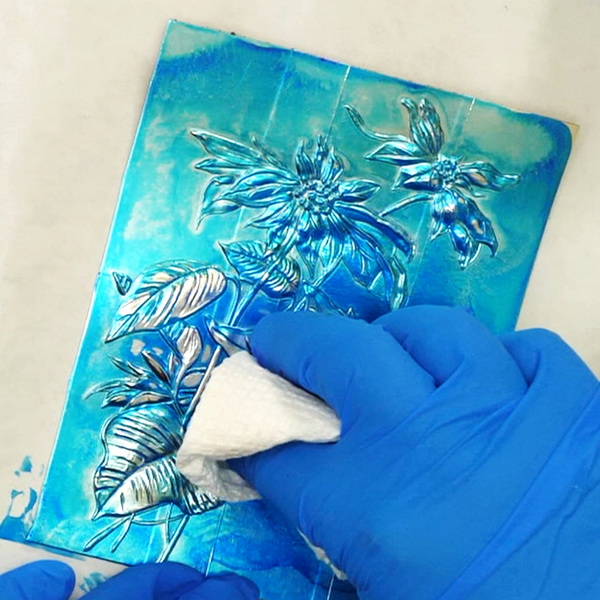
You may find that sometimes you’ve added too much alcohol ink to your surface. If you want the silver to shine through more, add alcohol to a Q-tip or paper towel and rub off some of the color on the raised areas. This allows more of the silver shine to come through the page.
Adding Alcohol Ink Mixatives and Alloys
I don’t generally use alcohol ink mixatives and alloys on my foil projects as the foil already has so much shimmer. I am usually trying to add more color to my foil. But this is an opportunity to mix in other metallics, like gold or rose gold to the silver foil.
To add mixatives to your foil add a drop of your alcohol ink color to the surface. While it’s still wet, add a drop of mixative on top. Mix both together with 99% alcohol or blending solution. Tip and move your card to blend the color together and move it around the page.

Tim Holtz Adirondack Alcohol Ink Metallic Mixatives are luminous, fast drying, acid free inks, specially formulated to create metallic highlights when combined with alcohol inks.
Painting with Alcohol Inks
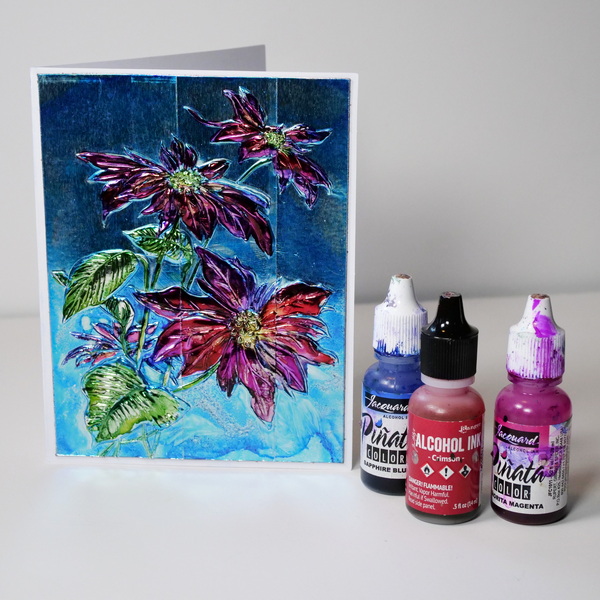
You can also use a paintbrush with alcohol inks and 99% isopropyl alcohol to create beautiful, detailed images to your alcohol ink foil cards. In this example, I embossed the foil tape with the Tim Holtz Poinsettia embossing folder (it’s no longer available, but here are some other poinsettia embossing folders that will work well.)

This embossing folder features a variety of poinsettia blooms and holly leaves and berries and one thin metal cutting die shaped like a poinsettia.

This gorgeous Scenic Poinsettias 3D embossing folder is from Spellbinders. This embossing folder measures 5.5" x 8.5".
Add a few drops of Jacquard Sapphire Blue alcohol ink to the background and add alcohol to help the ink move around the foiled image. Try to keep the alcohol ink on the background and off the poinsettia image. Keep the ink light in this step so that the main image will have some contrast. Some of the color may seep into the poinsettias, which is ok as this can be adjusted later. Let the alcohol ink fully dry.

Jacquard Piñata Colors are intensely saturated, transparent, quick-drying alcohol inks ideal for use on virtually any clean surface. Acid-free, permanent, and moisture-resistant once dry, Piñata Colors are formulated with highly concentrated, lightfast dyes for long-lasting vibrancy.

Rigger brush is also known as a liner or script brush. This brush set includes 6 different sizes: #000 #00 #0 #1 #2 #3.
Painting the Poinsettia Flowers
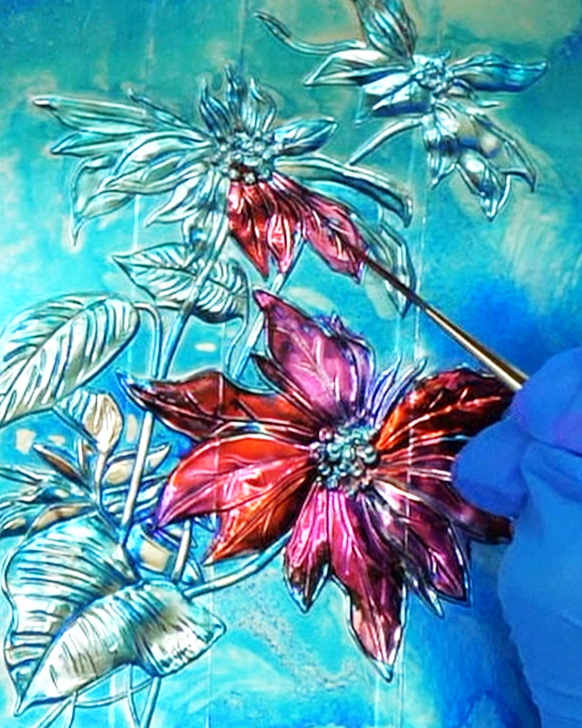
Once dry, use a paper towel or q- tip to lift any excess blue ink that is on the poinsettia. It is ok to have a few blue edges, but you don’t want to muddy the color that you’ll be adding on top.
Apply Jacquard Senorita Magenta and Tim Holtz Poppyfield alcohol ink to a palette or dish. With a liner brush, add strokes of these colors onto the poinsettia leaves. Add some Magenta, then some Poppyfield alcohol ink layering and mixing on the poinsettia. By using this technique, this gives you lighter areas, darker areas and mixed areas which bring variation to your image.

Acid free fade resistant fast drying transparent inks specially formulated to create a colorful polished stone effect.

Jacquard Piñata Colors are intensely saturated, transparent, quick-drying alcohol inks ideal for use on virtually any clean surface. Acid-free, permanent, and moisture-resistant once dry, Piñata Colors are formulated with highly concentrated, lightfast dyes for long-lasting vibrancy.
If you find that your alcohol ink dries out quickly on your palette paper, dip your brush into alcohol and swirl it into the ink. This will rewet your alcohol ink colors. Be careful how much alcohol you use. It can help move the colors, but too much will cause bleeding when applied to your image.
Painting the Leaves with Alcohol Ink
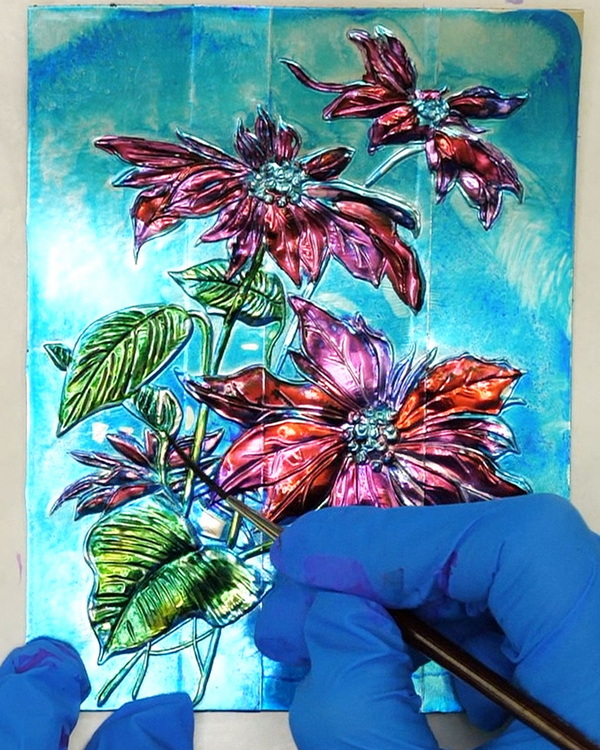
Put a few drops of Tim Holtz Lettuce and Jacquard Forest Green alcohol ink to the palette. Add the Lettuce ink across all the leaves. Then add in Forest Green alcohol ink to the leaf margins or areas of the leaves where you want to create shadows. You can go back and forth with this to get the right color combination. If it’s too dark in places, just dab off the ink or use a bit of paper towel with alcohol to lighten.
Get a beautiful, polished-stone effect on slick surfaces with the Lettuce Adirondack Alcohol Ink by Tim Holtz for Ranger Ink. This fast-drying dye ink is acid-free, fade-resistant and transparent.

Jacquard Piñata Colors are intensely saturated, transparent, quick-drying alcohol inks ideal for use on virtually any clean surface. Acid-free, permanent, and moisture-resistant once dry, Piñata Colors are formulated with highly concentrated, lightfast dyes for long-lasting vibrancy.
Alcohol Ink on Poinsettia Centers
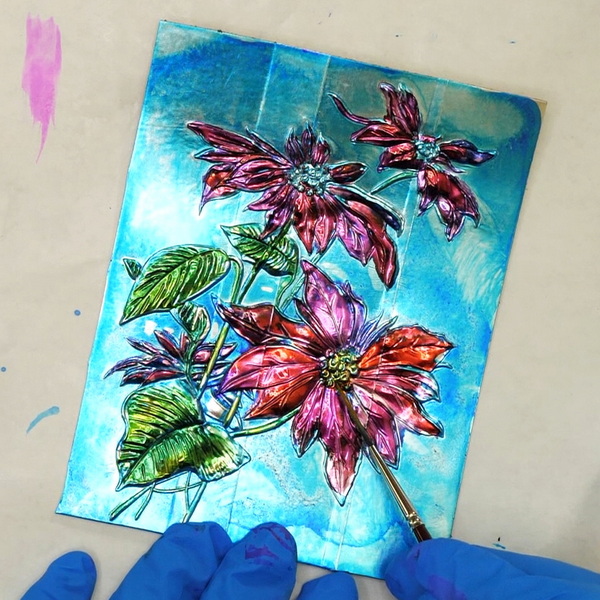
Add a few drops of Jacquard Golden Yellow alcohol ink to your palette. Add with a brush to the center of your poinsettia. You might find that some of the petals will end up with a bit of yellow on them. I like to add a few strokes of yellow onto the areas of the red petals that would get the most light. This creates highlights and more dimension in your images.

Jacquard Piñata Colors are intensely saturated, transparent, quick-drying alcohol inks ideal for use on virtually any clean surface. Acid-free, permanent, and moisture-resistant once dry, Piñata Colors are formulated with highly concentrated, lightfast dyes for long-lasting vibrancy.
Creating Contrast with Foil Alcohol Ink Cards

These alcohol ink foil cards are beautiful and using white cardstock as a border around the edges can help provide interesting contrast to your project.
If you decide to use these images as backgounds, contrasting white or black images on top of the foil is a great way to create beautiful variation to your cards.

Any Questions?
Any questions about how to create beautiful alcohol ink cards using foil? If so, I’d love to see your comments below!
I love this technique because you can create many unique cards using minimal supplies and get great results. Most people won’t realize that you’re using household items on their cards!
Project Supply List
Jacquard Piñata Colors are intensely saturated, transparent, quick-drying alcohol inks ideal for use on virtually any clean surface. Acid-free, permanent, and moisture-resistant once dry, Piñata Colors are formulated with highly concentrated, lightfast dyes for long-lasting vibrancy.
This gorgeous Scenic Poinsettias 3D embossing folder is from Spellbinders. This embossing folder measures 5.5" x 8.5".
This embossing folder features a variety of poinsettia blooms and holly leaves and berries and one thin metal cutting die shaped like a poinsettia.
The embossing stylus set have total 10 ball ends, 5 different diameters (1.0/1.5/2.0/2.5/3.0 mm). Rounded tip protects the paper from cutting and tearing, double-ended metal ball makes the tracing stylus convenient to use when making art nails or craft projects.
Give your papercrafts a distressed edge with the Cracked Large 3-D Texture Fades Embossing Folder from the Tim Holtz Vault!
The Big Shot Switch Plus in White from Sizzix features electric cutting, auto-reverse, and a 9" platform - all wrapped in a sleek, modern design. Includes dies, an embossing folder, and cutting pads to get you started. Compatible in the US and Canada only.
Jacquard Piñata Colors are intensely saturated, transparent, quick-drying alcohol inks ideal for use on virtually any clean surface. Acid-free, permanent, and moisture-resistant once dry, Piñata Colors are formulated with highly concentrated, lightfast dyes for long-lasting vibrancy.
Acid free fade resistant fast drying transparent inks specially formulated to create a colorful polished stone effect.
Get a beautiful, polished-stone effect on slick surfaces with the Lettuce Adirondack Alcohol Ink by Tim Holtz for Ranger Ink. This fast-drying dye ink is acid-free, fade-resistant and transparent.
Jacquard Piñata Colors are intensely saturated, transparent, quick-drying alcohol inks ideal for use on virtually any clean surface. Acid-free, permanent, and moisture-resistant once dry, Piñata Colors are formulated with highly concentrated, lightfast dyes for long-lasting vibrancy.
Jacquard Piñata Colors are intensely saturated, transparent, quick-drying alcohol inks ideal for use on virtually any clean surface. Acid-free, permanent, and moisture-resistant once dry, Piñata Colors are formulated with highly concentrated, lightfast dyes for long-lasting vibrancy.

This ceramic paint palette is made from premium handle glazed pure white porcelain. Ceramic palette with light, portable, super durable, double thickness and so on.
This is a great adhesive-backed for for using as a base for any card project or journal page.

Use this with your favorite adhesive to create a foil background to your next creative project!

My favorite paper towel to use in my art space, it's durable and strong.
Rigger brush is also known as a liner or script brush. This brush set includes 6 different sizes: #000 #00 #0 #1 #2 #3.
These bottles are perfect for fluid paints, glue, and isopropyl alcohol. The precision tips make it easy to control wet mediums when working in your art space.
For alcohol ink projects, 99% isopropyl alcohol will give you the best results every time!
Tim Holtz Adirondack Alcohol Ink Metallic Mixatives are luminous, fast drying, acid free inks, specially formulated to create metallic highlights when combined with alcohol inks.