Beautiful Smudge Free Pan Pastel Christmas Cards
Looking for smudge free results with your Pan Pastel Christmas cards? These easy Christmas cards take advantage of the beautiful blends you get with Pan Pastels without the smudging that sometimes occurs with this medium.
Hop-A-Long Studio is reader-supported. When you buy through links on our site, we may earn an affiliate commission at no cost to you. Learn more.
Blending with Pan Pastels
I love the beautiful blends that we can get with Pan Pastels. This is what makes Pan Pastels so forgiving and fun to use. If you are new to Pan Pastels, check out my How to Use Pan Pastels video where I walk you through the basics of using Pan Pastels on your projects.
Pan Pastels are a highly pigmented chalk-like pastel that gives great results on a variety of surfaces. I use these pastels not only on pastel paper but also in my mixed media projects. The nature of these mediums is that they give smooth blends and vibrant colors.
Making Vibrant Cards with Pan Pastels
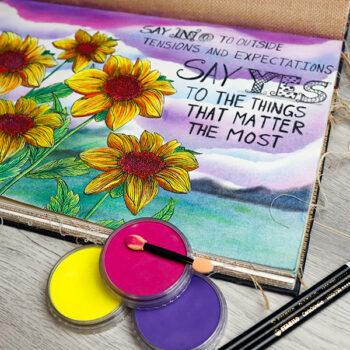
I enjoy making Pan Pastel Christmas cards during the holiday season. It’s such a fun way of giving small creative gifts to my friends and family. This is a great way of practicing your Pan Pastel skills in a small format. A lot of the techniques that I use for cards, I scale them up to use in a larger format in my art journal.
How to Make a Blended Pan Pastel Card Using a Stencil
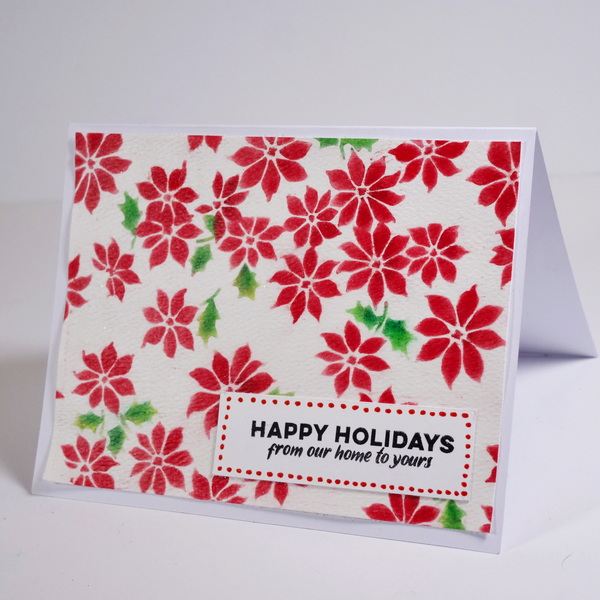
For this project, I’m using Strathmore 400 Series Pastel Paper, but any cold press watercolor paper can also be used for this technique. Choose your favorite Christmas stencil for this project. Today I’m using one of my new stencils, a Tim Holtz Tiny Poinsettia stencil. It’s a great size for cards as the scale works very well for an A2 sized card.
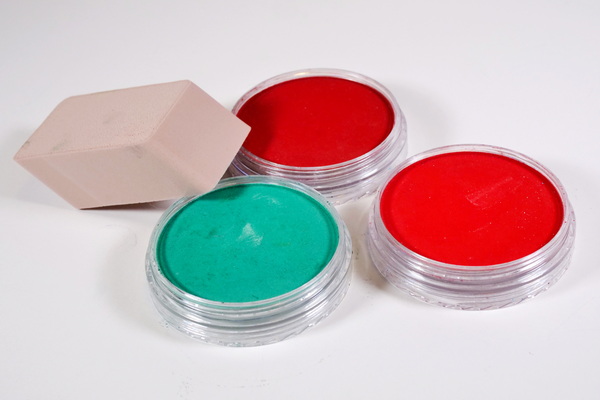
I limited my color palette today to using Pan Pastels in black, red, and green. As the red and green are not only traditional Christmas colors, but are complementary colors on the color wheel, this creates beautiful contrast and interest.
Taping Down the Stencil
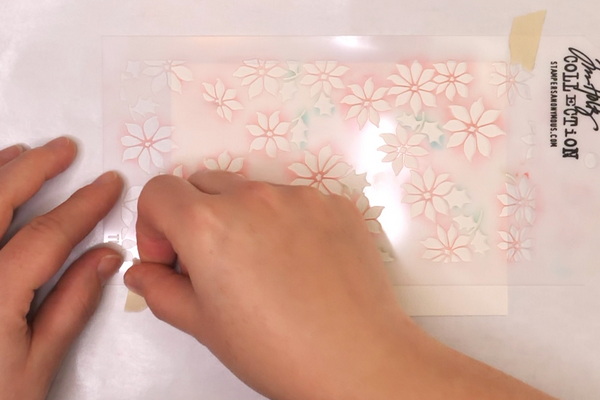
Starting by adding a piece of masking tape to the back of your piece of pastel paper. This will prevent it from sliding as you blend Pan Pastels onto the surface. Make sure to tape down your stencil with masking tape to prevent it from moving as you work. This is an important step because if your stencil slides, it will make it difficult to create crisp blended images and could smudge the pastels.
Blending the Poinsettia
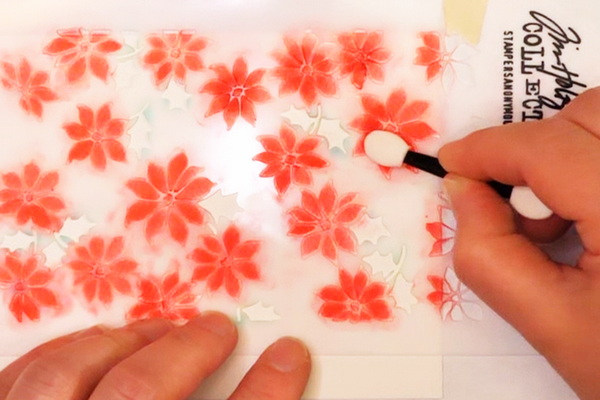
Start with a Sofft Tool or eyeshadow makeup sponge, gently tap the sponge onto the Pan Pastel surface. You don’t need to rub hard into the Pan Pastels as the color picks up easily. If you rub too aggressively, you will create crumbs that will tend to spread and end up in places you don’t want them.
Add a layer of Pan Pastel Permanent Red through the stencil on the poinsettia leaves. You can move in small circular motions, make straight strokes, or use whatever motion gives you an even blend. After adding a layer of Permanent Red Pan Pastel, add a little bit of Permanent Red Shade Pan Pastel to the centers and half of the poinsettia leaves. This will create subtle contrast and dimension to the shading of your poinsettia.
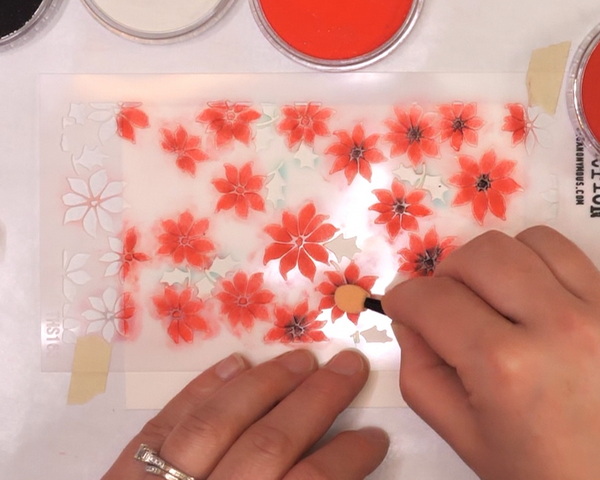
Lastly, add black Pan Pastel to the center of your poinsettia. You can choose to be very delicate and only color the center of your poinsettias. But I like to let it smudge onto the inner areas of the leaves. This creates a beautiful blend and gives more depth to the image.
Adding Green to the Poinsettia Leaves
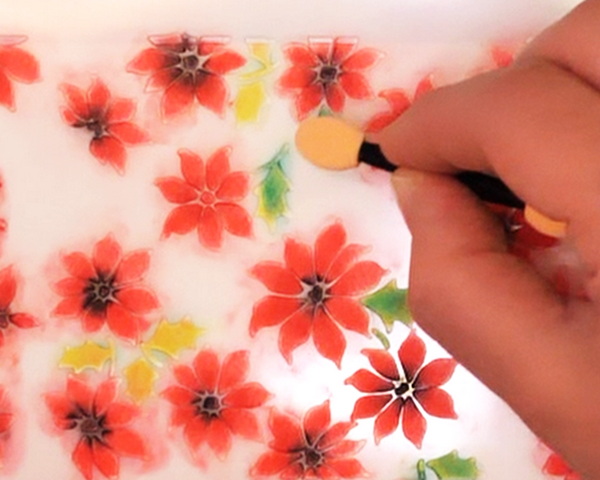
I love the wonderful contrast between the red and green leaves of the poinsettia plant. To create a layered effect on the green leaves, start with a layer of Bright Yellow Green Pan Pastel. Blend some Phthalo Green Pan Pastel to part of the leaves to create a midtone. To finish off and create shadows in the leaves, add a layer of Phthalo Green Extra Dark to the edges of some of the leaves. By varying the color and intensity, this will give you beautiful blends and variation on your poinsettia leaves.
How to Gently Remove Pan Pastels
Once you pull up the stencil, you might find that there are areas that have a tiny bit of Pan Pastel crumbs on the white that you’d prefer to remove. One wonderful attribute of Pan Pastels is that they can be removed with an eraser.
I like using a kneaded eraser because it lets me get into small areas as you can manipulate the eraser into any shape. The kneadable eraser is also a very gentle eraser. You can tap the eraser onto the surface to pick up crumbs of colors without disturbing the rest of the Pan Pastel.
I also like using the kneaded eraser to remove color from my stencil. Make the kneaded eraser into a tube shape and roll it across your stencil. This gently picks up the color without damaging the stencil.
Sealing Pan Pastels
The hardest part of working with Pan Pastels is figuring out how to protect your work. There are people who store their work between sheets of paper to protect it. You can also frame your piece behind glass. But you need to make sure to leave a gap between the glass and the paper so that the Pan Pastel will not smudge.
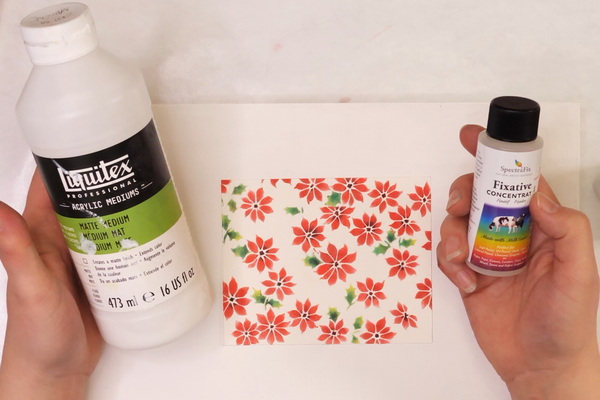
Using Fixatives to Seal Pan Pastels
I prefer using fixatives and mediums to seal my Pan Pastels. The positive thing about fixatives is that it allows you to keep working on your pastel piece. This lets you add additional layers which gives you more vibrancy, shadows, and highlights in your work. A drawback from the fixative is depending on what fixative you use it can slightly dull the color of the Pan Pastels.
Choosing a Fixative
Not all fixatives are the same. The only one that I can recommend for Pan Pastels is SpectraFix Pastel Fixative Spray. You can get this fixative pre-mixed in a spray bottle or as a concentrate that you mix with alcohol and add to a spray bottle.
What I love about this fixative spray is that it keeps the color of the pastel very true. You may get a tiny bit of dulling of the color, but it is hardly noticeable. You will need to add several layers of spray to get the color to fully sealed into the page. I like to add layer of fixative and let it dry.
Is My Pan Pastel Sealed?
Check to see if the Pan Pastel is sealed by touching the surface with your finger and see if it’s pulling up any color. If it is, add another layer and let it dry. Repeat this process until the Pan Pastel is fully sealed.
Another option is to add your first layer of color and then seal it. This generally seals in one layer because there is less Pan Pastel on the surface. Then you can add in your next layer of color and then seal it again. A rule of thumb is the more Pan Pastel is on the surface, the more fixative will be needed to seal the color.
I have tried using Krylon Workable Fixative for this and I don’t recommend it. The color dulls and gets very splotchy on the surface. It dulls and darkens it to the point where I have about half the color intensity that I started with.
Using Mediums to Seal Pan Pastels
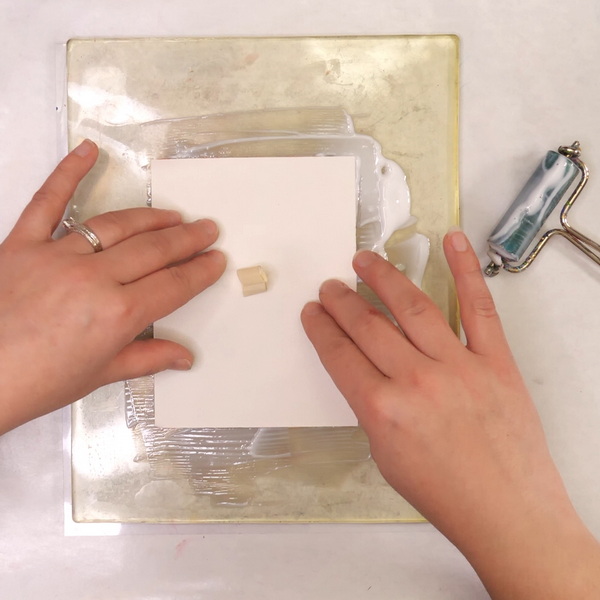
Another way to seal Pan Pastels is to use a matte or gloss medium. Use a gelli plate and add a layer of matte medium to the surface with a brayer. Add your card straight onto the surface, pressing firmly. Make sure not to move the paper in any direction. If you do, you’ll get smeared pastel on your surface. Lift the pastel paper off the surface and let it dry.
The reason this technique works is because you’re adding an entire layer of matte medium evenly to the page. You may notice that some areas have more matte medium than others. If this is the case, let the matte medium dry completely. Then add a few more layers of medium with a brush to even out the matte medium on the card.
How to Save a Smudged Pan Pastel Background
When I was working on this project, I did have a card that smudged. I decided to experiment and see if I could come up with an interesting project using the smudged background. Start with a background that has been blended as per the instructions above and add one layer of SpectraFix to the card.
Use a makeup sponge or larger Sofft tool to rub the background color across the pastel paper. This will soften the background. Because you have SpectraFix on the page, when you blend out the color, you should still be able to see the shapes, they will just look softer.
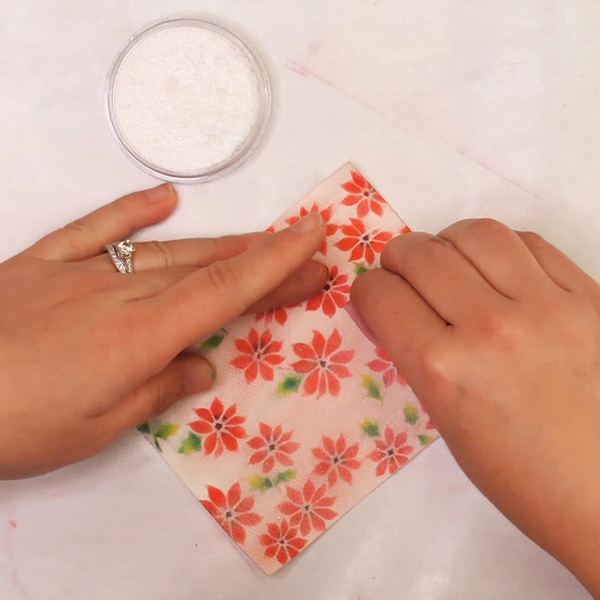
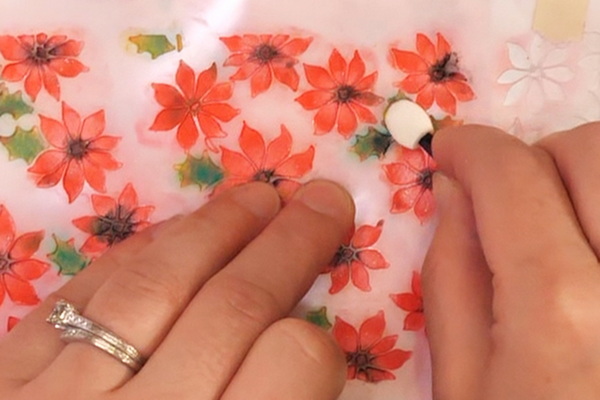
If you’d like to add more color, add some Permanent Red Pan Pastel or Pan Pastel White Coarse Pearl Medium to the page. This will add color and shine. It also makes the poinsettias on the page blend into the background a little more. Spray a layer of SpectraFix onto the page and let it dry.
Adding Additional Poinsettias
Add color to the poinsettias using a variety of greens and reds following the instructions above. What you’ll notice is because the other poinsettias have been softened, the next layer of poinsettias will be darker and more contrasting. After you’ve finished blending, set with several layers of SpectraFix to make sure that it is fully sealed.
This is a way to create more color layers onto your card designs and hide mistakes that you make. White pastel paper isn’t very forgiving. I often use other colors of Pan Pastel papers for my projects so that it hides the small smears and any uneven Pan Pastel application. But this card is a fantastic way to rescue a blemished background and create a beautiful, layered card.
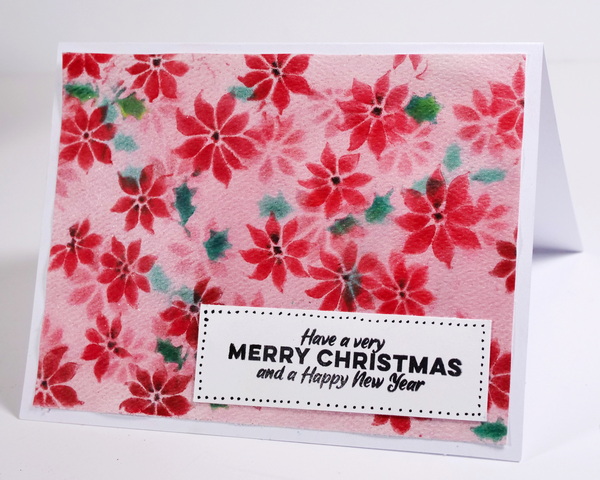
Finishing off the Pan Pastel Christmas Cards
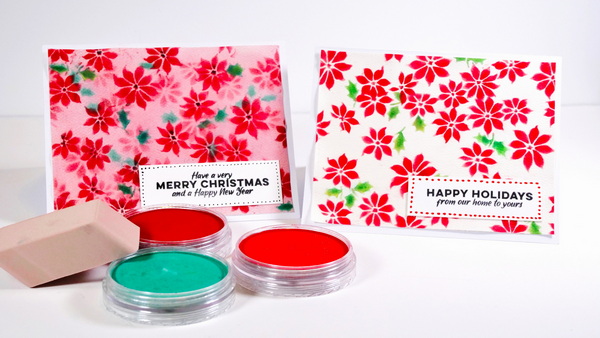
To finish off these Pan Pastel Christmas Cards, I like to mount them to an A2 card leaving an 1/8” border. This lets the color of the Pan Pastels pop on the card. I like to add a sentiment stamp onto white cardstock using Jet Black Archival Ink. For these cards I used the Simon Hurley Posh Poinsettia stamp set. I finished off this card by adding dots around the sentiment using Gelly Roll pens.
Any Questions?
Any questions on how to create these Pan Pastel Christmas Cards or how to get beautiful blends? It will take a bit of experimentation to get good blends and a great seal with the fixatives or mediums. I hope that this has given you a new way to use your Pan Pastels and how you can create without getting smudges.
I would love to know what you think about what I’ve shared today and your own experience with Pan Pastels and sealants. Please leave a comment below and I’d love to start a conversation with you!
PanPastel Artists’ Painting Pastel – Medium, Pearl White, Coarse
from: Blick Art Materials
PanPastel Artists’ Painting Pastel – Phthalo Green Extra Dark, 620.1
from: Blick Art Materials

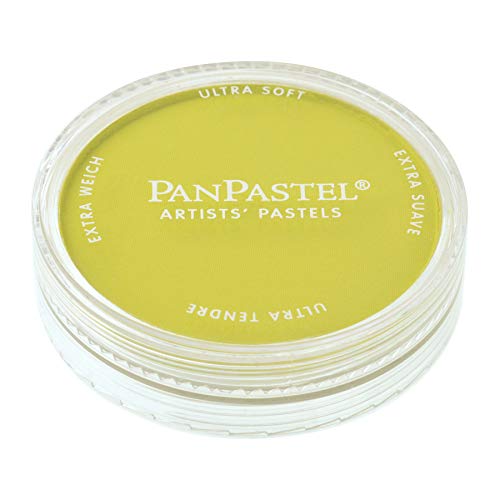
PanPastel Artists’ Pastels are pigment-rich, professional-grade soft pastels in a stackable pan format. Each contains 0.3 oz—about 35% more material than the average pastel stick—giving you easy access to intense, ultra-soft color that’s easy to lift, blend, layer without overfilling your surface’s tooth.

PanPastel Artists’ Pastels are pigment-rich, professional-grade soft pastels in a stackable pan format. Each contains 0.3 oz—about 35% more material than the average pastel stick—giving you easy access to intense, ultra-soft color that’s easy to lift, blend, layer without overfilling your surface’s tooth.

PanPastel Artists’ Pastels are pigment-rich, professional-grade soft pastels in a stackable pan format. Each contains 0.3 oz—about 35% more material than the average pastel stick—giving you easy access to intense, ultra-soft color that’s easy to lift, blend, layer without overfilling your surface’s tooth.
PanPastel Artists’ Pastels are pigment-rich, professional-grade soft pastels in a stackable pan format. Each contains 0.3 oz—about 35% more material than the average pastel stick—giving you easy access to intense, ultra-soft color that’s easy to lift, blend, layer without overfilling your surface’s tooth.

PanPastel Artists’ Pastels are pigment-rich, professional-grade soft pastels in a stackable pan format. Each contains 0.3 oz—about 35% more material than the average pastel stick—giving you easy access to intense, ultra-soft color that’s easy to lift, blend, layer without overfilling your surface’s tooth.

50 Pcs eyeshadow brushes are packaged in a safe and clean bag, easy to carry, and affordable.
These are great for blending Pan Pastels on any surface!

Excellent for erasing and highlighting with pencils, colored pencils, charcoal, and pastels, the Faber-Castell Kneaded Eraser is the perfect artist's erasing tool.
High quality latex-free eraser removes lead easily and cleanly with very little pressure.

This is the fixative you've been waiting for!
Non-toxic, workable, and fully archival, SpectraFix is a casein-based fixative that utilizes milk protein and grain alcohol to hold and protect your media without dulling or darkening colors. Because it's all-natural and odor-free , you can spray your project indoors while you work — no more odors, unhealthy fumes, or long waits outdoors!


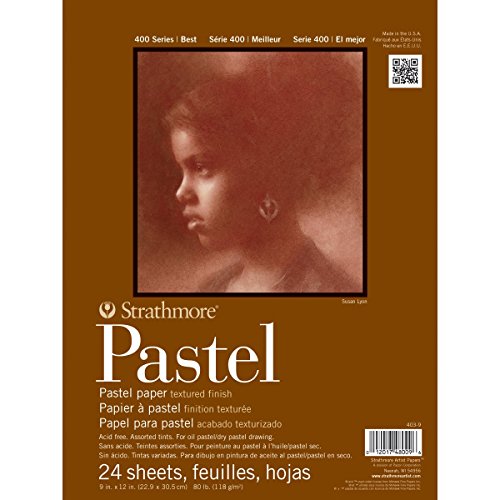
The textured finish and subtle colors make this paper an ideal background for hard, soft, and oil pastels, as well as a wide variety of drawing media.


The Jet Black Archival Ink Pad by Ranger Ink is acid-free, non-toxic, water-resistant, and fade-resistant, and provides lasting results. This ink will not deteriorate paper and does not bleed when inks, paints, or markers are used over it.