One Page Fold Up Book: Instax Mini Album
Today I will be sharing my version of the one page fold up book. If you have never seen these books, they are easy to make and fun to create. By taking a single sheet of paper, in just a few minutes you will have a book that you can create in.
It can be challenging to start creating in a new journal or book. So by making your own little book, this can be a fun way create in a way that is simple and not overwhelming.
One Page Fold Up Book
To create a fold up book, start with a piece of paper of your choice. These books can be created with a variety of different dimensions. You can use standard size letter paper to make a fold up book or you can use a variety of different finishes and sizes to make these books. The fold up book does not require any measuring, so you can experiment with a variety of different dimensions and still have a beautiful book.
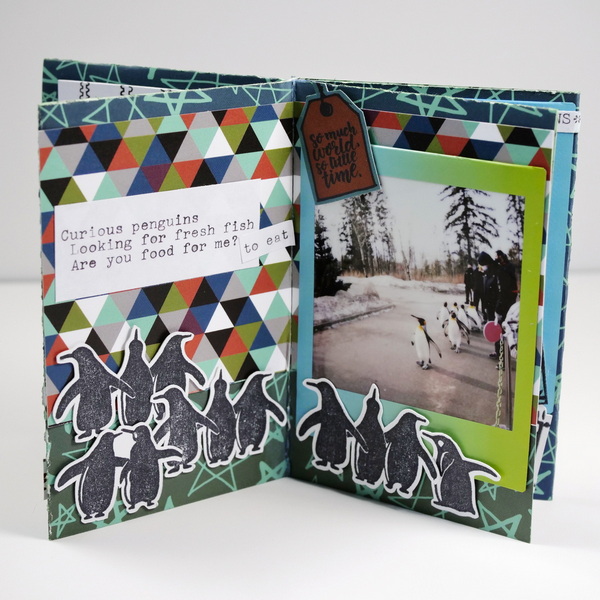
I chose a 12” by 12” piece of patterned paper which I cut down to 9” by 12”. I wanted to add my Instax square photos in this book, so by having a book page that was 3” wide allowed me to fit these photos.
Fold Up Book Instructions
Step 1: Fold the Paper in Half Widthwise
Fold the 9” by 12” piece of paper in half along the width so that the paper when folded is 12” by 4.5”. Unfold the paper.
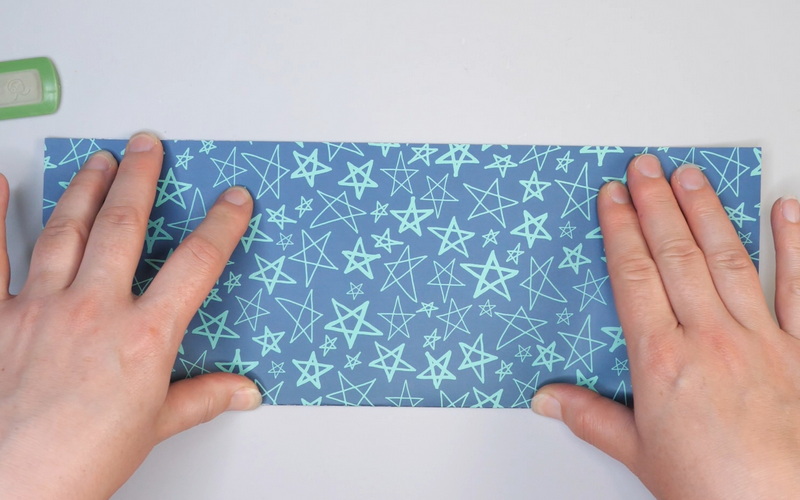
Step 2: Fold the Paper in Half Lengthwise
Fold the paper in half lengthwise so that the paper is now 6” by 9”. Unfold the paper. You will notice that the folded lines make a cross on your paper. Fold the paper the opposite direction along the same crease. This will create a neutral fold that will allow the paper to lie flat.
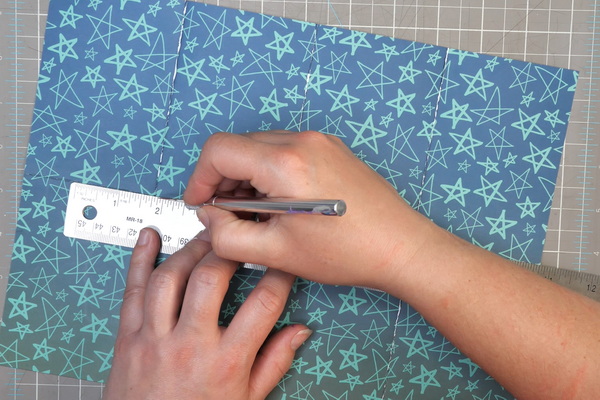
Step 3: Fold the Paper in Eighths
Fold the paper in eighths along the length. The easiest way to do this is to fold the paper lengthwise halfway to match up with the inner crease. Complete the same step on the other side of the paper as well. Unfold the paper and fold the opposite direction to create a neutral fold.
Step 4: Cut a Slit in the Center Squares
Cut a slit in the center squares of the paper using a knife and a cutting mat to get a precise cut. This can also be completed by folding the paper in half lengthwise and using scissors to cut the slit.
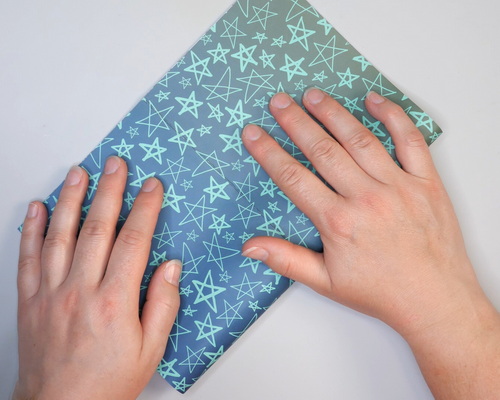
Step 5: Fold the Book
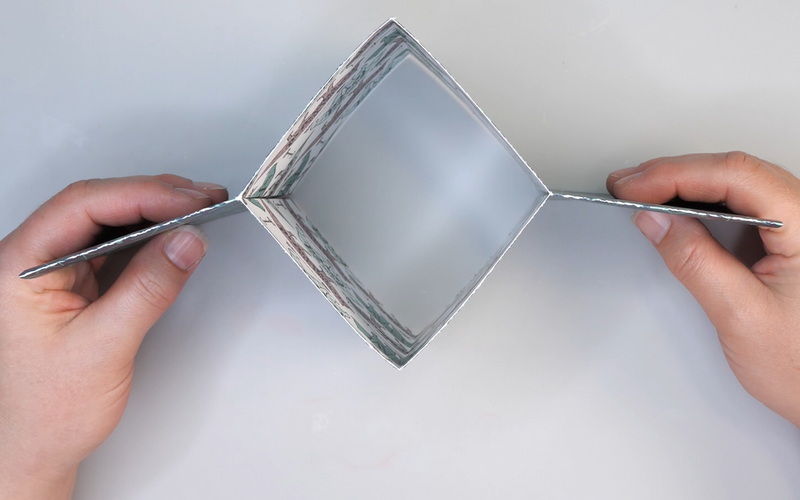
One you have completed the cut, fold the paper in half widthwise and stand it up by pressing the edges of the paper. This will create a diamond shape in the center of your paper. Press the paper together to fold the book. This creates an eight page mini book with a dimension of 4.5” by 3” per page.
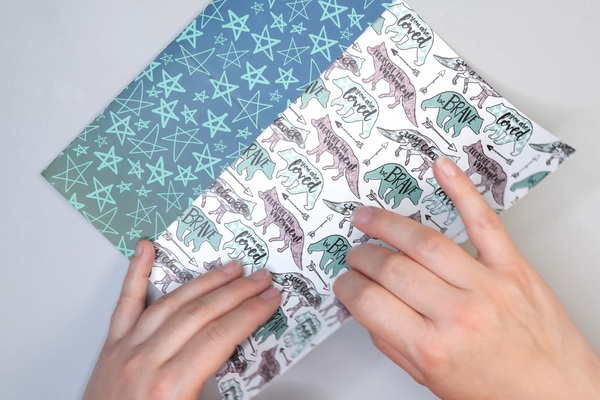
Step 6: Glue Edges of the Paper
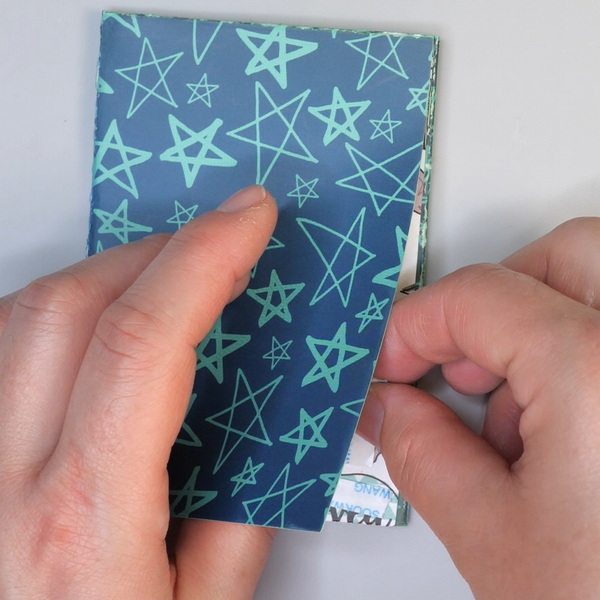
When you leaf through your book, you will see two edges that are not folded or joined. You can choose to glue these together or leave them loose. It is a personal preference. If you are going to add photos and paper to the book, I would suggest leaving these pages loose until you have completed the book. This way you will have a flat surface for applying journaling, ephemera, and photos.
Personalizing Your One Page Fold Up Book
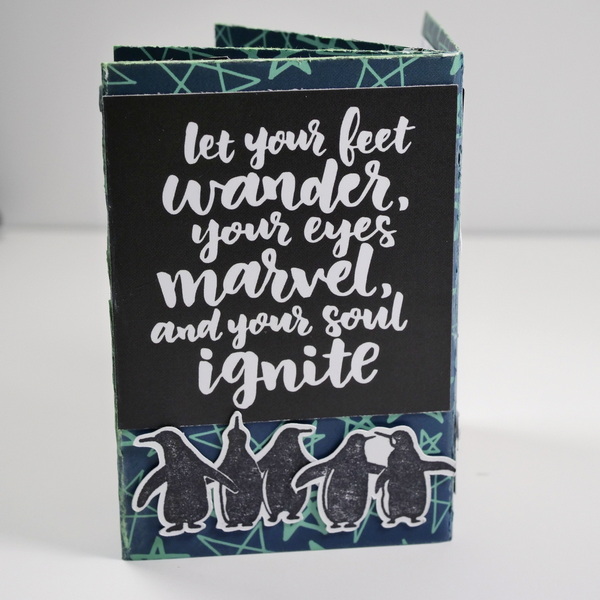
There are so many ways that you can personalize your one page fold up book. When I originally learned how to create this book design, the purpose of the book was to be a place to write haiku poetry. This fold up book is also a great place for notes, quotes, and other musings.
For this one page fold up book I wanted to create a mini album. I love Fuji Instax square photos and this little book was the perfect place to display photos and personal journaling. I used a variety of Wild Whisper Designs paper from their Child at Heart and Where to Next collections to add images and color to this album.
Techniques Used for This Album
For this album, I used a few techniques to add layers and interest to the pages.
Stamped Images
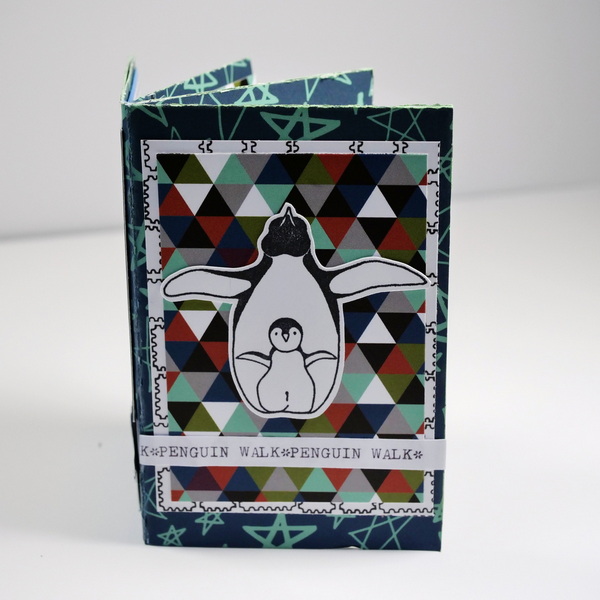
I stamped penguin images with Archival ink and used my Brother ScanNCut to cut them out. If you do not have a die cutting machine, some patience and a pair of scissors can get you a similar result.
I also used camera images that I stamped and inked for a previous project. For most projects I stamp, cut and color more images than I typically need. Little books like this are a great way to use up the additional images.
Cutting Out Paper Embellishments
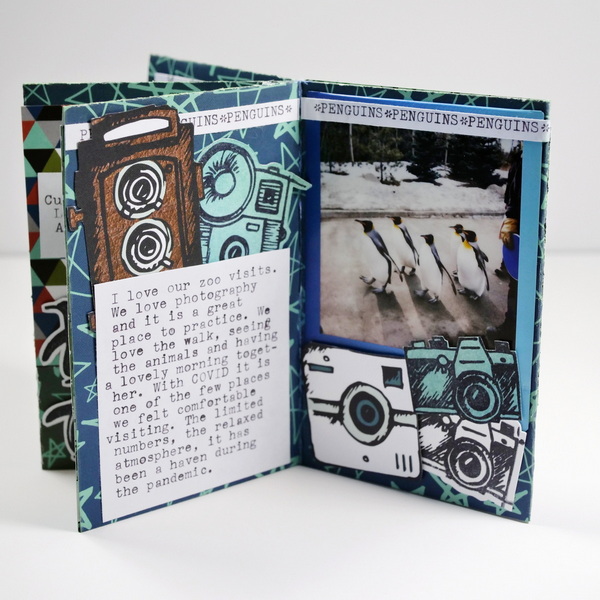
I love taking the graphical images on the Wild Whisper Designs paper and cutting them out to create embellishments. For this project, I used the cameras from the cover page of the paper collection and other camera images that worked well for this project.
Layering Paper
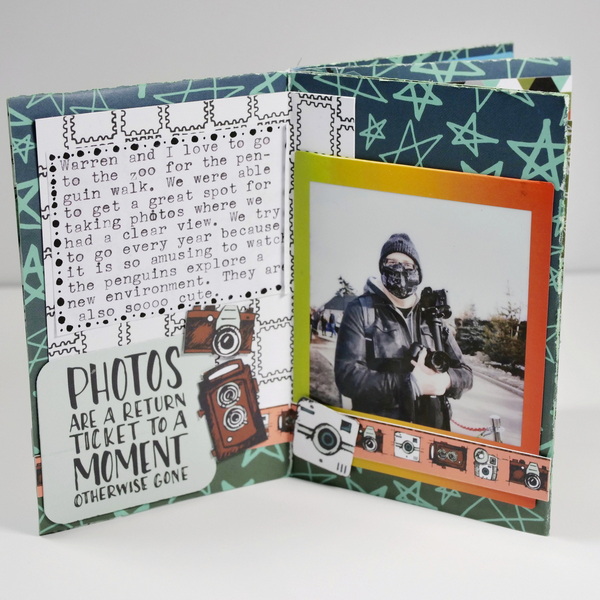
I used paper from two Wild Whisper collections, Child at Heart and Where to Next to layer paper on each of these pages. I also used the decorative strips that are included on the bottom of the 12″ by 12″ paper sheet to add additional layers to this project.
Journaling Blocks
Earlier this year I purchased a manual typewriter and have enjoyed using it for creating journaling blocks for my projects. I love the look of the lettering that I get with the manual typewriter.
Adding journaling blocks with your personal writing or a fun and distinctive computer font is a great way to add interest to these fold up books.
Questions?
What do you think of this one page fold up book? Is this something that you may try to incorporate in your creative practice? I would love to hear what you think about this project and if you have any questions. Please comment below or contact me directly, I would love to start a conversation.
Project Supply List
- Wild Whisper Designs Paper Collections: Child at Heart and Where to Next
- Wild Whisper Designs Stamp Set: Where to Next
- Ruler
- Cutting Mat
- Exacto Knife
- Paper Trimmer
- Royal Manual Typewriter
- Copy Paper
- Scissors
- Brother ScanNCut
- Ranger Archival Ink
- Tim Holtz Distress Oxide Inks: Cracked Pistachio and Blueprint Sketch
- Fuji Instax Square Camera and Film
- Local King Rubber Stamps Penguin Stamps
- Alvin Techliner Technical Drawing Marker Black Size 01 and 05