Mixed Media Magic: Transforming Pumpkins with Decoupage
Looking for a way to practice your mixed media skills outside the art journal? Try making a fun and original home décor pumpkins with decoupage techniques! I found a plastic pumpkin at my local craft store and thought it would be perfect for adding a variety of mixed media elements to make it unique.
Generally, I’m not much of a home décor creative, but occasionally it’s fun to change up the creative process. It can be a way of picking up new skills or learning how to use skills that you have in a different way. I find there’s always fun surprises along the path of creative self-discovery.
Hop-A-Long Studio is reader-supported. When you buy through links on our site, we may earn an affiliate commission at no cost to you. Learn more.
Choosing a Pumpkin
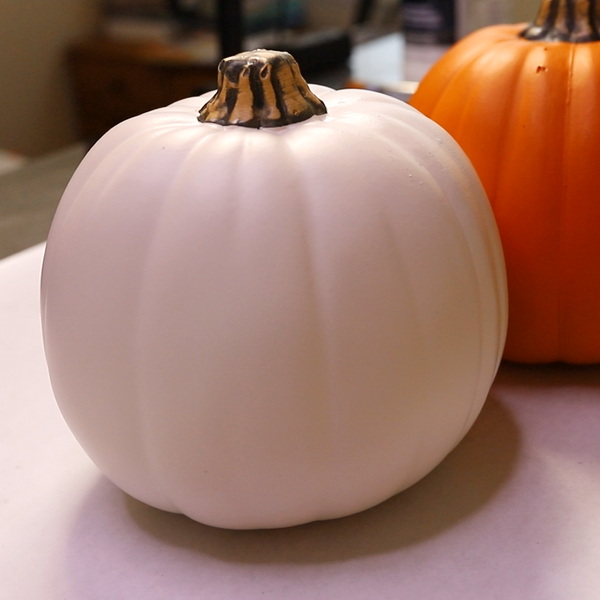
For this project I chose to use a white plastic pumpkin over using a real pumpkin with decoupage. The reason for this is that I can create a project and enjoy it more than once. Now I can pull out my pumpkin every fall and enjoy displaying it in my home. I’ve wanted to do a project with pumpkins for a few years now, but the idea of putting a lot of time into a project that would need to be thrown out didn’t appeal to me. I purchased this white plastic pumpkin at Michaels, but here’s a link to a similar pumpkin that I found on Amazon. https://amzn.to/48jL6vI
Prepping the Pumpkin for Decoupage Techniques
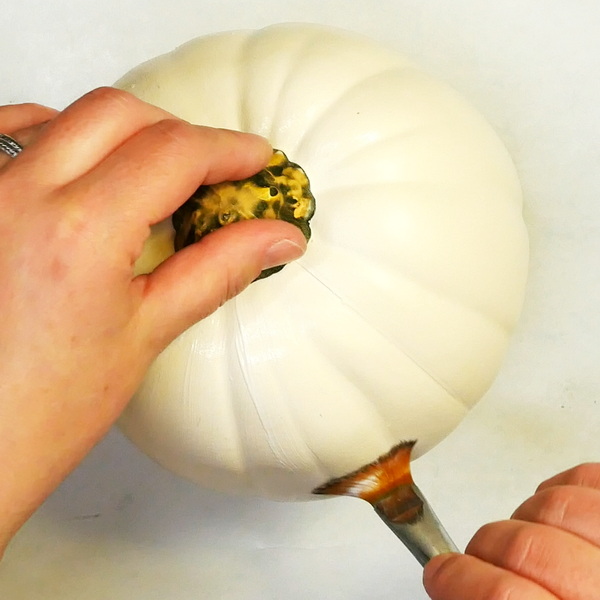
I love the white color of the pumpkin, and didn’t want to cover up the base color, but I did want to add a layer of gesso to create “tooth”, or roughness, to the pumpkin. I made the choice to use clear gesso instead of white gesso as it will dry clear and not effect the base color.
When you add gesso, this helps the paint and mediums adhere better to the surface and prevents the mediums from peeling off the slick plastic surface of the pumpkin.
If you wanted to change the color of your pumpkin, you could use white gesso or colored gesso to cover up the color. In this case, I purposely used Liquitex Clear Gesso so that the white color of the pumpkin would show.
Adding Tissue Paper
One of my favorite things about tissue paper is that it won’t completely cover up the pumpkin color because of its translucent nature.
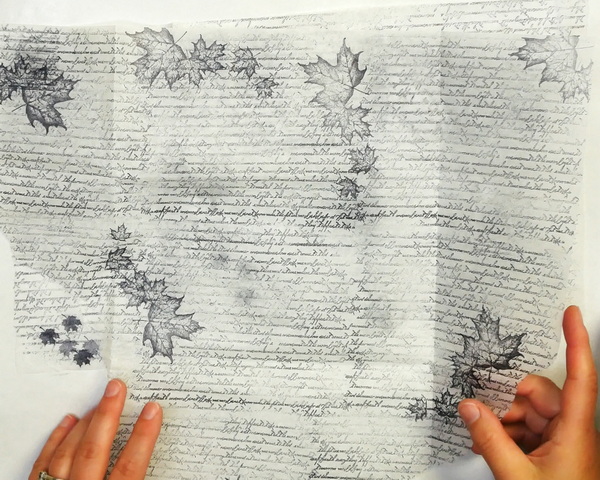
I started with white tissue paper and using a few of my favorite stamps, I added Jet Black Archival Ink to the white tissue paper. Using Wild Whisper Designs Script stamp and acorn and leaf stamps from Wild Whisper Designs Strength of the Season stamp set, I added images randomly to the tissue paper. On the second piece I also added in stamps from the Autumn (4) collection from Local King Rubber Stamp.
If you don’t know how to stamp on tissue paper or would like to see a detailed tutorial, click here. This is one of my most popular tutorials on how to alter tissue paper.
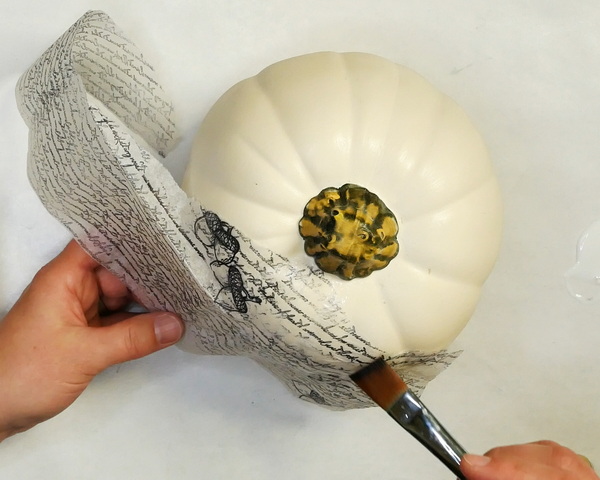
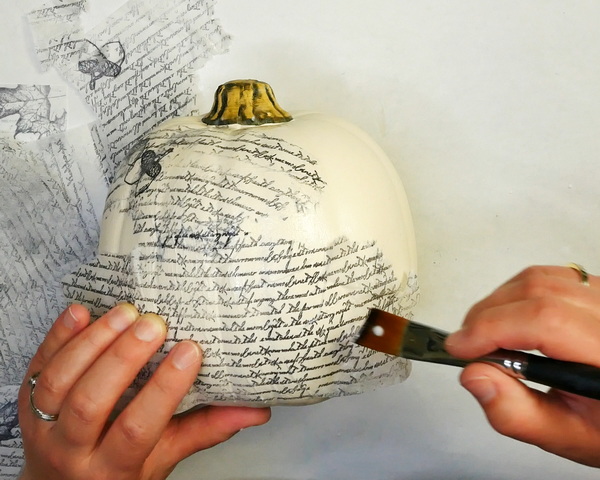
Tear your tissue paper into sections and use Liquitex Matte Medium to adhere it to the pumpkin. I like to start with a later of matte medium on the pumpkin, then lay the tissue paper onto the surface and very gently add another layer of matte medium on top. Be careful when you add your matte medium not to pull or apply the medium too roughly as this can rip the tissue paper.
Troubleshooting this Decoupage Technique
When decoupaging the tissue paper onto the surface of the pumpkin, there’s a few things to consider. If you apply your tissue paper in large sections, you’ll get more creases and wrinkles in your tissue paper.
Generally, I use smaller pieces so that I had more control over how the tissue paper is applied onto the pumpkin. I don’t want large creases but am fine with the additional texture that is created from wrinkles and overlapping areas of the tissue paper. It really depends on how particular you want to be. I don’t mind a bit of extra texture on the page.
Quality of Materials
Because I’m using stronger archival and acid free tissue paper, I can move and adjust the tissue paper even after it is laid on top of the pumpkin and matte medium. I would not attempt this with dollar store tissue paper. It isn’t as strong, so you need to be much gentler with the tissue paper.
I also prefer using matte medium over Modge Podge for this technique. The matte medium gives me better results, it doesn’t have a strong smell like Modge Podge, and it gives me a better finish. I will generally recommend artist grade products because you’ll get better results with less product. But I also recommend to sticking to your personal budget.
If you are on a tight budget and Modge Podge or Matte Medium is out of your price range, try watering down white glue. It will work for decoupage, but it doesn’t give the as nice of finish as matte medium. But it will work for decoupage projects decently well.
Adding in Leaves
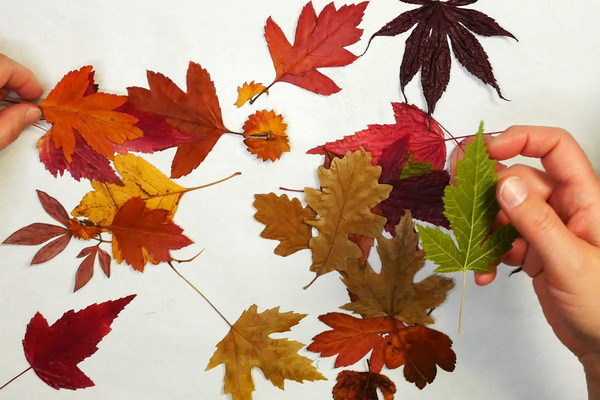
For this pumpkin decoupage technique, I am using pressed leaves that I collected around Calgary last fall. I pressed these leaves between the pages on my art journal and once they were dry, I sealed them with matte medium. If you haven’t seen my tutorial about how to seal leaves, check out this article: How to Press and Preserve Fall Leaves
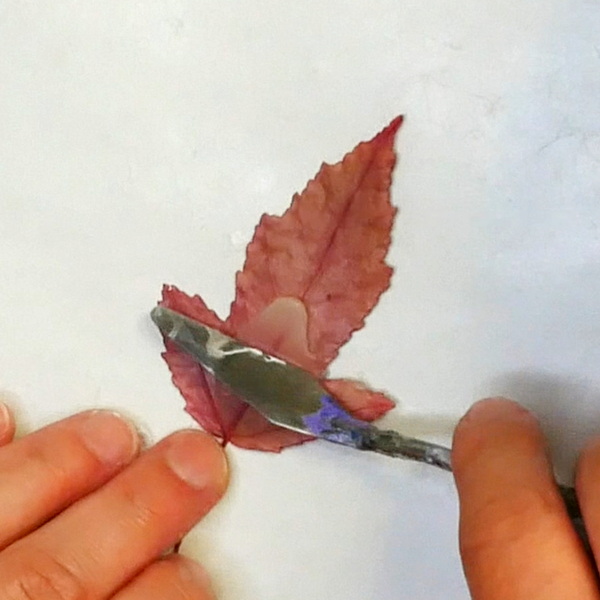
Once your leaves are sealed, they can now be bent and manipulated without breaking them. This means that they can now be used on home décor projects like a plastic pumpkin. The leaves will still resist bending a bit, so I’m using Yes Stick Flat Glue for my adhesive. This thick glue is strong and only a very thin layers needs to be applied. This will keep the leaves laying flat, even around the curves of the pumpkin.
You could also use artificial leaves for this step, but I like the look of natural leaves on this pumpkin project.
When adding in your leaves, you can make the choice to leave a lot of white space or cover the entire pumpkin with leaves. I like to make sure to leave some white areas for contrast.
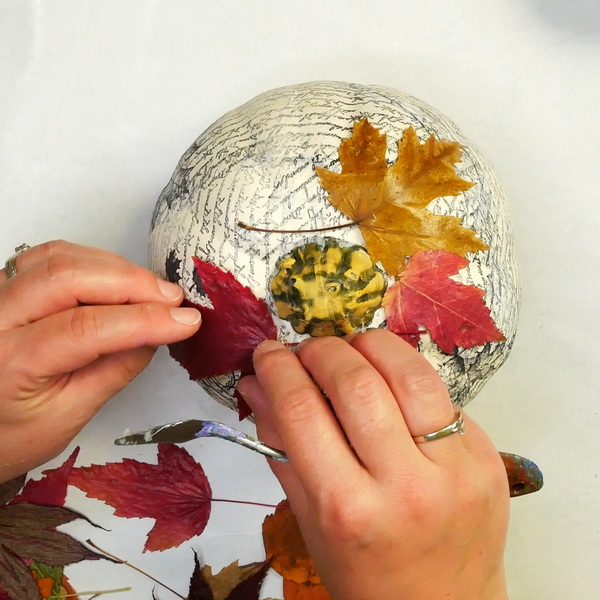
With this project I got a bit carried away and added more leaves than I had originally planned. The next time I create this type of project, I’d probably only add leaves at the top of my pumpkin and not add them all the way to the bottom.
Adding in Words
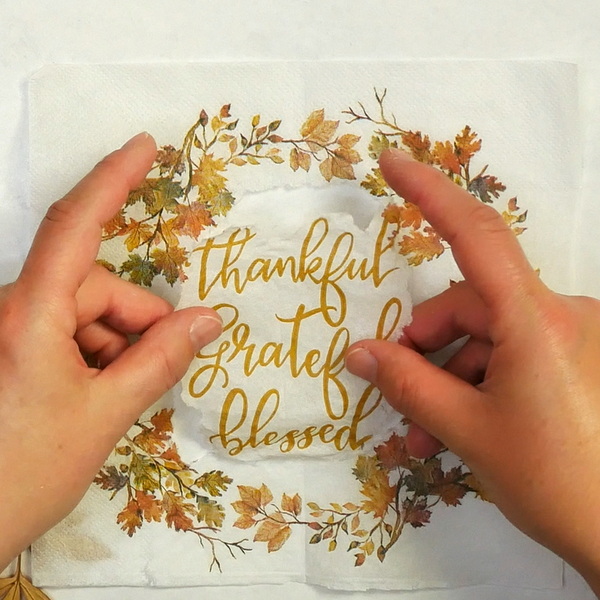
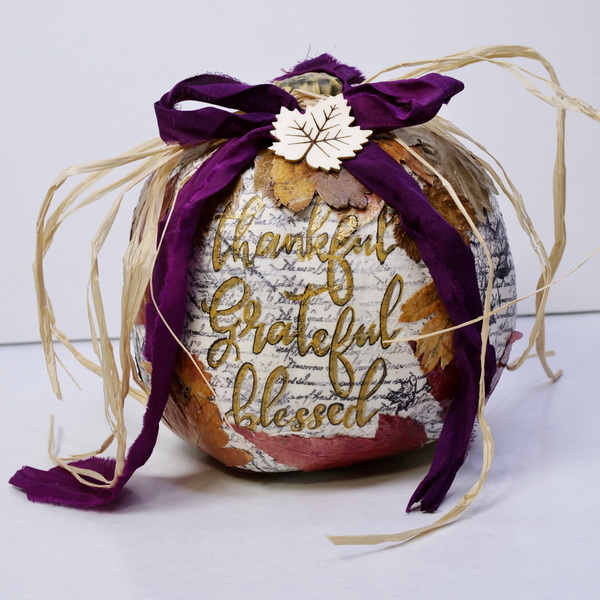
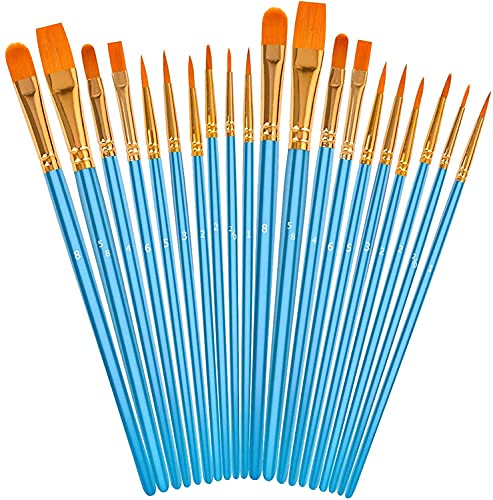
I found a great napkin that had the words “thankful, grateful, blessed” on them. I wanted to use the words from the napkin but not the wreath. To remove the words, I used an acrylic brush to carefully add water to the napkin so that the words could be cleanly torn out.
If you’d like more information about how to disassemble and use napkin pieces, check out this article where I go into a lot more detail about this process.
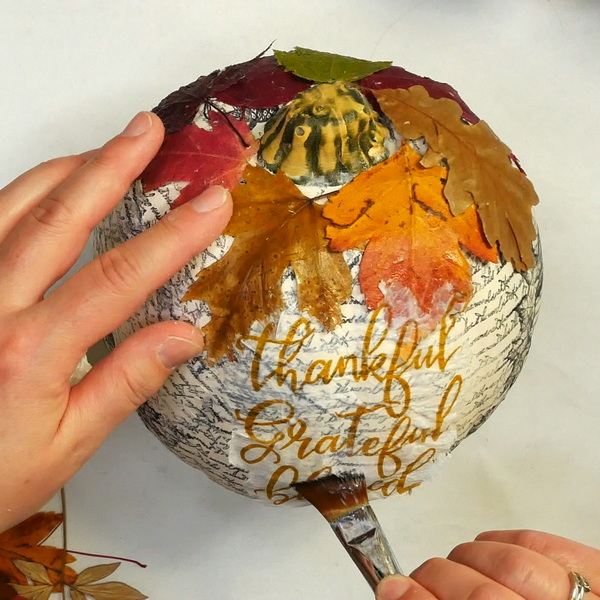
Using matte medium, I gently adhered the napkin to the surface of the pumpkin. Some areas of the napkin touched the top of the leaves, while other areas I added leaves around the image.
Adding in Highlights
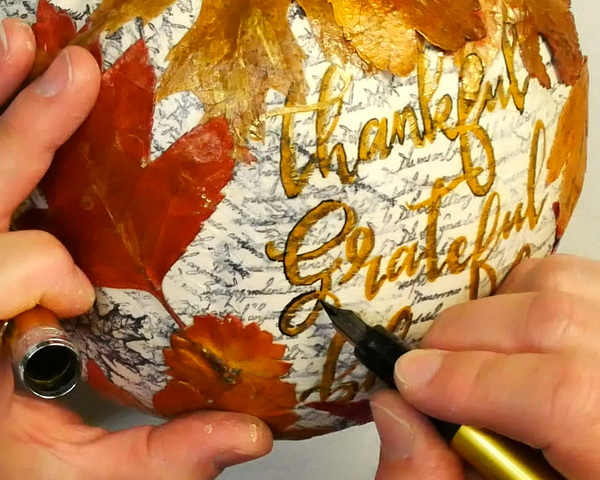
Once the matte medium is fully dry, you can start adding in highlights and contrast to your pumpkin. I started with adding more contrast to my words using a Plaisir Platinum Fountain Pen and Carbon ink. Add dark lines to the left side of the letters as this will help accentuate the words.
On the right-hand side of the letters use a Sakura Pen-Touch Gold pen to add highlights. This really helps the letters to have more contrast and presence on the pumpkin.

I would recommend sticking to paint pens and pens with metal nibs if you’re writing on medium that has just dried. The surface may seem dry, but I find that any soft nibbed pens like PITT Pens or Micron pens will not work as well on these surfaces and you could accidentally ruin your pens.
Adding Fibers for a Finishing Touch
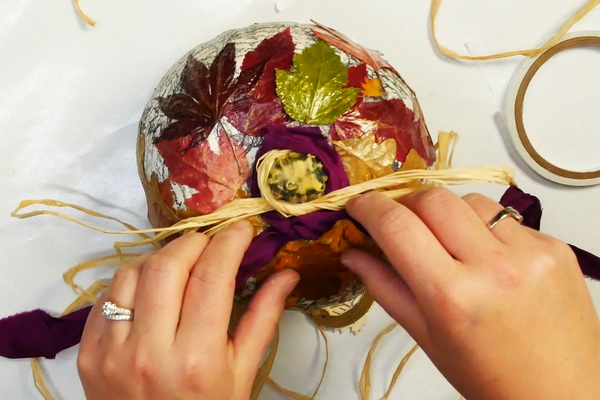
I felt that this pumpkin needed a finishing touch. Around the top of the pumpkin, I tied both sari ribbon and natural raffia ribbon.
To do this, start by adding a few pieces of sookwang tape around the top stem. The sookwang tape is strong enough to prevent the ribbon from sliding so I could make a knot.
Start with the raffia fibers and tie a double knot. Wrap the sari ribbon around the base just under the secured raffia fibers, this will keep the ribbon from slipping. Tie a knot and create a bow with the purple sari ribbon.
I found that the color of the sari ribbon was similar enough in undertones that it matched the darker purple leaves. You could make the choice to use any type of ribbon on this project.
To add a final touch and to distract from the knots, use Yes Stick Flat Glue to adhere a wood laser cut leaf to the sari ribbon. I love the natural wood color, so I didn’t alter it on this project.
Any Questions?
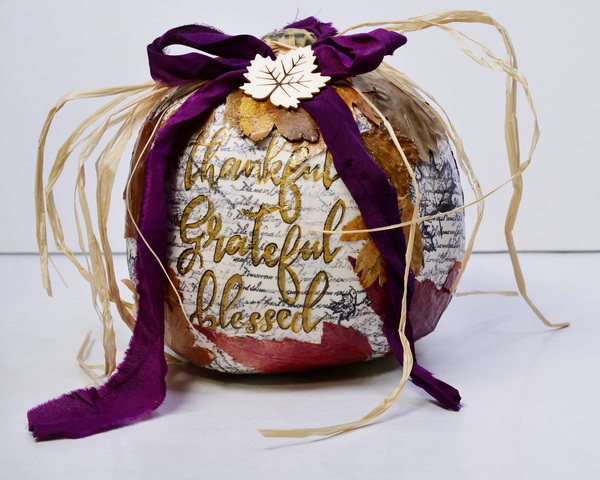
I love this mixed media pumpkin! As much as it is different than most of the other projects that I do, I loved the challenge of designing a home décor piece. I hope that this has also given you a better idea how to transform pumpkins with decoupage on your own projects. If you have any questions or thoughts, please leave a comment below. I’d love to start a conversation with you!
Project Supply List

Liquitex Acryic Medium – Clear Gesso, 4 oz bottle
from: Blick Art Materials

Archival material created and made in USA. Lineco is a leading and trusted brand for archival quality art, photography, and framing supplies. 16 gm2 tissue allows for translucency and durability. Acid-free and lignin-free; PH Neutral and Non Buffered.

The Jet Black Archival Ink Pad by Ranger Ink is acid-free, non-toxic, water-resistant, and fade-resistant, and provides lasting results. This ink will not deteriorate paper and does not bleed when inks, paints, or markers are used over it.

A quick and easy way to melt embossing powder this heating tool was specifically design for speed quiet and convenience. It can also be used to heat set or dry ink. It won't overheat and burn projects.

Creates a matte, non-reflecting finish when added to acrylic colors. Lightweight, non-toxic; Opaque when wet, translucent when dry. Intermixable with Liquitex Professional Acrylic Paint Colors and Mediums
Yes Stikflat Glue – Pint
from: Blick Art Materials

A 5-piece premium quality stainless steel artist palette knife set with sturdy comfort-grip wooden handles. Set includes the essential shapes and sizes needed for most types of palette knife techniques and painting applications.

Golden Interference and Iridescent Heavy Body Acrylics add an exciting range of options to your creative repertoire. Used alone or mixed with other acrylic paints, they enable you to achieve color effects that are truly spectacular.

Caran d’Ache Palette Aquarelle
from: Blick Art Materials

Liquitex Fluids Acrylic Medium – Gloss, 4 oz bottle
from: Blick Art Materials

Sakura marker pens write on glass, wood, porcelain, plastic, paper, and metal. Archival Quality: Pen paint is waterproof, fade resistant, and chemically stable when dry.

- Affordable entry-level pens with an elevated aluminum body
- Ultra-smooth, beginner-friendly steel nib
- Patented cap design keeps ink fresh
- Silky, scratch-resistant finish

Waterproof carbon ink cartridges for the Platinum Plaisir Fountain Pen.


You're going to feel just like an expert when you're cutting the smallest of details with the Cutter Bee Scissors by EK Success. These un"bee"lievable compact scissors will have you feeling like a queen bee when you swarm right into your fine detail or fussy cutting projects.


My favorite paper towel to use in my art space, it's durable and strong.