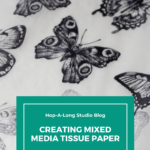
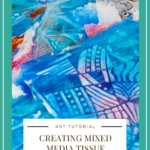
Creating Mixed Media Tissue Paper
If you are looking to personalize your art journal projects, creating mixed media tissue paper is a fun way to get unique colors and textures. Creating mixed media tissue paper is easy and only requires a few materials. In this tutorial I will share with you three different techniques for getting a variety of different textures with mixed media tissue paper.
Hop-A-Long Studio is reader-supported. When you buy through links on our site, we may earn an affiliate commission at no cost to you. Learn more.
What Type of Tissue Paper to Use?
There are a variety of tissue papers that you can use for this technique. From tissue paper used for gift wrapping to acid-free tissue paper used for protecting and storing works of art. I am using acid-free, PH neutral tissue paper but any white tissue paper will work for this technique.
Crinkle It Up! Altering Tissue Paper with Ink and Paint
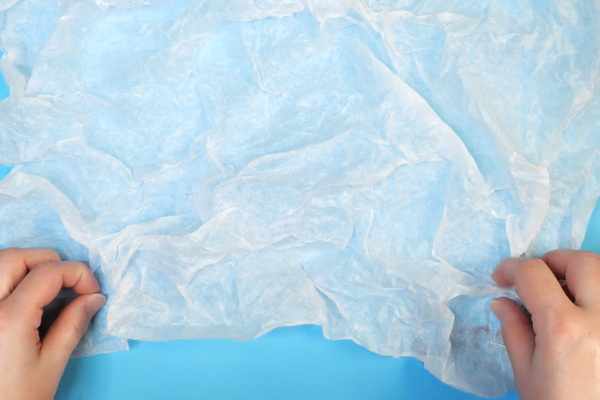
One of the easiest ways to create mixed media tissue paper is by adding permanent inks and acrylic paints to the tissue paper. I like creating crinkles and wrinkles in my tissue paper by crumpling it up and spreading it out, making sure to leave uneven and wrinkled areas.
Wrinkling the tissue paper is a personal preference. You can also lay the tissue out flat on the surface to add inks and paints. I like the effect of the wrinkles as it adds more texture and creates more variation as the paint blends.

Archival material created and made in USA. Lineco is a leading and trusted brand for archival quality art, photography, and framing supplies. 16 gm2 tissue allows for translucency and durability. Acid-free and lignin-free; PH Neutral and Non Buffered.
Types of Ink and Paint
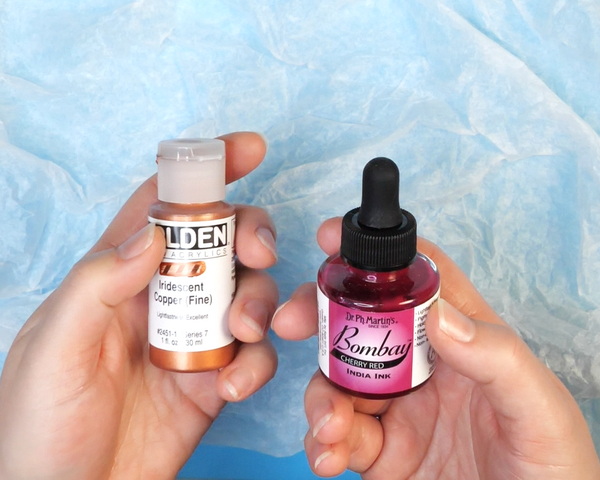
Make sure to use a permanent ink, such as India ink for this technique. My intention is to use the tissue paper for collage. If you use a dye based or water-soluble ink, the tissue will bleed when matte medium or glue is added.

Dr. Ph. Martin's Bombay India inks offer powerful color in a convenient dropper-stopper glass bottle. These highly pigmented India inks not only remain lightfast and permanent but are also totally waterproof when dry.
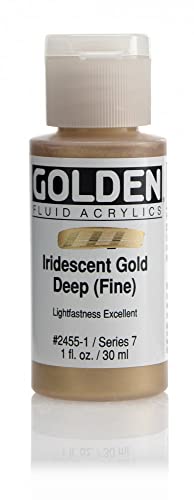
When choosing paint, both acrylic inks and fluid acrylics are ideal for this technique. If you don’t have any of these on hand, water down heavy body acrylic paint with water or glazing medium. You can also add paint with a paint brush very gently to the surface.

Adding the Ink and Paint
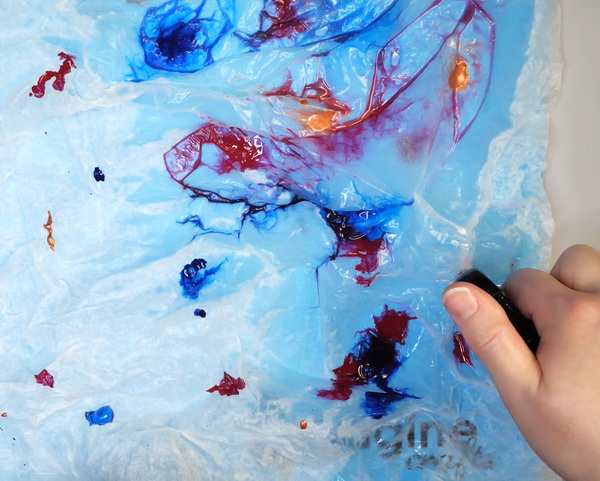
After crinkling your tissue paper and laying it out, add drops of ink and fluid acrylic paint to your surface. Use a spray bottle to spritz the surface to get the paint and ink to run. Depending on the color saturation that you like, continue to add more ink and paint to the surface until you’re happy with the result.
By adding less paint and thinning it with water, you can get a soft marbled effect with the tissue paper. If you would like vibrant mixed media tissue paper, continue to add more inks, paints and water. Set aside to air dry completely. I tend to do this technique on parchment paper or a silicone mat so that I can place it to the side to dry. Depending on how much water to use, this may take a while.
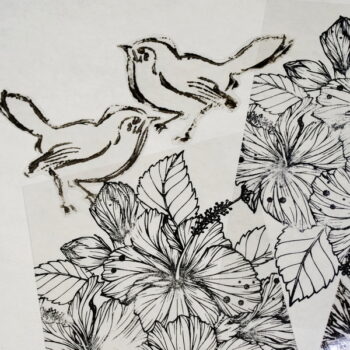
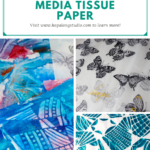
Stamping and Drawing on Tissue Paper
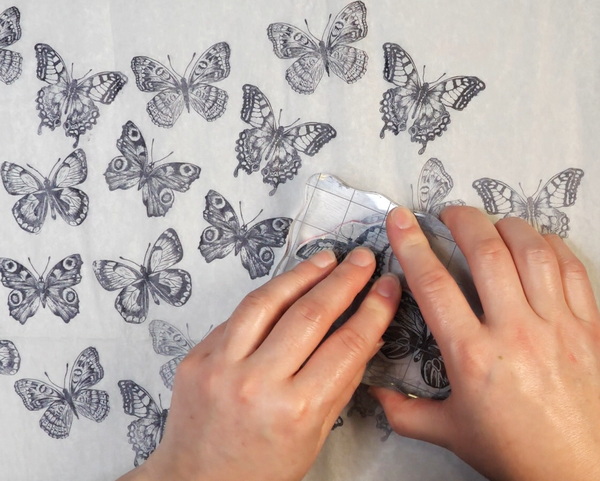
Stamping or drawing on tissue paper is an easy way to add custom designs on tissue paper. Make sure to use a permanent ink, such as an archival ink, when stamping so that the images will not bleed.
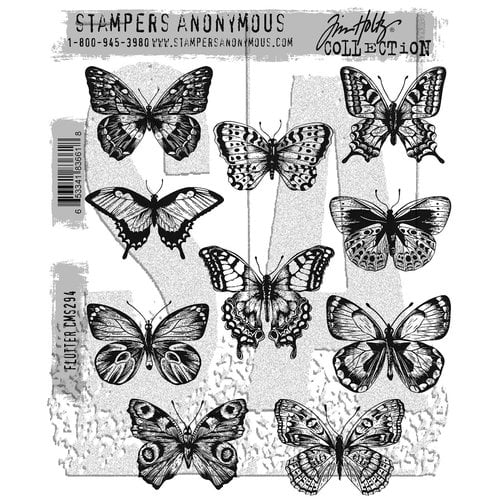
Create a beautiful altered art piece using the Flutter Cling Mounted Rubber Stamp Set designed by Tim Holtz for Stampers Anonymous. This set showcases a variety of butterfly species.
Ink your stamp and add the image onto the tissue paper. You can reink it after every stamp or stamp multiple times to create second or third values. By using multiple values this can add depth to the design. To understand more about stamping and values, please check out this article on stamping techniques.
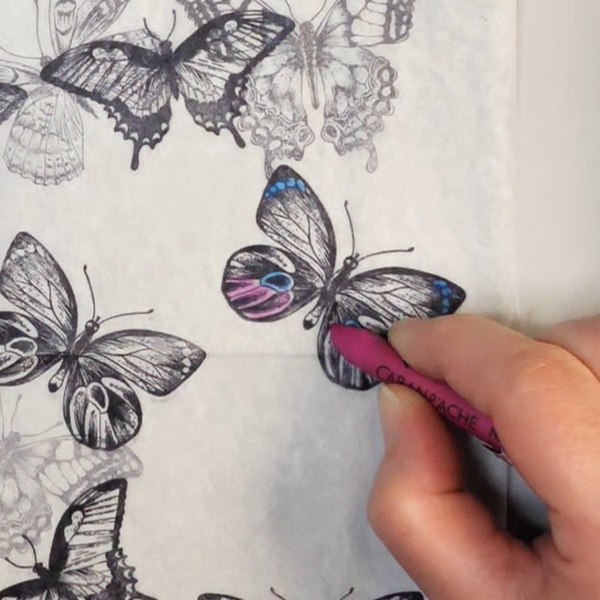
Once the stamped images are dry, you can choose to add color to the images. There is a variety of permanent pens and markers, Neocolor 1 Wax Pastels, and acrylic paint pens that will work for this step. For more opaque effects, use acrylic pens, for more translucent effects, try using markers or wax pastels.
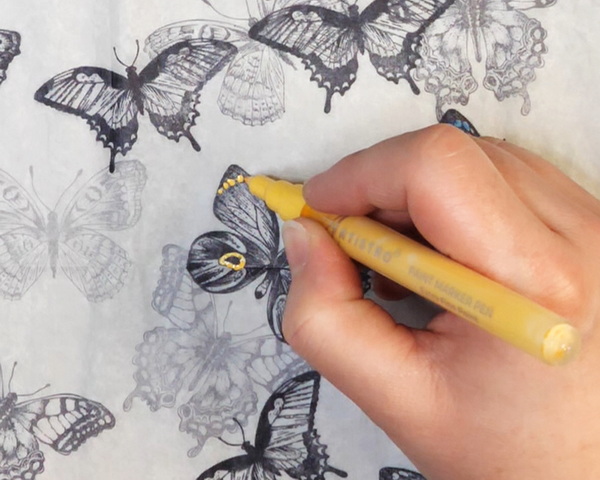
Another way to add designs to the tissue paper is to write and doodle onto the paper. You can use a variety of permanent pens, acrylic markers, wax pastels to add designs to the tissue. You can add drawings to the tissue paper or you can combine techniques by using stamps, writing and doodling to create a unique design.
My Moment of Clarity
I had a moment of clarity this week when stamping images on tissue paper. I generally stamp focal images and textures when using tissue paper. But this week I experimented with stamping words and quotes on the paper.
If you ever struggle with stamping words on your mixed media projects because the surface is uneven, stamping on tissue paper is a game changer! Instead of stamping onto the surface, stamp the words that you want to use onto the tissue paper.
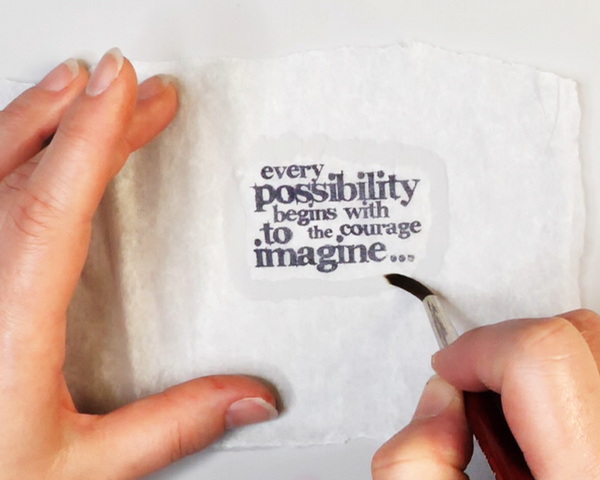
Add water gently around the image and tear the words out to create an uneven edge. Use matte medium to apply this to your project. This lets the words stand out beautifully on the background as you can’t see the white edges of the tissue paper.
Instead of struggling with words and images on your background, use tissue paper to get a perfect image every time. I plan to use this technique often in my art journal pages to get more consistent results.
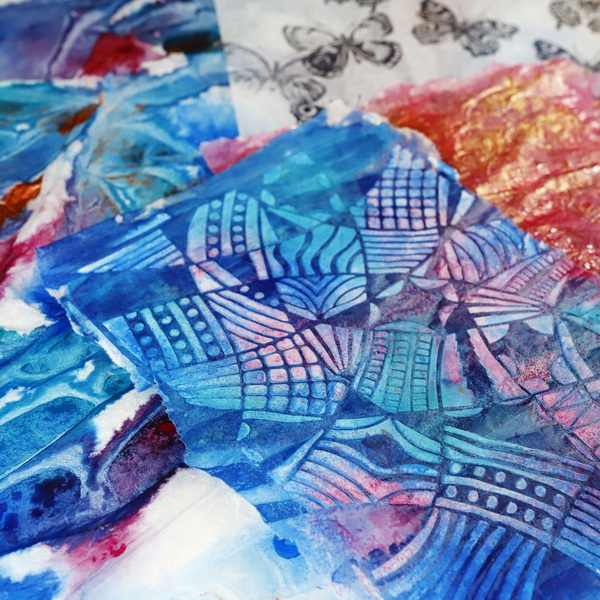
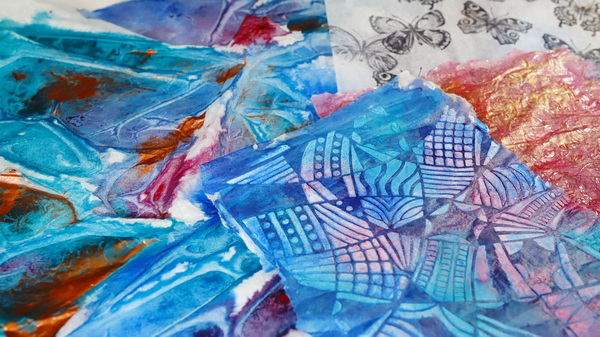
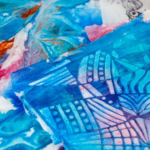
Adding Texture to Tissue Paper with Acrylic Mediums
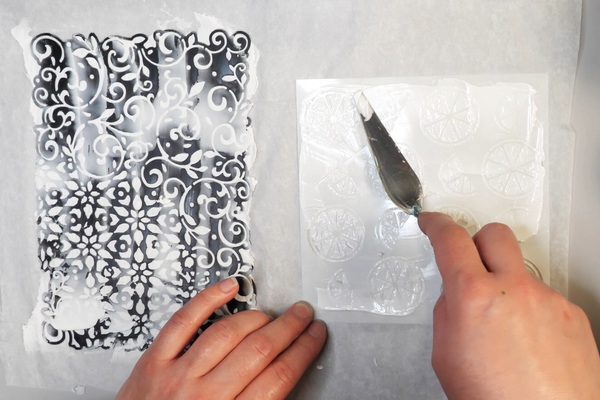
One of my favorite ways to add texture to tissue paper is with acrylic mediums and stencils. Place the stencil onto the tissue paper and add the acrylic medium using a palette knife. Remove the stencil and wash it immediately. Let the acrylic medium air dry on the tissue paper.
Which Acrylic Mediums to Use?
There are a variety of mediums that can be used for this technique. For a more subtle look, use heavy gel medium. This will create texture and shine but will be completely transparent.

Golden Extra Heavy Acrylic Gel Mediums holds peaks well and is ideal for impasto techniques. Along with the High Solid Gel, it's the thickest of the Golden gels.
Golden Acrylic Gel Mediums also act as adhesives in collage and mixed media projects that dry to form continuous films, offering excellent flexibility and resistance to chemicals, water, and ultraviolet light.
For an opaque effect, use one of the many paste mediums available. One of my personal favorites is Golden Fiber Paste as it creates beautiful texture and is easy to apply. I used modeling paste for this demo as I am trying to use up some of my older mediums.
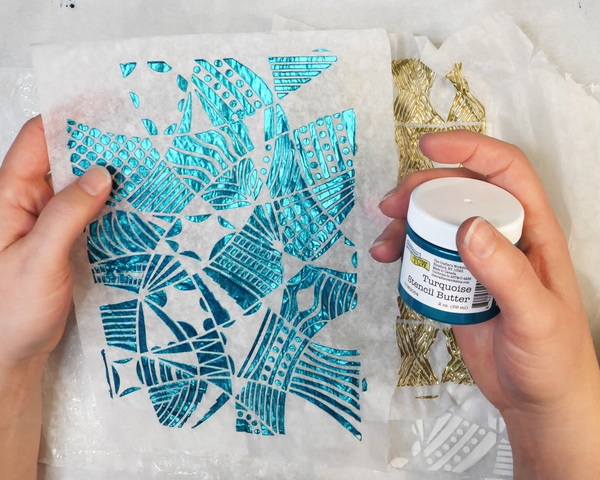
I also tried this technique with TCW Stencil Butters. These colored acrylic mediums have beautiful shine and brilliant color. It has a thicker consistency which helps get a clear image from the stencil with less bleed.
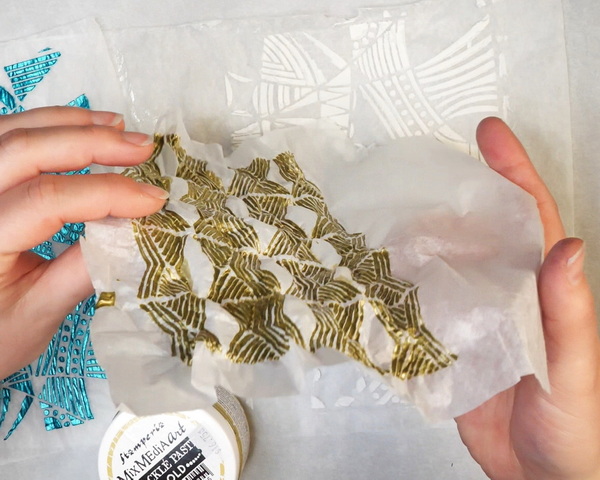
The last medium I tried was Stamperia Gold Crackle Paste. These pastes are very wet and loose, and they do not work well on tissue paper in my opinion. The tissue paper crinkled to the point of being almost unusable and the image came through a bit smeared from the loose medium.

Coloring Mediums with Paints and Inks
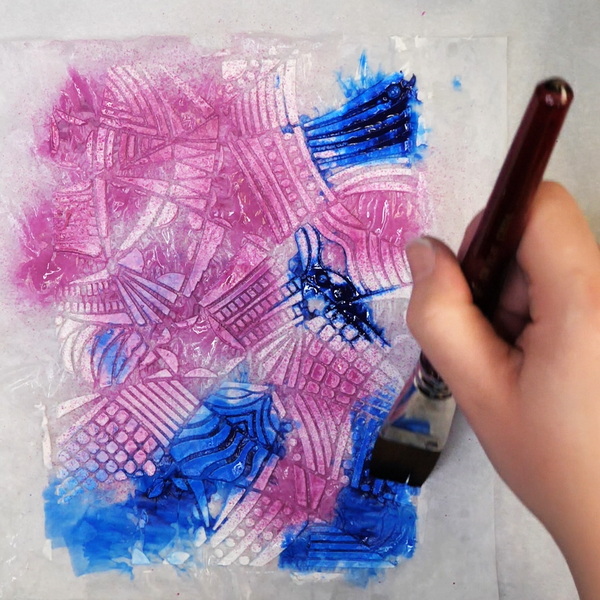
Once the mediums are dry, add color to the surfaces using paints and inks in a similar way that you did in the crinkle technique. Drop color onto the surface and spritz with water. You can also use a brush to move ink and paint around the surface.
The pastes will absorb the color while the paint will sit on top of the gel medium instead of absorbing it. This lets you get unique results depending on the medium you choose to use.
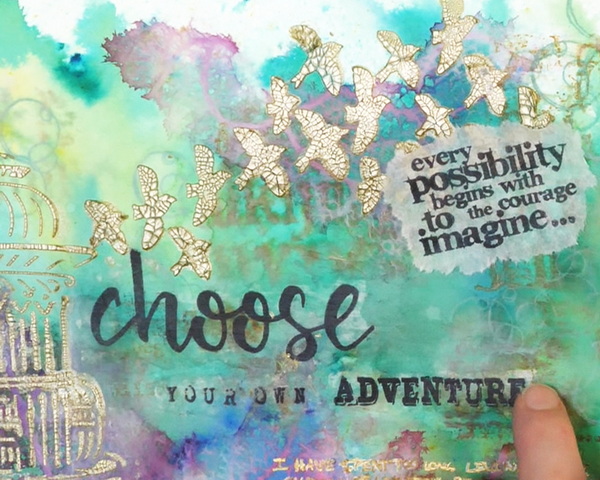
Adding Mixed Media Tissue Paper to Projects
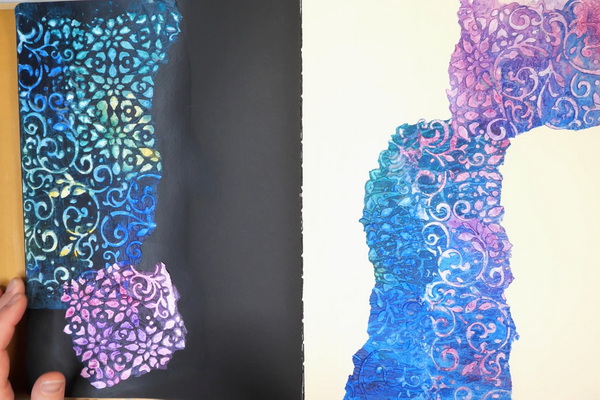
I love adding these mixed media tissue papers to my projects. Sometimes I will start with a white surface or an underpainting of acrylic and add these layers on top. The mixed media tissue paper can be cut or torn into shapes to add texture onto the page.
You can also use these papers on black or white papers to get very different effects. There are so many opportunities for personalization and creativity with this technique.
Any Questions?
I hope that you give this technique a try and I would love to hear how you use these mixed media tissue papers in your creative projects! It is a fun, easy and very forgiving technique. I would love to answer any questions you might have and hear about your experience with this technique! Leave a comment below or use the contact form to email me directly. I hope that you take some time for creative self-care this week!
Project Supply List
Archival material created and made in USA. Lineco is a leading and trusted brand for archival quality art, photography, and framing supplies. 16 gm2 tissue allows for translucency and durability. Acid-free and lignin-free; PH Neutral and Non Buffered.

HIGH FLOW ACRYLICS are an ultra-thin paint with ink-like consistency that provide incredible versatility. They can go directly from bottle to airbrush, refillable marker or dip pen and work great for drawing, staining, dripping, pouring, calligraphy and color washes.

A very strong tinting blue turquoise that reveals cool gem tones in glazing. PROFESSIONAL QUALITY colors combine the durability of acrylics with the versatility of ink, great for drawing, staining, dripping, pouring, calligraphy, color washes and spraying.

A more transparent version of our Dioxazine Purple, a single pigment color prized for its very deep bluish purple.
PROFESSIONAL QUALITY colors combine the durability of acrylics with the versatility of ink, great for drawing, staining, dripping, pouring, calligraphy, color washes and spraying.
Ideal for spraying, brushing, and staining. Excellent for fabric application. Result offers fine dispersion, high tinting strength, durability and flexibility.

Ideal for spraying, brushing, and staining. Excellent for fabric application. Result offers fine dispersion, high tinting strength, durability and flexibility

Ideal for spraying, brushing, and staining. Excellent for fabric application. Result offers fine dispersion, high tinting strength, durability and flexibility.

An opaque acrylic spray that dries to a glossy finish. Spray into Media Journals, onto Chipboard Shapes, Media Board and other porous surfaces.

Are you ready to add some extra sparkle and shine to your stenciling projects? We have got the product for you! This little jar of Turquoise Stencil Butter from The Crafter's Workshop will take your stenciling to new heights! Not only does this product shine, but it will add dimension wherever you need it!
Golden Extra Heavy Acrylic Gel Mediums holds peaks well and is ideal for impasto techniques. Along with the High Solid Gel, it's the thickest of the Golden gels.
Golden Acrylic Gel Mediums also act as adhesives in collage and mixed media projects that dry to form continuous films, offering excellent flexibility and resistance to chemicals, water, and ultraviolet light.

Dr. Ph. Martin's Bombay India inks offer powerful color in a convenient dropper-stopper glass bottle. These highly pigmented India inks not only remain lightfast and permanent but are also totally waterproof when dry.

Dr. Ph. Martin's Bombay India inks offer powerful color in a convenient dropper-stopper glass bottle. These highly pigmented India inks not only remain lightfast and permanent but are also totally waterproof when dry.
They adhere to nearly all surfaces and are non-clogging when used in pens. Inks can be diluted with water and used with brushes in traditional watercolor techniques or in dip pens, technical drawing pens, and airbrushes.
Dr. Ph. Martin's Bombay India inks offer powerful color in a convenient dropper-stopper glass bottle. These highly pigmented India inks not only remain lightfast and permanent but are also totally waterproof when dry.

Dr. Ph. Martin's Bombay India inks offer powerful color in a convenient dropper-stopper glass bottle. These highly pigmented India inks not only remain lightfast and permanent but are also totally waterproof when dry.

Dr. Ph. Martin's Bombay India inks offer powerful color in a convenient dropper-stopper glass bottle. These highly pigmented India inks not only remain lightfast and permanent but are also totally waterproof when dry.
Create a beautiful altered art piece using the Flutter Cling Mounted Rubber Stamp Set designed by Tim Holtz for Stampers Anonymous. This set showcases a variety of butterfly species.

These red rubber stamps come mounted on cling foam so you can use them with any acrylic block (sold separately). Great for using with Tim's signature distressing techniques! This package contains one 7x8.5 inch sheet of stamps.
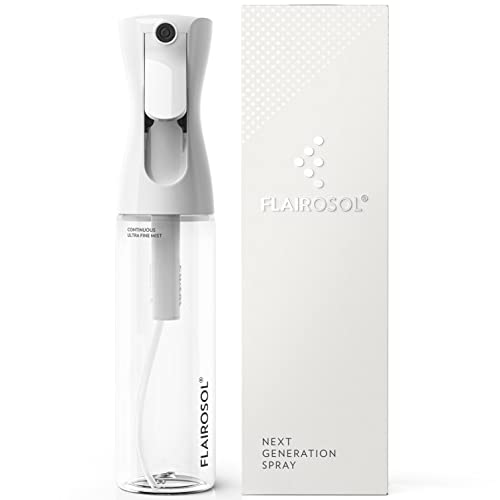
The iconic Dutch-designed Flairosol continues to set the standard in the spray industry. Elegantly designed and engineered fine mist spray bottles with robust pre-compression technology that deliver a continuous & 0.3mm ultra-fine mist lasting 1 second and multiple consecutive full trigger strokes will provide a consecutive spray

Contains one roll of Reynolds Kitchens Stay Flat Parchment Paper with SmartGrid lines, measuring 15 inches wide x 36 feet long (45 square feet total). Finally, parchment paper that doesn’t curl or roll! Just use the reinforced panel to TUCK, PRESS and PULL.

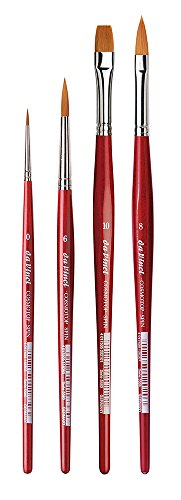
Synthetic bristles, short handle, aluminum ferrule. For use with acrylics and multi-media.

The Jet Black Archival Ink Pad by Ranger Ink is acid-free, non-toxic, water-resistant, and fade-resistant, and provides lasting results. This ink will not deteriorate paper and does not bleed when inks, paints, or markers are used over it.

Stamping block tools with grid and grip, 8mm thickness, assorted sizes.

Add vibrant, luminous color to your artwork with this 15-piece Assortment of Classic Neocolor I Artists' Pastels from Caran d'Ache. The reusable metal case comes with 15 artist grade pastels suitable for amateurs and professionals alike.

The Artistro Paint Pens for acrylic painting are made with the highest quality water-based Italian imported inks for a smooth, consistent flow and glossy, opaque finish. Our 0.7mm extra fine tipped nibs are made in Japan with love.
- Versatile brushes for all media
- Long-lasting synthetic filaments
- Lacquered brush handle
- Made by hand in Germany


3 Comments
Pingback:
Tokeloshe
Thanks for a great tutorial, I will definitely try the torn wet tissue paper technique again.
I love you style ❤️ Keep up the good work.
Nadine Milton
You’re welcome! Thanks for checking it out and giving it a try! Let me know how it goes and if you have any questions!