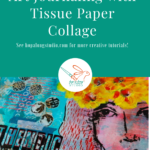
Art Journaling with Tissue Paper Collage
Tissue paper collage is a fun way to add layers and textures to your art journal pages. You can get a variety of printed tissue papers or purchase plain tissue paper to alter with inks, stamps and paints. The possibilities for tissue paper collage are endless and it’s a great way of personalizing your journal.
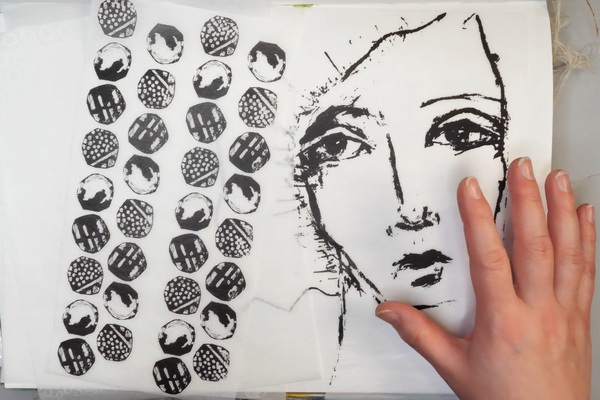
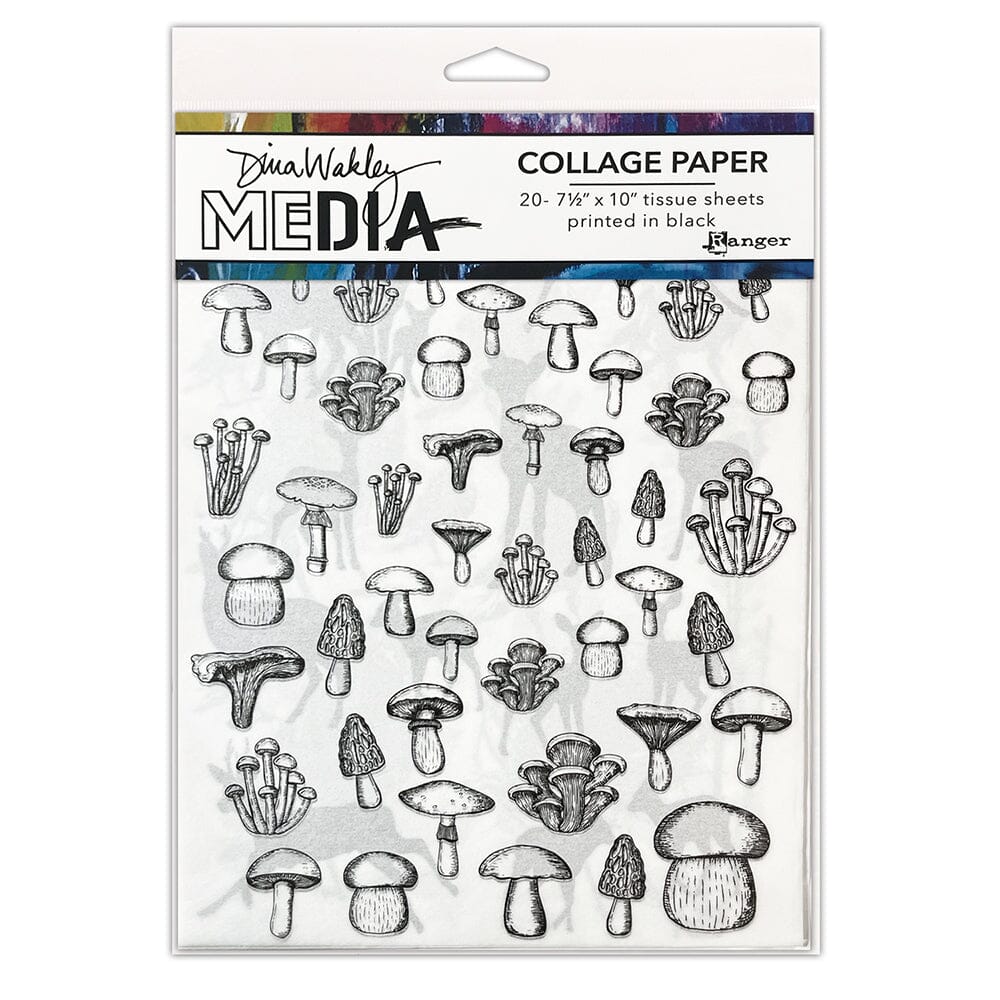
For today’s project and tutorial I am using Dina Wakley collage tissue paper. The papers are printed in both black and white which provides versatility on how you can apply them in your projects.
Hop-A-Long Studio is reader-supported. When you buy through links on our site, we may earn an affiliate commission at no cost to you. Learn more.
Why Use Tissue Paper?
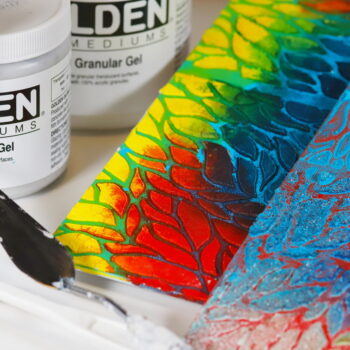
I love tissue paper collage because of the translucent quality of the medium. It can be layered beautifully on top of inks, paints and textures without eradicating the colors underneath. I also love the strength of the tissue paper. It can be altered with paint and ink before being added to the surface without it disintegrating.
Unfortunately, some of the tissue papers I used in today’s project are no longer available. Here are some other collections from Dina Wakley plus a few other brands that will work for this project.
Includes 4 sheets of 30" x 20" printed tissue that feature PaperArtsy's lovely art work. Cut apart and use large pieces or little bits on your journal pages, cards, canvases, and more.
Includes 4 sheets of 30" x 20" printed tissue that feature PaperArtsy's lovely art work. Cut apart and use large pieces or little bits on your journal pages, cards, canvases, and more.

Dina Wakley Media Collage Tissue features Dina's signature artwork printed in black. Ideal for collaging into mixed media and journal pages. Sheets measure 7.5" x 10" and include 2 each of 10 printed black designs. 20 sheets.

These rolls of collage paper was designed by Tim Holtz for the Idea-ology line. This package contains 3 rolls that are 6" wide x 6 yards long of semi-transparent paper suitable for use with collaging.
Dina Wakley Media Collage Tissue features Dina's signature artwork printed in black. Ideal for collaging into mixed media and journal pages. Sheets measure 7.5" x 10" and include 2 each of 10 printed black designs. 20 sheets.

Transform your creative projects with Collage Paper Serendipity by Tim Holtz for Idea-ology. This 30-piece set of 5" W x 6" H semi-transparent decoupage papers is perfect for adding a touch of vintage charm to your journal pages.

Dina Wakley Media Collage Paper are beautiful images printed on tissue that will be sure to inspire your creativity. The printed tissue is ideal for collaging into mixed media art and journal pages. Includes 20 Tissue Papers, 10 Printed and 10 Plain Package include 20 sheets of 7.5" x 10".
Last week I shared how to use napkins in your art journal projects. Napkins and tissue paper may seem similar, but they have different properties when using them in your journal. The napkins are more delicate than the tissue paper. Because of this they can’t be altered with inks or paint before being added to the page. To see more about how to use napkins in your projects, click here.
Finding Intention in the Art Journal Page
Today I wanted to share with you my intention behind this page. I love using my art supplies. The products and images are so inspiring! Though I find a deeper story gets expressed through the intuitive process of each page. Sometimes I don’t even know what that story is until I’m part of the way through creating the page.
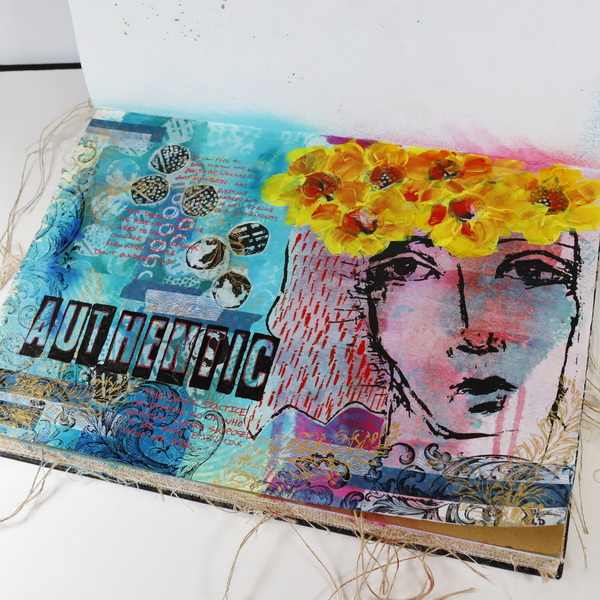
Embracing Authenticity
This page was inspired by one of my favorite books, “The Gifts of Imperfection” by Brene Brown. Every time I read it, I learn something new about myself. The word that came to my mind when working on this page was “authenticity.”
Living authentically isn’t easy. Especially in the world of social media where we often compare ourselves to other people’s highlight reels. It may seem easier to put on the armour of perfection and “everything is ok” than admitting that perhaps we are struggling. Being authentic takes courage and vulnerability, which isn’t always easy.

For over a decade, Brené Brown has found a special place in our hearts as a gifted mapmaker and a fellow traveler. And what’s now become a movement all started with The Gifts of Imperfection, which has sold more than two million copies in thirty-five different languages across the globe.
What is Authenticity?
I love this definition of authenticity from Brene Brown:
Authenticity is the daily practice of letting go of who we think we’re supposed to be and embracing who we are.
Brene Brown
I love this definition because it’s something I really want to strive for in my own life. Being comfortable being myself and not apologizing for it.
It isn’t easy being authentic, but the idea of hiding who I am feels even worse. I am learning to cultivate the courage to be imperfect and owning that imperfection. This means I need to be willing to show vulnerability to others while still having good boundaries. I’ve realized that the people who really care about you will love you for your imperfections. By being authentic we can build connection and trust in our relationships.
I have also experienced the shaming and harsh words that come from people who do not embrace authenticity. It can be so hurtful and it takes courage not to be shamed back into “armouring up” and being inauthentic. Through these hurtful experiences I have learned that it often has less to do with you than the other person. They might be unkind and discouraging to you because they are uncomfortable with your authenticity.
In this art journal page, I wanted to journal my thoughts about authenticity and how I want to work on being more authentic in my life.

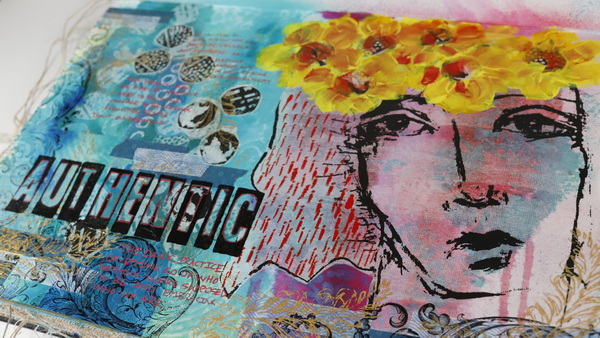
Tissue Paper Collage Art Journaling Page
Step 1: Altering Printed Tissue Paper
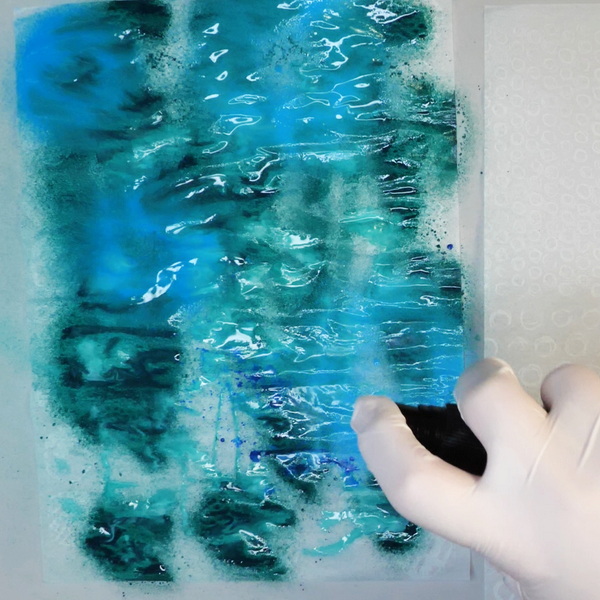
Altering printed tissue paper is a great way to color match tissue to your project. As the white tissue paper lacks contrast, I added color to the paper to create this contrast. Using a combination of spray paints and inks, spritz color onto the tissue paper surface.
You can also use acrylic paint and a brush for this step as the tissue paper is strong and won’t break. If you have too much paint on the surface, use a sheet of paper to make a print to remove the excess paint. Set aside to dry.
For more ideas on how to alter tissue paper, visit this article: Creating Mixed Media Tissue Paper.

This bottle features a glossy acrylic spray that is water-soluble when wet and permanent when dry. This is an opaque acrylic spray and dries to a glossy finish.

Brighten up your mixed media projects with the Turquoise Gloss Spray by Dina Wakley Media for Ranger Ink. This opaque acrylic spray dries to a glossy finish and it's water-soluble when wet, permanent when dry,

This bottle features a glossy acrylic spray that is water-soluble when wet and permanent when dry. This is an opaque acrylic spray and dries to a glossy finish.

Archival material created and made in USA. Lineco is a leading and trusted brand for archival quality art, photography, and framing supplies. 16 gm2 tissue allows for translucency and durability. Acid-free and lignin-free; PH Neutral and Non Buffered.

Dr. Ph. Martin's Bombay India inks offer powerful color in a convenient dropper-stopper glass bottle. These highly pigmented India inks not only remain lightfast and permanent but are also totally waterproof when dry.

Dr. Ph. Martin's Bombay India inks offer powerful color in a convenient dropper-stopper glass bottle. These highly pigmented India inks not only remain lightfast and permanent but are also totally waterproof when dry.
Step 2: Add Ink and Paint to the Art Journal Background
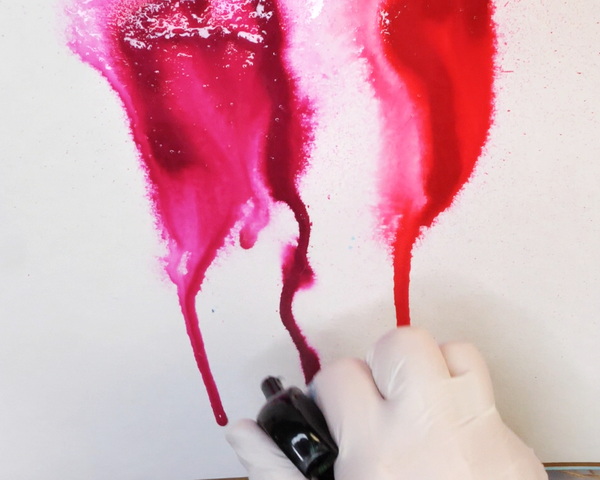
Using high flow acrylics and India inks, add drops of ink and paint to the top of your journal page. Use a spray bottle to move the paint down the page to cover the surface. For more details on this technique, visit this article 5 Art Journal Background Ideas Using Ink.

- Professional quality
- Intensely pigmented, ink-like colors
- Ready to use in refillable markers, dip pens, and airbrush
- No thinning required

HIGH FLOW ACRYLICS are an ultra-thin paint with ink-like consistency that provide incredible versatility. They can go directly from bottle to airbrush, refillable marker or dip pen and work great for drawing, staining, dripping, pouring, calligraphy and color washes.
Step 3: Add Stencil Images to Art Journal Background

While the paint and inks are still wet, use Distress Oxide sprays to add stencil images to the background. As the Distress Oxides will react with the water on the page, this will cause a color shift to the inks. I like adding stencils on top of paint drips to create more pattern and color on the page.
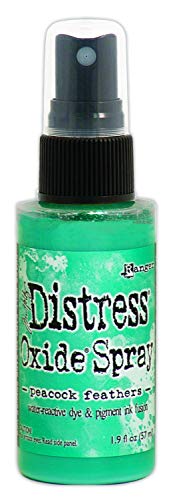
Create something you can be proud of with the Peacock Feathers Distress Oxides Spray by Tim Holtz. Included in the package is one 2 fl oz bottle of blue dye and pigment ink fusion that reacts with an oxidized effect when sprayed with water.
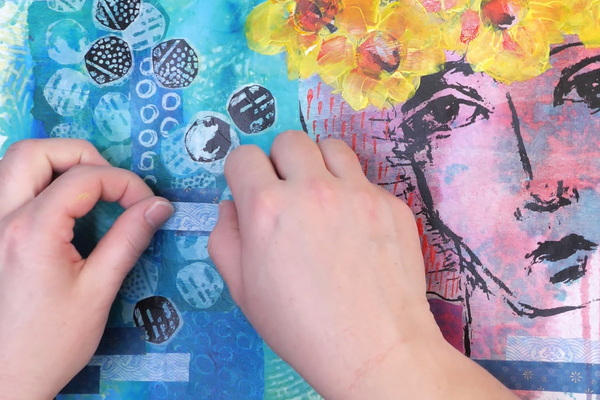
Step 4: Add Tissue Paper to Art Journal
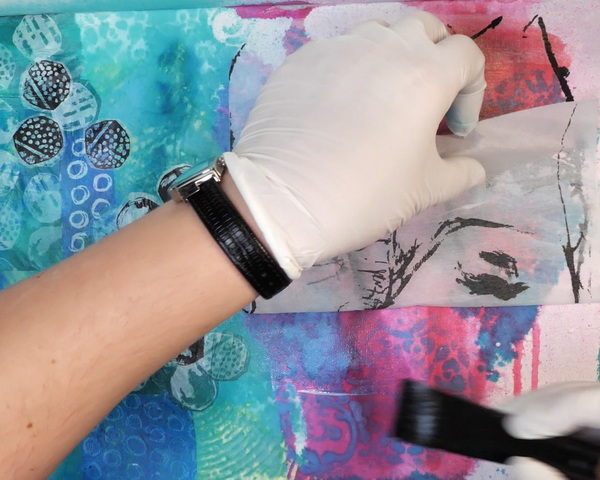
Add tissue paper onto the art journal page using Matte Medium. You can either cut your images with scissors or rip the tissue. Add matte medium to the surface with a brush, add the tissue paper and apply matte medium on top to seal it to the surface. When working with large pieces, like the face image, work in small areas.

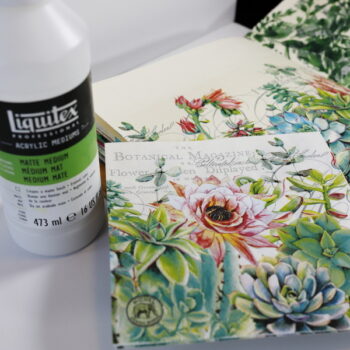
Liquitex Basics Acrylic Fluid Mediums improve the flow of acrylic paint colors, resulting in easier blending and increased transparency.
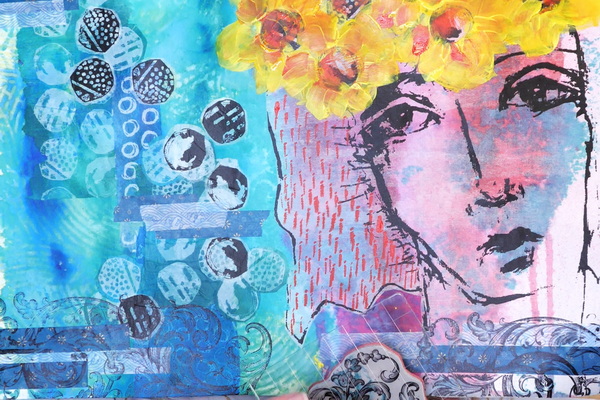
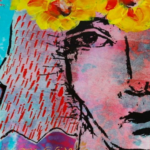
Step 5: Painting Loose Acrylic Flowers
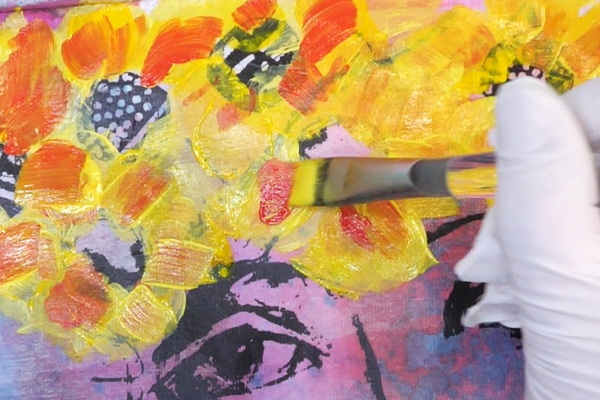
I like the girl that I added to the page, but I wanted to give her a flower crown. In the previous step I had added in tissue paper circles for the flower centers. Using a flat 1” brush and acrylic paint, paint the flower petals. For each petal, I used two strokes with the paint brush.
I started with Pebeo Primary Yellow Hue for the base color. To add brightness, try using a warmer color such as Golden Acrylics Hansa Yellow Opaque. To create margins in the flower petals, use Cadmium Red Medium acrylic paint. If you find the red too strong, add highlights to the flowers by mixing with Hansa Yellow. By adding layers with the paint this creates depth and interest to the flowers. As the girl is done in a very sketchy style, the loosely painted flowers match that style.
Finish up the flowers by adding a touch of Cadmium Red paint to the tissue flower centers.

- Professional quality
- Comparable pigment load to Golden Heavy Body Acrylics
- 100% acrylic emulsion; no fillers, dyes, or opacifiers
- Intense, permanent colors with a smooth, fluid consistency

Pebeo High Viscosity Studio Acrylic Paints are the ultimate mixed media acrylic! Vivid, deep, and richly pigmented, it offers very good lightfastness and permanence.

- A professional alternative to Liquitex Cadmium Soft Body colors
- Same tint strength, brightness, opacity, and flow of traditional cadmiums
Step 6: Add Mark Making
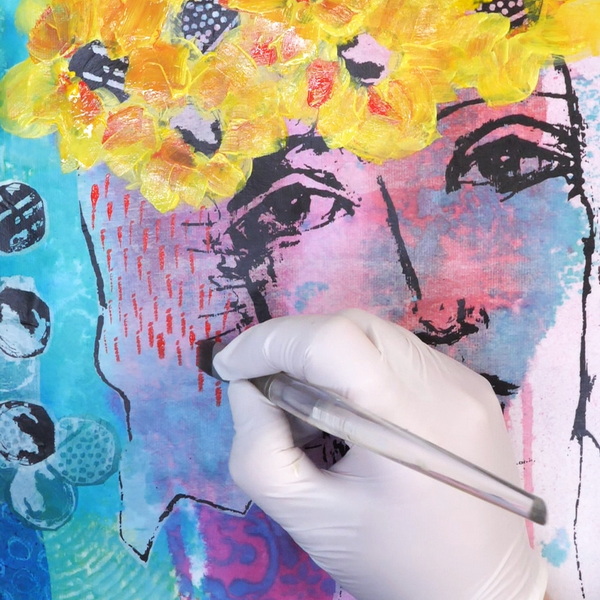
To create color and pattern to her hair, I made marks using a ½” flat paint brush with Cadmium Red paint.
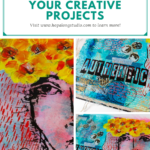
Step 7: Bringing Cohesion to the Page
I loved the look of this page, but it felt like the left and right side of the page were not cohesive. To create cohesion, I added a few different materials and patterns.
Washi tape is a fun way to add color and texture to the page. Try adding it in random places in layers.

48 rolls of marbling washi tapes set. Each roll is a different marble pattern, in a range of colors and patterns.
StazOn black ink and stamped images are a fun way to create borders and add texture and contrast to the page. Using the Stamper’s Anonymous Baroque stamp set I added images to the bottom and left-hand side of the page.

Create breathtaking DIY projects with the Baroque Cling Mounted Rubber Stamp Set designed by Tim Holtz for Stampers Anonymous. The set includes 2 cling rubber stamps that can be used with your favorite inks and an acrylic block (sold separately).

This acid-free, archival, permanent ink is solvent-based and appropriate for almost all surfaces. Designed for decorating non-porous and semi-porous surfaces.
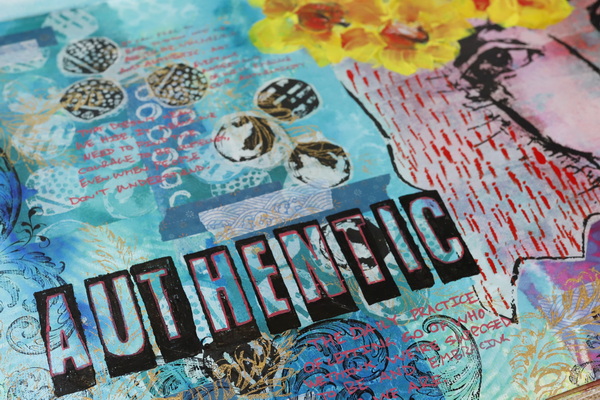
To make the black ink not just look like a border, I decided to add some highlights using gold paint and a leaf stamp. Stamp this image randomly on the page and over top of some of the tissue circles. All these elements together help bring cohesion to the page.


Golden Interference and Iridescent Heavy Body Acrylics add an exciting range of options to your creative repertoire. Used alone or mixed with other acrylic paints, they enable you to achieve color effects that are truly spectacular.
My recommended brayer for gel plate printing. 4" brayer provides even ink distribution and maximum coverage. Allows for consistent prints on a variety of surfaces.

Add a beautiful, rustic outdoor feel to your next stamping project with the Leaf Prints.
Step 8: Adding Words and Journaling
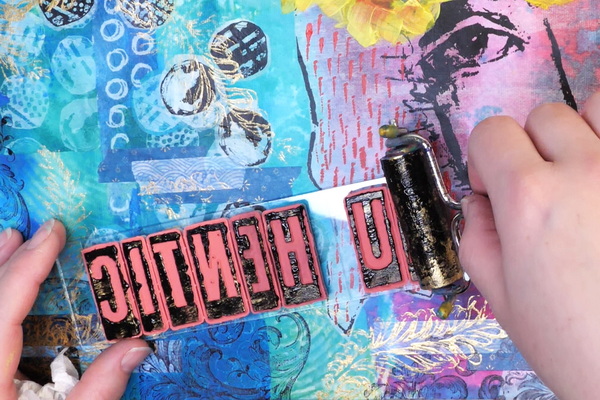
I stamped the word “authentic” on the page using Dina Wakley Block Alphas and black paint. If you want to learn more about this stamping technique, check out my article “Stamping Tips and Techniques.”
I didn’t get a great stamped image this time due to the unevenness of the surface. To correct this I used a paint pen to clean up the words and the edges. I also added outlining to the letters using a magenta paint pen.
Add your journaling onto the page using a paint pen. With the uneven mixed media surface, paint pens are the best tool for getting your journaling down on the page.

Dina Wakley from Ranger Ink has designed this Block Alphas rubber stamp set. Each letter is 1-5/8" tall and they are red rubber cling mounted stamps that adhere well to any acrylic block (sold separately).

The Artistro Paint Pens for acrylic painting are made with the highest quality water-based Italian imported inks for a smooth, consistent flow and glossy, opaque finish. Our 0.7mm extra fine tipped nibs are made in Japan with love.
Questions?
Any questions about this page or how to use printed tissue paper in your projects? I hope that this gives you some inspiration and confidence to try this technique. I would love to answer any questions that you might have. Please comment below or fill out the contact form, I would love to start a conversation with you! I hope that you take some for personal self-care this weekend and that you give this technique a try!

Project Supply List
Transform your creative projects with Collage Paper Serendipity by Tim Holtz for Idea-ology. This 30-piece set of 5" W x 6" H semi-transparent decoupage papers is perfect for adding a touch of vintage charm to your journal pages.
Dina Wakley Media Collage Paper are beautiful images printed on tissue that will be sure to inspire your creativity. The printed tissue is ideal for collaging into mixed media art and journal pages. Includes 20 Tissue Papers, 10 Printed and 10 Plain Package include 20 sheets of 7.5" x 10".
Includes 4 sheets of 30" x 20" printed tissue that feature PaperArtsy's lovely art work. Cut apart and use large pieces or little bits on your journal pages, cards, canvases, and more.
For over a decade, Brené Brown has found a special place in our hearts as a gifted mapmaker and a fellow traveler. And what’s now become a movement all started with The Gifts of Imperfection, which has sold more than two million copies in thirty-five different languages across the globe.
This bottle features a glossy acrylic spray that is water-soluble when wet and permanent when dry. This is an opaque acrylic spray and dries to a glossy finish.
This bottle features a glossy acrylic spray that is water-soluble when wet and permanent when dry. This is an opaque acrylic spray and dries to a glossy finish.
Brighten up your mixed media projects with the Turquoise Gloss Spray by Dina Wakley Media for Ranger Ink. This opaque acrylic spray dries to a glossy finish and it's water-soluble when wet, permanent when dry,

Tomoe River loose leaf paper contains 100 fine papers produced by SANZEN, a successor to the original Tomoe River FP paper by Tomoegawa, featuring the same great qualities as the original papers produced by Tomoegawa.
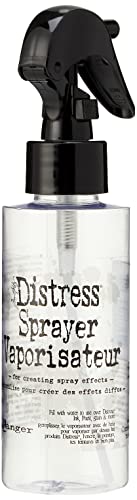
Add a distressed look to your projects with the Distress Sprayer by Tim Holtz for Ranger Ink. This distress tool is used to spray water over Distress Ink, Paint, Stain, and more to create a water-droplet look on your projects.
Pebeo High Viscosity Studio Acrylic Paints are the ultimate mixed media acrylic! Vivid, deep, and richly pigmented, it offers very good lightfastness and permanence.
Archival material created and made in USA. Lineco is a leading and trusted brand for archival quality art, photography, and framing supplies. 16 gm2 tissue allows for translucency and durability. Acid-free and lignin-free; PH Neutral and Non Buffered.
- Professional quality
- Intensely pigmented, ink-like colors
- Ready to use in refillable markers, dip pens, and airbrush
- No thinning required
HIGH FLOW ACRYLICS are an ultra-thin paint with ink-like consistency that provide incredible versatility. They can go directly from bottle to airbrush, refillable marker or dip pen and work great for drawing, staining, dripping, pouring, calligraphy and color washes.
Create something you can be proud of with the Peacock Feathers Distress Oxides Spray by Tim Holtz. Included in the package is one 2 fl oz bottle of blue dye and pigment ink fusion that reacts with an oxidized effect when sprayed with water.
Liquitex Basics Acrylic Fluid Mediums improve the flow of acrylic paint colors, resulting in easier blending and increased transparency.
- Professional quality
- Comparable pigment load to Golden Heavy Body Acrylics
- 100% acrylic emulsion; no fillers, dyes, or opacifiers
- Intense, permanent colors with a smooth, fluid consistency
- A professional alternative to Liquitex Cadmium Soft Body colors
- Same tint strength, brightness, opacity, and flow of traditional cadmiums
Golden Interference and Iridescent Heavy Body Acrylics add an exciting range of options to your creative repertoire. Used alone or mixed with other acrylic paints, they enable you to achieve color effects that are truly spectacular.
My recommended brayer for gel plate printing. 4" brayer provides even ink distribution and maximum coverage. Allows for consistent prints on a variety of surfaces.

Simmons brushes include a mixture of handmade brushes with natural bristles in an interlocking construction and synthetic brushes with larger diameter filaments to provide stronger spring and snap.
48 rolls of marbling washi tapes set. Each roll is a different marble pattern, in a range of colors and patterns.
Add a beautiful, rustic outdoor feel to your next stamping project with the Leaf Prints.
Dr. Ph. Martin's Bombay India inks offer powerful color in a convenient dropper-stopper glass bottle. These highly pigmented India inks not only remain lightfast and permanent but are also totally waterproof when dry.
Dr. Ph. Martin's Bombay India inks offer powerful color in a convenient dropper-stopper glass bottle. These highly pigmented India inks not only remain lightfast and permanent but are also totally waterproof when dry.
Create breathtaking DIY projects with the Baroque Cling Mounted Rubber Stamp Set designed by Tim Holtz for Stampers Anonymous. The set includes 2 cling rubber stamps that can be used with your favorite inks and an acrylic block (sold separately).
This acid-free, archival, permanent ink is solvent-based and appropriate for almost all surfaces. Designed for decorating non-porous and semi-porous surfaces.
Dina Wakley from Ranger Ink has designed this Block Alphas rubber stamp set. Each letter is 1-5/8" tall and they are red rubber cling mounted stamps that adhere well to any acrylic block (sold separately).
The Artistro Paint Pens for acrylic painting are made with the highest quality water-based Italian imported inks for a smooth, consistent flow and glossy, opaque finish. Our 0.7mm extra fine tipped nibs are made in Japan with love.

16 pcs background stencils for painting, each texture stencil measures 8 x 8 inch and 12 x 8 inch.
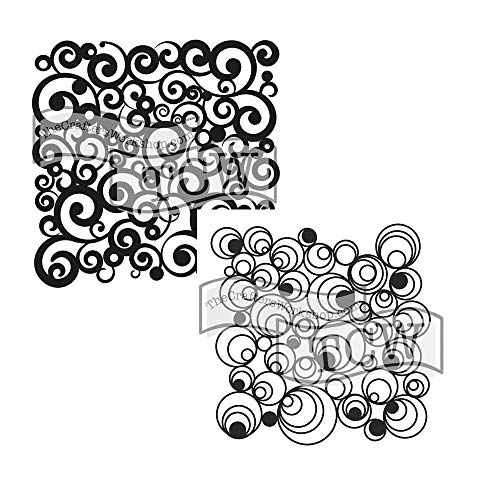
This 12" x 12" reusable Cosmic Swirl Doodling stencil is designed by Jaime Echt for The Crafter's Workshop

- Acid-free palette paper, 50 Sheets at 9" X 12"
- Smooth mixing surface against grey paper for a neutral back drop on which to view colors

Stamping block tools with grid and grip, 8mm thickness, assorted sizes.


2 Comments
Tommy McDonell
Nice.
I don’t do journals but I do a lot of paintings with collage elements.
However, I want to use faces made of women I made on a Gelli plate on a painting that clay board
And one that is made or 300# paper.
Do I use the same principles done here
Nadine Milton
Hi Tommy, the principle is similar, but you should use a heavier medium when applying to a board. For most of my collage elements for canvas and birch boards I use Gelli prints that are printed on 200 or 300 watercolor paper. I tend to use heavy gel medium to apply them to my boards to make sure that I get solid adhesion. You may want to check out this article about collage/decoupage. I talk about using it in a journal, but the same principle works on a canvas or board. https://hopalongstudio.com/how-to-decoupage-in-an-art-journal/
Let me know if that answers your question!