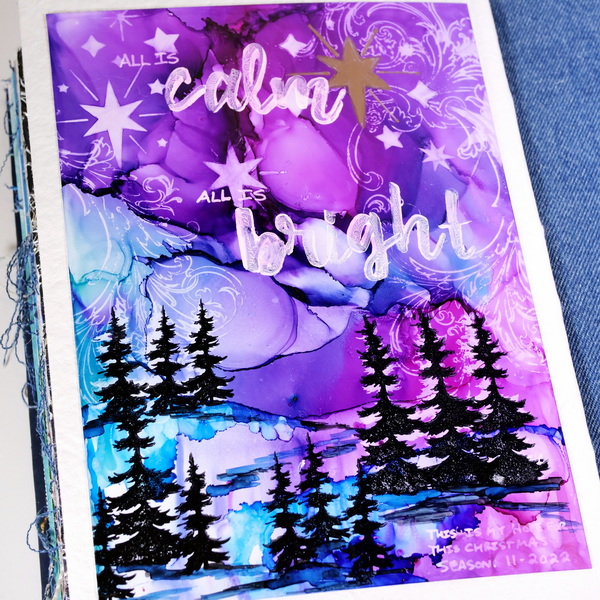
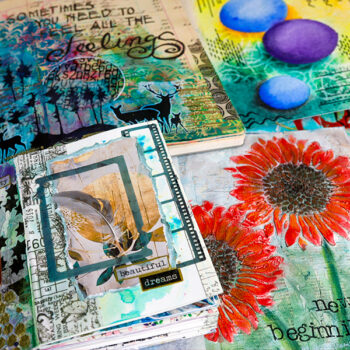
Techniques for Creating Beautiful Layers with Alcohol Inks
Alcohol inks are a beautiful and fun art medium, but how do you create layers and dimension with alcohol inks? This may seem difficult and complicated, but alcohol ink layering techniques are easy to do if you understand the right methods. I’ll be working on a page for my art journal, but these techniques can easily be adapted for card projects or tags too.
Hop-A-Long Studio is reader-supported. When you buy through links on our site, we may earn an affiliate commission at no cost to you. Learn more.
Creating Layers with Ink Blending
For this project, start by choosing your favorite alcohol ink surface. My recommended surfaces for alcohol inks are Graphix Craft Plastic, Yupo, and NARA. Even though I will be adding this project to my art journal, I like to work on the Yupo on a flat surface before mounting it into my art journal.
Basic Ink Blending Techniques
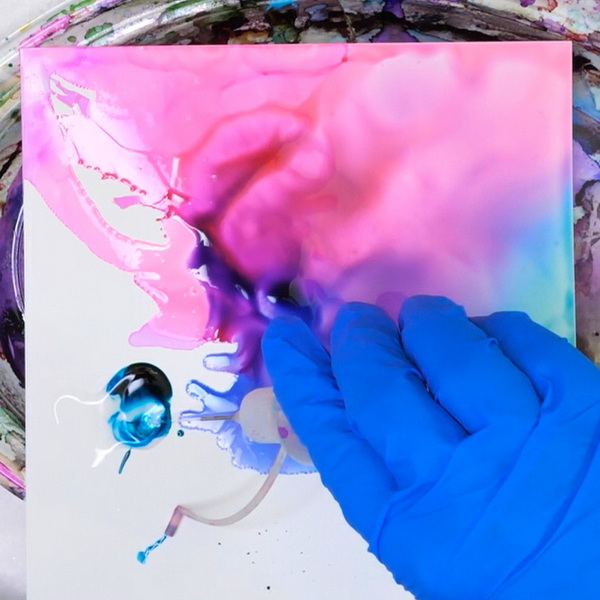
Before we can add a lot of complex layers to our project, we need to start with basic alcohol ink layering techniques. If you’re new to alcohol inks, start with adding a few drops of alcohol ink to your Yupo and a few drops of 99% isopropyl alcohol to the page. If you don’t have 99% isopropyl alcohol, Tim Holtz Blending Solution will also work in place of alcohol.
For this project, I started with Jacquard Pinata Senorita Magenta alcohol ink for my first color. Move the ink and alcohol around the page to make it spread and blend. As you move it around the page, it will start to dry. You can also use an ink blower to move and dry the ink more quickly. This creates beautiful textures as some areas of the ink will be heavier and other areas will be thinner.
While the color is still wet, add in a second color of alcohol ink. I love the combination of colors that can be created with the Jacquard Pinata Teal alcohol ink when mixed with the Senorita Magenta ink. Add a few more drops of isopropyl alcohol to help the ink move around the surface and blend. By applying more ink and using an ink blowing tool, this creates beautiful blends on your project.
Adding Additional Layers of Ink
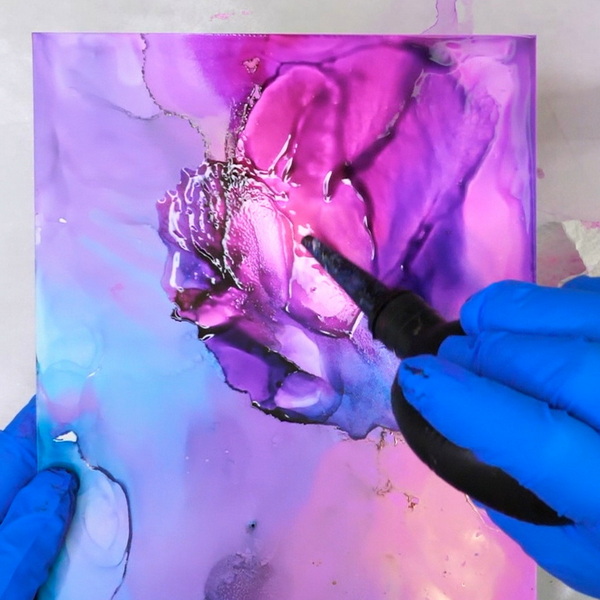
Once you’ve covered your surface with your first layer, take a look at it. If you like the result, leave it as it is. I liked my surface, but there were a few areas that I wanted to adjust. Once the first layer is dry, you can another layer of alcohol ink to your surface.
Be careful when you add your second layer. When you add more alcohol ink, this will rewet the layer below and makes the color move. It can be hard to control, so be aware of this before adding your second layer. I like creating a second layer to add bold texture and overlapping colors. It also tends to create strong edges to the areas of alcohol ink.
Usually when I start with a background I determine if I want a smooth, subtle texture or a bold, contrasting texture. I use one layer of alcohol ink for the smooth textures and two layers to get the bold, overlapping textures.
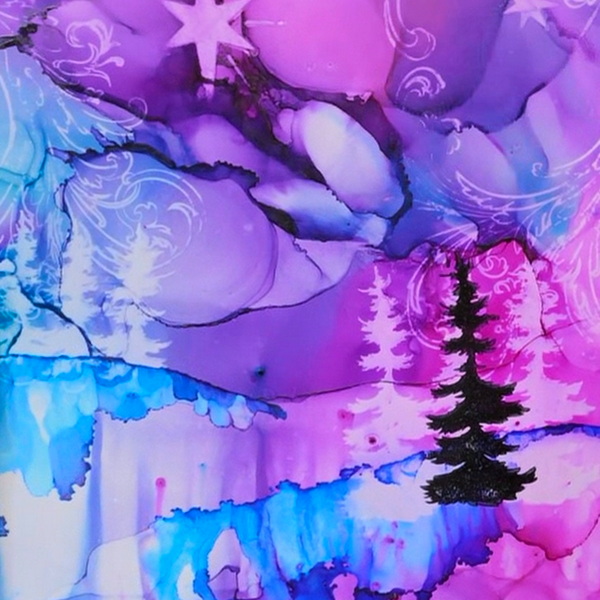
Creating Layers with a Horizon Line
When using alcohol layering techniques, you may want to create strong lines on your project. I tend to add in horizon lines for my alcohol ink landscapes.
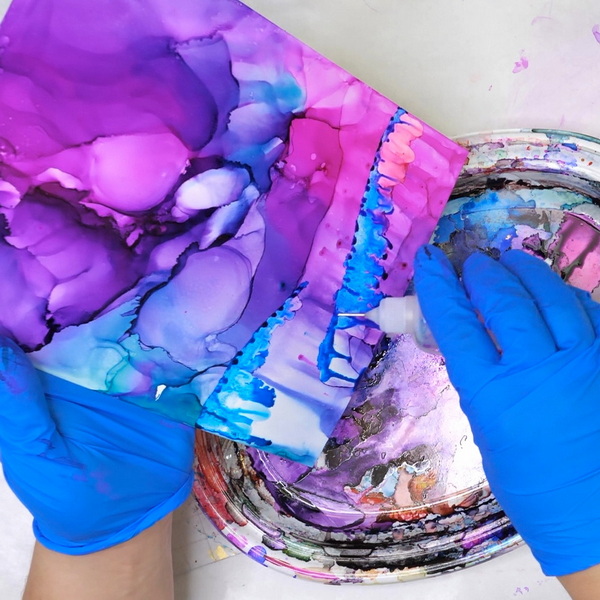
To create a horizon line, take your isopropyl alcohol that has been decanted into a needle nosed bottle and draw a horizon line across the page. You can make it a straight horizon line, or you can create valleys and hills in your landscape. This will lighten the alcohol ink and will cause it to drip down the page. I tend to tilt my page and catch the ink drips with a paper towel.
You can leave your horizon as it is, or you can add color to create a vibrant horizon line. For this art journal page, I used Jacquard Pinata Baja Blue to create contrast in my horizon. If you find that the alcohol ink isn’t flowing as much as you’d like, add a bit of isopropyl alcohol to get it blending and flowing.
Subtractive Layers Using Isopropyl Alcohol
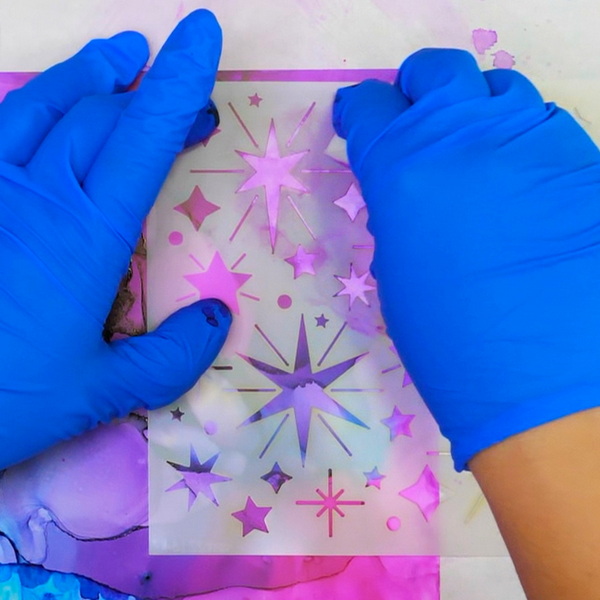
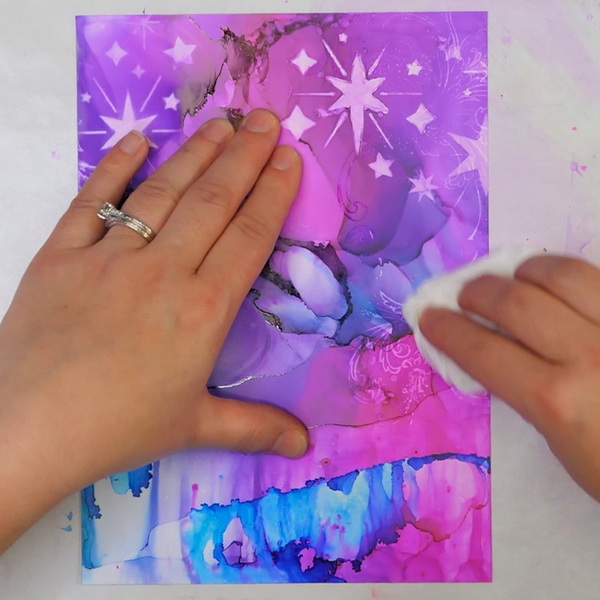
When using alcohol ink layering techniques in our projects, we often think about adding layers. But removing layers is a great way to create dimension in a project. Try using a stencil and a little bit of alcohol on a sponge to remove color from your background.
For this art journaling page, I wanted stars in the sky. Instead of adding layers to create the stars, by gently dabbing and rubbing the alcohol through a stencil, I was able to gently remove alcohol ink to create the night sky effect. The key to this technique is only adding a little bit of alcohol at one time and working slowly area by area. Too much alcohol applied through the stencil will seep under the stencil and instead of creating beautiful contrasting shapes, you’ll end up with blobs of lightened color.
Subtractive Layers Using Alcohol Lift Ink
I like using alcohol lift ink with rubber stamps to create subtractive layers to my backgrounds. One of my favorite stamp sets for creating background texture is the Stamper’s Anonymous Fabulous Flourishes.
How to Use Alcohol Lift Ink
If you’ve never used alcohol lift ink before, it can be applied like any other conventional ink to a stamp. Add the lift ink to the stamp and stamp it onto your surface. As the lift ink is clear, it will be hard to see on the surface. Give the lift ink a minute or so to set. You don’t want the ink to completely dry, but if you try to remove it right away it will smear your image.
Before removing the ink, take a piece of toilet paper (not paper towel) and press it into the surface. This will remove any extra alcohol lift ink that is sitting on the surface. Gently rub with the alcohol ink surface with the toilet paper and your image will be revealed. I love this technique because of the detail you can get from the image and how the subtractive techniques create beautiful layers on your project.
Creating Drop Shadows Using Alcohol Lift Ink
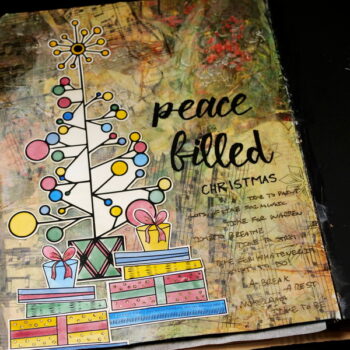
Before moving on to adding layers to the alcohol ink surface, I used alcohol lift ink to add trees to my horizon line using Stamper’s Anonymous Tree Line stamp set. This didn’t create a very strong image, but I wanted to lighten and create some definition to the surface at the treeline.
Adding Stamped Layers to Alcohol Ink
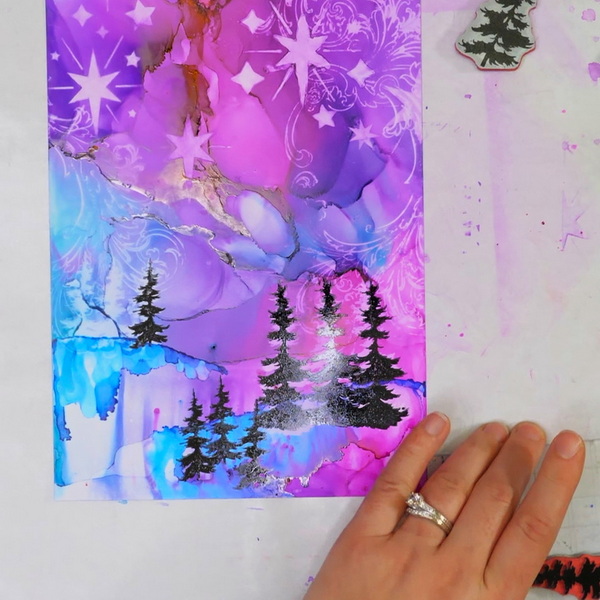
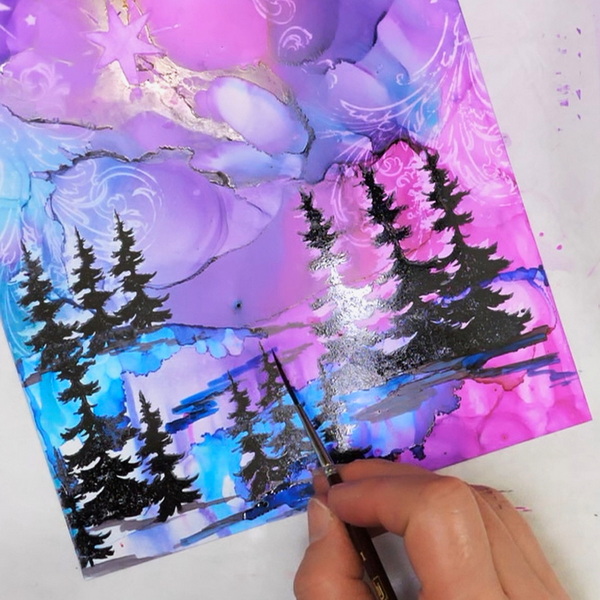
An easy alcohol ink layering technique is to use stamps and black StazOn ink to add images. I like using Jet Black StazOn as it will stamp on top of both the colored and metallic alcohol inks. This is because it is a solvent-based ink.
I also like using archival ink, which is an oil-based ink, but the metallic areas of the project will resist the ink. Depending on the look you are trying to achieve, choose the ink that works best for you.
Use the Stamper’s Anonymous Treeline stamp set to stamp groups of trees onto the horizon line and the foreground area of your project. In the treeline areas where I used alcohol lift ink, I used the same stamps to stamp the black trees. By offsetting the stamp slightly this creates a drop shadow effect to the edge of the images. This is another way to create depth and dimension to the scene.
Painting with Alcohol Inks
One problem with using stamped images is that you’ll need to ground them onto your project. They may feel like they’re floating in space, which can easily be fixed by using a paintbrush and alcohol ink.
Using a combination of Tim Holtz Pitch Black Alcohol Ink and Pinata Sapphire Alcohol Ink and a liner brush, paint shadows and lines around the base of the trees. Not only does this ground the trees but creates more variation in the scene. It gives a sense of perspective on what is closer and what is further away.
Stamping with Acrylic Paint on Alcohol Inks
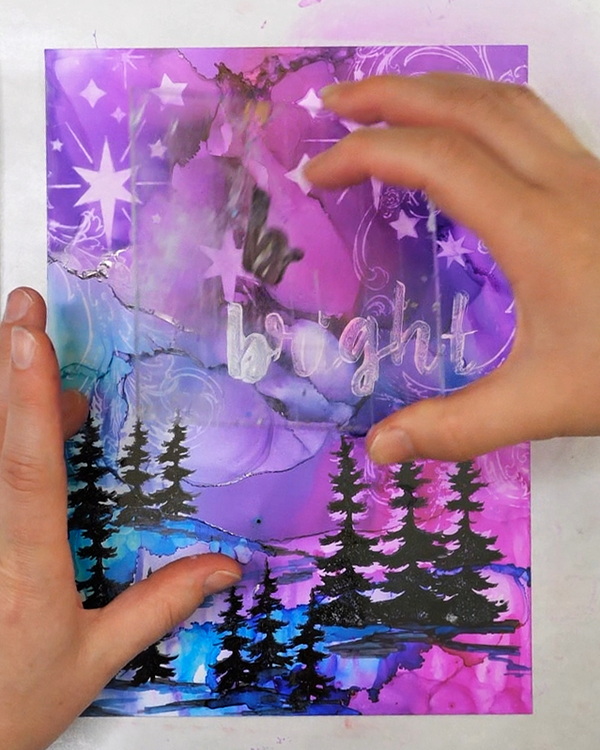
To finish up this project, add in your journaling. As I wanted a bold title to this page, I used script letter stamps and Amsterdam Titanium White acrylic paint.
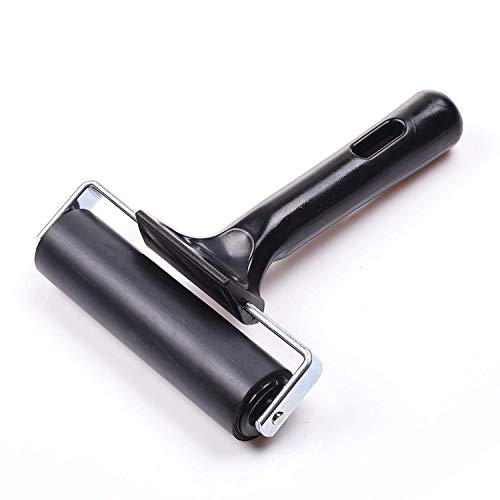
To get even stamping with paint, add acrylic paint to a palette and roll it evenly onto a brayer. Brayer the white paint onto the stamp and stamp it onto your project. Be careful when stamping as the surface tension between the slippery Yupo and the stamp may cause it to slip a little. If you’re gentle and press down evenly, you should get a good image.
If you find that you do end up with some uneven areas on your lettering, let it dry. Add in Posca White acrylic paint pen to any uneven edges to correct stamping mistakes.
Be aware that as the paint dries, some of the alcohol ink color will seep into the paint. This is the nature of alcohol inks. I have yet to find an acrylic paint or a paint pen where the white paint stays a true white color.
Adding Journaling
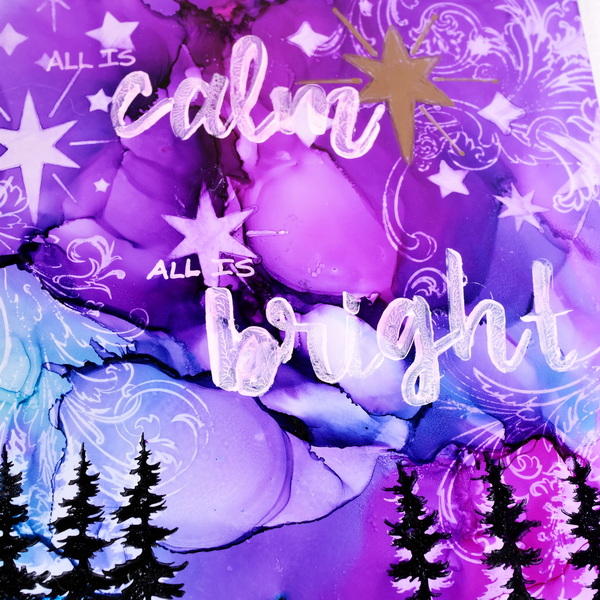
When I was creating this page, I was thinking of the Christmas carol Silent Night. I love the opening lines:
Silent Night, Holy Night
All is Calm, All is Bright
I’m not sure what your Christmas experience is this year, but I feel like it’s been a very busy time of year. I’ve found that my schedule has really picked up the closer to the end of the year, especially with teaching classes in-person and online. I know that this the same with many of us. There are more events, more parties, and more reasons to get together. It can be great, but the busyness can feel very overwhelming.
I was thinking about this song. About the idea of a silent and calm night, which feels like such a contrast to many of our own Christmas experiences. I asked myself this question:
What do I want from this Christmas and what might I change so I can enjoy my Christmas?
This is a question that both me and my husband have discussed together. We’ve come up with a list of things that we do and do not want to do over the holidays. This doesn’t mean that we don’t see people or spend time with the people that we love. We’re just choosing to take it at a slower pace. Sometimes we can be bouncing from one event to another without being present in the moment and enjoying the experience.
The challenge I have made for myself this year is how am I going to have a calm Christmas? What am I going to do to be present in the moment, to enjoy time with my friends and family during this holiday season?
My journaling in this page includes my intention for the holiday. I love to add in these intentions to my art journal. Not because I always do them perfectly. But by creating in my journal, writing down my intention, this brings it to mind and helps me work towards finding more balance in my life. The beauty of the art journal is that the artistic process reminds me of the important things. It is a record of the growth and thoughts I have throughout my life.
What’s Your Intention?
What’s your intention for this holiday season? Is there anything that you would like to have more or less of this Christmas? I’d love to hear your thoughts on these questions.
I hope that you’ve enjoyed these alcohol ink layering techniques and that you’ll give the techniques and this art journal project a try. I’d love to answer any questions that you may have about these techniques, just leave a comment below!
Project Supply List
Jacquard Pinata Colors – Teal, 0.5 oz bottle
from: Blick Art Materials

Jacquard Pinata Colors – Senorita Magenta, 0.5 oz bottle
from: Blick Art Materials

Jacquard Pinata Colors – Baja Blue, 0.5 oz bottle
from: Blick Art Materials

Jacquard Pinata Colors – Sapphire Blue, 0.5 oz bottle
from: Blick Art Materials

Ranger Ink – Tim Holtz – Alcohol Inks – Pitch Black – 2 Oz
from: Scrapbook.com


For alcohol ink projects, 99% isopropyl alcohol will give you the best results every time!
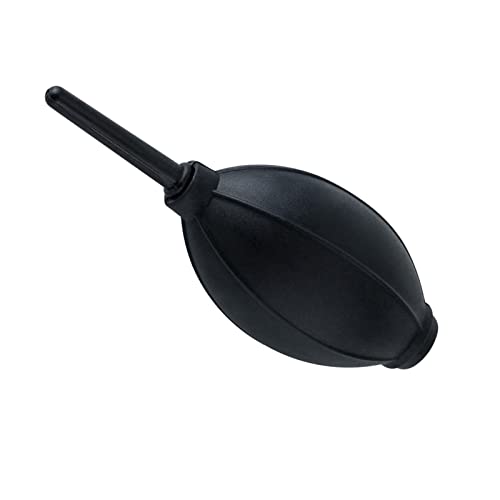
Our dust-free air blower is perfect for cleaning. The silicone air bag is soft, comfortable to your skin and for holding.


Makeup applicators are great for blending Pan Pastels, applying paint through stencils and many other mixed media techniques.


Great for using with Tim's signature distressing techniques! These red rubber stamps come mounted on cling foam so you can use them with any acrylic block (sold separately).

Amsterdam – Titanium White, 120 ml tube
from: Blick Art Materials

The Ultra Fine to Fine Set of 3 from POSCA. This set includes the white PC-1MR, PC-1M & PC-3M.

Rigger brush is also known as a liner or script brush. This brush set includes 6 different sizes: #000 #00 #0 #1 #2 #3.


My favorite paper towel to use in my art space, it's durable and strong.


4 Comments
Jamie
Try sealing with a spray then adding the Posca pen embellishments.
Nadine Milton
That’s a great idea, thanks for sharing!
Sonia Payne
I can not tell you how wondering your videos are! You have helped and inspired to so much. I need this for mind therapy. May God bless you and yours! S.
Nadine Milton
Thank you for your lovely comment! I’m so glad that you feel inspired and that my website has been helpful to you- it makes my heart so happy! Art journaling and art is my happy place and my place of rest and healing. I work out so much of the things going through my mind when I create. Thanks for taking the time to comment and for kindness!