How to Collage with Dried Leaves in Your Journal
Have you ever tried collage with dried leaves in your art journal? Dried leaves can be a hard medium to use because they can crack and disintegrate in your project. But by using a few simple techniques, you can preserve your leaves and create a beautiful, layered autumn art journal project.
Hop-A-Long Studio is reader-supported. When you buy through links on our site, we may earn an affiliate commission at no cost to you. Learn more.
How to Prevent Dried Leaves from Falling Apart
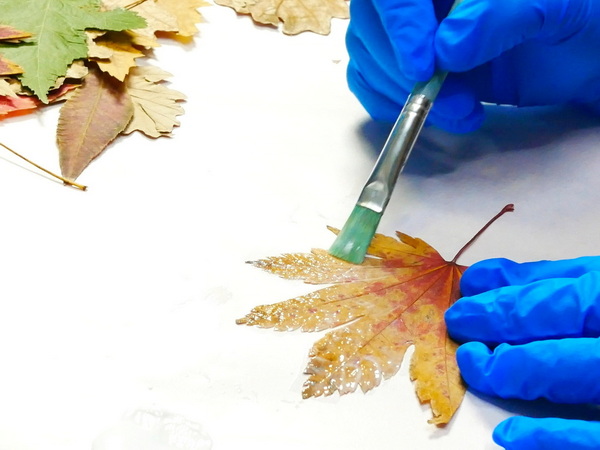
The hardest thing about using dried leaves in your art journal is preventing them from falling apart. Especially with collage, if you use a thick gel medium to add dried leaves to the page, you can rip, tear, or crumble the leaf.
Last week I went into detail about how to dry and protect your leaves for using them in the art journal. Before adding dried leaves to any project, dry and coat them with a layer of matte medium to make them strong and pliable. For more details on how to do this, check out this article: How to Press and Preserve Fall Leaves.
Creates a matte, non-reflecting finish when added to acrylic colors. Lightweight, non-toxic; Opaque when wet, translucent when dry.
Art Journal Collage with Dried Leaves
Protecting dried leaves is a simple process, but I also wanted to show you how you can incorporate them with collage into your journal projects. Leaves are wonderful because of the variety of color, shapes, and textures. All you need to do is pick them off the ground once they fall!
The Importance of Gratitude
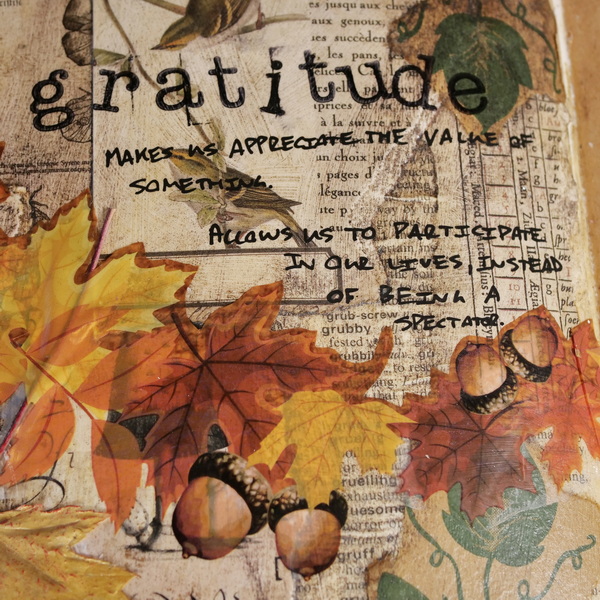
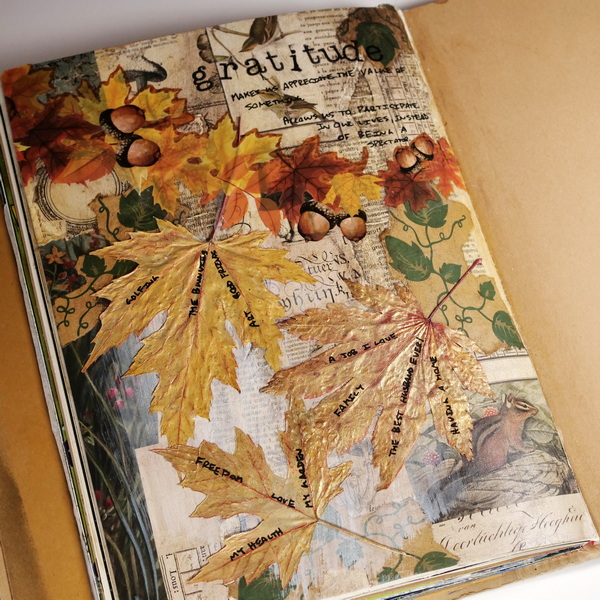
Thanksgiving in Canada was a few weeks ago and I love to go through the exercise of writing down and remembering my blessings. There are so many things to be grateful for! On Thanksgiving weekend, I went for a drive outside the city. The leaves were changing and the sun was shining. Using leaves on a page for gratitude seemed to be the perfect focal image!
Gratitude may not always come easy. There’s lots of things that aren’t going right in our lives and in the world around us. But I feel like we always have a choice about what we focus on. We can focus on what we don’t have or focus on the many blessings that we do have in our lives. I’ve been reading Atlas of the Heart by Brene Brown and she has some very profound things to say about gratitude.
In Atlas of the Heart, Brown takes us on a journey through eighty-seven of the emotions and experiences that define what it means to be human.
She quoted Robert Emmons, a leading scientific expert on gratitude.
Gratitude makes us appreciate the value of something, and when we appreciate the value of something, we extract more benefits from it; we’re less likely to take it for granted.
Robert Emmons
In effect, I think gratitude allows us to participate more in life. We notice the positives more, and that magnifies the pleasures you get from life. Instead of adapting to goodness, we celebrate goodness. We spend so much time watching things – movies, computer screens, sports – but with gratitude we become greater participants in our lives as opposed to spectators.
I find this so profound. I love the idea that we are participating in life more when we choose gratitude. It allows us to celebrate the good in our lives. For myself, the more that I focus on what I am grateful for, the more content I am with my life and with what I have. This page is an opportunity for me to write down the things that I am grateful for.
What are you grateful for? What resonates from you from this excerpt? I would love to hear your thoughts and see how you explore the topic of gratitude in your life.
Choosing Collage Materials
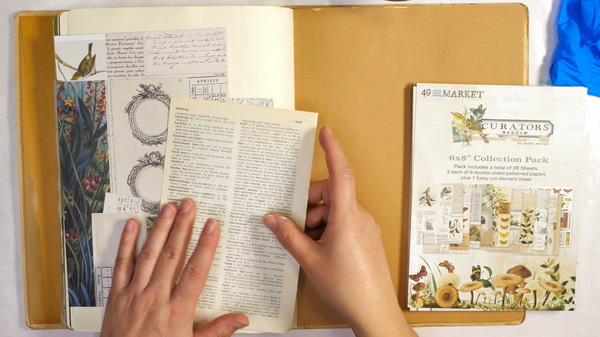
The collage materials that you choose will dictate the look and feel of your art journal page. For this collage project, I’m using scrapbooking paper with other papers that I found around my home.
I’m using the 49 and Market Curators Meadow collection to use on this project. This paper is no longer available, but 49 and Market’s Peach collection or Nostalgic Memories collection would work just as well.
The combination of images on these papers is perfect for collage. There are birds, cursive writing, and a variety of images layered on each page. These papers are collages of images. The neutral colors of this paper are really great and there is a large variety of images to work with.
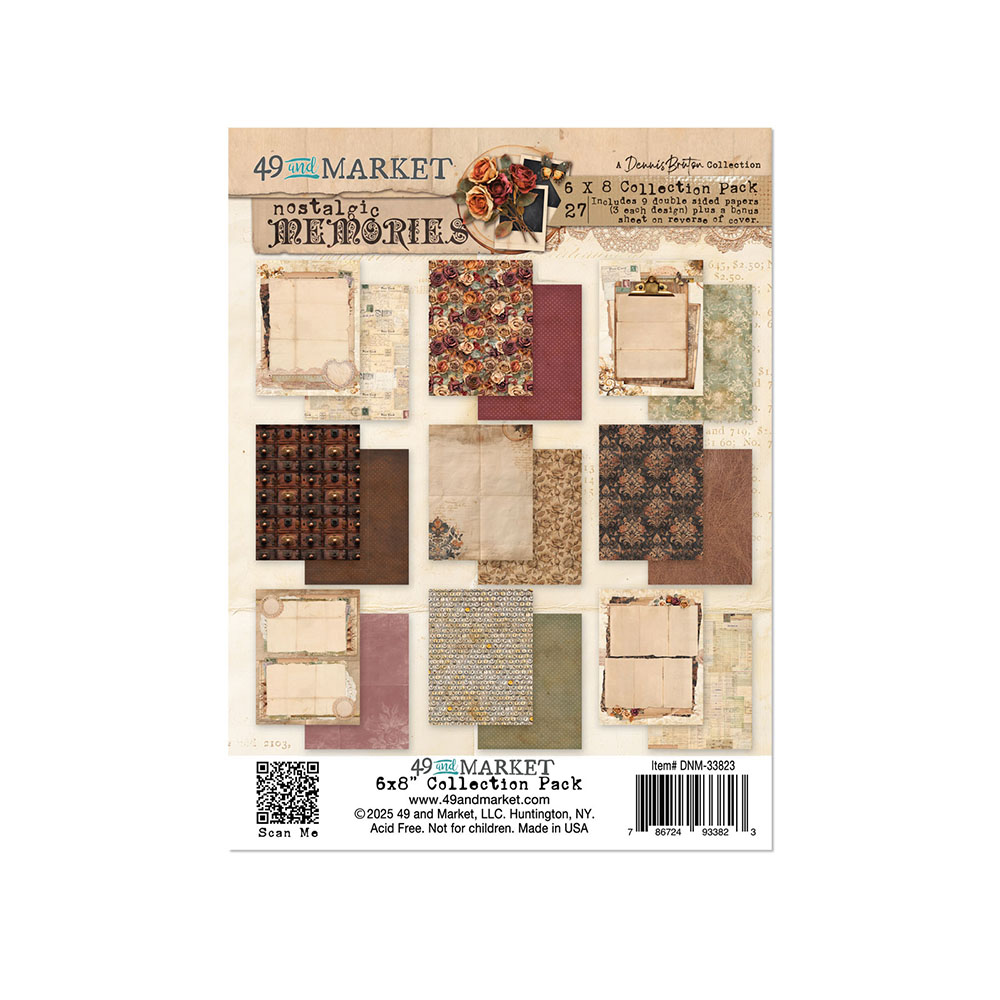
Capture your precious moments with the exquisite Nostalgic Memories 6x8 Collection Paper Pack designed by Dennis Bruton for 49 and Market.
This 6" x 8" Collection Paper Pack is part of the Color Swatch Peach Collection designed by Katie Pertiet for 49 and Market.
The found papers that I’m using are from a set of flowers that I was gifted from my husband. The flower plastic and paper wrap are fall themed. I held onto this paper knowing that it would work so well with this layout. I also found some old dictionary paper for use in my collage.
Creating a Collage Background
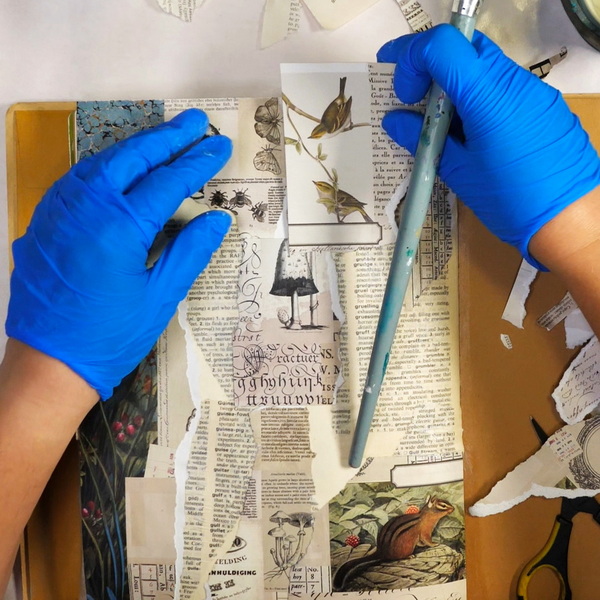
To create a collage background, use your favorite gel medium. I like using Golden Regular Gel for most of my collage projects. It’s generally heavy enough to seal the paper that I want to use. I used semi-gloss gel for this project.
Regular Gel Semi-Gloss is a translucent medium with a consistency similar to Heavy Body paints. Use for extending colors, altering sheen, increasing translucency and adhering collage elements.
For most art journaling try using matte or semi-gloss so that the papers in your journal doesn’t stick together. The gel gloss can sometimes make your pages stick together, even after it has fully dried.
Start by tearing your paper into pieces that you can add randomly to your journal page. Add gel medium with a brush to your journal page and add it to the back of the torn paper. Press the paper down on the surface. Add another layer of gel medium on top of the torn paper.
By adding the gel medium to the journal and the torn paper, this way you will get a good adhesion. It also prevents bubbles and ripples in your piece.
Continue to layer your pieces of paper until you’re happy with the overall design. It will be random and may not feel very cohesive at this point, but don’t worry, it’s just the first layer!
Adding Acrylic Washes
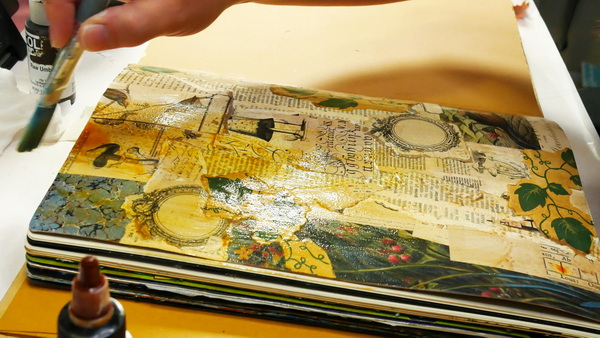
To create cohesion to the art journal page, add a wash using your favorite color of paint. For this fall project, I wanted to use muted browns to give it a fall feel.
Start by adding a few drops of fluid paint or high flow acrylic to your palette and mix in a generous amount of water. As these acrylics are highly pigmented, only a few drops are needed to make a beautiful, intense wash.
Started with a layer of Raw Umber and Burnt Sienna and cover the entire page with a soft wash. If you find it too grey and wanted a brighter tone to the page, try using a layer of Quinacridone Azo Gold wash.
- Professional quality
- Comparable pigment load to Golden Heavy Body Acrylics
- 100% acrylic emulsion; no fillers, dyes, or opacifiers
- Professional quality
- Comparable pigment load to Golden Heavy Body Acrylics
- 100% acrylic emulsion; no fillers, dyes, or opacifiers
At any point if you feel like you’ve added in too much paint to the surface, dab some of the paint away with a baby wipe or paper towel. Let the acrylic paint fully dry.
Adding Isolation Layers
To create more dimension to your page, add a layer of matte or gel medium across the entire project. This is called an isolation layer. This seals in the wash below and creates subtle dimension to the piece. Now anything that you add on top will not pull up the wash that you added. It is sealed in by the gel medium.
Adding Micaceous Iron Oxide
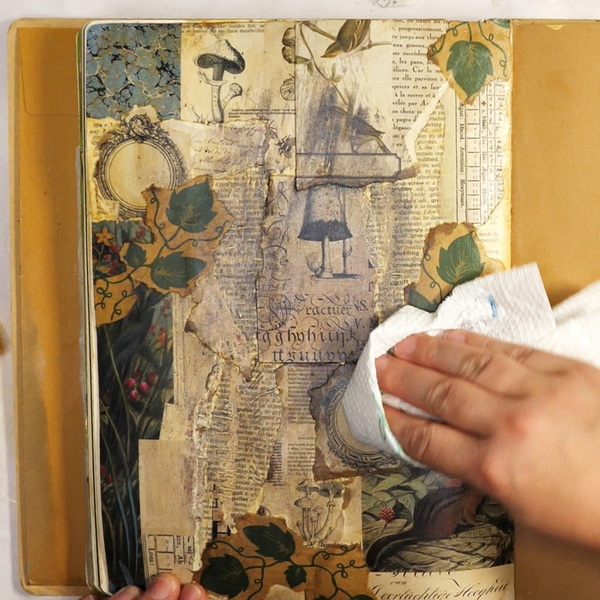
If you are looking from some gritty sparkle to add to your journal page, try Golden Micaceous Iron Oxide in your project. This fluid paint has a dark tint and a lot of mica in the paint mix.
Add Micaceous Iron Oxide to your journal surface. Use a paper towel to rub it into the cracks and crevices of your collage page. Any rough brush marks, edges or texture will now be shown. If you find the layer of Iron Oxide too thick or dark, spray your surface with a spray bottle. This will help you thin the color and get a more subtle effect.
Ideal for spraying, brushing, and staining. Excellent for fabric application. Result offers fine dispersion, high tinting strength, durability and flexibility
Make sure to rub the Micaceous Iron Oxide in instead of using a paintbrush. This lets it get into the cracks and crevices creating texture and contrast. You can even use your finger to get the paint all the way into the cracks and crevices. Let the paint completely dry.
Creating Contrast
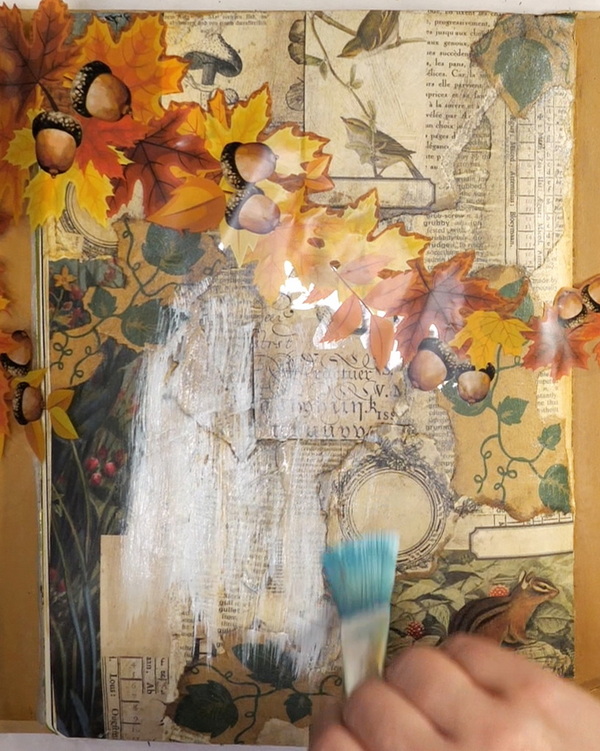
Before adding the next layer of collage, I like to test fit my images to give me a better idea on how they work on the page. This page ended up getting a bit more monochromatic than I like. The leaves were disappearing on the page.
To create contrast, in the area that you’ll be adding in leaves, add a thin layer of white gesso. This helps lift the leaves from the background and creates contrast without covering up all the details.
A ready-mixed painting ground, Liquitex Acrylic Gesso primes surfaces and adds the right level of tooth for optimum color stability, adhesion, and absorbency.
Altering Leaves
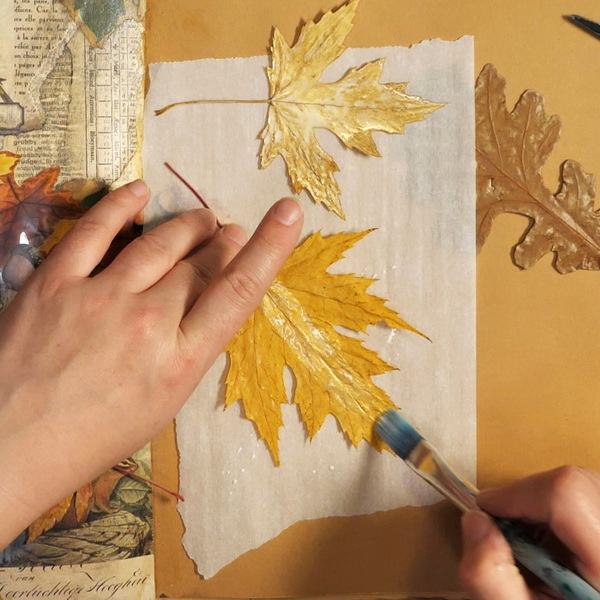
As the leaves were too similar in color to the washes, I wanted to add some paint to them to brighten them up. Using Golden Iridescent Gold Fine fluid paint, I created a wash to be added to the leaves.
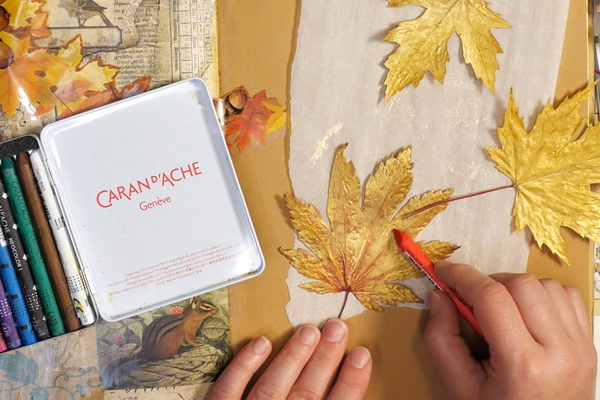
These leaves have already been treated with matte medium, so they didn’t get brittle or break from the paint being applied on top. Once the wash dried, I rubbed Caran d’Ache Neocolor 1 Wax Pastels across the leaves to show the contrast of the veins and leaf edges.
Golden Interference and Iridescent Heavy Body Acrylics add an exciting range of options to your creative repertoire. Used alone or mixed with other acrylic paints, they enable you to achieve color effects that are truly spectacular.
Add vibrant, luminous color to your artwork with this 15-piece Assortment of Classic Neocolor I Artists' Pastels from Caran d'Ache. The reusable metal case comes with 15 artist grade pastels suitable for amateurs and professionals alike.
Assembling the Second Layer
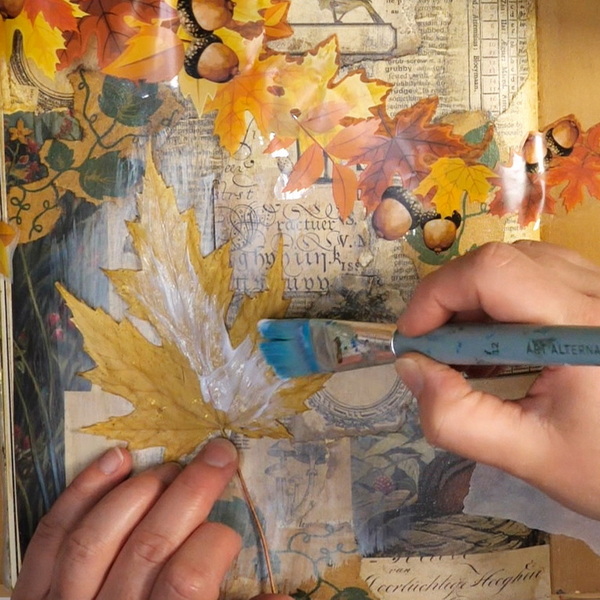
For the second layer, I chose to use the flower plastic wrap that had the leaves and acorns. Using scissors, I fussy cut out the images that I wanted to use.
I played around with the angle as this image would determine how your eye will move across the journal page.
Before applying the plastic, I wanted to tuck a section of a fall leaf under the plastic. I figured out placement and using gel medium, added a generous layer of medium to the leaf and added it to the surface.
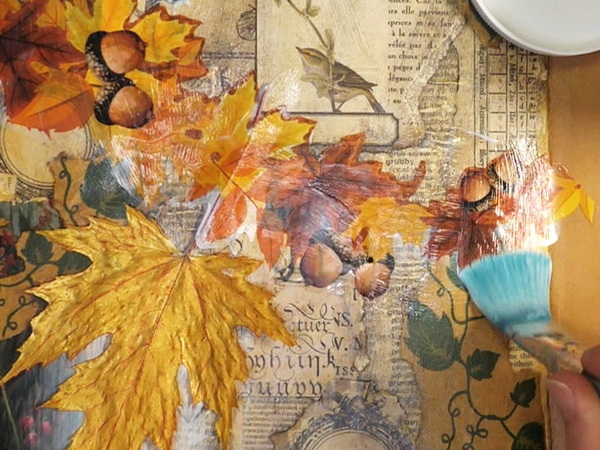
As plastic isn’t porous, I only added gel medium to the journal and placed the plastic on top. It will move and slide a bit as it is placed due the slippery surface. Position the plastic in place and add a layer of gel medium over top. This not only seals the plastic, but the shiny plastic now has the same semi-gloss finish as the rest of the project.
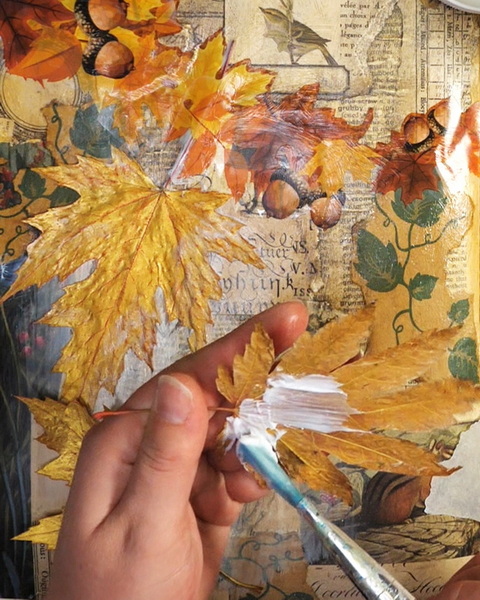
Using gel medium, add collage the rest of the dried leaves to the project.
Adding Stamping and Journaling
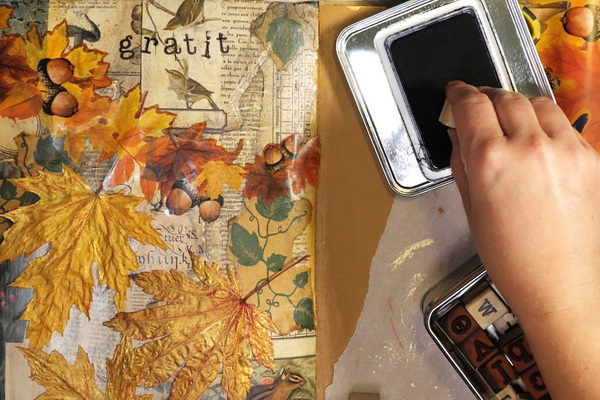
As this page is about gratitude, stamp the word gratitude with your favorite set of stamps and Jet Black Archival Ink. You could also use stickers for this step. Below the stamped word, I added in my two favorite quotes from this passage about gratitude.
Makes us appreciate the value of something.
Robert Emmons
Allows us to participate in our lives, instead of being a spectator.
Usually when I journal, I often hide the journaling on the page. For this project, I wanted the journaling to be front and center. Using a Posca black acrylic paint pen I wrote on the leaves the things I am thankful for. This is a reminder to me to always remember the good things in my life.
Each package contains 52 wooden stamps embossed with alphabet letters and 2 ink pads. Please make yourself know that a set of 26 alphabet letters is about 3.7" long and 2.9" wide. and each stamp is 0.6"long, 0.6"wide and 0.6" high.
The Jet Black Archival Ink Pad by Ranger Ink is acid-free, non-toxic, water-resistant, and fade-resistant, and provides lasting results. This ink will not deteriorate paper and does not bleed when inks, paints, or markers are used over it.
Introducing the ultimate tool for unleashing your creative potential - the Posca Paint Marker. Elevate your artistic endeavors with a marker that combines innovation, versatility, and top-notch quality, all in one package.
Any Questions?
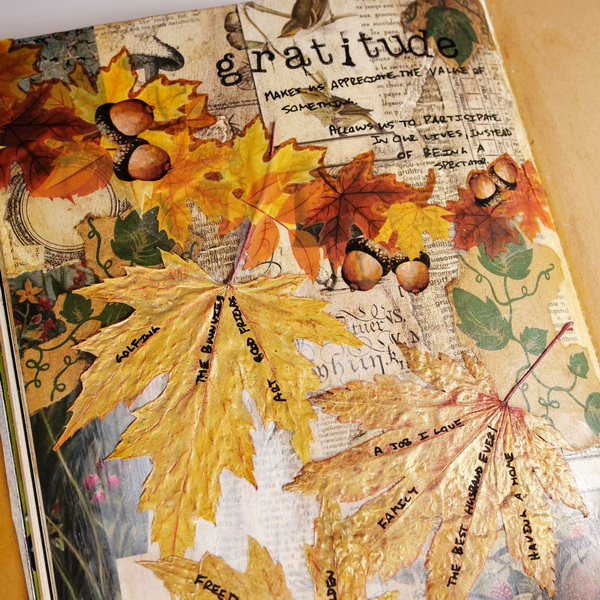
Any questions about how to collage with dried leaves? There are a lot of collage layers and washes for one page, but these layers are what can create a lot of depth to your piece.
I would love to hear your thoughts on this project and the passage that I included from Atlas of the Heart. I would love to know what you’re grateful for! Leave a comment below and I’d love to start a conversation with you.
Project Supply List
In Atlas of the Heart, Brown takes us on a journey through eighty-seven of the emotions and experiences that define what it means to be human.
Capture your precious moments with the exquisite Nostalgic Memories 6x8 Collection Paper Pack designed by Dennis Bruton for 49 and Market.
This 6" x 8" Collection Paper Pack is part of the Color Swatch Peach Collection designed by Katie Pertiet for 49 and Market.
Regular Gel Semi-Gloss is a translucent medium with a consistency similar to Heavy Body paints. Use for extending colors, altering sheen, increasing translucency and adhering collage elements.
A dictionary is a must for any collage project! Use this or any other book for text paper for your next project.
Ideal for spraying, brushing, and staining. Excellent for fabric application. Result offers fine dispersion, high tinting strength, durability and flexibility
- Professional quality
- Comparable pigment load to Golden Heavy Body Acrylics
- 100% acrylic emulsion; no fillers, dyes, or opacifiers
- Professional quality
- Comparable pigment load to Golden Heavy Body Acrylics
- 100% acrylic emulsion; no fillers, dyes, or opacifiers
Golden Interference and Iridescent Heavy Body Acrylics add an exciting range of options to your creative repertoire. Used alone or mixed with other acrylic paints, they enable you to achieve color effects that are truly spectacular.
Add vibrant, luminous color to your artwork with this 15-piece Assortment of Classic Neocolor I Artists' Pastels from Caran d'Ache. The reusable metal case comes with 15 artist grade pastels suitable for amateurs and professionals alike.
Each package contains 52 wooden stamps embossed with alphabet letters and 2 ink pads. Please make yourself know that a set of 26 alphabet letters is about 3.7" long and 2.9" wide. and each stamp is 0.6"long, 0.6"wide and 0.6" high.
The Jet Black Archival Ink Pad by Ranger Ink is acid-free, non-toxic, water-resistant, and fade-resistant, and provides lasting results. This ink will not deteriorate paper and does not bleed when inks, paints, or markers are used over it.
Introducing the ultimate tool for unleashing your creative potential - the Posca Paint Marker. Elevate your artistic endeavors with a marker that combines innovation, versatility, and top-notch quality, all in one package.
When you need somewhere to create and preserve your artwork, look no further than this Dylusions Classics Journal from Ranger Ink, designed by Dyan Reaveley. This journal includes 52 double-sided pages, 28 mixed media, 12 black and 12 Kraft pages, all waiting for your inspiration.
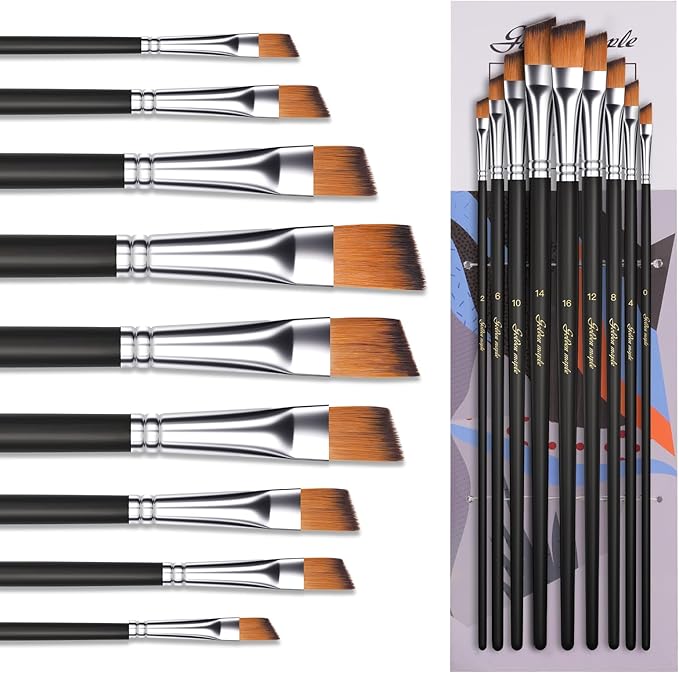
This angled paint brushes set includes 9 sizes (0,2,4,6,8,10,12,14,16) for achieving optimal painting results. Crafted for durability, these acrylic paint brushes deliver smooth strokes and precise color control. The resilient filaments hold paint effectively and release it evenly for seamless application.
Perfect for adventurous artists, this water pot expands on site then collapses for transport. It's also easy to clean and store. Ridges around the rim keep brush handles separated and organized while you're painting.
A quick and easy way to melt embossing powder this heating tool was specifically design for speed quiet and convenience. It can also be used to heat set or dry ink. It won't overheat and burn projects.
Creates a matte, non-reflecting finish when added to acrylic colors. Lightweight, non-toxic; Opaque when wet, translucent when dry.
Liquitex Basics Acrylic Gesso is formulated to produce a smooth, absorbent, finely textured ground for painting on most porous surfaces, including canvas, paper, fabric, wood, or plaster.
Golden Interference and Iridescent Heavy Body Acrylics add an exciting range of options to your creative repertoire. Used alone or mixed with other acrylic paints, they enable you to achieve color effects that are truly spectacular.


