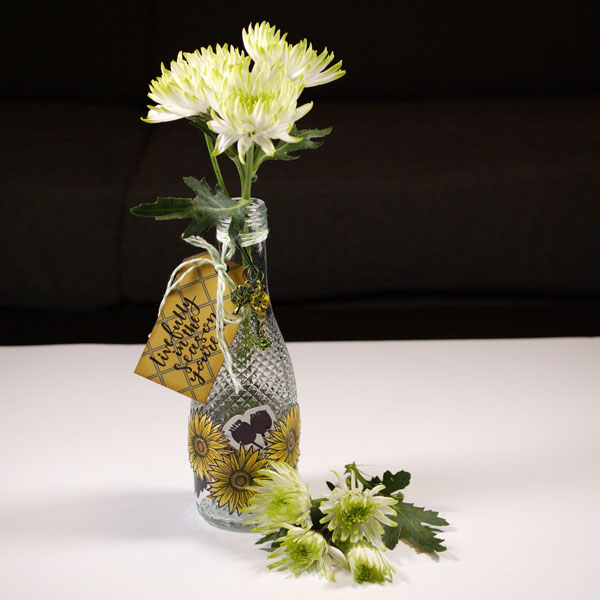
How to Create a Wine Bottle Flower Vase
As Mother’s Day is just a few days away, I wanted to share a creative project that is “off the page.” Most of us stick to flat surfaces such a journal to create in. But today I wanted to share with you how to create a wine bottle flower vase. With Mother’s Day just around the corner, this is a simple project that make a great gift for that special person in your life.
The Inspiration
The inspiration for this wine bottle flower vase came from a problem that I often have during the summer months. When working in my garden I often come across flowers that have been broken off from the wind and rain. Instead of throwing them out, I usually bring them inside to enjoy in a vase. The problem is that I do not have a lot of vases that are small enough for just a few flowers.
I discovered that I had a couple of half size wine bottles that were destined to be recycled. I thought they would be a perfect size for a small vase. These bottles are the right size, but they needed some personalization.
The Project
The Wild Whisper Designs products with their colors and style was perfect for this wine bottle flower vase. I love the Strength of the Seasons collection, not just for the colors and the beautiful imagery, but the inspiring quotes that come in this collection.
Step 1: Choosing the Bottle
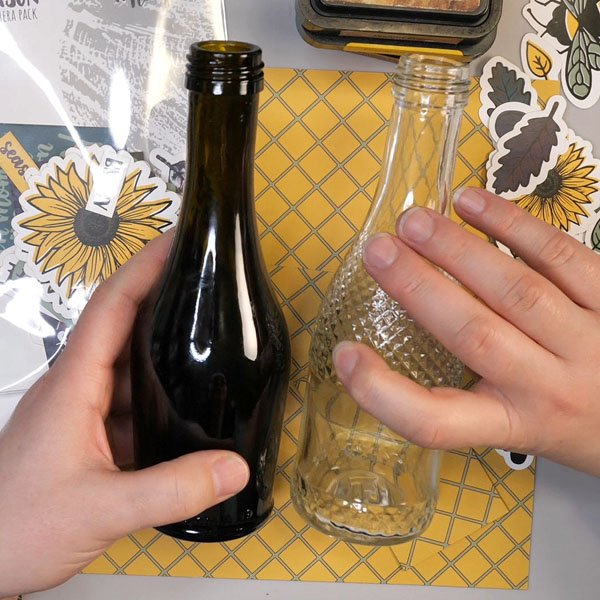
For this wine bottle flower vase, choose a half size wine bottle. It is the perfect size to hold a small collection of flowers. It also has the benefit that the flowers do not need to have long stems to be arranged beautifully in this vase.
This same project can be created using a full-sized wine bottle but do scale up the size of the paper and ephemera to be in scale with the size of the bottle.
Step 2: Choosing the Paper
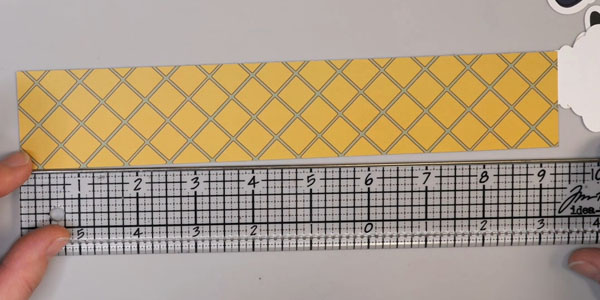
For this wine bottle flower vase, use the Road Trip Paper Collection from Wild Whisper Designs. The colors and patterns of the yellow paper coordinate well with the Strength of the Season ephemera.
I cut the patterned paper to 1 5/8” by 9 ¼” as this gave me a band of paper that was the perfect fit for my wine bottle. Depending on the size of your wine bottle, adjust the size of your paper accordingly.
Step 3: Choosing Ephemera
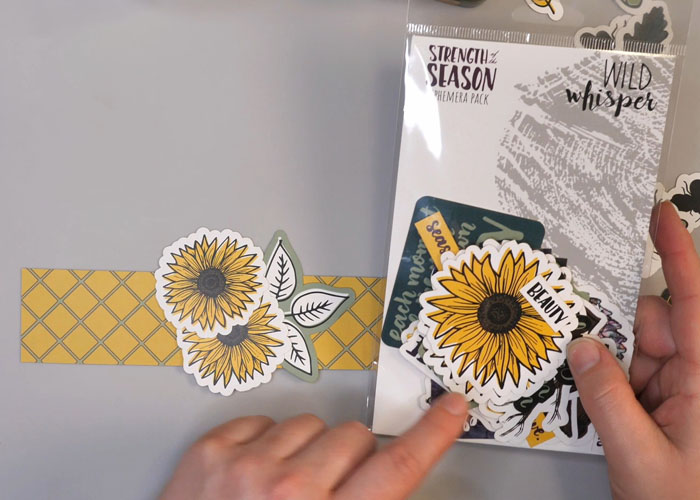
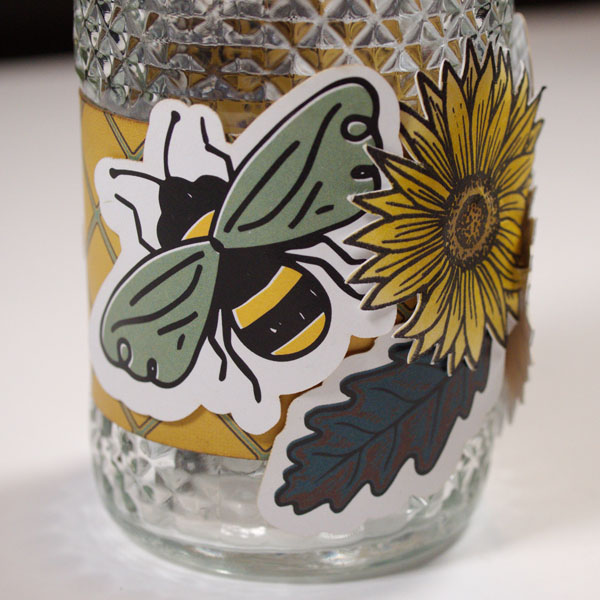
To decorate this wine bottle flower vase, use the Wild Whisper Designs Strength of the Season ephemera as the colors coordinated well with the yellow patterned paper. This vase is decorated with colors and imagery that symbolize nature and sunshine. You can use a variety of ephemera or found objects from your home to decorate your wine bottle flower vase. The possibilities are endless.
Step 4: Stamping and Coloring Images
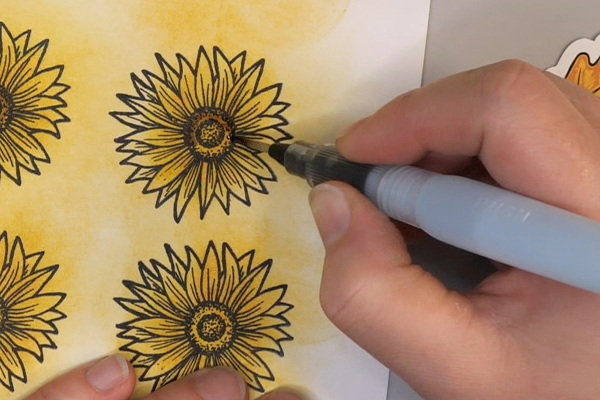
You can use just ephemera images, or you can use a combination of stamped images and ephemera for the wine bottle flower vase. The Wild Whisper Designs Strength of the Season stamp set has beautiful sunflower images that are the perfect scale for this project.
Stamp these images using Ranger Jet Black Archival ink. By using a waterproof ink, this will ensure that there is no smudging when ink and water is added during the coloring process.
Using a blending tool and foam, add layers of Tim Holtz Distress Ink Fossilized Amber, Mustard Seed, and Wild Honey ink to the images. Blend additional layers of color in the darker hues closer to the center of the sunflower.
Using a water brush, add Tim Holtz Distress Ink Vintage Photo and Walnut Stain to the center of the flower. Fussy cut or use a Brother ScanNCut electronic cutting machine to cut out the images.
Step 5: Shaping the Sunflowers
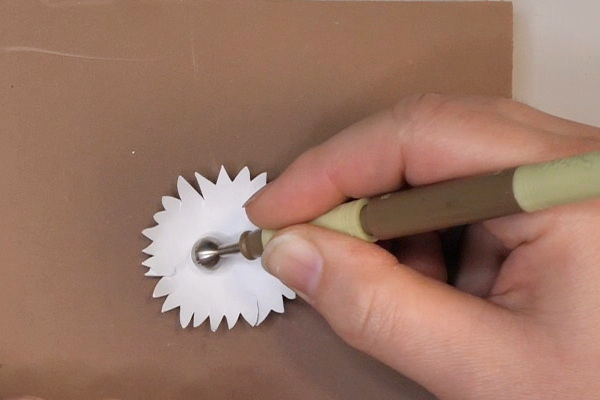
Using a flower shaping tool, shape the sunflower images. Flip the sunflowers images upside down and working from the center pushing outward, add pressure to the paper. This will slightly curl the paper at the edges. Continue to do this until all the edges of the flower curl inwards.
Flip the sunflowers right side up and add pressure to the flower center with the flower shaping tool. This will cause the flower edges to curl up creating a dimensional flower.
Step 6: Inking Paper Edges
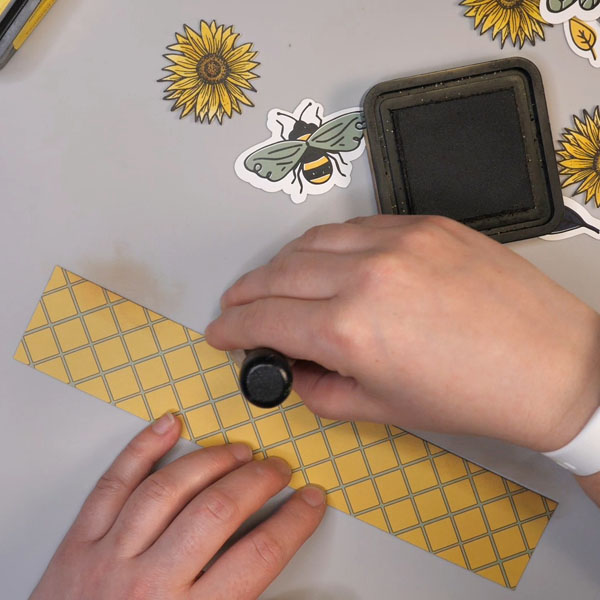
To add more depth to the design, add Walnut Stain ink with a blending tool onto the edges of your patterned paper.
Step 7: Laying Out the Design
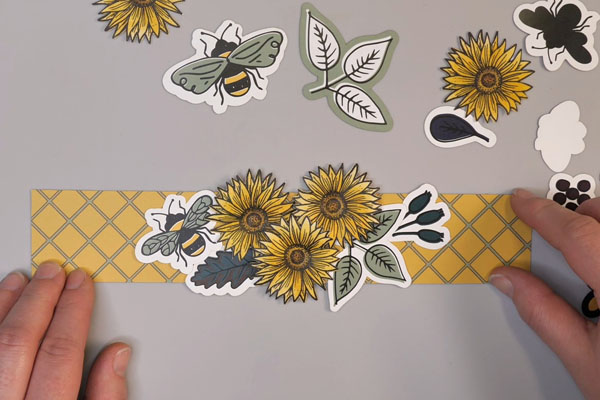
Before adding the paper and ephemera to your wine bottle flower vase, lay out the ephemera onto the strip of patterned paper. By test fitting the design, this will make sure that you are happy with where the flowers are positioned.
At this point, if you would like to add a sealant to the paper before adhering it to the bottle, this is the time to do so. You can use a variety of sprays and sealants for this step, from Modge Podge or Gel Medium to a sealant spray.
Step 8: Adhering Paper to the Bottle
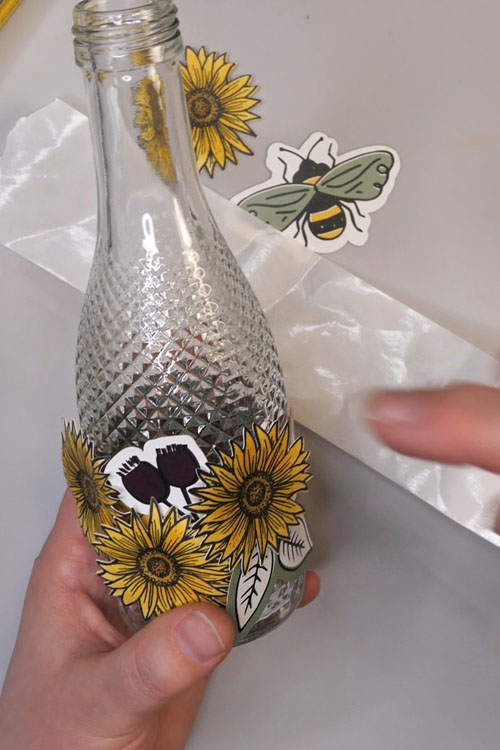
Adhere the paper to the wine bottle flower vase using glue dots, a glue gun, or another strong adhesive. Add the ephemera to the bottle following the planned design that you laid out in Step 7.
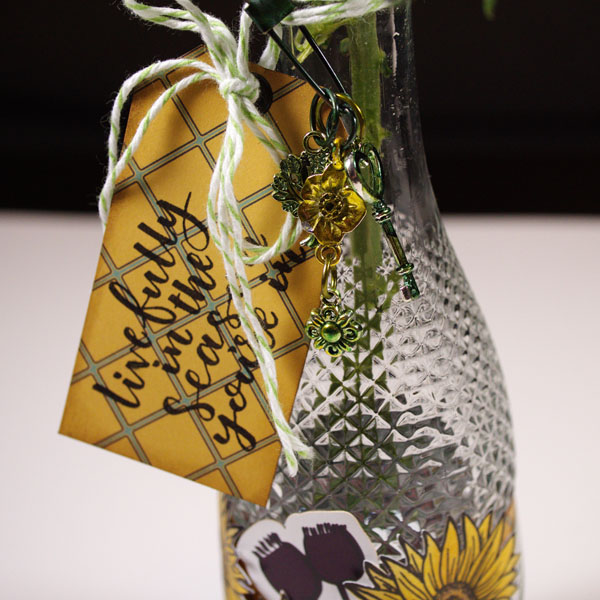
Step 9: Creating Quote Tag
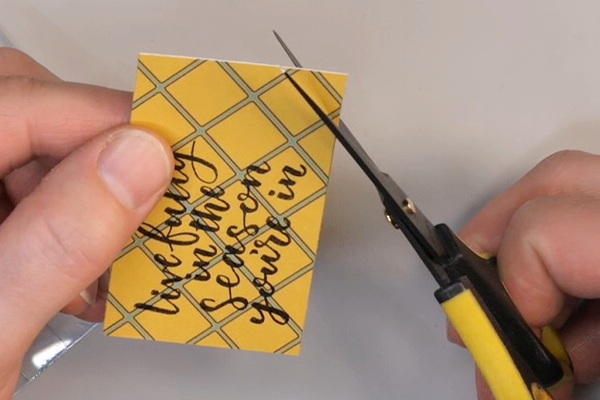
Cut a piece of the yellow patterned paper 1 5/8” by 3” to make a quote tag. Cut the top two edges off at an angle to make a tag shape. Using the quote “Live fully in the season you’re in” from Wild Whisper Designs Strength of the Season stamp set, stamp the quote with Archival Ink.
Using a hole punch or Crop-A-Dile, punch a hole at the top of your tag. Add a brad to the tag by using a Crop-A-Dile or brad tool.
Step 10: Coloring Charms with Alcohol Ink
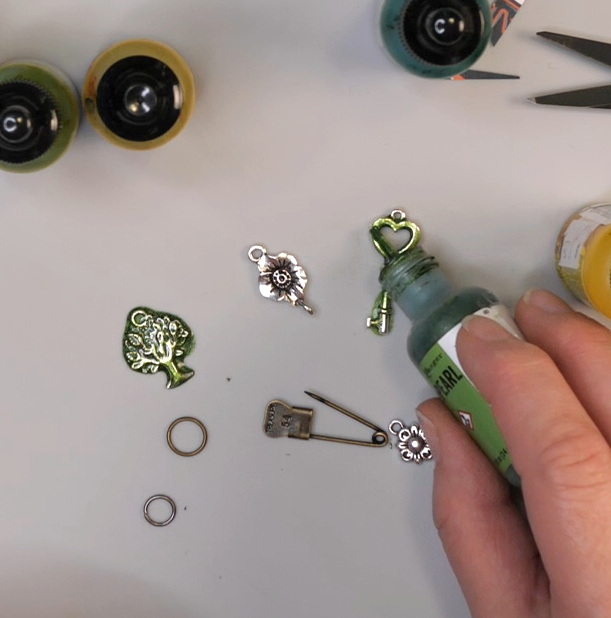
Choose silver charms that coordinate with the theme of your design. If you would like to match the colors of your project, color them using alcohol inks. Do this by applying small drops of the alcohol ink onto the charms and jump rings. Allow to air dry.
Step 11: Adding Tags and Charms to Bottle

Tie a piece of string or ribbon tie around the bottle mouth. Double knot to secure. Add the tag to the bottle and create a loose loop so that the tag will hang down from the bottle. Tie a knot and bow to secure.
Thread a pin through the string around the bottle mouth and use jump rings attach the charms to the pin.
What Do You Think?
What do you think about this wine bottle flower vase project? I hope that you give it a try and can use this project as a gift to encourage someone. You do not need a lot of materials or time to be able to make a custom gift to brighten someone’s day. If you have any questions, please comment below, or contact me directly. I would love to connect with you!
Project Supply List
If you are interested in purchasing any of the Wild Whisper Designs products, visit their website and use code DTNADINE at checkout to get 10% off your next order.
- Wine Bottle
- Wild Whisper Designs: Strength of the Season Stamp Set and Ephemera, Road Trip Paper Collection
- Tim Holtz Distress Ink: Fossilized Amber, Mustard Seed, Wild Honey, Vintage Photo, Walnut Stain
- Archival Ink: Ranger Jet Black
- Tools: Fiskars Paper Cutter, Brother ScanNCut, Flower Shaping Tool
- We R Memory Keepers Crop-A-Dile and Brad
- Ink Applicators: Water Brush, Ranger Mini Blending Tool and Foams
- Creative Imaginations Super Seal Sealant Spray
- Adhesives: Thermoweb Zots and Glue Gun
- Silver Charms, Jump Rings and Pin
- Alcohol Inks: Ranger Alchemy, Envy, Bottle, Citrus, Golden Yellow
- Other Materials: Non-stick Mat, Stamping Block, String