How to Start Gel Printing with Zero Experience
Do you have a brand-new gel plate with no idea how to use it? Gel plate printing fun and beautiful art form is so relaxing and creative, but there’s tricks for getting the best results with your plate. Let’s pull out our gel plates as I share with you everything you need to know to get started with gel printing.
Hop-A-Long Studio is reader-supported. When you buy through links on our site, we may earn an affiliate commission at no cost to you. Learn more.
Learning to Gel Print for the First Time
When I started gel printing many years ago, I started by watching videos. But I found learning how to use the gel plate was incredibly frustrating. Everything looked so easy, and I was just making a mess. After a few dozen tries, I gave up on the gel plate and didn’t pull it out for several years.
But then I had an opportunity to take a mixed media class with a professional artist and learned how to correctly use a gel plate to get fabulous prints. This was a big “ah-ha” moment for me. It opened so many new pathways for creative expression and taught me a lot about texture, pattern and color.
What Do You Need for Gel Printing
Before we get into printing, let’s talk about our basic materials.
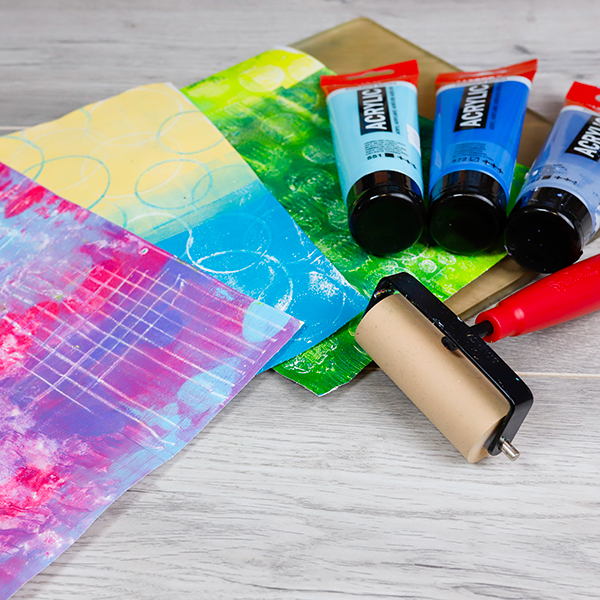
Gel Plate
You’ll need a gel plate, I recommend the Gelli Arts or Gel Press plates for being easy to clean, very durable and easy to use. The one you see here is a Gelli Arts Plate that’s about 8 years old that I’ve made hundreds of prints on.


Brayer
You’ll also need a brayer. I recommend the Speedball brayers because of the quality of the rubber. They give the most even application of paint, are easy to clean and will give you better results than cheaper brayers.
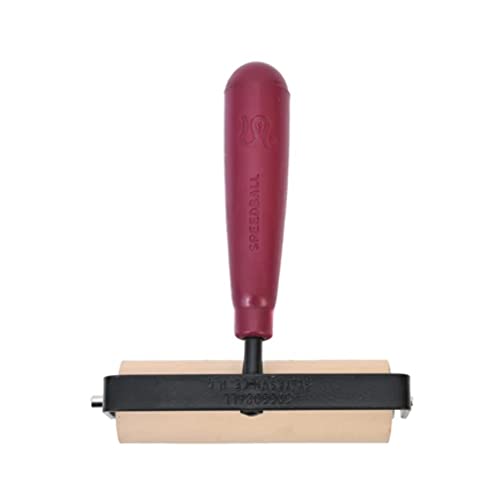
My recommended brayer for gel plate printing. 4" brayer provides even ink distribution and maximum coverage. Allows for consistent prints on a variety of surfaces.
Acrylic Paints
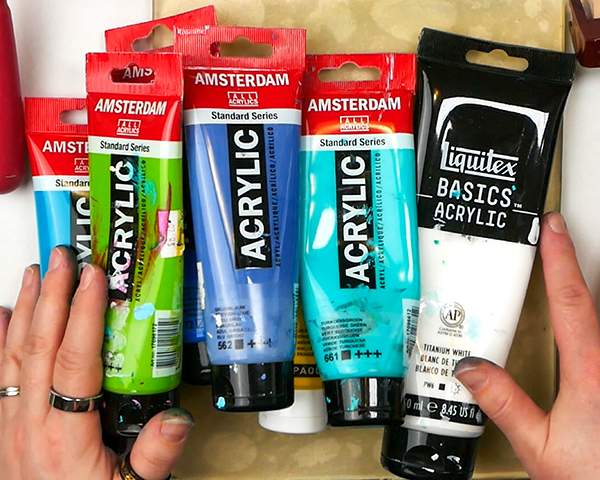
My favorite brands of gel printing paints are Amsterdam Acrylics, Pebeo Acrylics and Liquitex Student Acrylics. All these paints are pigmented, heavy body paints with great color saturation but are considered a student paint. They are that perfect blend of quality at a reasonable price.
I also use these paints in all my art journal projects, so they’re a versatile paint not only for gel plate printing, but for all your creative projects.

Proudly crafted in the Netherlands, these acrylic paints are value priced and easy to use, making them an excellent choice for the beginning or intermediate artist.
Paper
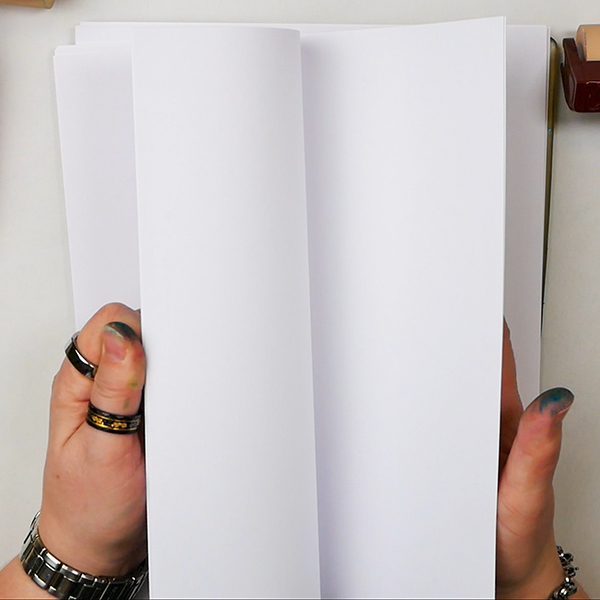
There are all sorts of paper that you can use for your gel printing projects, but I would suggest white copy paper when you’re starting out. Copy paper is inexpensive, easy to use with acrylic paint, and are thin so they are easily applied to any of your collage projects.
Make sure to come back and see future videos where we will be using cardstock, watercolor paper, onion paper, deli paper, tissue paper along with other unique surfaces for gel printing.
Mark Making Tools
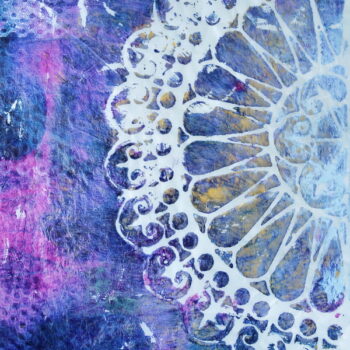
To create designs in your gel plate, you need to use anything that will make an impression. This includes soft mark making tools, stamps, stencils, leaves, feathers, doilies, lace, place mats, plastic lids, bubble wrap, saran wrap, and corrugated cardboard to name just a few materials. You can purchase many types of tools but look around your house and see what you can find!
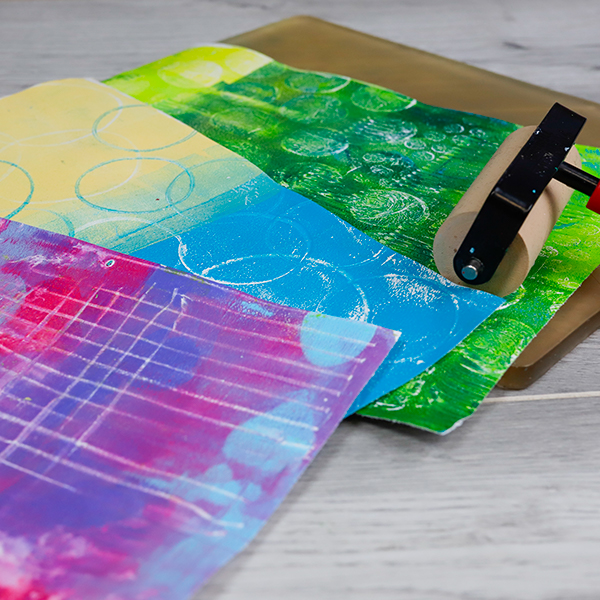
Making Your Very First Gel Plate Print
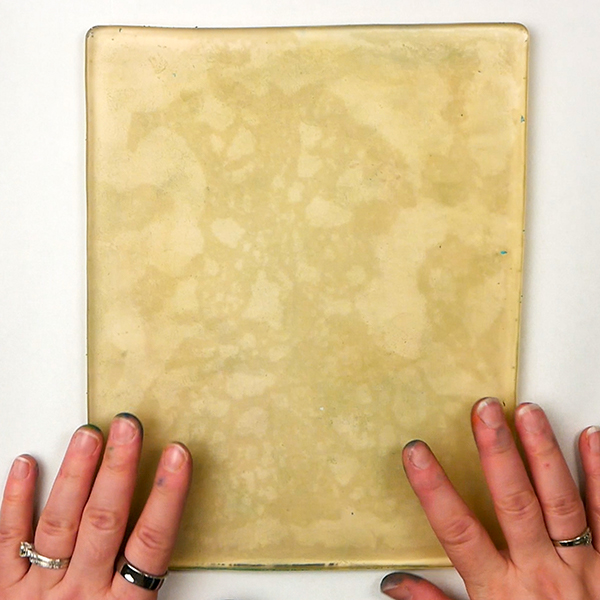
To make your first gel plate print, remove the plastic off your gel plate, and place it onto a clean surface.
Add small dots of paint onto your surface, they should be dime sized or smaller. I usually start with 3 to 5 dots of paint and then spread it, if I need more, I can always add more. IF you start with too much paint, you’re going to struggle with getting good results.

Tip #1: Do Not Add in Too Much Paint
The biggest issue that beginners have with the gel plate is by adding too much paint to start. My first year or so of working with a gel plate, I always added in too much paint. As I’ve developed my skills and practiced printing, I’ve been able to control how much paint I use. Please learn from my mistakes! Start with a little bit of paint and add more as you go.
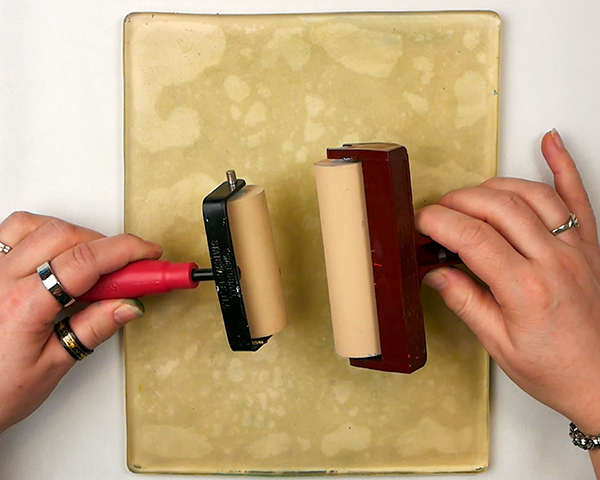
Spreading the Paint with a Brayer
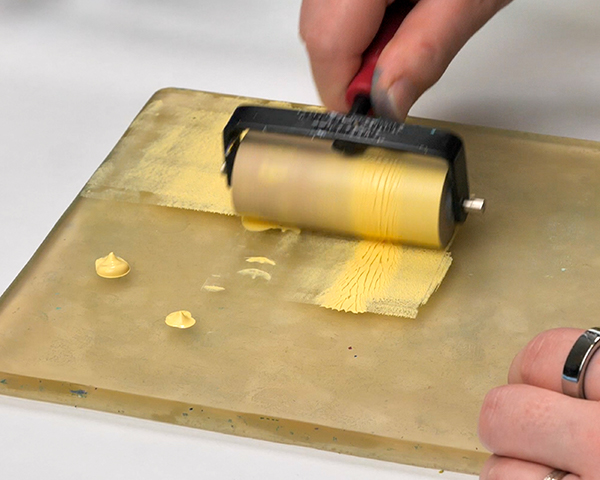
When you’re spreading the paint with a brayer, I try to roll the brayer around in the small dot of paint to cover the brayer. Then I roll the paint out onto the surface. This will help you spread the paint more evenly onto the gel plate.
Please note that this is not the conventional way of using a brayer, where you have the paint evenly on the brayer before adding it to the surface. But it’s a great way to spread paint on a gel plate without too much paint waste.
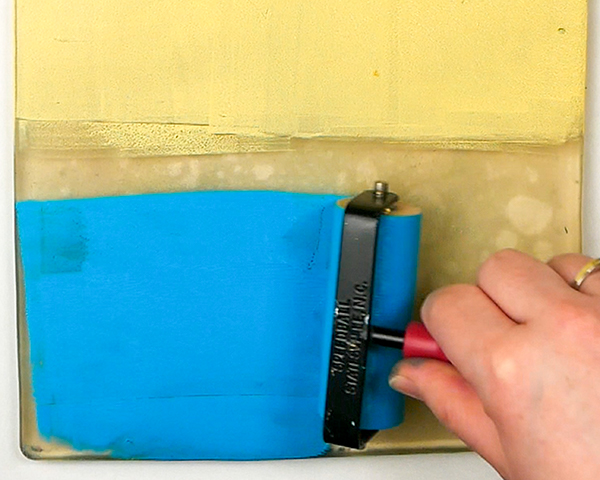
This will leave you with a very thin coat of paint on your gel plate. If you have very thick layers of paint, this is going to affect the print. By printing with thin coats of paint, this will help you get the best impressions with your mark making tools.
Add in Impressions
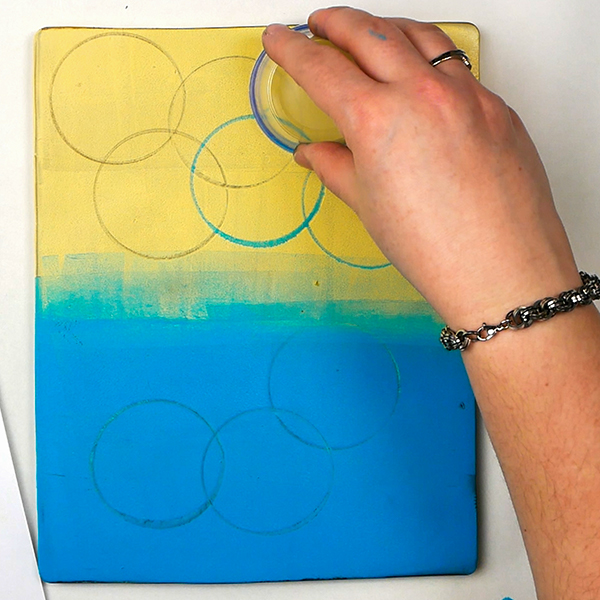
Now it’s time to add impressions to your plate. Please make sure that all your tools are very soft, anything sharp can cause damage to the plate. If you damage the plate, these marks will be seen in every print that you make!
For this week’s lesson, I will focus on mark making tools that you can find around your home. This first impression is going to be created using plastic takeout containers. You can see that the plastic container will lift the paint, leaving you clear lines where the container has made its mark. You can do these marks close together, creating overlapping patterns and groupings. There’s a lot of options.
When you are adding in your marks, if you find that you’re not getting clear impressions, you may have added in too much paint. If this is the case, you will need to stamp your tool on a piece of paper or wipe off your tool between impressions.
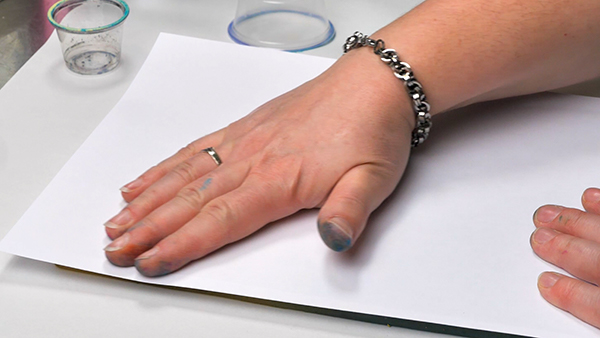
Taking Your First Print
To take your first print, line up your sheet of copy paper just past the bottom of the gel plate. I like to line it up to the bottom just in case I want to add a second layer to the print. By lining the paper up at the bottom, this helps you line up a previously created print correctly to add a second layer.
Add your paper to the surface and gently rub making sure that the gelli plate and paper are in full contact. If you rub the paper and it slides, you are using way too much paint. It should stick in place once you add it to the gel plate.
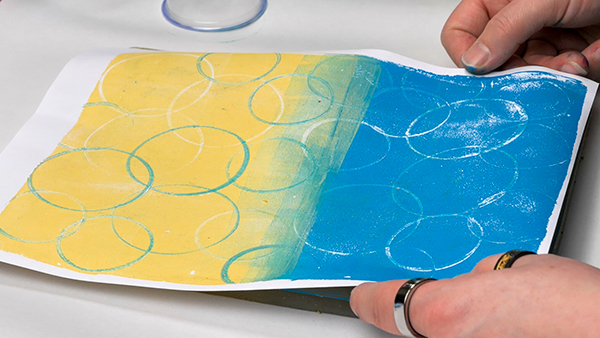
To remove your print, start from one corner and gently peel the paper away from the plate. It should put up a touch of resistance, this is how you know you’re using the right amount of paint. If you do this correctly, you should get a very nice, clear print.
Tip #2: Add Your Marks and Take Your Print Quickly
The time between adding your paint, making your marks and taking the print should be less than a minute or two. Depending on the temperature in your room and the humidity level this will affect how much working time you’ll have. As I’m working in my studio and my lights are hot, I have much less working time than you will probably have.

Household Materials for Gel Plate Printing
Here’s a few other household materials that I found that are great for gel plate printing.
Bubble Wrap
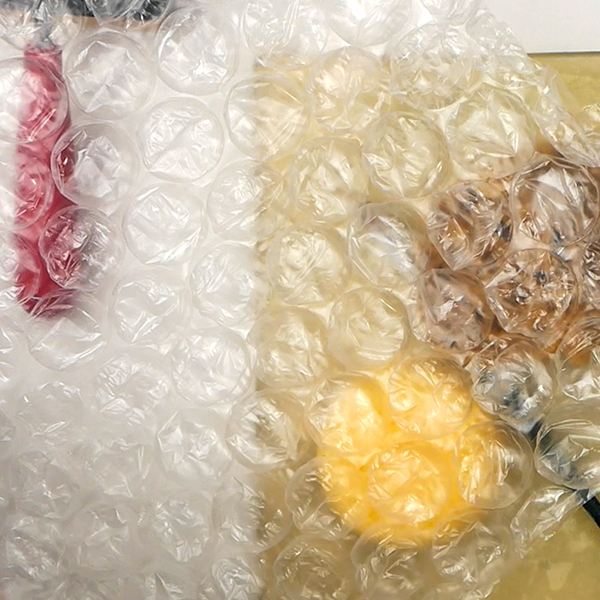
Whenever we have packages delivered, I always take sections of the bubble wrap that comes in the boxes. By using small, medium and large bubble wrap, this will give different marks on your gel plate images.
Take Out Containers
Those little take out containers are perfect for gel printing! I tend to keep them after I’ve used up the sauces because they have thick rims which make for great impressions.
Pencil Eraser
Use a pencil eraser to make marks on your gel plate, it’s soft enough not to harm your plate.
Saran Wrap
Use a section of saran wrap and crumple it onto the surface of your plate to make interesting marks.
Art Materials for Mark Making
Here’s some of my favorite art supplies for mark making.
Acrylic Brushes
By adding in marks with small and large, flat and round brushes this can create unique marks.
Silicone Mark Making Tools
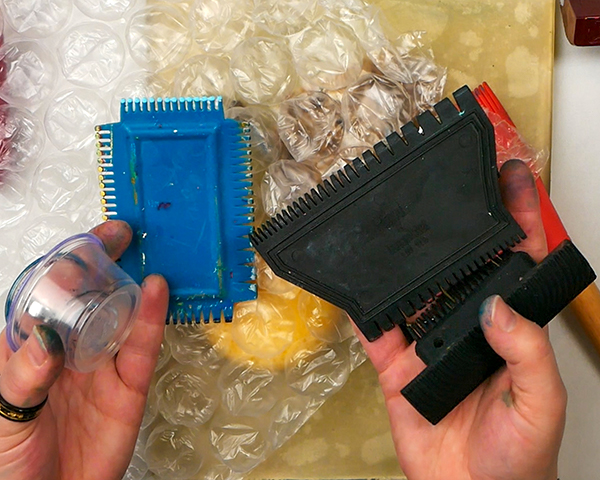
There are both hard and soft mark making tools available from Catalyst and Art Alternatives. The ones that I’m using today are soft rubber and silicone.
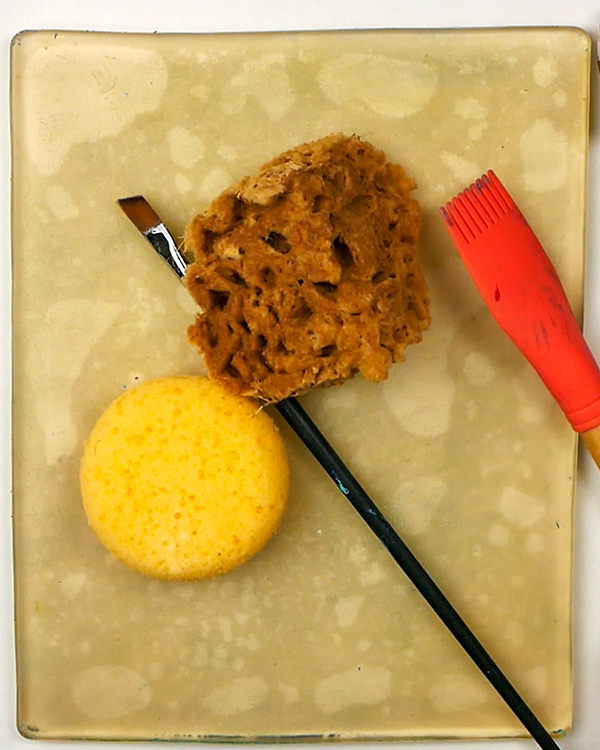
Sponges & Sea Sponges
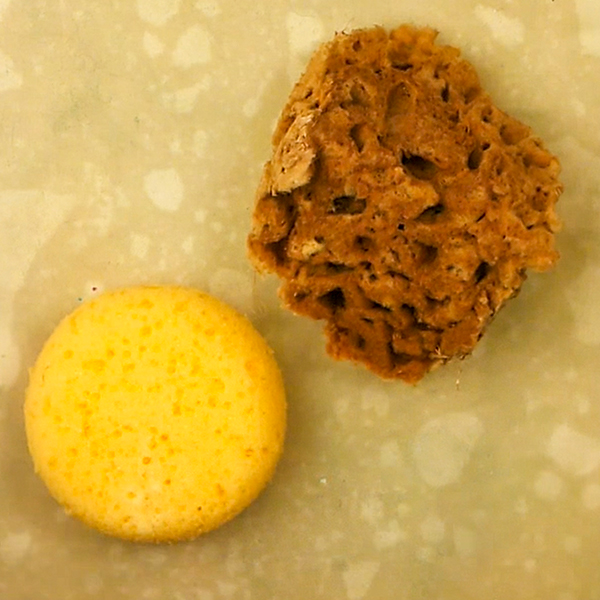
Sponges and sea sponges are great for creating unique and subtle textures on your gel plate. Just make sure to be using a soft sponge, not the hard, scrubby side if you’re using a kitchen sponge!

Set of 2 rubber tools for adding texture to clay, paint, and gel prints. Each comb features a different pattern on each of its edges. Made from firm rubber for optimal control and a secure grip.

Not quite a brush. Not quite a palette knife. Princeton Catalyst Blades and Mini-Blades are crafted from flexible silicone to give artists exciting new tools for expression. Mounted on artist brush handles, they offer a unique blend of tradition and innovation.

Features large size bubbles; heavy-duty large bubbles provide extra strength and protection for large bulky items; use large bubble cushioning to fill empty spaces in boxes and add instant padding for fragile items

Get precision, enhanced colour control, and smooth blending with naroa sponges to create artwork that impresses. Natural fibres and high absorbency allow for increased application time and a bigger color load.

My favorite budget acrylic brush. These brushes hold acrylic paint well, have soft bristles and clean up easily with soap and water.
What to Try Next with the Gel Plate?
By just looking around your home, you’ll find all sorts of unique textures that you can add to your gel plate. Play around with all these different tools and see what unique results you can get.
Make sure to sign up to my newsletter for free printables, guides, and updates for when my next gelli printing article comes out. I’ll be building on this technique and showing you ways to use different materials and how to layer paints and prints to create unique, one-of-a-kind pieces of art!

If you’re interested in more information about gel printing, check out these articles:
- 4 Ideas for Using Gelli Prints in Your Art Projects
- Gelli Plate Printing with Leaves
- How to Gelli Print on Tissue Paper
Project Supply List
Proudly crafted in the Netherlands, these acrylic paints are value priced and easy to use, making them an excellent choice for the beginning or intermediate artist.
My recommended brayer for gel plate printing. 4" brayer provides even ink distribution and maximum coverage. Allows for consistent prints on a variety of surfaces.

Pebeo High Viscosity Studio Acrylic Paints are the ultimate mixed media acrylic! Vivid, deep, and richly pigmented, it offers very good lightfastness and permanence.

Liquitex Basics Acrylic Colors were developed for students and artists who require dependable quality at an economical price. Each color is uniquely formulated to bring out the maximum brilliance and clarity of the individual pigment.

1 ream (500 sheets total) of 8.5 x 11 inch white copier and printer paper. Acid-free to prevent yellowing. Smooth 20 pound weight paper for consistent ink and toner distribution; dries quickly and resists paper jams.
Get precision, enhanced colour control, and smooth blending with naroa sponges to create artwork that impresses. Natural fibres and high absorbency allow for increased application time and a bigger color load.
Features large size bubbles; heavy-duty large bubbles provide extra strength and protection for large bulky items; use large bubble cushioning to fill empty spaces in boxes and add instant padding for fragile items
My favorite budget acrylic brush. These brushes hold acrylic paint well, have soft bristles and clean up easily with soap and water.
Set of 2 rubber tools for adding texture to clay, paint, and gel prints. Each comb features a different pattern on each of its edges. Made from firm rubber for optimal control and a secure grip.
Not quite a brush. Not quite a palette knife. Princeton Catalyst Blades and Mini-Blades are crafted from flexible silicone to give artists exciting new tools for expression. Mounted on artist brush handles, they offer a unique blend of tradition and innovation.


6 Comments
Irith shechner
Thank you. I would like to receive your newsletter
Nadine Milton
I’m glad that you enjoyed the article. Click here to sign up for my newsletter: https://hopalongstudio.com/join-the-community/
Erica
What a fun post! Thank you for sharing.
Nadine Milton
I’m glad that you enjoyed it! I hope that you’ll give these techniques a try!
Ginny
I look forward to leaning more about gel printing.
Thank you for your simple and easy to understand directions.
Nadine Milton
You’re welcome, I’m glad that you found the information helpful. I remember how frustrated I was at the beginning when I was learning to gel print. I hope that this makes your learning curve a little bit easier!