Gelli Plate Printing with Leaves
Gel plate printing with leaves is a fun and easy technique that lets us get outside to find beautiful textures. Summer in Canada is short. So, I make a point to get outside and incorporate nature in my art journal and gel plate printing projects.
Today I am sharing my favorite techniques for Gel plate printing with leaves and how to get good results with organic materials.
Hop-A-Long Studio is reader-supported. When you buy through links on our site, we may earn an affiliate commission at no cost to you. Learn more.
Finding Leaves for Your Prints
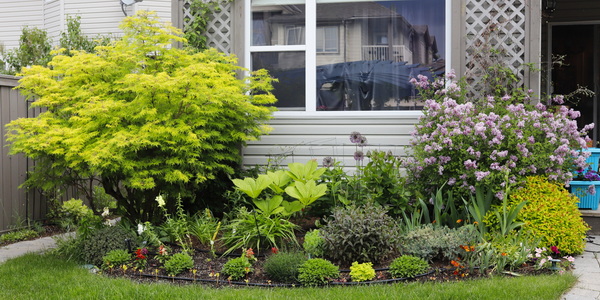
Now that summer is upon us, I’ve been spending a lot of time out in my garden enjoying the beautiful weather. My garden has so many leaf textures, which is perfect for creative play with the gel plate!
If you don’t have a garden, there are parks and wild areas that you can forage for beautiful leaf shapes and textures. Just make sure not to set the plant back by taking too many leaves. Bring scissors or a knife when collecting your samples to prevent harming the plants. By cutting rather than tearing off leaves prevents disease and stress for the plants.
Since most leaves will start withering or drying out within several hours of collection, use them immediately after collection. If you can’t, press them between paper to keep the leaves from curling until you have time to work with your gel plate. Be aware that if you do press the leaves, they will lose some of the bumpy texture that we want in the gel prints.
Basic Gel Plate Printing with Leaves
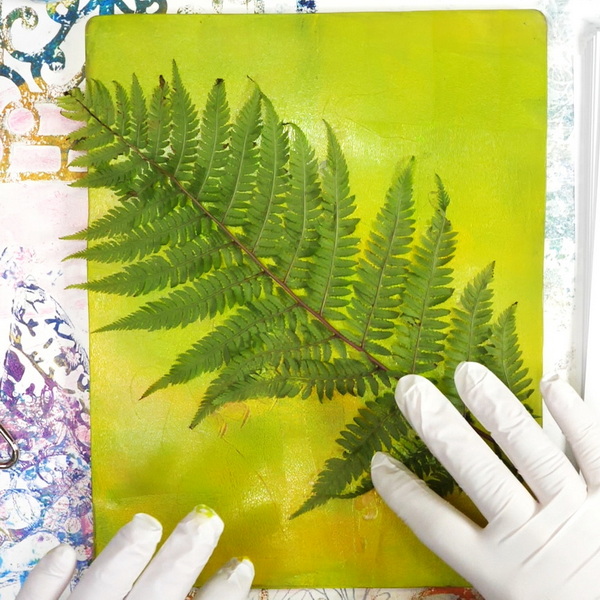
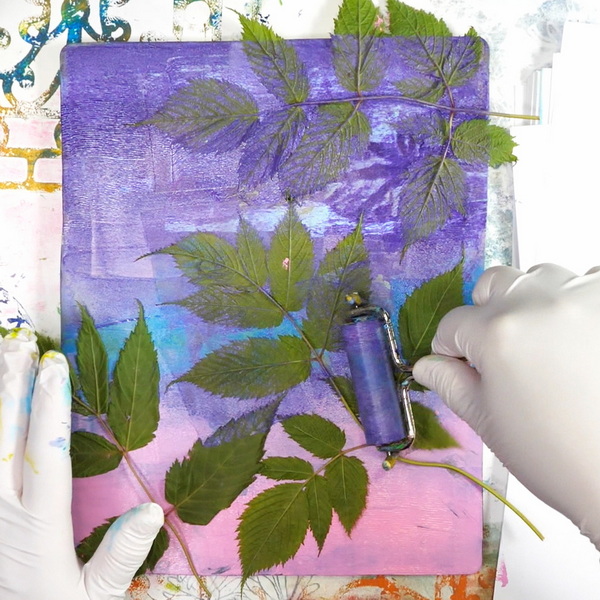
Basic printing with leaves on the gel plate is very simple. Add acrylic paint with a small brayer to the surface, add your leaves, and leave them there. Press a piece of paper on top to make the print. You might find that the printing surface in uneven from the veins and stems of the leaves. Press down firmly and evenly to make sure you get a good quality print.

- Versatile tool for printmaking, scrapbooking, and stamping
- Provides even ink distribution and maximum coverage
- Allows for consistent prints on a variety of surfaces
- Sturdy metal core and plastic handle


Proudly crafted in the Netherlands, these acrylic paints are value priced and easy to use, making them an excellent choice for the beginning or intermediate artist.

Pebeo High Viscosity Studio Acrylic Paints are the ultimate mixed media acrylic! Vivid, deep, and richly pigmented, it offers very good lightfastness and permanence.
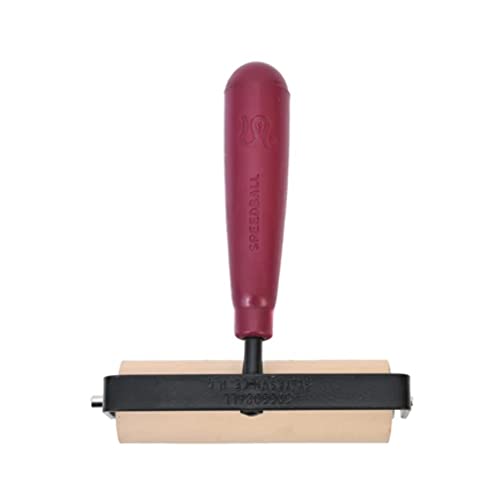
My recommended brayer for gel plate printing. 4" brayer provides even ink distribution and maximum coverage. Allows for consistent prints on a variety of surfaces.
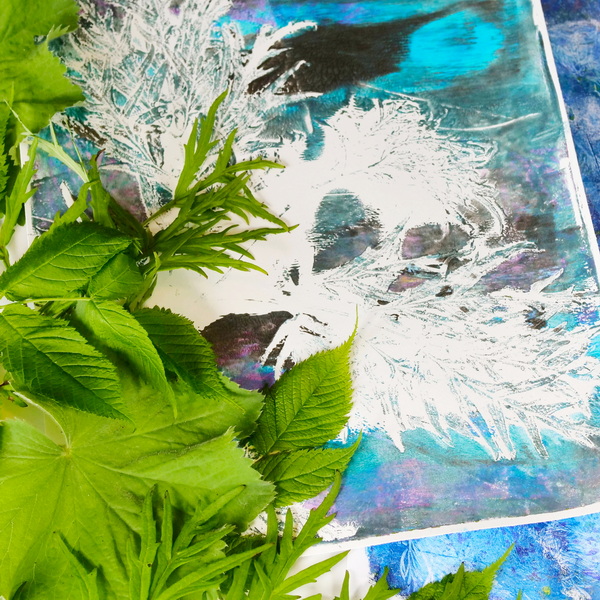
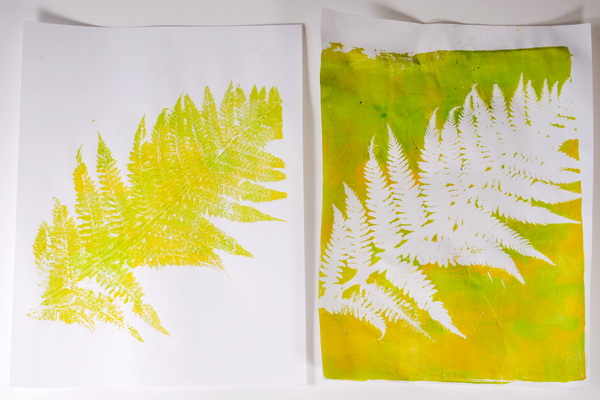
When you pull the print off the gel plate, it should have a white area that is leaf shaped. By leaving the leaf on the surface, this gives a very bold design to the gel print.
If you are having trouble getting a good impression, try using a 6” large brayer to help press down the paper to the surface. I find that I tend to get a better print by using a brayer over just using my hands when the surface is uneven.
When Gelli printing I always take a second print. Remove the leaf from the page and you should see a perfect outline of the leaf in the acrylic paint. Take a print and you will notice that it is the positive image of the leaf.
If this is your first time Gelli plate printing, check out this article where I go into detail on how to use a gel plate, how to add paint and get a good first print.
Adding Leaves to an Existing Print
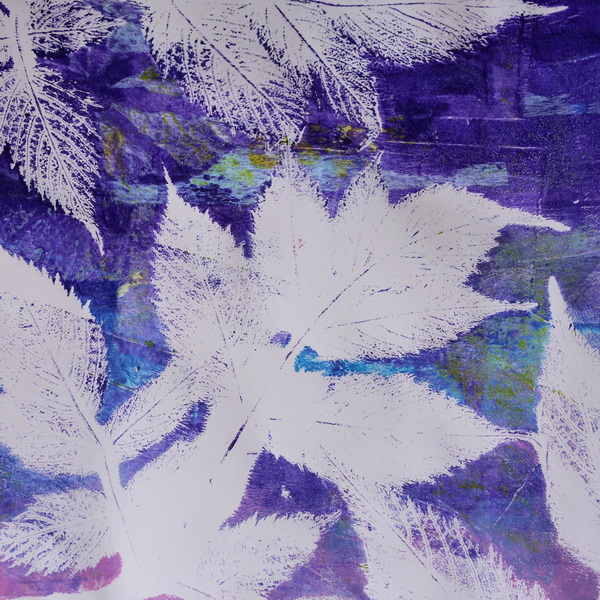
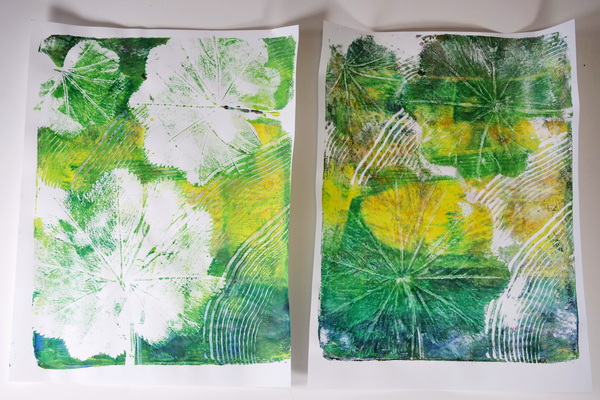
One of my favorite techniques when Gelli plate printing with leaves is to add additional prints on top of an existing gel print. Start by using the same technique as above. But instead of printing on a blank piece of paper, try using a print that already has paint on the surface.
The strong outline images that are created by leaving the leaves on the gel plate lets the layers of paint underneath be shown in the print. You can keep adding layers until you have a result that you are happy with.
By creating second and even third layers on a print can add texture and interest to the leaves can let the first layers of paint be seen
For best results using this technique, make sure that the layers of paint are contrasting colors.

Accentuating Texture on Leaf Prints
As much as beautiful outlines are fantastic on gel prints, sometimes you may want more detail in your leaf prints.
To accentuate texture to the leaves left on the plate, run the brayer still covered in paint over the leaf. The paint will transfer onto any high points on the leaves, such as the veins and stems. Add your paper on top to make a print.
You now have a leaf outline but some of the leaf texture from the veins and stems will be on your first print. The second print will also have leaf texture because of the leaf being pushed into the gel plate when taking the first print.
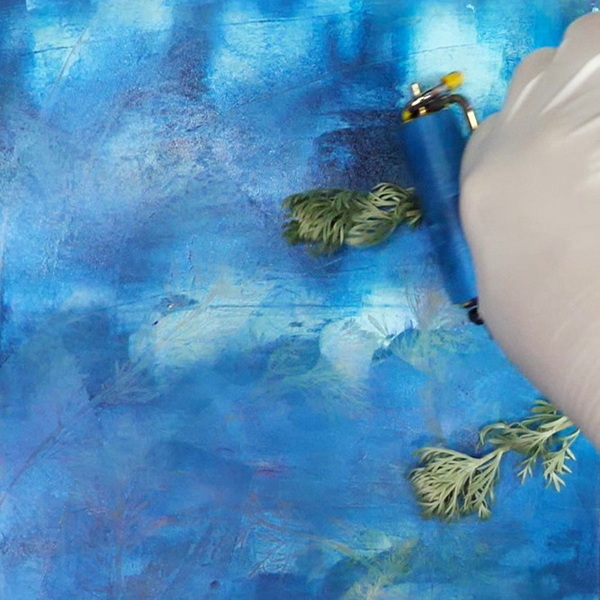
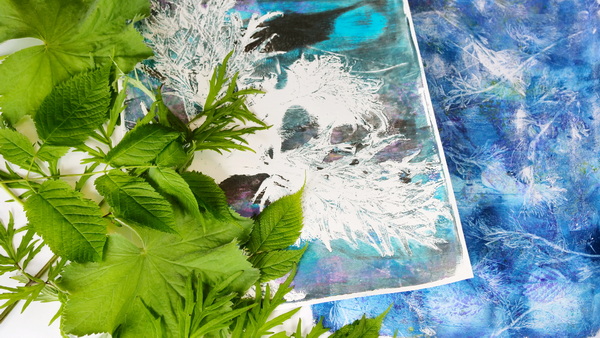
Creating Subtle Leaf Textures with the Gel Plate
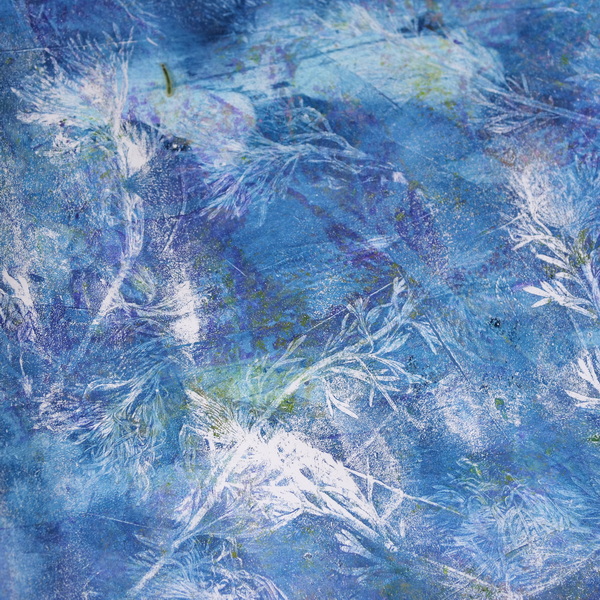
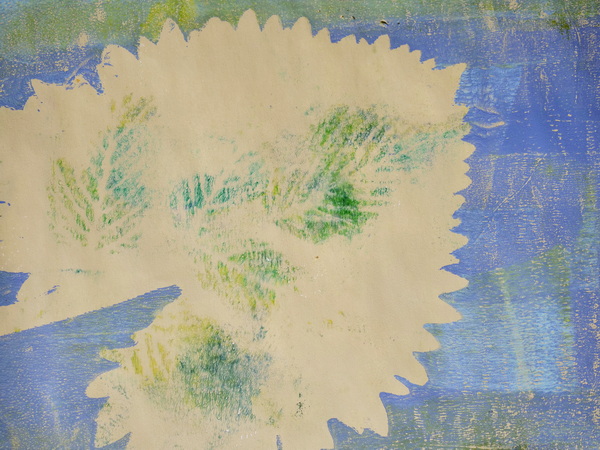
You may want to create subtle leaf textures on the page. This can be accomplished by pressing the leaves into the gel plate, but not leaving them on the surface.
To get the best contrast on these prints, apply a thin layer of paint to your surface. Press your leaves and textures into the plate. I like rolling my brayer over top to make sure that it’s creating a strong impression onto the Gelli plate.
Your print will have fine lines of texture. Any areas where you pressed your leaves into the paint should have removed some, if not all, of the paint creating a fine textured print.
Using Curved Leaves in a Gel Print
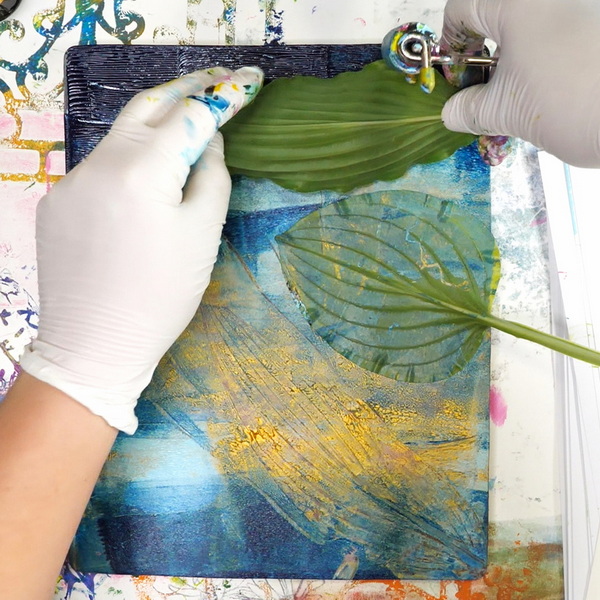
You may end up using leaves in your prints that don’t like to lay flat, an example of this is Hosta leaves. Usually, one side of the leaf will lay flatter than the other. It may take some experimentation to get a good print with these leaves.
Depending on the leaf, you might be able to leave it on the surface. If it won’t stay in place, you can use it for creating subtle leaf textures by pressing it into the surface.
You may also need to add paint on the leaves several times before they will start sitting flatter on the Gelli plate. In the example above I left some of the leaves on the page while taking others off for a variety of texture.
Mixing Mark Making with Leaf Prints
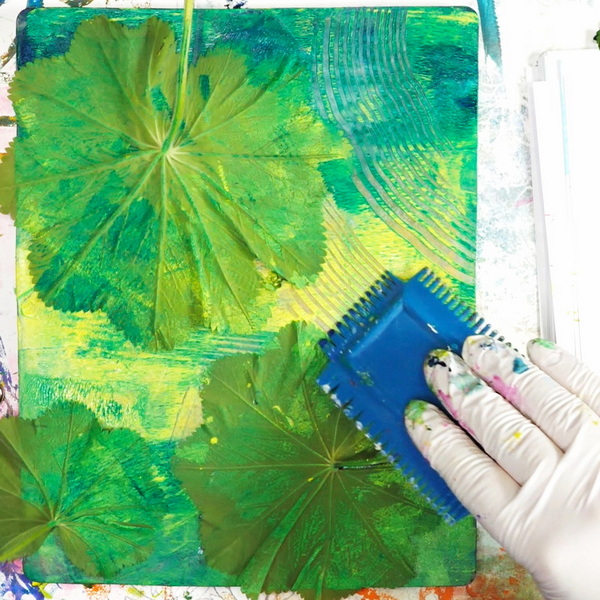
A fun way of mixing up your prints is to add mark making to your leaf prints. For these prints, I added the leaves and then added the mark making before taking my prints.
For this technique you could use stamps, stencils, or other mark making tools. Another option is to create multiple layered Gelli prints, some with leaves and others with mark making. The combination of techniques is endless!
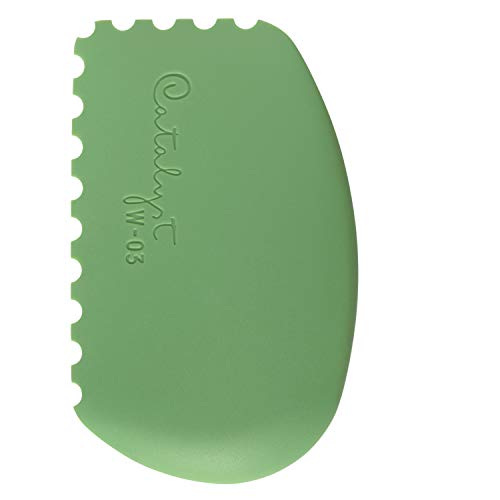
Ergonomically designed to fit in the palm of your hand, Princeton Catalyst Wedges and Contours are exciting new tools for creative expression.
Made of solid nylon, Contours feel natural in your hand with their comfort-touch finish.

Not quite a brush. Not quite a palette knife. Princeton Catalyst Blades and Mini-Blades are crafted from flexible silicone to give artists exciting new tools for expression. Mounted on artist brush handles, they offer a unique blend of tradition and innovation.
What Do You Think?
What do you think about Gelli plate printing with leaves? Is this something that you would try in your own creative practice?
The leaves that I have tested and used in my Gelli prints are Goat’s Beard (Aruncus Dioicus), Lady’s Mantle (Alchemilla Mollis), Hosta, Lemony Lace Elderberry (sambucus racemosa), Silvermound Artemisia, and Coral Bells (Heuchera). You can use almost any leaf that you forage, but these plants are specifically in my garden because of the beauty of their leaves.
I hope that you give this technique a try and take time for creative self-care this week! If you have any questions about this technique or Gelli plate printing in general, please leave a comment below!

Project Supply List
- Versatile tool for printmaking, scrapbooking, and stamping
- Provides even ink distribution and maximum coverage
- Allows for consistent prints on a variety of surfaces
- Sturdy metal core and plastic handle
Proudly crafted in the Netherlands, these acrylic paints are value priced and easy to use, making them an excellent choice for the beginning or intermediate artist.
Pebeo High Viscosity Studio Acrylic Paints are the ultimate mixed media acrylic! Vivid, deep, and richly pigmented, it offers very good lightfastness and permanence.
My recommended brayer for gel plate printing. 4" brayer provides even ink distribution and maximum coverage. Allows for consistent prints on a variety of surfaces.
Ergonomically designed to fit in the palm of your hand, Princeton Catalyst Wedges and Contours are exciting new tools for creative expression.
Made of solid nylon, Contours feel natural in your hand with their comfort-touch finish.
Not quite a brush. Not quite a palette knife. Princeton Catalyst Blades and Mini-Blades are crafted from flexible silicone to give artists exciting new tools for expression. Mounted on artist brush handles, they offer a unique blend of tradition and innovation.
Designed to appeal to students, Canson XL pads contain more sheets at a comparable or better price than other value pads in the marketplace.

1 ream (500 sheets total) of 8.5 x 11 inch white copier and printer paper. Acid-free to prevent yellowing. Smooth 20 pound weight paper for consistent ink and toner distribution; dries quickly and resists paper jams.

Pebeo High Viscosity Studio Acrylic Paints are the ultimate mixed media acrylic! Vivid, deep, and richly pigmented, it offers very good lightfastness and permanence.

Pebeo High Viscosity Studio Acrylic Paints are the ultimate mixed media acrylic! Vivid, deep, and richly pigmented, it offers very good lightfastness and permanence.

Pebeo High Viscosity Studio Acrylic Paints are the ultimate mixed media acrylic! Vivid, deep, and richly pigmented, it offers very good lightfastness and permanence.

Pebeo High Viscosity Studio Acrylic Paints are the ultimate mixed media acrylic! Vivid, deep, and richly pigmented, it offers very good lightfastness and permanence.

Pebeo High Viscosity Studio Acrylic Paints are the ultimate mixed media acrylic! Vivid, deep, and richly pigmented, it offers very good lightfastness and permanence.

Pebeo High Viscosity Studio Acrylic Paints are the ultimate mixed media acrylic! Vivid, deep, and richly pigmented, it offers very good lightfastness and permanence.

Proudly crafted in the Netherlands, these acrylic paints are value priced and easy to use, making them an excellent choice for the beginning or intermediate artist.

Proudly crafted in the Netherlands, these acrylic paints are value priced and easy to use, making them an excellent choice for the beginning or intermediate artist. They can be mixed with water or mediums, and clean up requires only soap and water.

Proudly crafted in the Netherlands, these acrylic paints are value priced and easy to use, making them an excellent choice for the beginning or intermediate artist. They can be mixed with water or mediums, and clean up requires only soap and water.

Proudly crafted in the Netherlands, these acrylic paints are value priced and easy to use, making them an excellent choice for the beginning or intermediate artist. They can be mixed with water or mediums, and clean up requires only soap and water.

Proudly crafted in the Netherlands, these acrylic paints are value priced and easy to use, making them an excellent choice for the beginning or intermediate artist. They can be mixed with water or mediums, and clean up requires only soap and water.

Proudly crafted in the Netherlands, these acrylic paints are value priced and easy to use, making them an excellent choice for the beginning or intermediate artist. They can be mixed with water or mediums, and clean up requires only soap and water.

Proudly crafted in the Netherlands, these acrylic paints are value priced and easy to use, making them an excellent choice for the beginning or intermediate artist.


2 Comments
Sandra
This is a very well written article for gel printing with botanicals. I have a suggestion though, It will help clarify things for beginners since it can get confusing when you’re first starting out with gel plates. I would switch the two photos left to right immediately following this paragraph:
…When Gelli printing I always take a second print. Remove the leaf from the page and you should see a perfect outline of the leaf in the acrylic paint. Take a print and you will notice that it is the positive image of the leaf…
That way the photographs match the progression of your instructions.
Nadine Milton
Thank you and thanks for your feedback!