How to use Resist Techniques with Alcohol Inks
Alcohol inks are a beautiful and vibrant medium and today I will share several ways to use resist techniques with alcohol inks in your projects.
This resist technique will work with a variety of projects, including art journals, cards, and scrapbook pages. If you are new to alcohol inks, this is a beginner friendly technique that will help you get started. This article includes tips for getting great results with your alcohol inks.
Hop-A-Long Studio is reader-supported. When you buy through links on our site, we may earn an affiliate commission at no cost to you. Learn more.
What is a Resist?
A resist is created by adding a barrier layer to the surface before adding another medium on top. In this case, we will be creating a resist that will repel or prevent the alcohol ink from sticking to the surface.
You can use a variety of objects and techniques to create a resist. Today I will be using shelf liner to create areas that will resist the alcohol ink.
How to Use Shelf Liner as a Resist
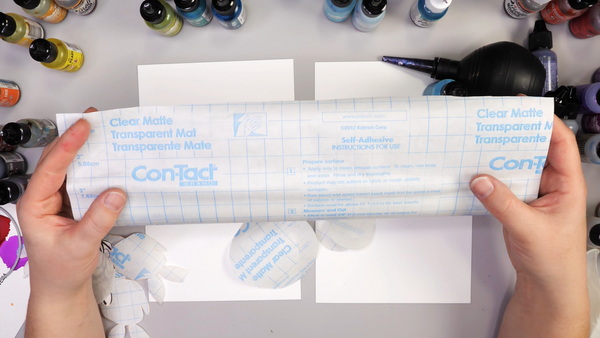
Why I chose to use shelf liner for these resist techniques with alcohol inks is because shelf liner has a repositionable adhesive surface. It can be purchased in transparent sheets and can easily be removed from Yupo. When creating alcohol ink projects, I would suggest using Yupo as the inks move beautifully on the surface. Yupo works well with shelf liner as it is easy to remove, but also has good adhesion when applied.
Cutting Shelf Liner to Shape
You can cut the shelf liner in any shape that you would like to add to your project. In today’s projects, I cut shelf liner in circles and the outline of a stamped shape for my resists.
To create the circles, the easiest way is to use a circle die and die cutting machine. If you don’t have these tools on hand, you can always draw circles using found objects or by hand. My favorite circle making tool is the Helix Circle Maker which helps you draw circles quickly. Use scissors to cut out your shapes.
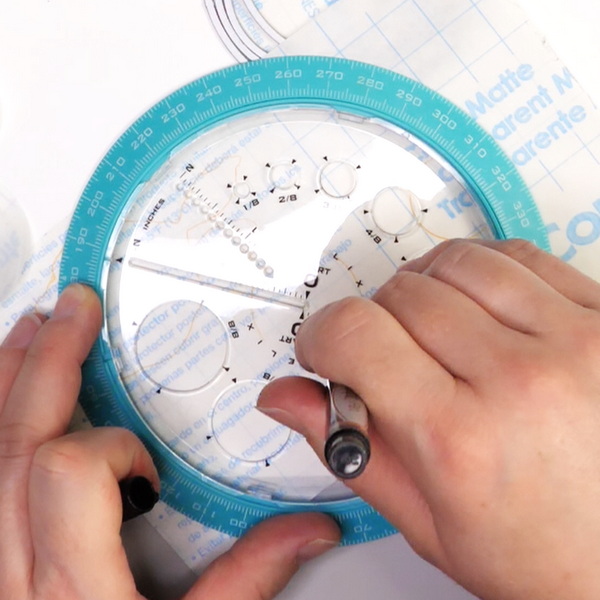
When choosing a stamped image for a resist, stamp your image on a white piece of paper and cut out. When cutting out the image I created a 1/8” border around the edge as I wanted a small white border around my completed image. Place the image upside down on the backing of the shelf liner and trace.
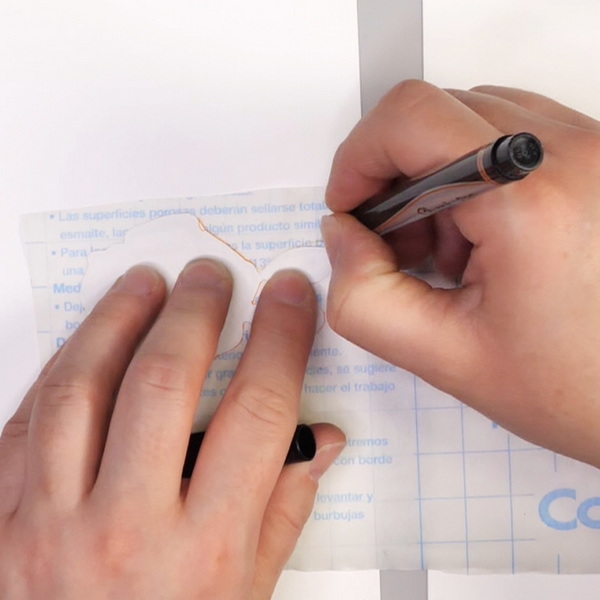
Make sure to trace the image upside down on the shelf liner backing. This way when you remove the backing and place it on the Yupo, the shelf liner will be in the right direction for stamping your image.
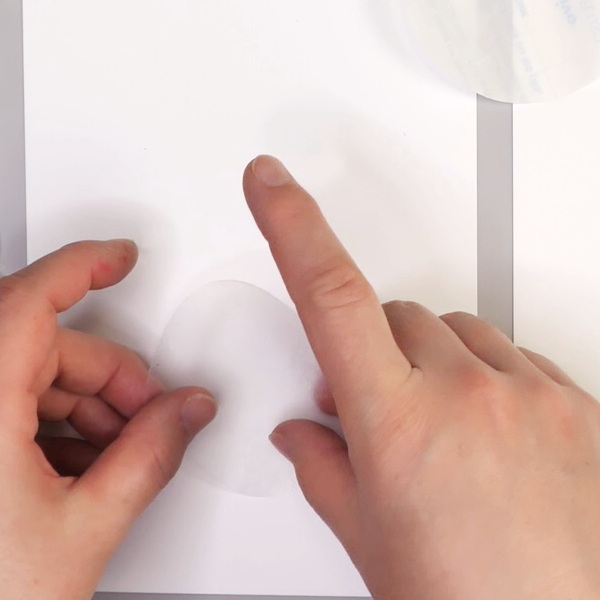
Once you have cut out your shapes, remove the backing and add the images to your Yupo surface.
Adding Alcohol Inks
Start by adding a small amount of 99% isopropyl alcohol onto your page. Tilt the Yupo to move the alcohol around the surface. While it is still wet, add a few drops of alcohol ink to the isopropyl alcohol. The alcohol ink will blend with the isopropyl alcohol and will move around the page.
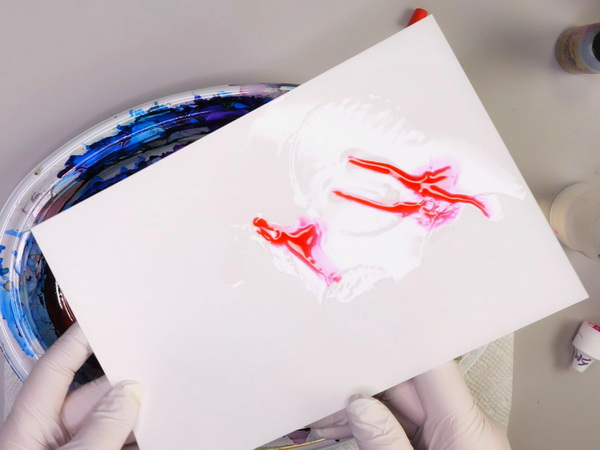
If you want to soften the color or get more movement around the page, add more isopropyl alcohol to the surface. Take your time, the ink won’t move super quickly, but as you let the color mix you will get beautiful blending and shading with the ink.
As you add the alcohol ink, you will see that the alcohol ink will cover the shelf liner. As the shelf liner acts as a resist, it will prevent color from being added to the white Yupo it is covering.
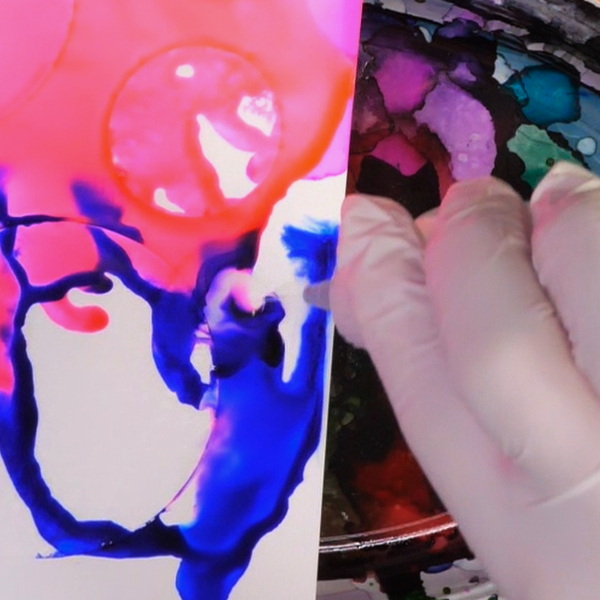
Continue this process of adding layers of ink and alcohol to the page and moving color around the surface. If you find that you have added too much alcohol or alcohol ink to the page, tilt the surface to let the excess ink fall onto a paper towel. You can also use a plastic dish to catch the ink so it can be reused in another project.
Alcohol Ink Color Blending
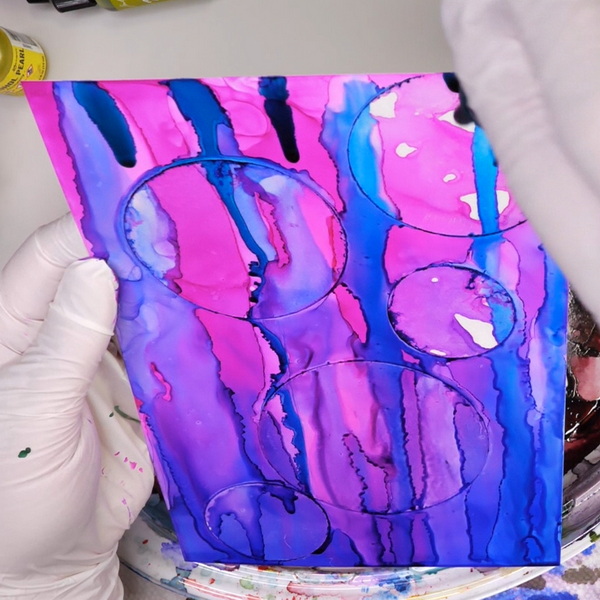
There are so many ways to spread and blend the alcohol ink. You can add colors in pools, tilt the paper to let the ink drip in lines, the ideas for blending alcohol inks are limitless.
My favorite way to use this technique is to create layers. I will create a first layer of alcohol ink color and let them dry completely. I will then add in more alcohol ink to create layers and accents to the first layer. Be aware that when you add alcohol to the surface, the ink below will rewet and mix with the fresh ink.
What is the Difference Between Isopropyl Alcohol and Distress Blending Solution?
Isopropyl alcohol and Distress Blending Solution are two unique products that I use with my alcohol inks. The main difference is that isopropyl alcohol is a very concentrated alcohol with very little water added. The Distress Blending Solution includes alcohol but also has resin and other ingredients in the solution.
Do I Have to use 99% Isopropyl Alcohol?
If you are looking for consistent results, I would highly suggest using 99% isopropyl alcohol. For success with alcohol inks, you want to use an alcohol that has as little water content as possible. Water and alcohol inks don’t play nicely together. For the best consistent results, use 99% isopropyl alcohol. I have tried using rubbing alcohol with my alcohol inks, but the water in the rubbing alcohol created blotchy and inconsistent results.
Should I use Distress Blending Solution or Isopropyl Alcohol?
Both isopropyl alcohol and Distress Blending Solution will help the alcohol inks blend on the surface. Both products will dilute the ink effectively for creating lighter shades of ink.
Distress Blending Solution is more expensive than isopropyl alcohol. I tend to mainly use isopropyl alcohol in my projects and use Distress Blending Solution only for projects using Alcohol Mixatives and Pearls.
Why are my Alcohol Inks Grainy?
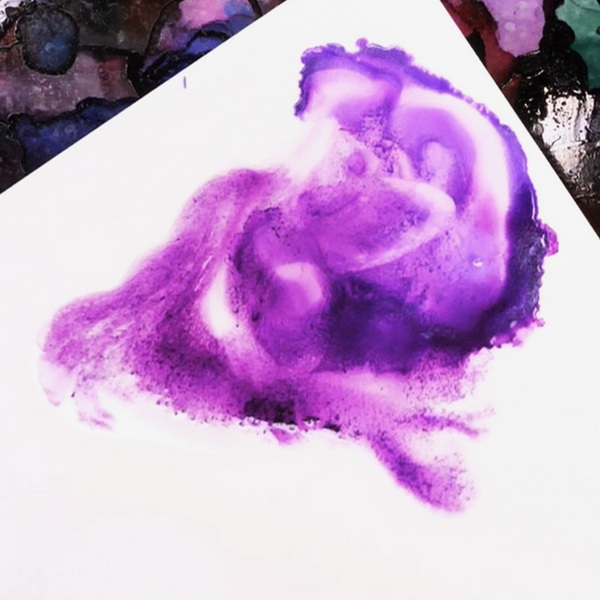
When using any alcohol inks with shimmer in them, like alcohol ink Mixatives and Pearls do not use isopropyl alcohol. The mica and other additives that create the shine do not mix well with alcohol inks. When you add the alcohol to these mediums, they will clump and will create a grainy look to your surface.
If you use Distress Blending Solution with these pearl and metallic inks, you will get even blending and beautiful shimmer.
How to Use Alcohol Lift Ink
Alcohol Lift Ink is an easy way to add texture by removing alcohol ink from your surface. This is not technically a resist, but it is a beautiful way to add beautiful patterns to your alcohol ink surface.
Cover your stamp with alcohol lift ink and stamp it onto the surface. Lift ink will pull up some of the alcohol ink color when you stamp, so have a piece of paper handy to stamp off on.
This is a fun way to create several projects at the same time. You can add lift ink to the alcohol ink surface and use the alcohol ink pulled from the surface on another project.
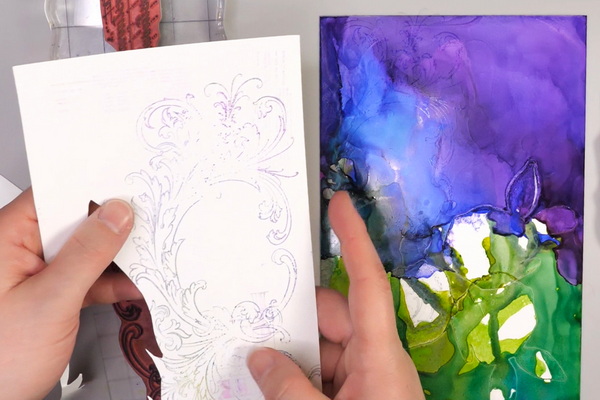
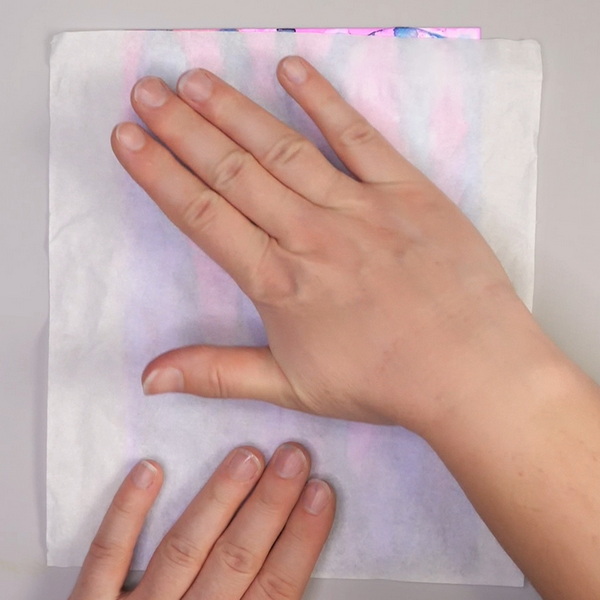
Once you have stamped your images, let the Lift Ink sit for several minutes. Using a Kleenex, cover the surface and gently press to remove any excess lift ink.
Use a Kleenex or a paper towel to rub the areas that have been stamped with Lift Ink. You will notice that the area with the lift ink will lighten and remove the alcohol ink color. This creates beautiful patterns to your surface.
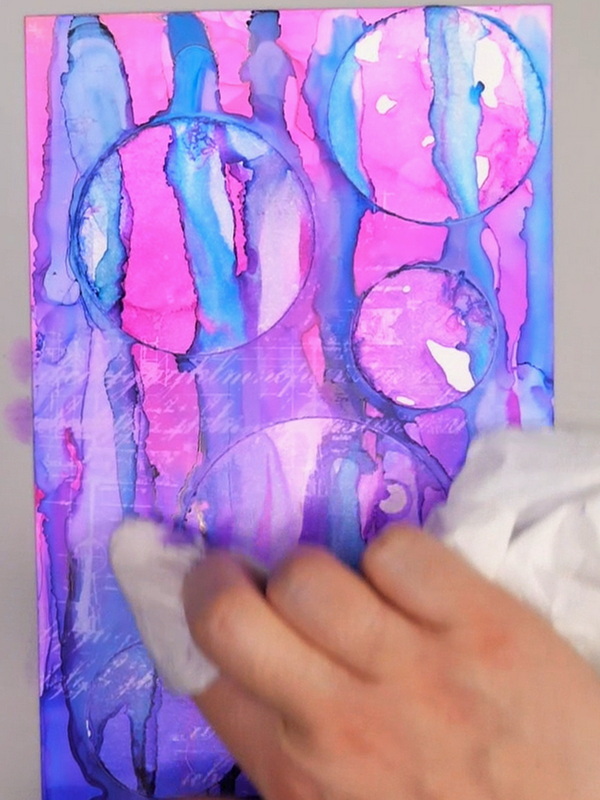
To get consistent results with this technique, do not rush the process. Take the time to let the ink sit, dab off the excess and then rub. This way you will get beautiful, detailed images.
When I first tried this technique, I rushed the process and ended up with blurred images that I wasn’t happy with. A few minutes of patience goes a long way toward fantastic results.
Removing Shelf Liner
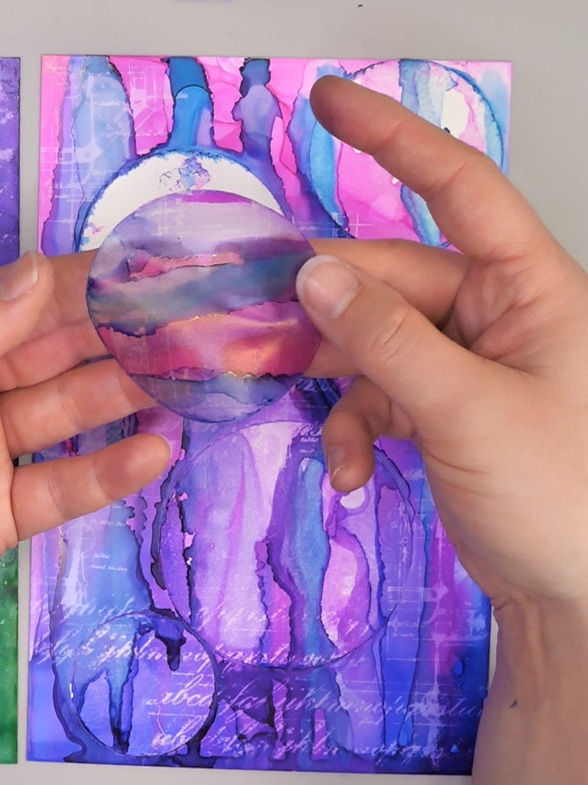
Remove the shelf liner from the alcohol ink background. You should be able to peel the images up easily from the Yupo.
You will notice that the shelf liner has alcohol ink on the surface. I like using these images for other projects as they make beautiful stickers. I would not suggest using these masks again on an alcohol ink project. If you do, the inks will rewet, and it might bleed onto your project in ways that you won’t be happy with.
When removing the shelf liner, it may leave a bit of sticky residue on the surface. You might also have places where the alcohol ink seeped under the shelf liner. If this happens, use a Q-tip and isopropyl alcohol to remove the ink.
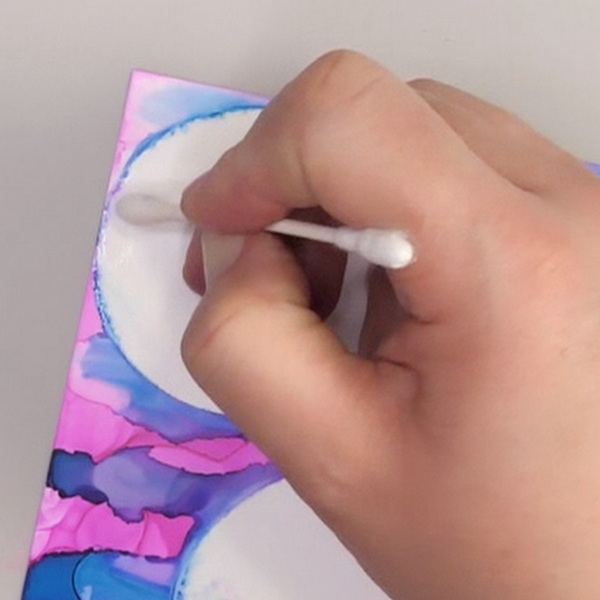
This may only lighten the areas with the alcohol ink, it may not completely disappear. But most of the ink can be removed. This is why it’s important to have a solid seal with the shelf liner so that you don’t have to do clean up later.
Stamping and Doodling in Resisted Areas
Now that you have these bold white areas, they can be left as is or other images can be added to them. My favorite technique is to add stamping and doodling to areas where I created the resist.
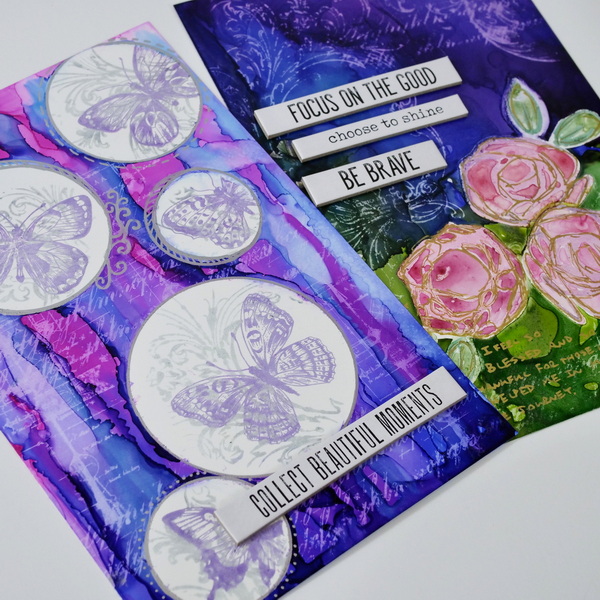
Using my Artistro acrylic paint pen and the Helix Circle and Angle maker, I outlined all my circles in pen. I continued to add doodle designs to the surface to give the circles a frame.
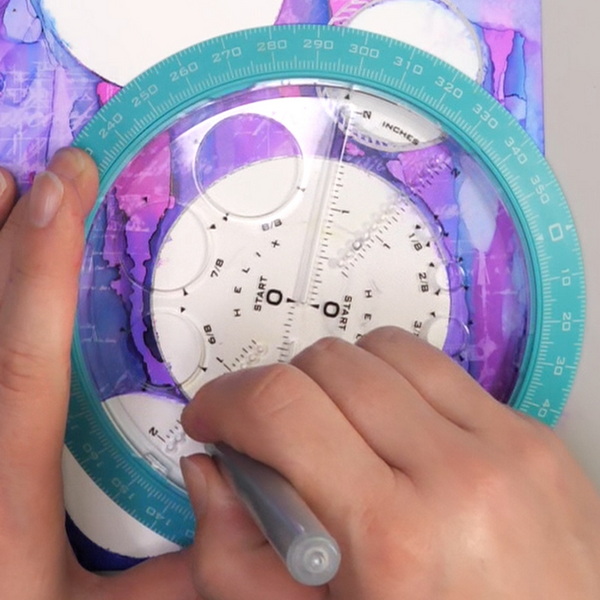
I chose to use archival ink for this step as it is oil based and will stick to the Yupo. To make sure that I didn’t stamp past the circle, I created circle masks to mask the area outside the circle.
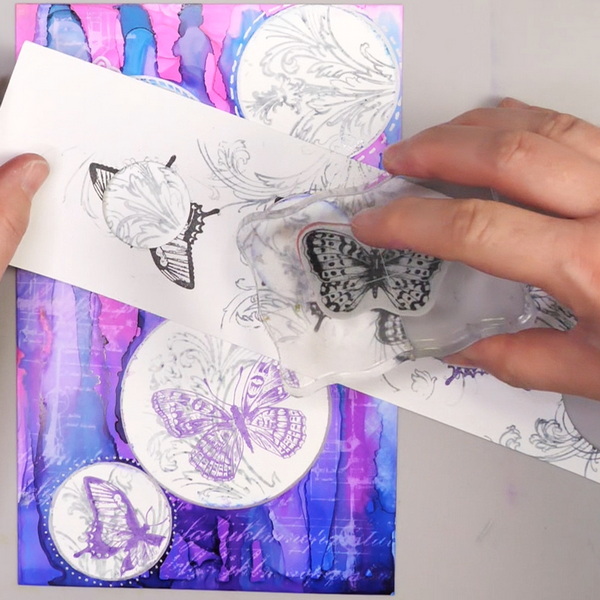
Be aware that archival ink stamped straight onto Yupo softens a bit as it dries. I tend to use bold stamps over detailed stamps when choosing images for my project.
For this project I stamped with Fabulous Flourishes stamps and Speckled Egg Archival Ink to create a background to the circles. Then I added Flutter butterfly stamps with Villainous Potion Archival Ink to stamp my focal images.
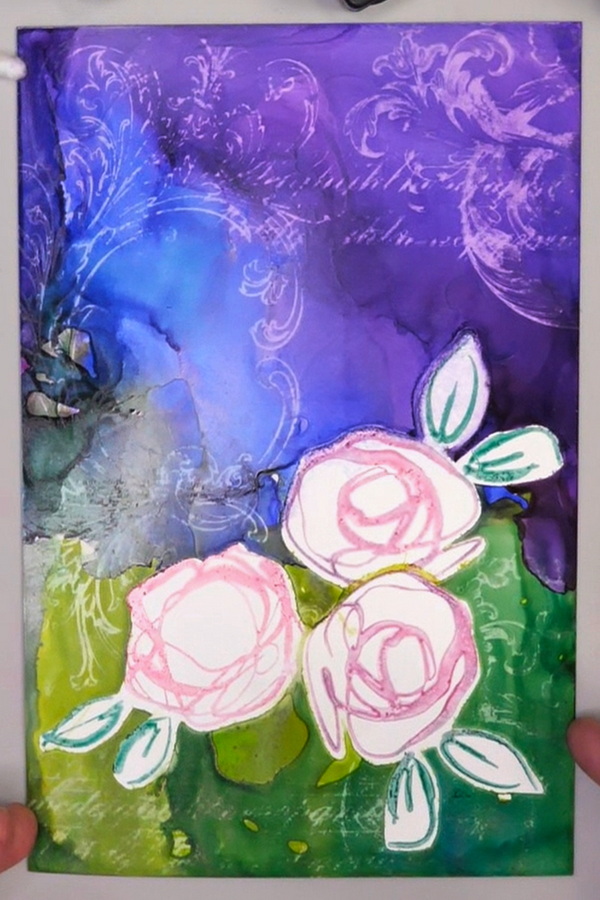
For the second layout, I stamped the roses from the Dina Wakley Abstract Blooms stamp set using archival ink Kitch Flamingo and Evergreen Bough.
Adding Watercolor Paints to Yupo
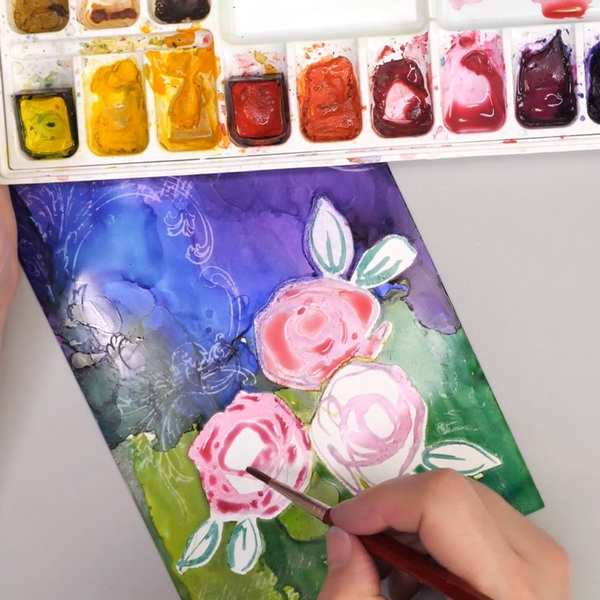
Yupo is useful for more than just alcohol inks. This medium also works well with watercolor and acrylic paints. The roses on the page did not feel complete, so I added in color using my watercolor paints. I chose to add in some darker hues, but you could also choose to have very pale pink to contrast with the ink.
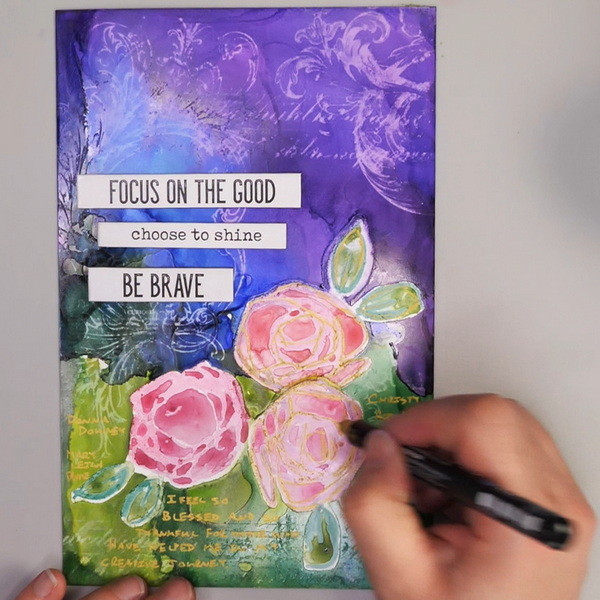
I felt like I lost some contrast, so to finish off this page, I added in sketchy lines with a Posca acrylic pen. This helped the roses pop from the page creating more dimension.
Today’s Journal Inspiration
As with every page, I start with a thought or question.
Who has inspired me in my creative journey to help me get to where I am today?
There are people in this world who inspire us. They plant the seeds in our lives to help us grow. In this page I focused on my art journey, but this could be in any area of our lives. These are people who choose to serve and help us, to encourage us and help us change for the better.
There are always people who want to discourage us, so I really wanted to think back on the positive memories. To think of the people who went out of their way to help me. I am so thankful and feel blessed to have met them and know them.
In this page, I wrote a note of thankfulness and included some of the names of the people who made an impact on my life. They inspired me to be more, to try more and to not give up.
This led to another question that I wanted to answer in this page.
“How do we want to show up in the world?”
We can choose to be competitive with others or be part of community. How do we want to show up in this world and what do we want people to remember about us? This has reminded me to think about how I want to live out every day and show up in the world. To remember the kind people who have helped me and hopefully be that person for someone else.
What to Do with These Yupo Pages?
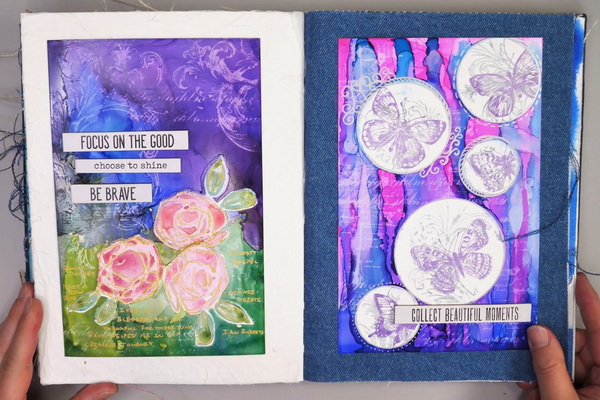
I finished up this page with some journaling and some Ideology Quote Chips that aligned with my theme.
What do you do with these Yupo pages after you have completed them? They can be added to a larger art journal page as a focal point for the page. They can be added to a slightly larger art journal page to create a frame around the piece. Or you can add it to a frame as a beautiful piece of home décor.
These resist techniques with alcohol inks can also be easily adapted for cards. My original test pieces were done with 5 by 7 cards. By leaving off the journaling this can make a beautiful card.
Questions?
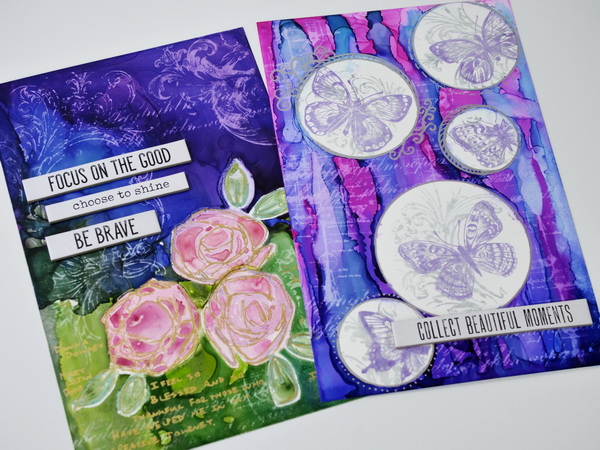
I know that I’ve covered a lot of information in today’s post about using resist techniques with alcohol inks. Any questions about resist techniques and how to use alcohol inks in your projects? I hope that you give this project a try. Alcohol inks are an easy medium if you are starting out with art journaling. Relax, have fun, and enjoy the process when working with alcohol inks!
For more alcohol ink inspiration, check out Sherry Telle, another fantastic alcohol ink artist! I have had the opportunity to take classes from her and she does amazing work with alcohol inks.
I would love to hear from you! Leave a question or comment below. I would love to start a conversation!
Project Supply List
Legion Yupo Paper
Contact Brand Clear Matte Shelf Liner
EK Success Cutter Bee Precision Scissors
Sizzix Framelits Die Set
Tim Holtz Sizzix Vagabond 2
Tim Holtz Sizzix Vagabond 2 Cutting Plates
Dina Wakley Media Abstract Blooms Stamps
Staples 110 lb White Cardstock
Archival Ink Jet Black
Jacquard Pinata Alcohol Inks: Senorita Magenta, Sapphire Blue, Teal, Baja Blue, Rainforest Green, Copper Purple
Tim Holtz Alcohol Ink Aquamarine
Tim Holtz Villainous Pearl Alcohol Ink
Tim Holtz Tranquil Pearl Alcohol Ink
Tim Holtz Alchemy Pearl Alcohol Ink
Ranger Tim Holtz Alcohol Ink Stream
Ranger Tim Holtz Alcohol Ink Boysenberry
99% Isopropyl Alcohol
Ranger Tim Holtz Alcohol Ink Citrus
Ranger Tim Holtz Alcohol Ink Pool
Ink Blower
Tim Holtz Alcohol Lift Ink
Stamping Block
Tim Holtz Archival Ink Kitsch Flamingo
Tim Holtz Archival Ink Evergreen Bough
Tim Holtz Archival Ink Speckled Egg
Tim Holtz Archival Ink Villainous Potion
Tim Holtz Stamper’s Anonymous Faded Type
Tim Holtz Stampers Anonymous Baroque Stamp Set
Tim Holtz Stampers Anonymous Fabulous Flourishes
Tim Holtz Stampers Anonymous Flutter
Tim Holtz Stampers Anonymous Warehouse District
Uni Posca Fine Acrylic Marker Gold
Winsor and Newton Cotman Watercolor Permanent Rose
Winsor and Newton Cotman Watercolor Alizarin Crimson Hue
Winsor and Newton Cotman Watercolor Purple Lake
Winsor and Newton Cotman Watercolor Dioxazine Purple
Daniel Smith Extra Fine Watercolors Sap Green
Winsor and Newton Cotman Watercolor Viridian Hue
Winsor and Newton Cotman Watercolor Hooker’s Green
Kleenex
Paper Towel
Helix Angle and Circle Maker


