How to Use Layering Stencils to Create Dimensional Images
Have you ever tried using layering stencils to make dimensional images for your projects? Layering stencils are extremely popular but understanding a few key techniques can help you get consistent results. If you don’t own any multi-layered stencils, today I’ll show you how you to create layered images using any stencil in your collection.
Hop-A-Long Studio is reader-supported. When you buy through links on our site, we may earn an affiliate commission at no cost to you. Learn more.
How to Use Layering Stencils
Recently, there has been a trend toward layering stencils that use several stencils to make one image. This means ink, paint and other mediums can be added in layers to create one beautiful and intricate image with multiple colors. I recently purchased Altenew Golden Days stencil on a whim, and I now use this stencil on many of my projects. It creates beautiful, complex images very easily.
When learning how to use layering stencils, there’s a few things to consider before using them and adding color to your image.
Color
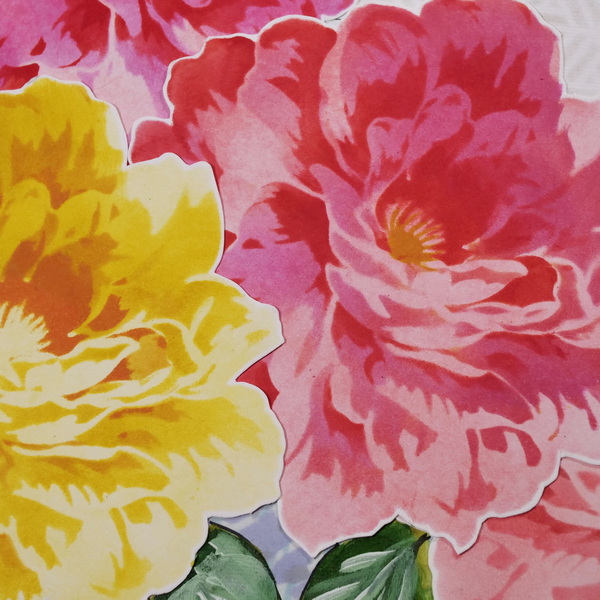
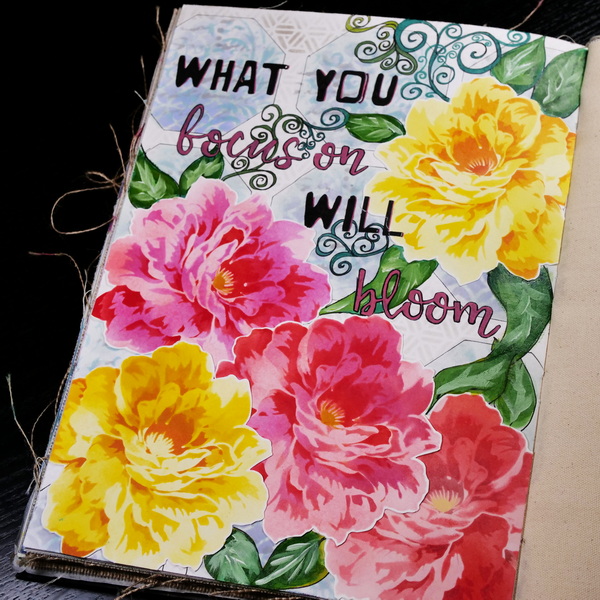
Understanding color is very important. For each layer to work the best and create highlights, shadows, and dynamic colors, you need to work in one color, but in a variety of hues. For creating the yellow peony image, try using Tim Holtz Distress Ink Wild Honey, Squeezed Lemonade, Mustard Seed and Spiced Marmalade. These ink colors range from light yellow to a dark, orange/yellow color.
By using colors that are similar, this brings harmony to your design and creates a beautiful, dimensional image. You can use more than one color, but sticking to one side of the color wheel will generally give you a more cohesive look. Depending on the stencil you are using will affect how much variation in color you can use. Take time to experiment and figure out your favorite color combinations!
Opacity
If you are using ink with your layering stencils, I recommend a dye ink like Tim Holtz Distress Inks. You can use opaque inks like oxides or chalk ink, which provides much more solid color. But this makes them less forgiving and harder to blend the colors from each layer together. You will need to have more variation in values between the layers to compensate for the opacity.
How to Use Altenew Golden Days Layering Stencil
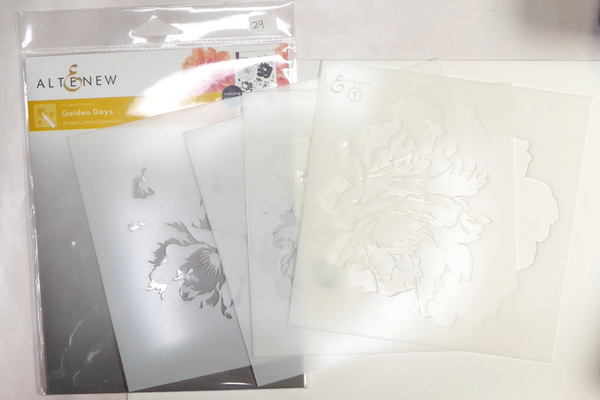
Most layering stencils come with several stencils in one package that are sold as a set. Today I’ll be demonstrating with the Altenew Golden Days layering stencil.
For the Altenew stencils, each stencil has a number etched on the stencil. They will be numbered 1 through 4 so that you know which stencil to start with.
Altenew Golden Days Stencil Layer 1
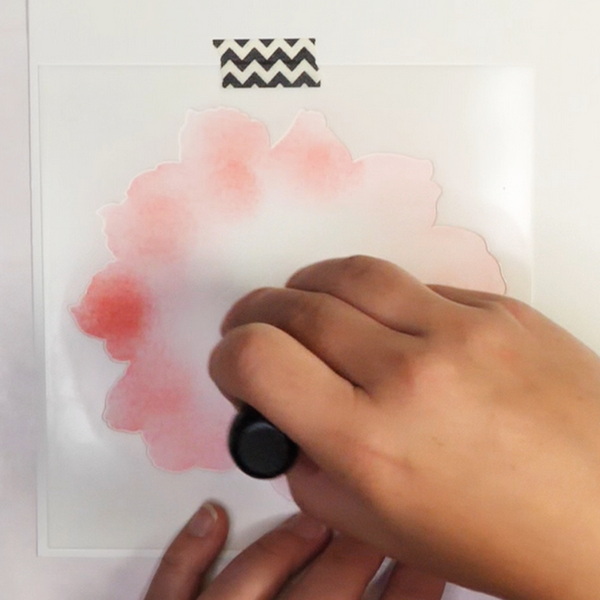
Start with stencil 1, which is the basic image outline and use the lightest color of ink or paint for this layer. For this demonstration, I’m using a Tim Holtz Mini Blending tool with a domed foam to add Distress Ink Worn Lipstick to my image.
Depending on the intensity of your lightest color, you can add one, two or more layers of ink through the stencil. I purposely chose to create a less consistent layer of ink as I wanted it to look like there was lighter and darker spots on the peony. This gives the illusion of spots of sunlight hitting the flower. Let the ink dry completely before adding the next layer.
Altenew Golden Days Stencil Layer 2
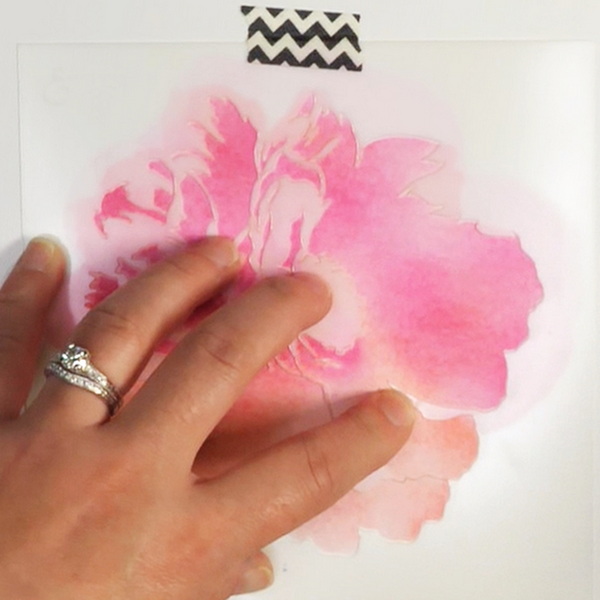
Add stencil 2 on top of the inked image, lining up the edges of the stencil. What you’ll find with these stencils is that they don’t cover the same surface area as stencil 1. You’ll need to look for reference points at the bottom and side of the flower to correctly line up the stencil.
Once you have lined it up, add a piece of washi tape to secure your stencil in place. Add your next color, which should be a bit darker than the previous color. I am using Distress Ink Picked Raspberry to add the next layer of color.
Altenew Golden Days Stencil Layer 3
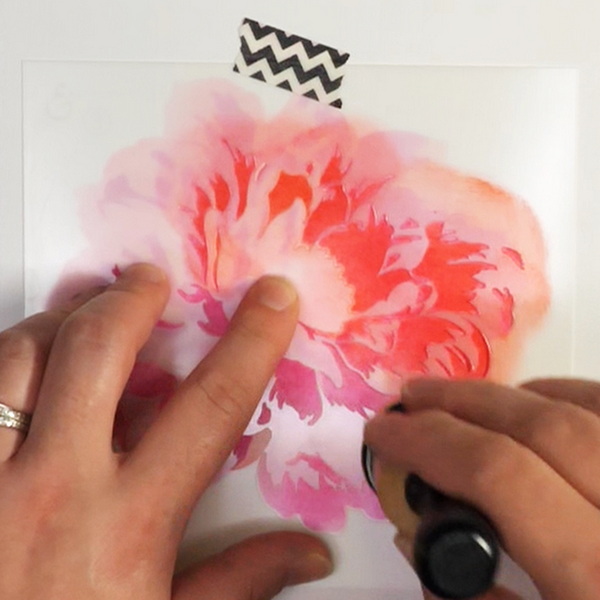
Add the third stencil to the surface, but this one you may find a bit more difficult to line up. Look at the bottom flower petals for a reference point. For this layer there are 3 main reference points on the bottom petals that will line up.
Use a darker ink color than in layer 1 or 2. Because I don’t have a lot of pink ink colors, I used Festive Berries Distress Ink. By adding it lightly to the surface, the pink from below mixes with the red. This creates a harmonious design as the ink is semi-translucent.
Altenew Golden Days Stencil Layer 4
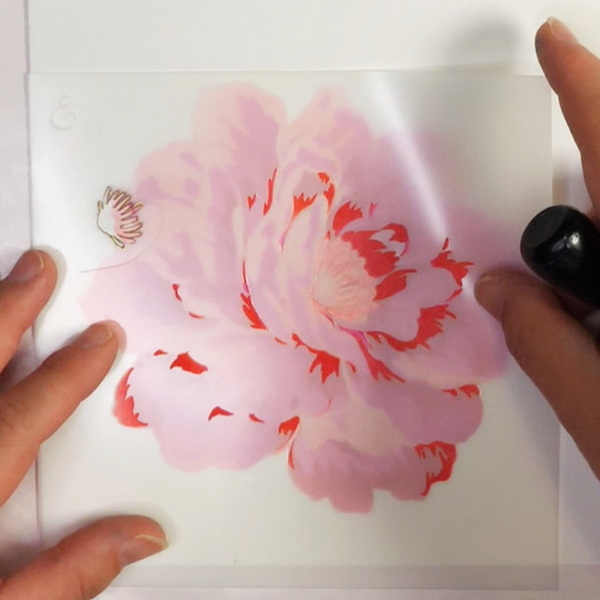
For the fourth stencil, it might be a bit challenging to line up this stencil correctly. Try lining up the stencil with the flower center as a guide. From there, it should be easier to see which petals line up with the stencil. Use your darkest color for this layer. For my flower I used Tim Holtz Distress Ink Barn Door.
The fourth stencil also includes a flower center. You can make this dark or light depending on your preference. As peony centers are usually lighter in color, I chose Wild Honey Distress Ink for this step.
You could also choose to use a medium or a paint pen to add shimmer or shine to the flower center. If you want the flower center color to stand out from the image, use a more opaque medium. For this example I used a dye ink to allow the color to mix and blend with the red giving it a much more subtle yellow tone.
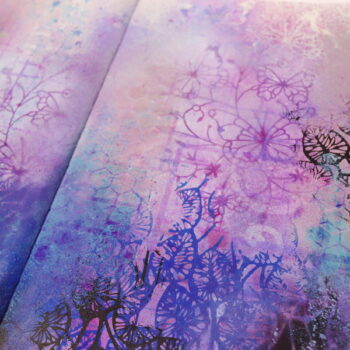
Layering Stencils Using Any Stencil Image
As amazing as the complex layering stencils are, you may want to create an image with the stencils you already own. It’s quite easy to create a custom image with any stencil once you understand the process.
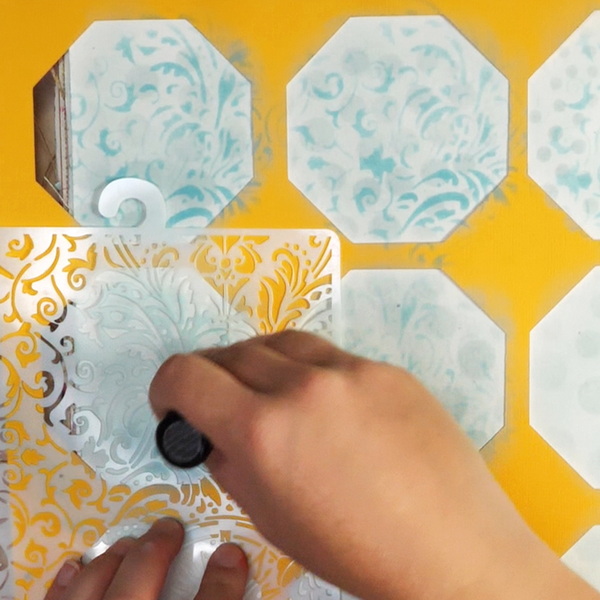
Start with a Large Stencil
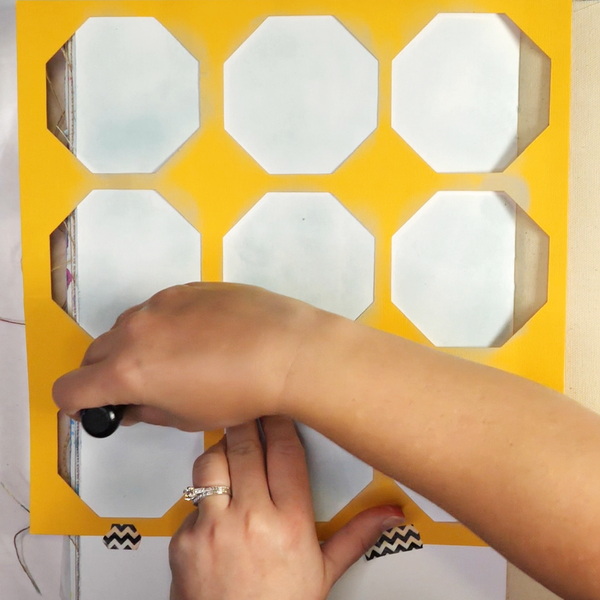
For this technique to work, you need to start with a stencil with large openings. For this demonstration, I created my own stencil using cardstock and my Brother ScanNCut.
Add the stencil to the surface using washi tape or any low tack tape. Using your favorite ink, paint or other medium, add color to the stencil. For this art journal project, I used Tim Holtz Distress Oxide Ink Speckled Egg to add color through the stencil with a blending tool.
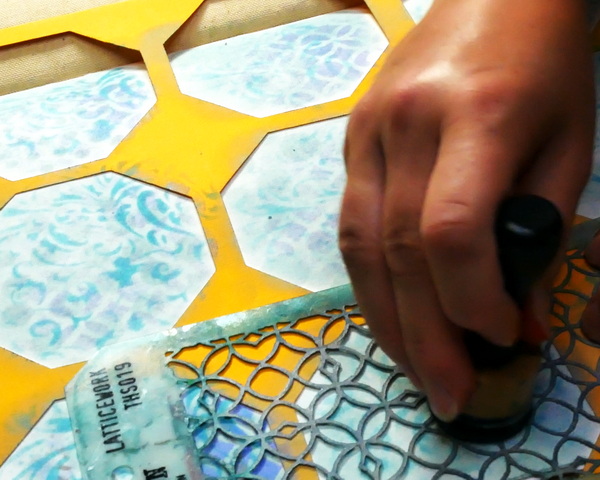
Adding the Second Layer
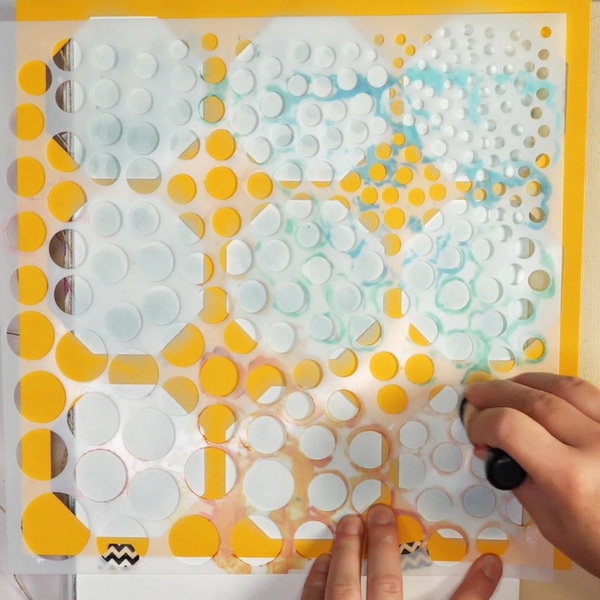
Leave the hexagon stencil in place and add another stencil on top of it. I used The Crafter’s Workshop Circle Explosion stencil as this gives me a variety of large to small circular shapes. To give these circles a more subtle feel, try adding another layer of Speckled Egg Oxide Ink to the surface using a blending tool.
Adding the Third Layer
Depending on the size of your stencil openings and the images you would like to add on top, you now have several design choices.
You can leave the two stencils on the surface and add another stencil on top. This means that any color that you blend onto the surface will only be inside the circle patterns.
You can also choose to remove the circle stencil and instead add a few more layers to the hexagon shapes. As my openings weren’t very large, I chose to remove the circle stencil.
To add extra layers to the surface I added Broken China Distress Oxide Ink through a Stamperia stencil. To add a different color to the background, I also added in Shaded Lilac Oxide Ink through a Tim Holtz Latticework stencil. I finished off my adding Hickory Smoke Oxide Ink through a Stamperia word stencil.
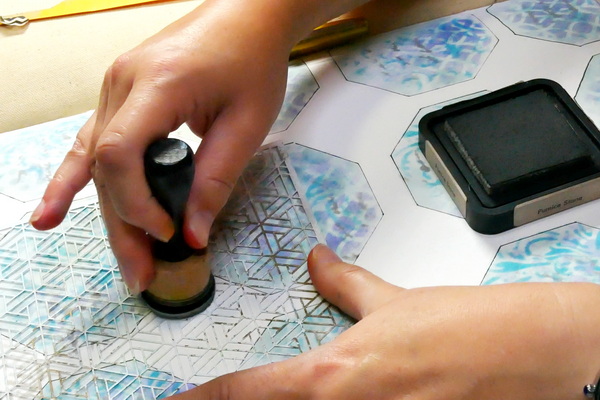
One you’ve added your layers, remove the hexagon stencil and you’ll see that now you have a multi layered image. You can create a lot of details in just one image using this technique. The key is to vary the sizes between the stencils and how you add them to your journal page.
Art Journal Page Using Layering Stencils
To turn these layering stenciled images into a beautiful art journal page, only a few more steps are needed.
Art Journaling Inspiration
When I start a page, I always start with a thought that drives the direction of my artistic process.
The inspiration for this page was this thought:
What you focus on will bloom
As we’re in the last few months of the year, my thoughts have turned to what I want to accomplish by the end of the year. I’ve been thinking the goals that I have accomplished this year and other ones that I’m struggling to get traction on. My realization is that we can plan, but if we don’t focus on the things that are important to us, they won’t happen on their own.
There are so many distractions in our lives. How do we get past the distractions to focus on the things that are really important? We need to choose. To prioritize and decide what we will say yes and no to. This page is a reminder to decide what my focus will be and to work hard on the things that really matter.
It’s also been a challenge to me to think about where my attention goes. Do I focus on things that go wrong, or on things that irritate me or frustrate me? Or do I focus on the good? This doesn’t mean we have a perfect life without frustrations. But do we choose acceptance and peace, or do we choose focusing on the negative?
I feel that this is a good reminder to continue to work on self-care. Sometimes self-care is taking time for creativity and art. Sometimes it’s just giving ourselves the opportunity to re-prioritize, focus on the good and find acceptance when things don’t go according to plan.
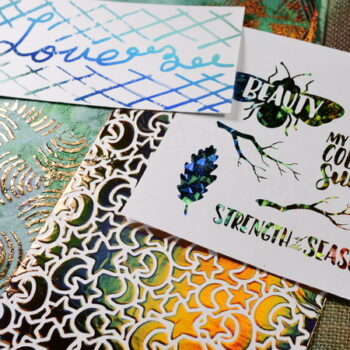
Adding Definition to the Background
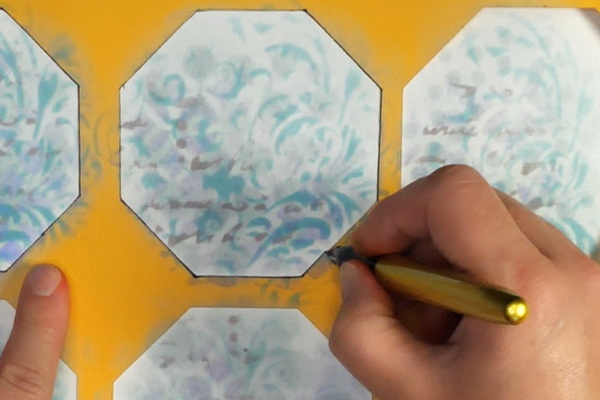
As I wanted the hexagon shapes to represent a lattice, I used a Plaisir fountain pen with black ink to outline the hexagon shapes. Using Paper Rose Triangle Burst stencil, add in texture using Pumice Stone Distress Ink.
Using Art Glitter glue, attach the fussy cut Altenew Golden Days peonies to the art journal page.
Adding the Quote
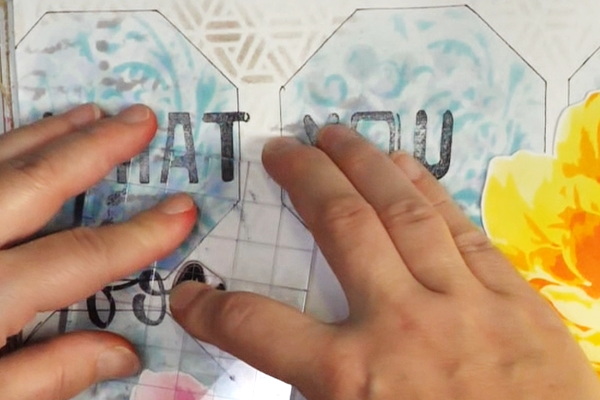
As I was working on rough watercolor paper, I knew that using stamps to add my quote would lead to a lighter colored image. Using Jet Black Archival ink, I stamped the quote onto the page. This will serve as a guide for adding paint pen to fill in the letters to make them darker.
It’s important on art journal pages to have a range of color and values. By darkening the letters with a Uni Posca Black acrylic paint pen, this helped the quote pop on the page. Because the archival ink stamped lightly, this also let me use Artistro Trending Colors paint pens to add color to the cursive letters.
Adding Leaves and Doodles
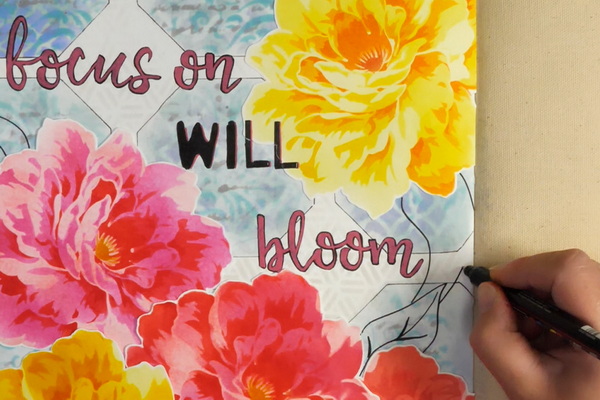
To help bring the focal images together, try adding leaves and doodles. My intention was the give the impression of vines twining and that the flowers, leaves, and trellis were part of a cohesive image. Draw simple leaves and doodle images to the page using a Uni Posca black paint pen.
To finish off this page, paint the leaves and doodles. For the doodles, I used a variety of Artistro Trending Colors paint pens.
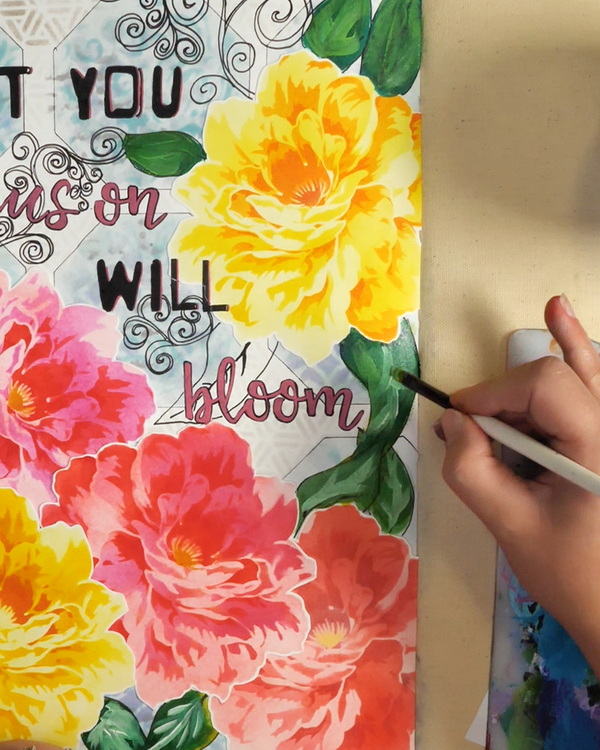
For the leaves, I used a combination of acrylic paints. Using Golden Green Gold acrylic paint and a small flat paintbrush, add a layer of paint to the leaf shapes. Using a bit of Holbein Hooker’s Green and Golden Phthalo Green (Blue Shade), add dark areas to the leaves. Continue to add in layers of paint until you reach the right consistency of color. To add highlights and details to the leaves, mix the green paint with Amsterdam Titanium White and add to the leaf margins.
Any Questions?
Any questions on how to use layering stencils or about how to create your own custom layered designs? I hope that you found this tutorial helpful for how to use layering stencils and how to incorporate them into an art journal page.
I would love to answer any questions or comments that you have. Please leave a comment below, I’d love to start a conversation with you! I hope that you give this technique a try and take time for personal self-care this week.
Project Supplies

Hammermill 8.5” x 11” Colored Cardstock 110lb Paper is a premium thick cardstock designed for print and copy use on copiers and printers. It’s heavy cardstock that’s ideal for heavy duty projects.
Altenew – Simple Coloring Stencil – 4 in 1 Set – Golden Days – $21.44
from: Scrapbook.com

Tim Holtz Distress Ink Pads – Worn Lipstick
from: Scrapbook.com

Tim Holtz Distress® Ink Pad Picked Raspberry
from: Ranger Ink Industries
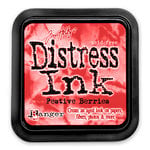
Ranger Ink – Tim Holtz – Distress Ink Pads – Festive Berries
from: Scrapbook.com

Ranger Ink – Tim Holtz – Distress Ink Pads – Barn Door
from: Scrapbook.com

Tim Holtz Distress® Ink Pad Wild Honey – $5.99
from: Ranger Ink Industries
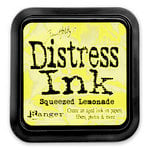
Ranger Ink – Tim Holtz – Distress Ink Pads – Squeezed Lemonade
from: Scrapbook.com

Tim Holtz Distress Ink Pads – Mustard Seed
from: Scrapbook.com
Tim Holtz Distress Ink Pads – Spiced Marmalade
from: Scrapbook.com

Ranger Ink – Tim Holtz – Distress Ink Pads – Pumice Stone
from: Scrapbook.com
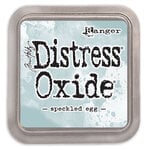
Ranger Ink – Tim Holtz – Distress Oxide Ink Pads – Speckled Egg
from: Scrapbook.com
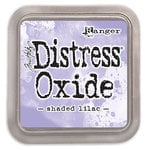
Ranger Ink – Tim Holtz – Distress Oxides Ink Pads – Shaded Lilac – $6.64
from: Scrapbook.com
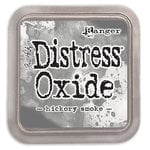
Ranger Ink – Tim Holtz – Distress Oxides Ink Pads – Hickory Smoke
from: Scrapbook.com
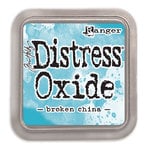
Ranger Ink – Tim Holtz – Distress Oxides Ink Pads – Broken China
from: Scrapbook.com

The Artistro Paint Pens for acrylic painting are made with the highest quality water-based Italian imported inks for a smooth, consistent flow and glossy, opaque finish. Our 0.7mm extra fine tipped nibs are made in Japan with love.

Art Glitter Glue is permanent and dries clear and adheres to a variety of surfaces. It's water based and acid free. Make sure to close lid to avoid drying of glitter glue. Bundle comes with one bottle of 8oz, one bottle of 2 oz and a metal tip for easy application.

Introducing the ultimate tool for unleashing your creative potential - the Posca Paint Marker. Elevate your artistic endeavors with a marker that combines innovation, versatility, and top-notch quality, all in one package.
Robert Simmons Simply Simmons Synthetic Brush – Flat Shader, Short Handle, Size 8
from: Blick Art Materials
Holbein Fluid Acrylics – Hookers Green, 35 ml Bottle
from: Blick Art Materials

Golden Fluid Acrylics – Phthalo Green (Blue Shade), 1 oz bottle
from: Blick Art Materials
Amsterdam – Titanium White, 120 ml tube
from: Blick Art Materials


Ranger Ink – Tim Holtz – Mini Ink Blending Tool – Round
from: Scrapbook.com
Ranger Ink – Tim Holtz – Mini Ink Blending Tool Replacement Foams – Domed
from: Scrapbook.com

The Jet Black Archival Ink Pad by Ranger Ink is acid-free, non-toxic, water-resistant, and fade-resistant, and provides lasting results. This ink will not deteriorate paper and does not bleed when inks, paints, or markers are used over it.
Introducing the ultimate tool for unleashing your creative potential - the Posca Paint Marker. Elevate your artistic endeavors with a marker that combines innovation, versatility, and top-notch quality, all in one package.
Faber-Castell Collapsible Water Cup
from: Blick Art Materials

My favorite paper towel to use in my art space, it's durable and strong.