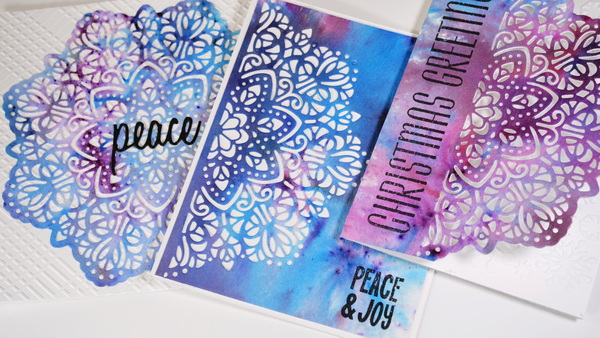
3 Christmas Card Ideas Using One Die Cut Design
If you’re new to making Christmas cards or are looking for a simple and easy holiday cards, today I’m sharing 3 Christmas card ideas using only one die cut. I love choosing beautiful and intricate dies for my cards. If you choose the right die, it can be used for so many different designs!
Hop-A-Long Studio is reader-supported. When you buy through links on our site, we may earn an affiliate commission at no cost to you. Learn more.
Creating Colorful Backgrounds
One of the keys to a beautiful and unique Christmas card designs is creating a beautiful, colorful background. There are many patterned papers and colorful cardstocks that will give you fantastic results. But one of my favorite techniques is to make my own patterned paper. By using watercolor paper with Brusho Crystal Colours and Nuvo Shimmer Powders, we can create colorful and unique shimmery backgrounds.
Brusho Crystal Colours
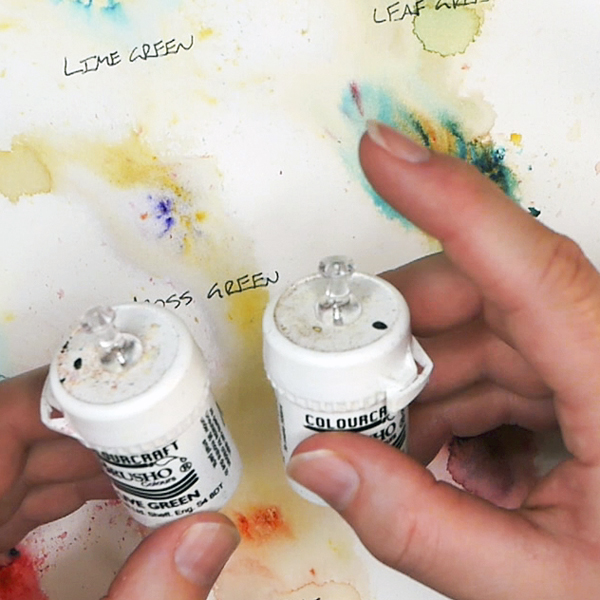
Brusho Crystal Colours are highly pigmented watercolor crystals. These crystals create colorful and unique backgrounds when mixed with water. The high pigment loads produce intense color, and every color has a mix of multiple colors within each color. This means that a green color will not just have green crystals in it, but also blue, yellow, and black. This variation makes for amazing results on your projects!
For more information about the basics of brushos, visit this article.
Nuvo Shimmer Powders
Nuvo Shimmer Powders are a newer product that I have started using. These shimmer powders work in the same way as the Brushos. They are watercolor crystals, but they also have mica included with the color. I find that they are less pigmented than the Brusho Crystal Colours, but the mica adds a beautiful, shimmery look to any project.
I have been using these to complement my Brushos as these two mediums can easily be mixed.
How to Make Backgrounds Using Brusho Watercolor Crystals
Adding Brusho and Nuvo Watercolor Crystals
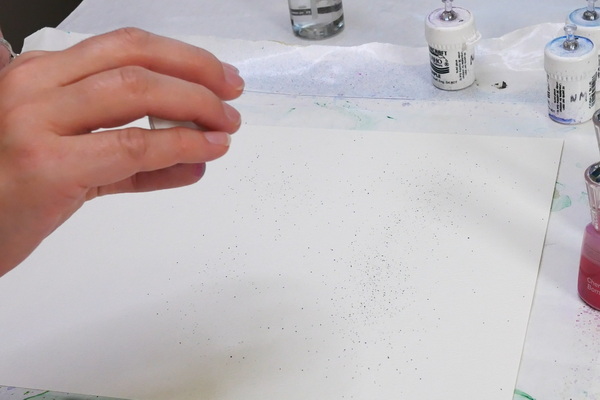
Start by adding a generous amount of Brusho and Nuvo watercolor crystals to your watercolor paper. I would suggest using watercolor paper or mixed media paper as it will absorb a lot of color and water.
Shake out color onto your page. You should not have mounds of color, but a light sprinkling of powder across the page. Add your favorite colors to your page. For the Brushos I used Rose Red, Purple, Prussian Blue, and Turquoise. I also used Nuvo Shimmer Powders in Lilac Waterfall, Cherry Bomb and Lunar Rocket.
I used more colors than I usually use for Brusho backgrounds, but since the colors were in similar color families (red, blue, and purple), it worked fine. If you want to have multiple contrasting colors on the surface, stick to 3 colors of Brushos and a complementing color of Shimmer Powder to add shine. If you use too many colors, this can make a muddy mess if the colors don’t work together.
Adding Water to Watercolor Crystals
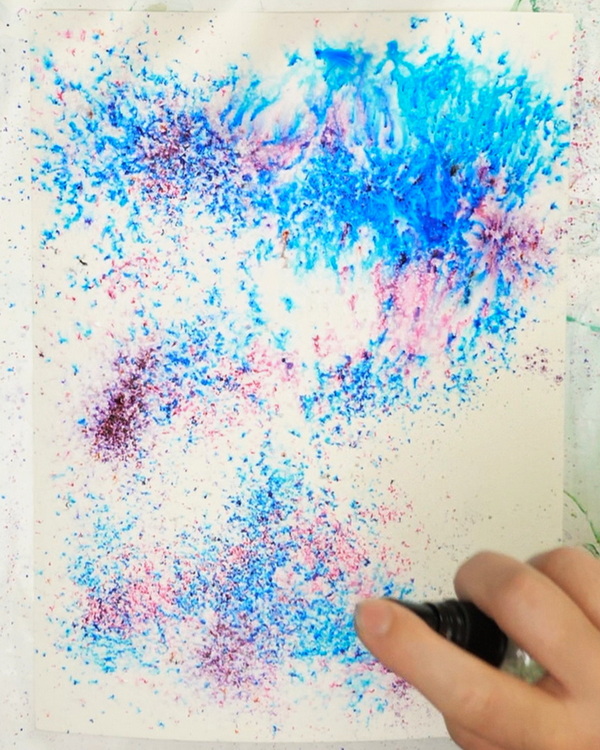
Using a spray bottle with a fine mist, mist the surface of the page. You’ll notice that the colors will wet and start moving on the page. For a more speckled and contrasting look, add very little water. If you want soft, watery backgrounds, continue to add water until you get a very soft, blended background.
Be careful when you add water because you don’t want it pooling on your page. You can always add more layers of color onto the page and rewet the color to get a deeper colored mix. Brushos are meant to be layered, so you can always go back in to add more water. If you add too much water, you lose some of the variation to the background.
For these backgrounds, I did them in one layer, but if you want to add layer on layer, this is a great way to have more control over your color mix.
3 Designs Using One Die Cut
If you get the right die cut, you can get multiple designs out of one image. I find that simpler designs like trees, ornaments and snowflakes are easier to use in many ways on a card. The die that I’m using today is an “off the edge” die, the Frosty & Bright Snowflake from Crafter’s Companion. These off the edge dies open more creative possibilities when creating unique card designs.
How to Use a Die Cut Machine with Thin Metal Dies
If you have never used a die cut machine with thin metal dies, here’s the most basic way to cut a die.
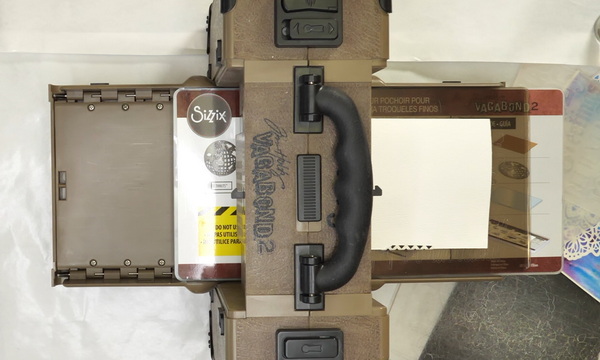
First, you need a die cutting machine. I’m using the Sizzix Vagabond 2, but this has recently been replaced by the Big Shot Switch machine. There are a variety of machines available from different companies, but I’ve had good success from the Sizzix machines.
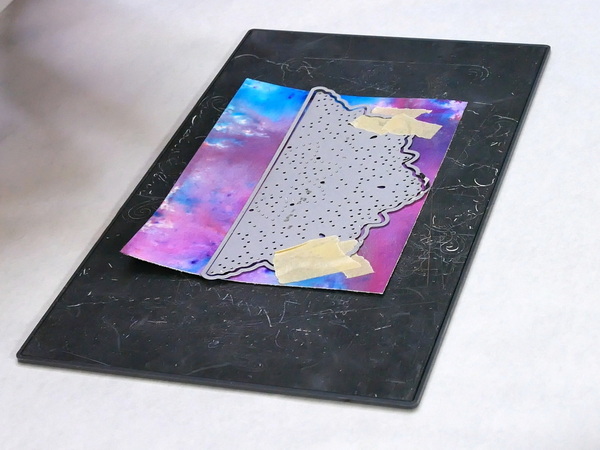
Based off the instructions from the manufacturer, make a sandwich of paper and die between two cutting plates. Depending on the machine, the plates, order, and set up of these plates are different.
To get a good cut, make sure that the metal die cutting side is facing up (the bumpy side of the die) and the paper is laying on top of it. This will give you the best cut and will prevent you from dulling your metal die.
Once you follow the manufacturer’s instructions on how to layer the paper, die and plate, run this through the machine. It will cut the paper to create the die cut shape.
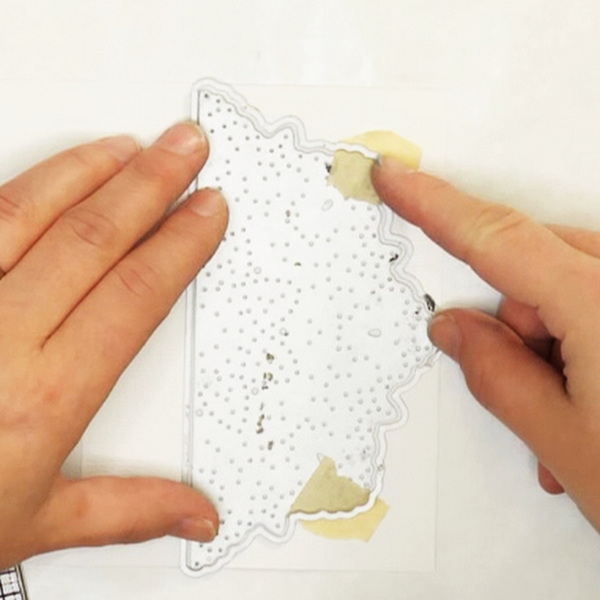
Troubleshooting Tips for Intricate Die Cuts
If you have intricate dies, you may need to run them through your machine several times to get a good image. Depending on how flat your cutting plates are, this will affect the quality of the cut. You may need to add small layers of paper or cardboard between the plate (called shims) so that you get a good cut.
I recently purchased a Sizzix Precision Base Plate and it’s been very helpful for getting even cuts with intricate dies. The base is made of metal, so it is stiff and works a lot better for me to get an even cut.
Using An Off the Edge Die for Christmas Cards
Off the edge dies work a bit differently that most die cuts. Where most dies have a cut border all the way around the image, the off the edge dies have an edge that can be used or removed from the image.
This means that there are more design options when using this type of die as I’ll demonstrate below.
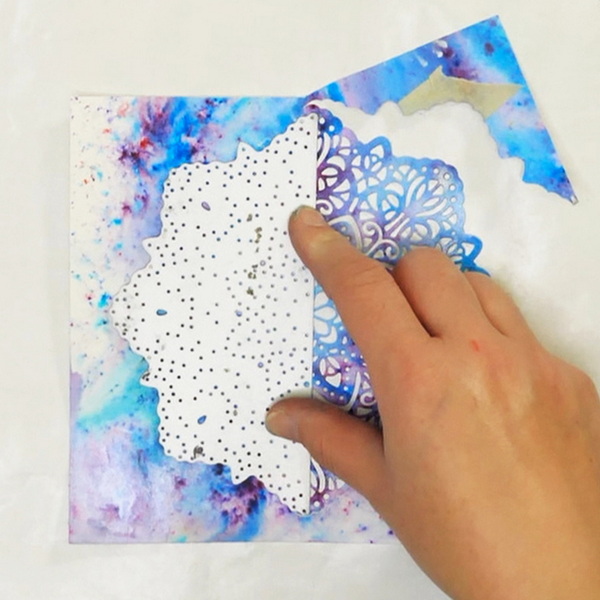
Die Cut Subtractive Technique

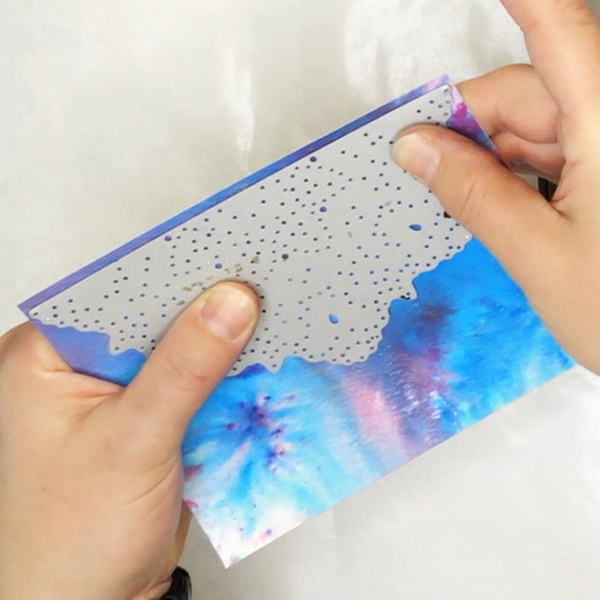
The first technique is to use the die in the way is was designed to be used, as a subtractive die. Instead of cutting out the edge of the paper, this die cuts out the details but does not cut around the edge.
For this card, cut a piece of Brusho background paper to 4.25 by 5.5 inches. Line up the die to the edge of the paper and run it through your die cut machine. When you pull the die from the paper, you will be left with a detailed image without an edge.
I trimmed the edges by 1/8” on each side and mounted the watercolor paper on a 4.25 by 5.5 inch (A2 size) white card back. This leaves a very thin white border around the card and creates contrast between the Brusho paper and the snowflake design.
Tri-Fold Card Using Die Cut Edge Technique
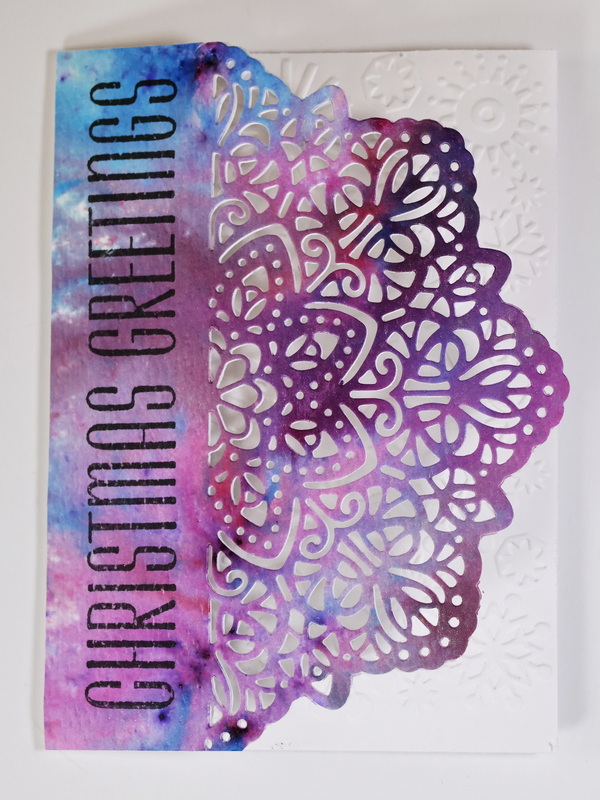
For a tri-fold card, cut a piece of the Brusho paper to 4.25 by 5.5 inches. Take the die cut and line it up where the outer edge of the snowflake is just within the right-hand side of the paper. Add the second die piece around the first die. This creates a cutting edge around the outside of the die.
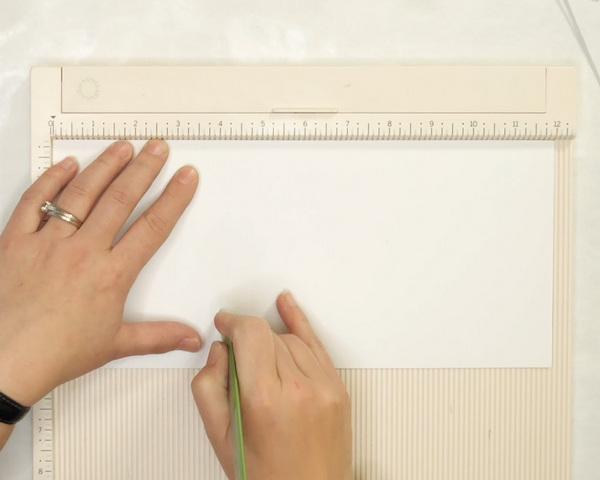
To create the card base, cut white cardstock to 12” by 5.25”. Score the cardstock at 4” and 8” with a score board and bone folder. Fold the card at 4” and 8” to make a tri-fold card. If you find that the card doesn’t lay completely flat, cut the edge that folds in by 1/16” so that it lies flat.
Take the left side of the card and add the metal die to the edge as we did above. This will create a cut edge after being run through a die cutting machine.
Using Glitter Art Glue, glue the watercolor brusho die cut on top of the white cardstock. This creates an intricate snowflake design on the front of the card. If you didn’t want to mess with glue, you could back the whole piece of watercolor paper with a double-sided adhesive sheet before running it through your die cut machine. This makes it easy to remove the backing and add it to the card.
If you’d like to add more texture to the card, use an embossing folder to add texture to a piece of white cardstock. Cut it down to the size of the card and adhere it to the left flap using glue.
Now when the card sits closed, you have a beautiful snowflake design with a textured background.
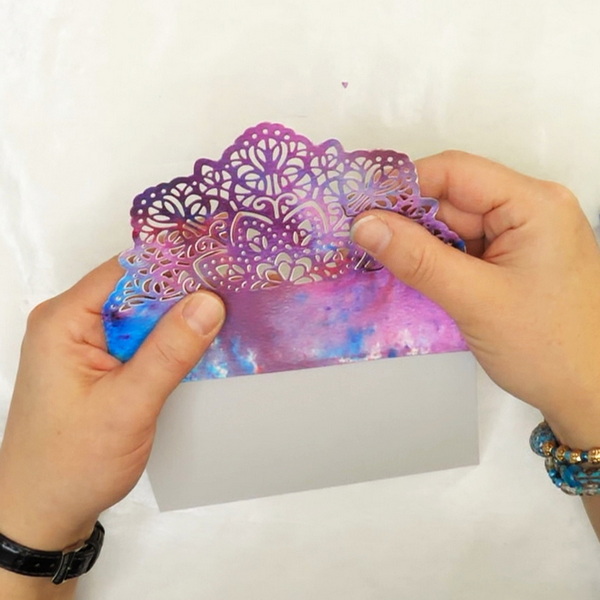
Creating a Large Snowflake Design
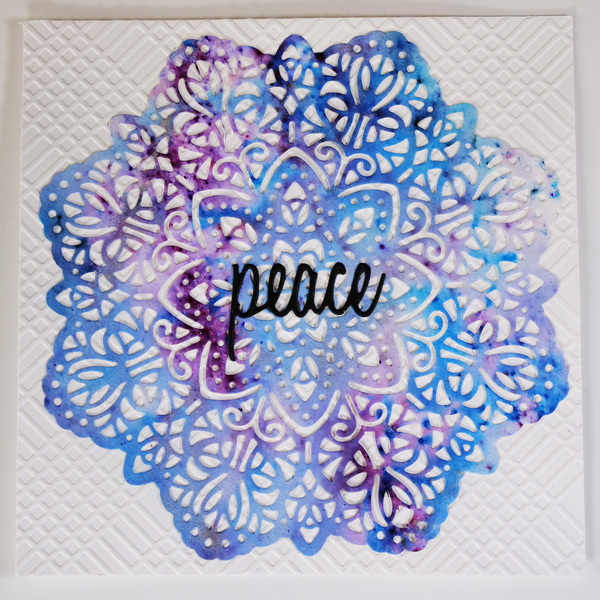
What is fun about the edge dies are that they can create a mirrored image. With this snowflake die, you can create a large snowflake by cutting out the image, flipping the paper around and cutting it out again. As it is exactly half a snowflake, this is a great way to create a beautiful, custom design using the Brusho paper.
You can back this beautiful design onto a piece of cardstock. I love the contrast of white, so I added an embossed design to the white cardstock before gluing the snowflake on top.
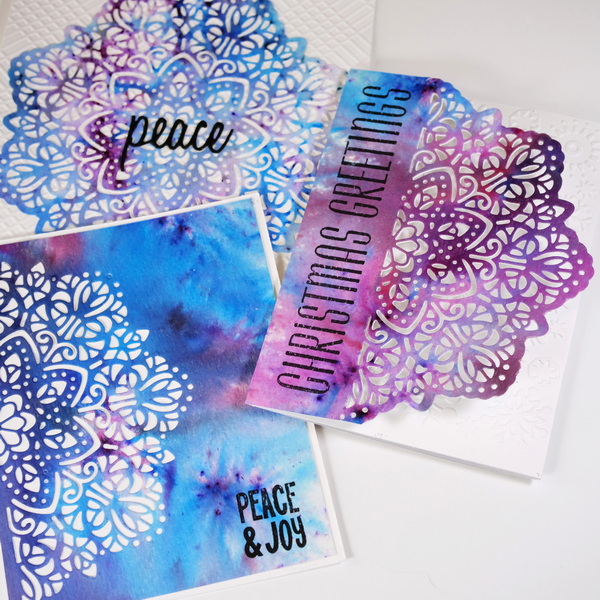
Stamping Sentiments
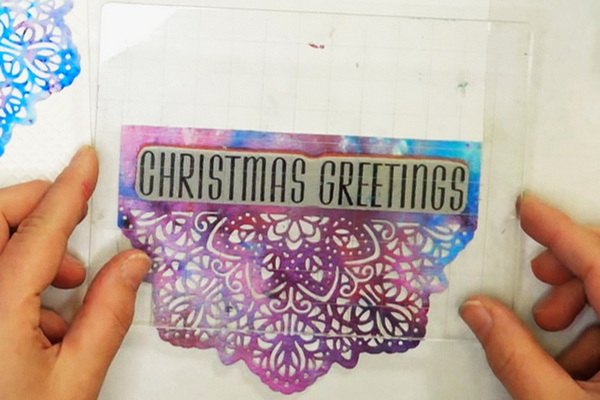
Using LDRS Creative Peace & Joy Pirouette and Stamper’s Anonymous Christmastime stamp sets, stamp sentiments onto your cards using Jet Black Archival Ink. As archival ink is waterproof, dries quickly and has intense color, it’s a great choice for cards.
You can also use your favorite die cut sayings and glue them onto the card. For the large snowflake, I added the word Peace using a pre-cut die cut.
I like to pre-cut out a variety of words from the Script Holiday Words die cut set from Sizzix. I tend to cut them out in black, white, gold and silver. By keeping these in a little bag as I’m creating cards, this makes it very easy for me to pull out a sentiment to add to my card.
Bonus Christmas Card Designs
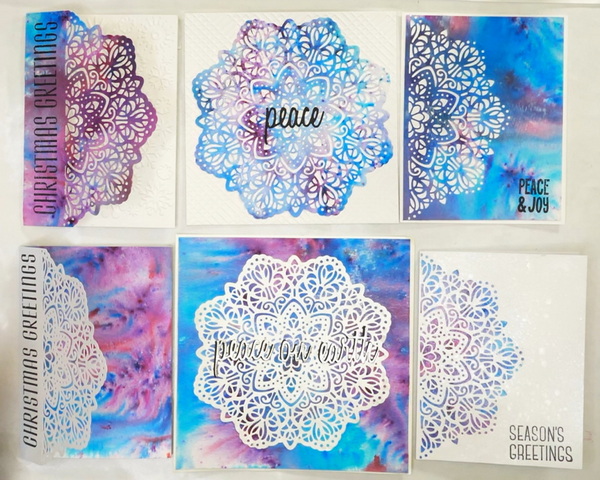
Each of these designs I showed with the Brusho paper as the die cut image, it is easy to reverse this and use the Brusho papers as the background. I love using black or white cardstock because it adds such contrast to the design.
It’s just a different take on the same project. By using the 3 card designs both ways, it give you a lot of variation to your projects from the same designs.
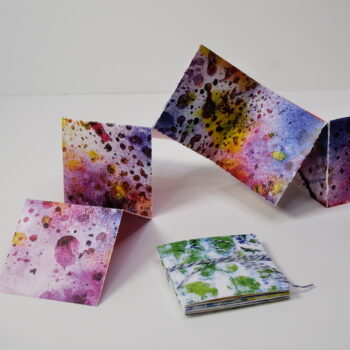
Applying This Technique to Art Journaling
If you’ve been following me for a while, you know how much I love art journaling. The Brusho technique can easily be used in a journal. The large snowflake is the perfect size to add to a journal layout. Add a bit of journaling, a few gems and you have a completed art journaling page!
Any Questions?
Any questions about these Christmas card ideas using one die cut? I’d love to hear what you think, please leave a comment below. I’d love to start a conversation with you! I hope that you take some time for self-care over this holiday season!
Project Supply List
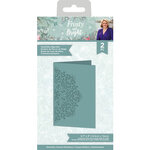
Crafter’s Companion – Frosty and Bright Collection – Christmas – Edgeables – Dies – Snowflake
from: Scrapbook.com


Nuvo – Shimmer Powder – Lunar Rocket
from: Scrapbookpal.com
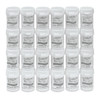
Brusho Crystal Colours – Set of 24 assorted colors, 15 g, pots
from: Blick Art Materials

The Big Shot Switch Plus in White from Sizzix features electric cutting, auto-reverse, and a 9" platform - all wrapped in a sleek, modern design. Includes dies, an embossing folder, and cutting pads to get you started. Compatible in the US and Canada only.


Sizzix – Tim Holtz – Alterations Collection – Thinlits Dies – Script Holiday Words
from: Scrapbook.com

This White Tool 'N One is from Spellbinders. This tool can be used for paper piercing, paper removal, and more. This tool's attachments fit into the hollow body of the tool. This tool has a brush tip to clean small pieces from die cuts.
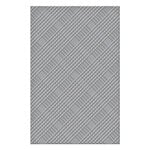
Spellbinders – Celebrate You Collection – Embossing Folders – Diamond Plaid
from: Scrapbook.com

Add a distressed look to your projects with the Distress Sprayer by Tim Holtz for Ranger Ink. This distress tool is used to spray water over Distress Ink, Paint, Stain, and more to create a water-droplet look on your projects.

Hammermill 8.5” x 11” Colored Cardstock 110lb Paper is a premium thick cardstock designed for print and copy use on copiers and printers. It’s heavy cardstock that’s ideal for heavy duty projects.


Ideal for cutting a wide variety of crafting materials including paper, photos, scrapbook pages or specialty materials. Cutter comes with a lifetime warranty.

Art Glitter Glue is permanent and dries clear and adheres to a variety of surfaces. It's water based and acid free. Make sure to close lid to avoid drying of glitter glue. Bundle comes with one bottle of 8oz, one bottle of 2 oz and a metal tip for easy application.

Scor-Pal has all the grooves you will need to score your cardstock projects accurately and quickly while providing a precise and crisp fold.

You're going to feel just like an expert when you're cutting the smallest of details with the Cutter Bee Scissors by EK Success. These un"bee"lievable compact scissors will have you feeling like a queen bee when you swarm right into your fine detail or fussy cutting projects.

Includes 1/2" spaced holes for centering, 1/16" outer edge marks and 1/8" grid with inch marks. The transparent ruler allows you to see your project under the ruler for accurate positioning and marking.