The Art of Napkin Decoupage: How to Easily Transform Any Surface
Are you new to napkin decoupage? Or have been trying to refine napkin techniques on your own creative projects? Using napkins is a fun and beautiful way to add designs quickly to any surface. I love incorporate napkins into my canvas paintings, art journal projects and cards.
But what it you want to use napkins on a curved surface or for a home décor piece? What do we need to know to make sure that we get great results every time? Today I’ll be sharing about how I use napkins outside of the art journal by transforming a plastic pumpkin into a beautiful piece of fall home décor.
Hop-A-Long Studio is reader-supported. When you buy through links on our site, we may earn an affiliate commission at no cost to you. Learn more.
How to Add Napkin Decoupage to a Pumpkin
It may seem very simple to move napkins from a flat surface to a curved surface. There’s a few tips and techniques to ensure that you end up with fabulous results every time!
Preparing Your Surface
If you are working on any slippery or uneven surface (plastic, glass, wood, or any non-paper surface), you need to make sure that you prepare your surface properly. This will make a huge difference in how your finished project looks.
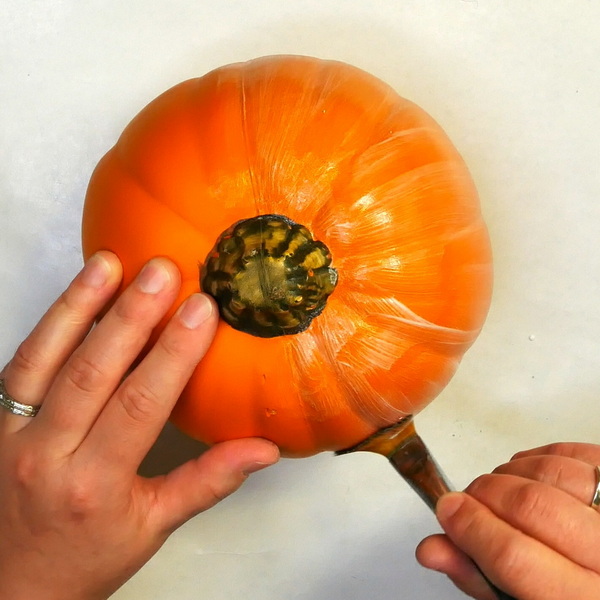
Before decorating this plastic pumpkin, I want to add more “tooth” or roughness to the surface. This helps the layers of napkin stick more easily to the surface. This will prevent slipping, moving or the napkin peeling off the surface over time.
I wanted to keep the orange color of this pumpkin, so I chose Liquitex Clear Gesso to prepare the surface. This gesso has a very rough and sandpapery feel when dry, which makes it the perfect surface for napkin decoupage.
When you apply the clear gesso, it’ll look cloudy initially, and you may notice brush marks. Don’t worry about this. It’ll dry clear and you shouldn’t notice the layer of gesso on your project.
Working on Other Surfaces
If you are working on a darker surface or a surface that you don’t like the color of, instead of clear gesso use a white or colored gesso.
To create colored gesso, add acrylic paint to white gesso. The other option is to purchase gesso that has already been colored. Be aware that the napkins will be semi-transparent when applied. You want to stick with a lighter color or a color that you want showing through the napkin.
Working on Wood
If you are working on a wood surface, I highly recommend adding a layer of Liquitex matte medium onto the surface first. Once dry, add a layer of clear or colored gesso to the surface.
The reason that you want to add a layer of matte medium is to seal the wood. Not all wood is of high quality. Over time, the tannins from the wood can seep into your project and discolor your project. By adding a layer of matte medium, this seals the wood. Then you can add in a layer of gesso to create tooth.
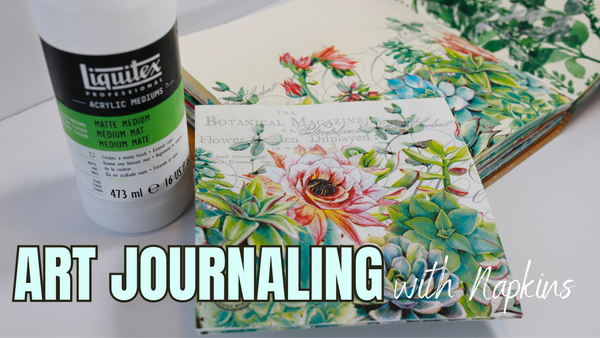
Preparing Your Napkin
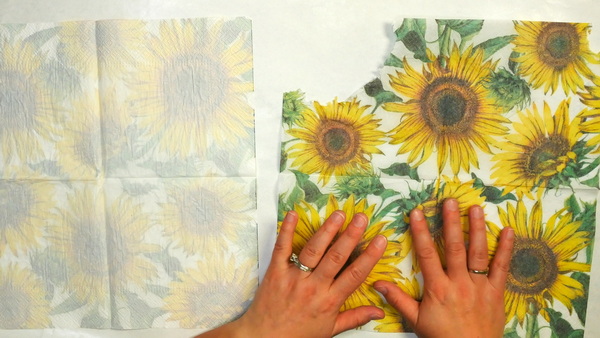
If you’ve never used a napkin before in a project, make sure that you remove the layers of white napkin that are attached to the printed image. For full details of this process, please refer to this article: Art Journaling with Napkins.
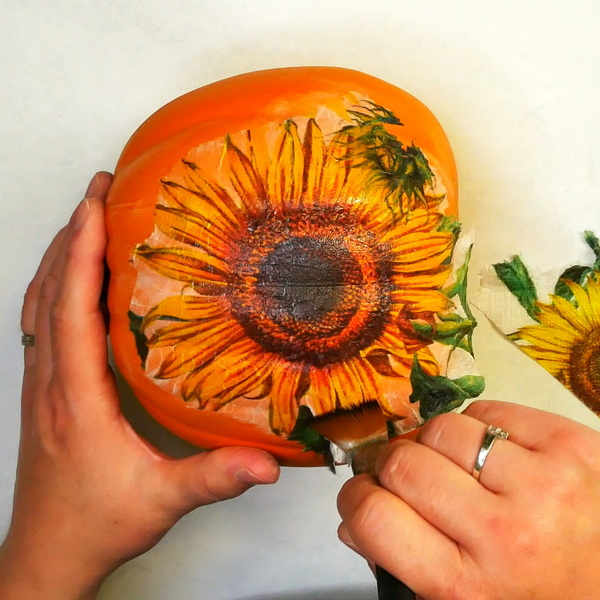
Once you have removed the layers, you will be left with a colorful and semi-transparent napkin that can be used on your surface. You can choose to add the napkin as one layer. For this project I’ll be using sections of the napkin and decoupaging them onto the surface.
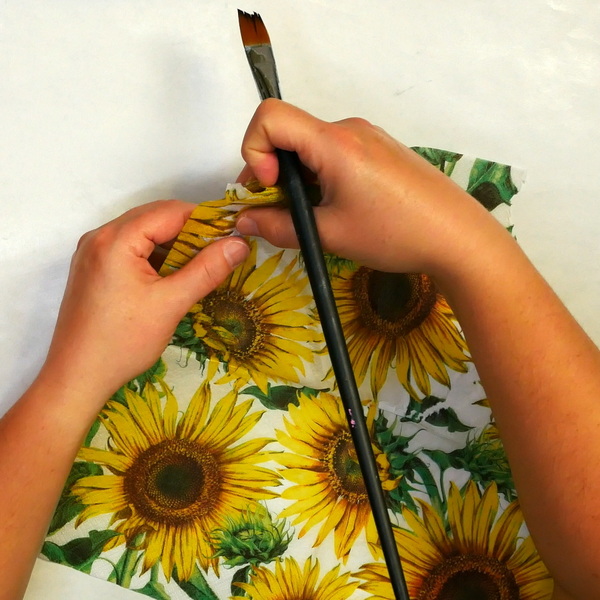
To separate the napkin into pieces, you can choose to tear it apart with your hands. But I prefer to use a small brush and water to dampen the napkin and gently pull the pieces apart. By using water and a brush I generally get a better, more controlled result when separating the napkin. Check out my article Art Journaling with Napkins for a detailed description of this process.
Decoupage the Napkin onto the Surface

To decoupage the napkin onto the surface, add a layer of matte medium onto the surface with a 1” acrylic brush. Gently lay the piece of napkin at the top of the area covered with matte medium. Add matte medium onto the napkin surface, pressing gently as you apply the medium. I like to work section by section moving down the image.
By working section by section instead of putting the entire napkin image down at once, this gives you more control and will prevent wrinkles or tearing of your image.
Troubleshooting Techniques
Continue to add the napkin piece by piece onto your surface. Make sure to keep your hands away from the areas that are still wet. If you put your fingers on the wet or tacky surface, you may accidentally pick up sections of the wet napkin. This has the potential of ruining the image.
I like to add a few pieces of napkin, then use my Ranger Heat It tool to dry the section. Once dry, I will continue to add more sections of napkin to the project. This way I end up with a beautiful result without damaging the delicate napkin. It takes a few more minutes, but you’ll end up with a better result.
Why I Don’t Apply the Entire Napkin at One Time…
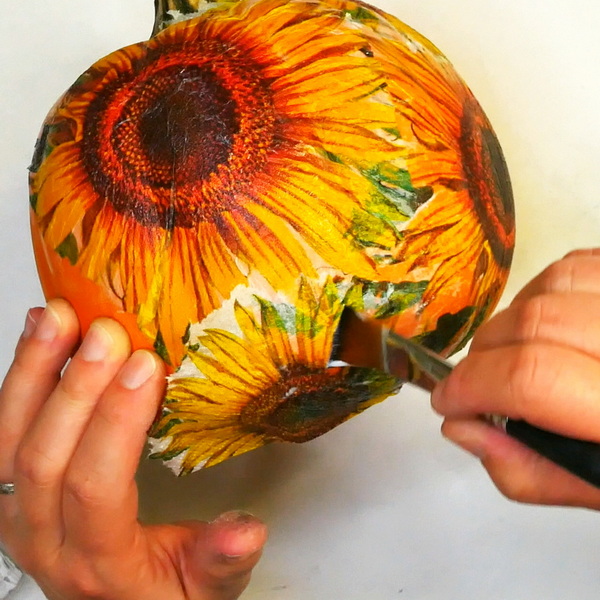
You might wonder why I’m not adding the entire napkin at once. Depending on shape and size of the item that you are completing napkin decoupage on, this can sometimes cause overlapping of images and wrinkles.
If you are using a cylinder or a shape that is more uniform, you could measure your piece and use a full piece of napkin on the project. But because the pumpkin has bumpy areas and is round, there is no way to easily add the napkin without some unappealing overlapping of images. By adding in the napkin piece by piece, I get to control the design. If I make a mistake in my napkin application, it is easier to hide.

Letting the Napkin Dry
For this pumpkin, I worked from the top of the pumpkin adding in layers of napkin decoupage. After the top of the pumpkin was completed and fully dry, flip the pumpkin to add napkin to the bottom and then let it fully dry. This way the piece is fully dry and cured and ready to go for the next step.
Adjusting the Napkin Images
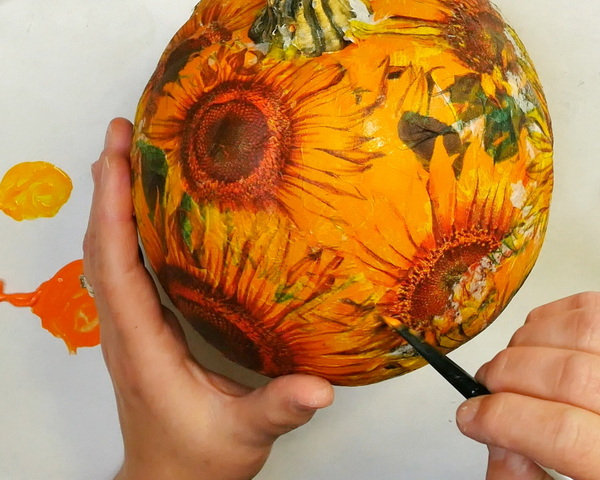
When I was looking at my finished piece, I noticed that some areas of the napkin still had contrasting white areas showing. This happened because I left some of the white napkin around the sunflower images instead of tearing right up to the edge. I had hoped that by layering the flower images the white would not be noticeable like it often is on a white surface.
To fix this, I used a bit of Amsterdam Azo Yellow Deep and Pebeo Cadmium Orange acrylic paint to cover up these areas of white. By mixing the paint with water to create a soft paint wash, this lets me add color without removing the details of the napkin images.
I adjusted the sunflowers by looking at the image and determining what areas would look more cohesive with orange or with yellow. In some areas I used both. By adding these subtle paint layers, you don’t see the white areas anymore and the pumpkin looks uniform in pattern.
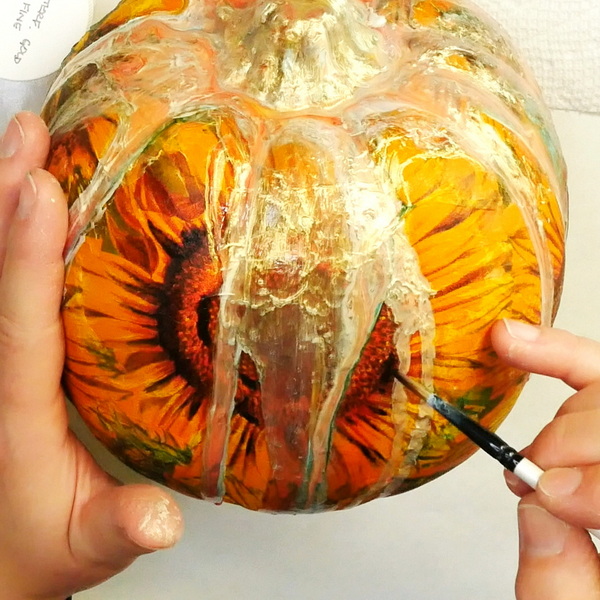
Adding in Pouring Medium

For this next step, I wanted to try another medium that I typically only use on a flat surface: pouring medium. I love adding pouring medium to my art journal projects, book covers, and to create original paint pour artwork. Until now, I’ve only ever used it on a flat surface. This is an experiment to try pouring medium on a 3D surface.
Creating Your Pour
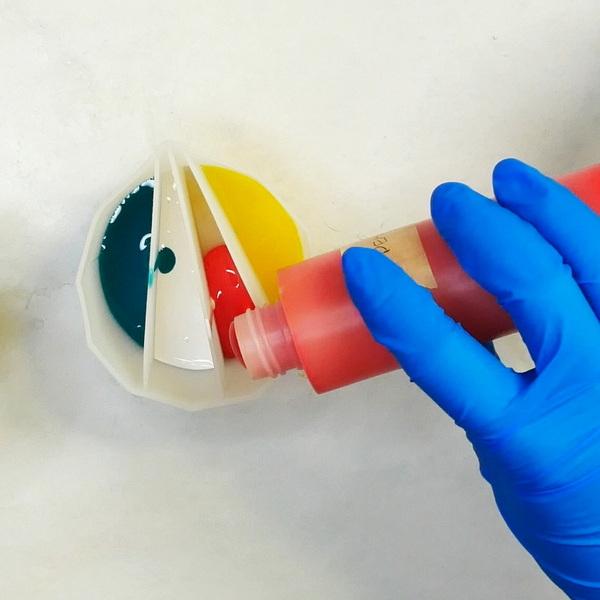
You can use pre-colored pouring medium or you can add acrylic paint to clear pouring medium to color it. For this project, I am using a combination of Liquitex Pouring Medium and Demco Pouring Medium that I had premixed. Using a 4-section split cup that I purchased from Amazon, I added in 5 paint colors that I thought would work well together. Golden Acrylics Turquoise Phthalo, Amsterdam Pyrrole Red, Pebeo Primary Yellow, and Golden Fluid Acrylics Titanium White. If you don’t have a split cup, you can always try making a dirty pour. To make a dirty pour, combine several colors of paint pouring medium into one cup.
Acrylic Paint Pouring on a Pumpkin
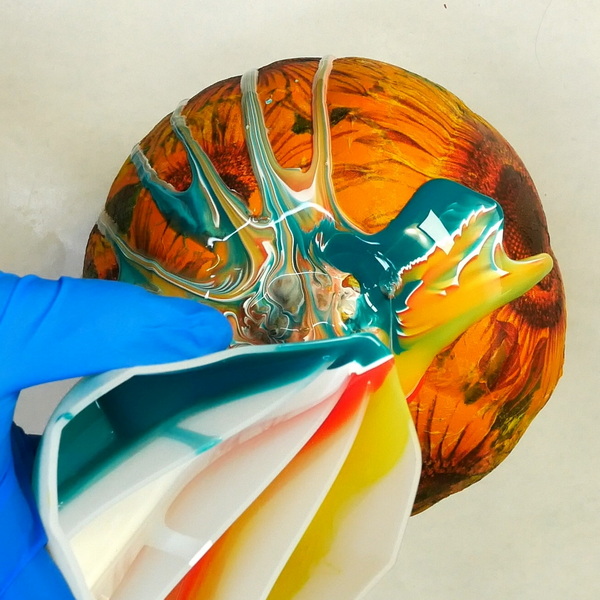
Starting at the top of the pumpkin, slowly add the pouring medium to create drips down the side of the pumpkin. I elevated the pumpkin on a small cup and added parchment paper underneath to catch any drips. Parchment paper works well because the leftover medium can be peeled off the paper. I like to use these paint pouring “skins” in other projects.
Continue to add pouring medium to the surface until you have the result you like.
Adjusting the Paint Pour
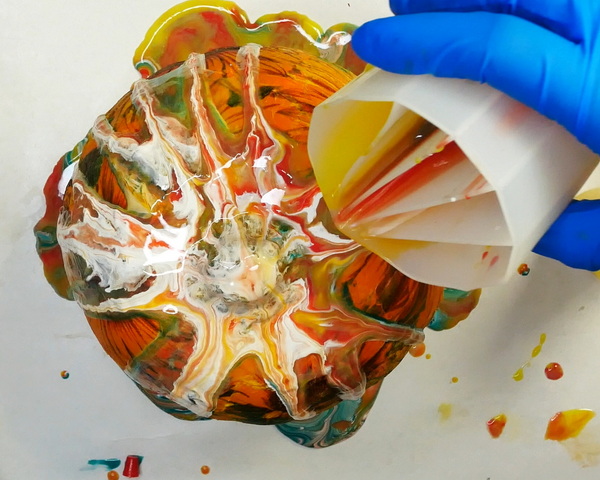
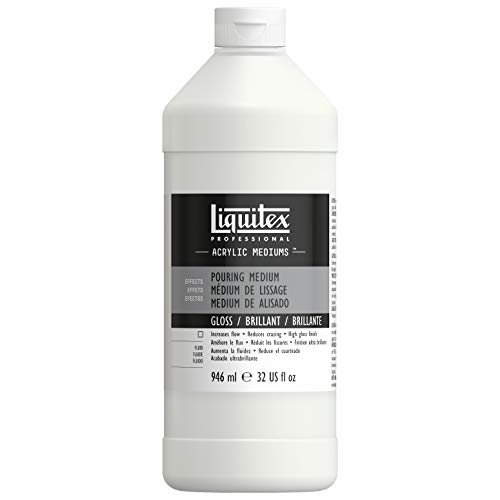
As with every experiment, there is a learning curve. I realized that the colors of the paint that I chose didn’t really work with the napkin colors. While the paint pour was still wet, I mixed up some more paint and continued to add another paint pour to the surface. This time I used the thicker pouring medium. Liquitex Pouring Medium is my favorite medium available and I use it for many of the paintings that I sell. The quality is very high, it doesn’t yellow, and it’s a bit thicker, so it’s a better choice for 3 dimensional projects.
I continued to add pouring medium to the surface until I was happy with the result. Set the pumpkin it aside to dry overnight so that it would fully cure.
The Next Day…
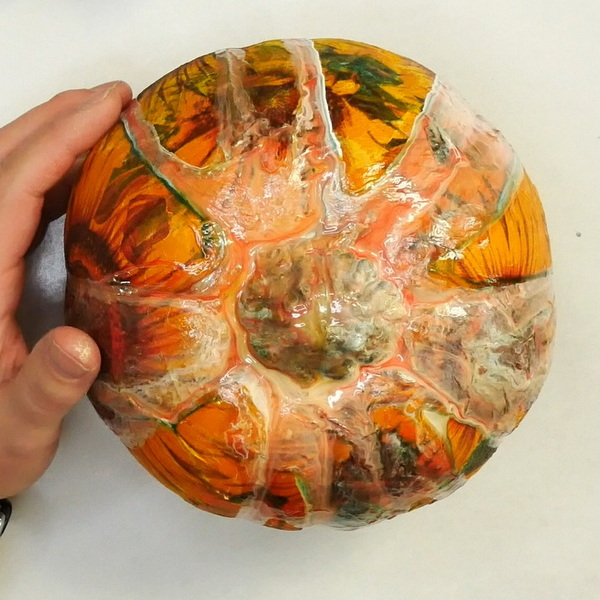
The next day I realized that working with paint pouring on an uneven surface with color was very different than working on a flat surface.
When working on a flat surface with paint pouring, I have a white surface to start with. This means that I don’t need to add quite as much color to the paint. Also, my pours end up drying to at least a ¼” thick, because they are on a flat surface. This is why my paint pours are usually quite intense color and have great depth in the design.
Because I was working on an uneven surface, I realized that the color was a lot lighter than I expected and the paint pour wasn’t as thick due to gravity. I had also used too many translucent paints (gold, silver, bronze, etc.) for the second pour, so the color wasn’t as dramatic as I expected.
This happens to all of us at one time or another in our creative process. We have an image in mind on how the project will turn out. It can be frustrating when it doesn’t work out that way. But it’s an opportunity to learn and to try something new.
How to Fix a Paint Pour
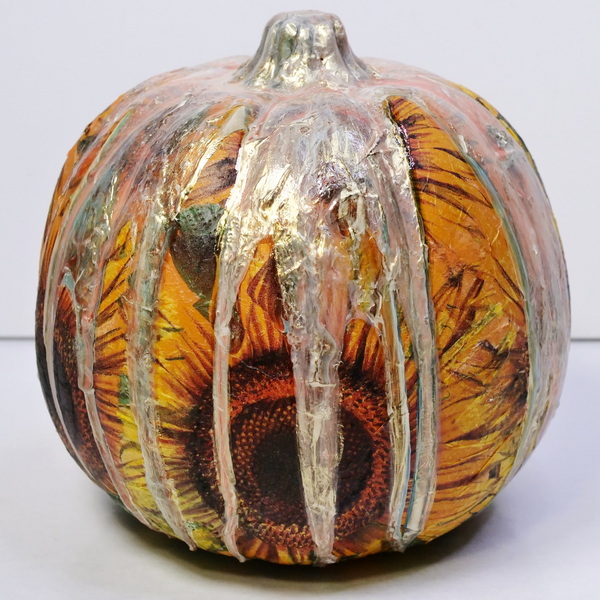
I had a choice to make. I could try adding another paint pour and wait another full day for it to dry. To be honest, I wasn’t feeling that patient. So instead, I decided to use Golden Acrylics Interference Gold (Fine) paint on top of the pour.
Using a small brush, I applied a layer of color across the areas with the paint pour. Because of the nature of this paint, it didn’t take away from the color below due to its iridescent properties. But it did enhance the color and create more shine on the pumpkin. I was very happy with the effect. It wasn’t exactly what I had envisioned, but I thought it added some interesting texture and color to the pumpkin.
Adding in Contrast to the Napkins
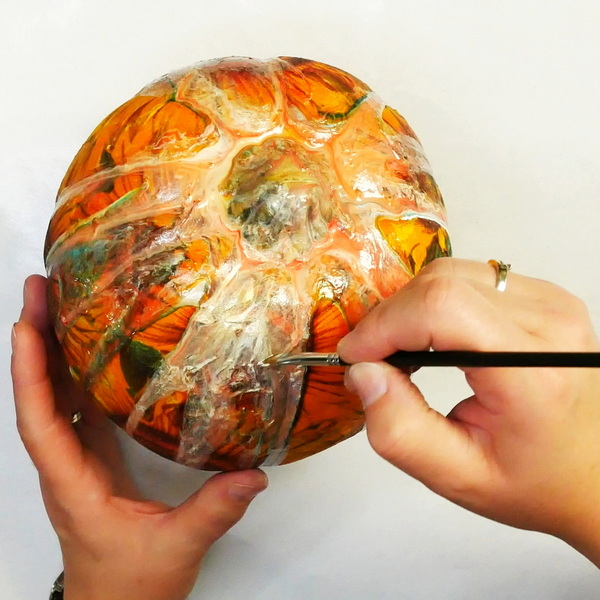
After everything dried, this was a great opportunity to create more contrast to the napkin art. Using my Stabilo All pencil, I added in dark areas around the sunflower centers and areas where I wanted to add darker shadows. As the Stabilo All pencil is water soluble, use a small round paintbrush and water to add more contrast. This one final detail made a huge difference in the overall look of the decoupage pumpkin.
Any Questions?
Any questions about how to use napkin decoupage on a pumpkin? You may end up with a few wrinkles, even if you’re trying to get a perfect surface, but that’s ok. Often you won’t notice them. It’s always a bit harder on an uneven surface than a flat surface. But I hope that this gives you the techniques that you need to get a great result! I’d love to know if you have any questions or comments about what I’ve shared today. Please leave a comment below, I’d love to start a conversation with you!
Project Supply List


Creates a matte, non-reflecting finish when added to acrylic colors. Lightweight, non-toxic; Opaque when wet, translucent when dry. Intermixable with Liquitex Professional Acrylic Paint Colors and Mediums
Liquitex Acryic Medium – Clear Gesso, 4 oz bottle
from: Blick Art Materials

Use these cheerful sunflower napkins for your next mixed media project!

A quick and easy way to melt embossing powder this heating tool was specifically design for speed quiet and convenience. It can also be used to heat set or dry ink. It won't overheat and burn projects.
Amsterdam – Azo Yellow Deep, 120 ml Tube
from: Blick Art Materials

Pebeo High Viscosity Acrylics – Cadmium Orange Hue, 100 ml tube
from: Blick Art Materials
- Durable LDPE Plastic: Made from sturdy yet squeezable LDPE plastic for leak-free dispensing.
- Twist Top Caps: Allow for easy dispensing and precise application with twist-to-open and close caps.

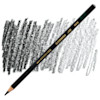
Stabilo Colored Marking Pencil – Black
from: Blick Art Materials

Golden Fluid Acrylics – Titanium White, 1 oz bottle
from: Blick Art Materials

Amsterdam – Pyrrole Red, 120 ml Tube
from: Blick Art Materials

- Professional quality
- Comparable pigment load to Golden Heavy Body Acrylics
- 100% acrylic emulsion; no fillers, dyes, or opacifiers
- Intense, permanent colors with a smooth, fluid consistency
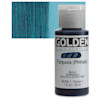
Golden Fluid Acrylics – Turquoise (Phthalo), 1 oz bottle
from: Blick Art Materials
Ideal for spraying, brushing, and staining. Excellent for fabric application. Result offers fine dispersion, high tinting strength, durability and flexibility.

Golden High Flow Acrylics – Quinacridone Nickel Azo Gold, 16 oz bottle
from: Blick Art Materials

Golden High Flow Acrylics – Iridescent Bronze (Fine), 1 oz bottle
from: Blick Art Materials

Golden High Flow Acrylics – Iridescent Copper (Fine), 1 oz bottle
from: Blick Art Materials
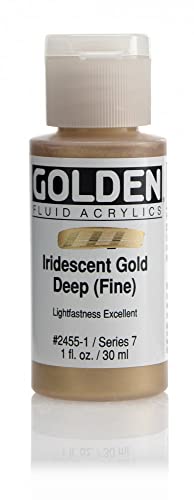
Golden High Flow Acrylics – Iridescent Gold Deep (Fine), 1 oz bottle
from: Blick Art Materials