Everything You Need to Know About Diamond Painting
Are you feeling stuck in your art practice? Or maybe you’re looking for a new art or craft to try? Diamond painting may be the answer for you! Join me as we dive into diamond painting, learn what it’s about and how this can inspire to the rest of your art practice!
Having moments of feeling uninspired in your creative practice is normal. Every artist and creative goes through this. I have creative blocks more often than I’d like to admit. What do we do to mix it up? Changing art mediums or subject matter can be enough for me. This might mean moving from painting to collage or working on a DIY project instead of in an art journal.
But sometimes it just doesn’t help. This is where I look for something completely different to try. It maybe an art medium, but often it’s a craft that doesn’t require any creative decisions from me.
Hop-A-Long Studio is reader-supported. When you buy through links on our site, we may earn an affiliate commission at no cost to you. Learn more.
Discovering Diamond Painting
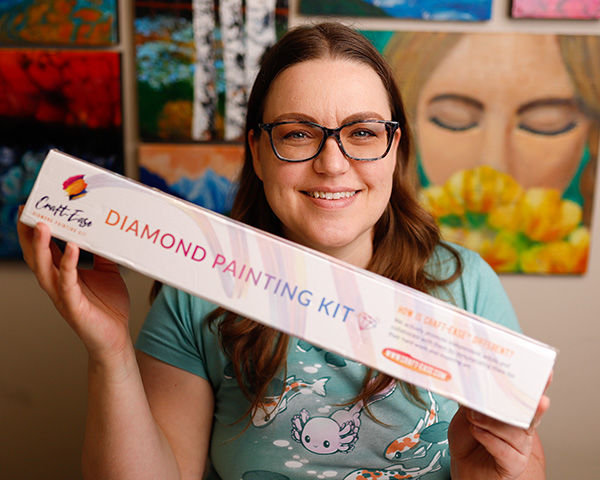
When Craft-Ease contacted me offering to send me a diamond painting to try, I took them up on it. My cousin has been diamond painting for years and seeing her beautiful works made me curious to try it myself.
The Craft-Ease Diamond Kit
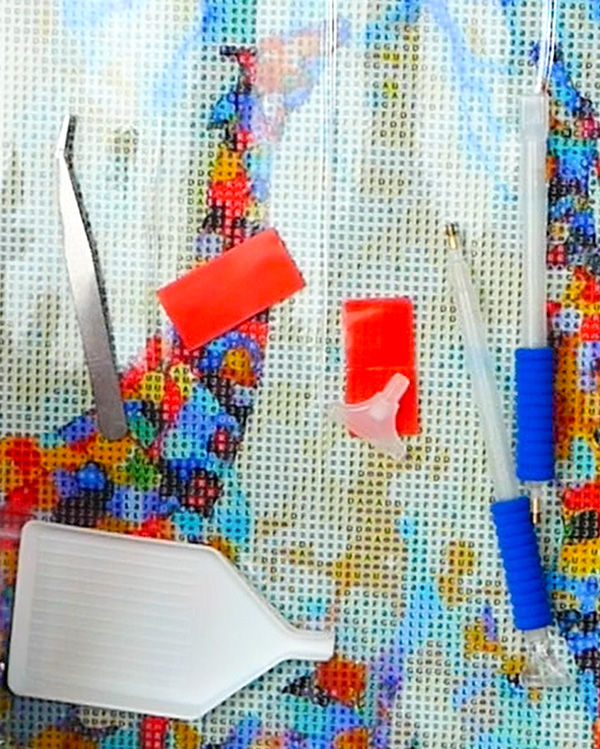
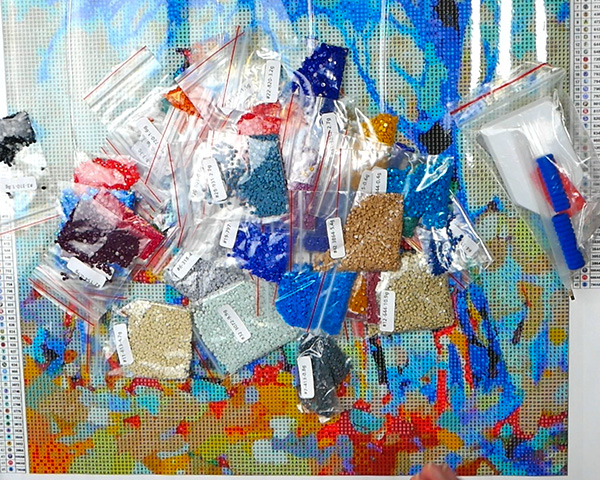
When you order a Craft-Ease Diamond Kit it comes with a poured glue diamond painting design covered with a plastic sheet, a package that contains the diamonds (also known as drills), a diamond tray, 2 diamond applicators with soft grips with 2 larger ends that will let you apply more diamonds at once. It also comes with a set of tweezers and sticky wax for the diamond applicator.

Why a Craft-Ease Diamond Kit?
Why would you want to buy a Craft-Ease Diamond Kit over all the other diamond kits out there?
Collaboration with Artists
Craft-Ease collaborates with artists. Many of their paintings are original works of art created by artists and licenced to make diamond paintings. This means that when you purchase a diamond painting, you are also supporting an artist. In the world of AI, supporting artists is very important to me.
Beautiful Images
I appreciate the quality of the imagery that is available on Craft-Ease’s website. The reason that I’ve never tried a diamond painting before now is most of the imagery of the diamond paintings were not my style. I want to work on something beautiful to hang on my wall, not just something to create and put away in a drawer.
Quality Product
I am impressed with the poured glue surface of the diamond painting. Cheap diamond paintings use double sided tape, that can easily peel off. The background is poured glue, which is super sticky. The last thing you want is to spend a lot of time on a project, just to have the diamonds fall off before you’re done. Over the course of creating this painting, I moved it around my home as I worked, and I never lost a single diamond.
This painting also comes with some beautiful AB diamonds. They are even more sparkly than the regular diamonds and they add such a beautiful addition to the project!
Quality diamond painting kits with poured glue backgrounds and sparkly AB diamonds for every skill level.
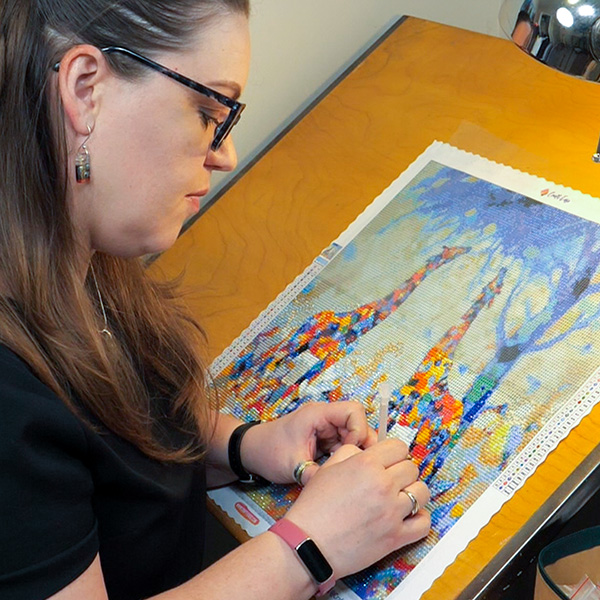
How to Diamond Paint
If you’re curious about diamond painting, let me walk you through the basic steps to make a diamond painting. But make sure to check out the video above to view the entire process and the tricks I learned to get the best results!
The Basics of Diamond Painting
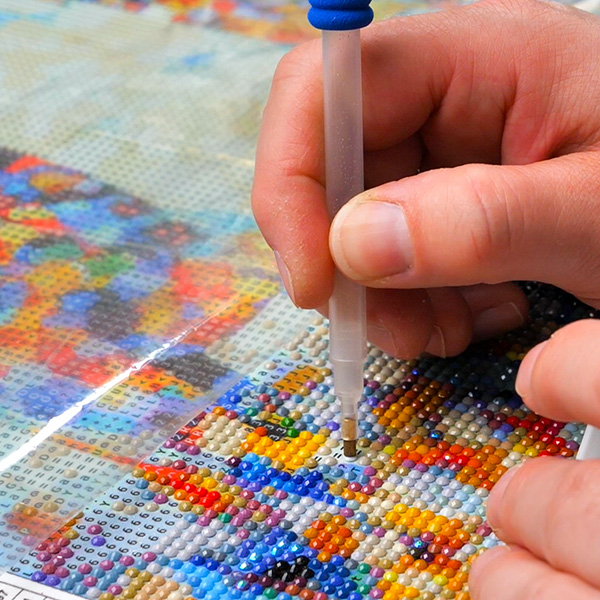
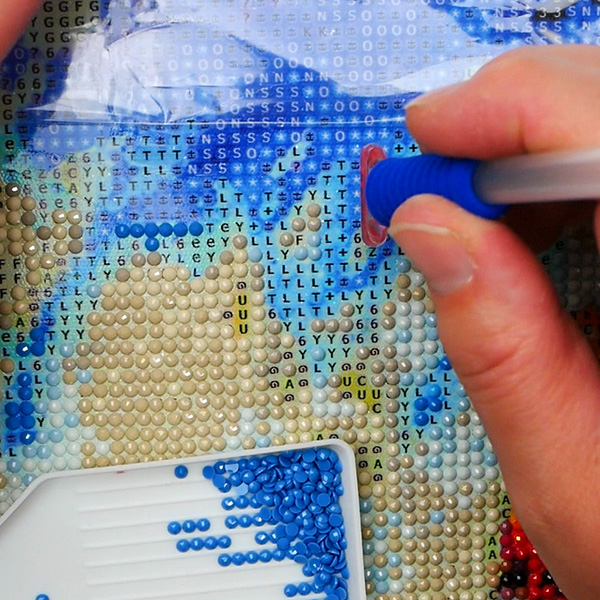
Add wax to your tool by pushing the tip into the soft pink wax provided. This will need to be replaced as you diamond paint as the wax loses its stickiness over time.
After you’ve checked to make sure that you have all the diamond packages (they should be labeled with a color number), find the letter that matches the number on the legend that’s on the top right-hand side and bottom left-hand side of the painting. On the diamond painting, every square will have a letter or number, check the chart to see what diamond package correlates with that number.
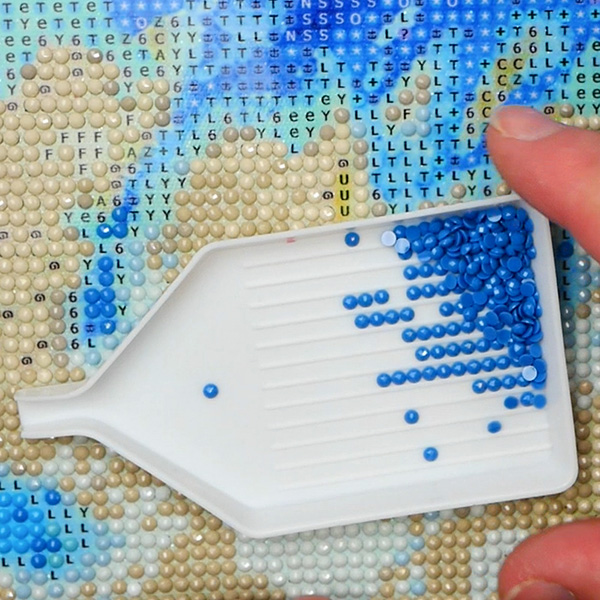
Pour some diamonds into the diamond tray, shake gently so that the diamonds sit flat. Pick one up at a time and add it to your diamond painting.
So that’s the basic idea! It’s a very simple exercise of matching letters to numbers to create a beautiful painting. A diamond painting is very similar to cross-stitch. But instead of creating stitches, you are adding diamonds to the canvas surface.
Tips to Get the Best Results with Your Diamond Painting
How Many Diamonds to Add to the Tray?
When adding diamonds to your tray, don’t dump the entire package out in the tray. If you accidentally upset the tray, you have a LOT of clean up to do! I tend to have about this many diamonds in a tray.
If you don’t have enough diamonds in the tray, the diamonds don’t sit in a row where you can use the bigger tools. If you have too many diamonds in your tray, then you can’t get them to lay flat either.
Using Larger Tools in a Diamond Painting
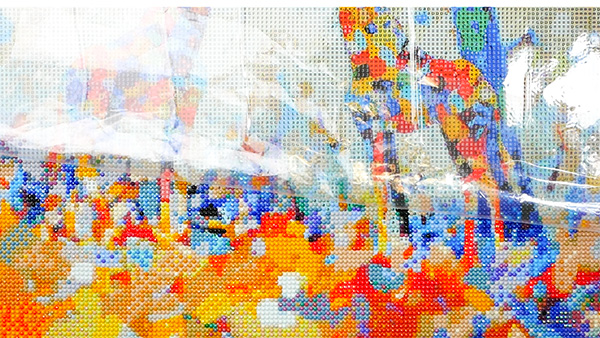
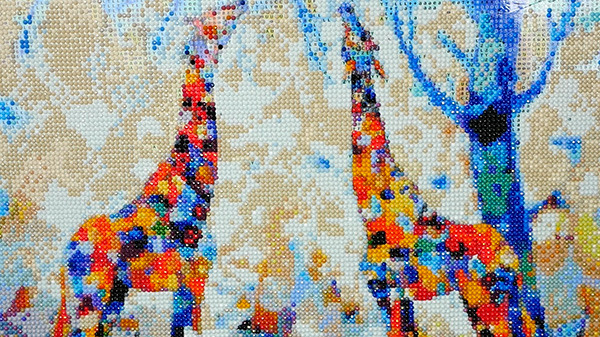
I tend to use the single diamond tool primarily on this diamond painting. This diamond painting, “Meet for Lunch” by Penelope Hunter is considered an average difficulty level painting. This means that there are large areas that will have the same diamond color (like the sky), but many areas with mixed colors meaning that you can only place 1 diamond at a time.
If you want to get a project done quickly with large tools, stick to the easy diamond paintings as they have lots of large areas of colors that can be created quickly with the large tools.
The Most Efficient Way to Place Diamonds
I found for efficiency, an area with 4 diamonds or more I would use the larger tools. Any smaller areas I found it quicker to use the single tool. The larger tools got the diamond down quickly, but not always at the perfect angle. I would often adjust them with the single tool after placing them on the sticky canvas. It does take practice to get a good angle with the larger tools and get consistent results.
Always remember than even though a tool can hold 6 diamonds, you can use it for placing 4 diamonds- there’s no rules!

3 Lessons I Learned from Diamond Painting
So that’s the basics of diamond painting, but I found it valuable to my creative art practice in so many ways!
Learning About Color
As a painter and art journaler, color can be a hard thing to master. Choosing colors, hues, and values can be overwhelming. What’s interesting about diamond painting another artist’s work is that it can teach you a lot about color.
For example, the tree in this painting isn’t just black. It has a lot of different shades of blue and green that made the tree so much more dynamic. By spending the hours diamond painting, this is a great way of learning about color and how other artists use them on a surface to create highlights and shading.
Learning About Design
One of the interesting things about diamond painting is how the image is pixelated. Because of this, the designs need to be clear, otherwise everything would look like a blob. Understanding how the bushes, giraffes and trees were formed from pixels has taught me to simplify my work. It’s a great way of evaluation my own projects. Do I have enough contrast? Does the focal image stand out or is it being obliterated by the background details? It’s a fascinating way to look at painting and design.
Finding Mindfulness and Rest
When I started working on this diamond painting, I didn’t expect to love it as much as I did! It was much more restful and fun than I ever expected. At the beginning, I felt a bit overwhelmed. I realized very quickly it was going to be a lot of hours to get this diamond painting done. But then I took a breath and let myself be immersed in the process.
What a relaxing and mindful practice this became for me! It was a chance to quiet my mind, listen to music and find relaxation. Often, I would sit down planning to work on the painting for 10 minutes, which often led to working on it for 30 minutes, then an hour, then 2 hours. It was amazing how quickly the time went by!
I started working on it for 15 minutes before I would head to sleep for the night. What a difference it made in my sleep! Instead of having a busy mind, with so many things running around in my head, the diamond painting slowed my mind, and I slept better. The diamond painting was immensely helpful for my sleep and my mental health.
Now that I’m done it, I think I may need to start on another one. I miss the mindfulness and purposeful slowness this craft practice gave me!
Caring for Your Body While Diamond Painting
Most of us work on a diamond painting on a flat surface, like a table. This is ok, but you’ll notice that as you work, your neck and back might not be loving the process. I have been dealing with neck and back issues for many years, which is why I avoid working on a flat surfaces when possible.
But when working on the diamond painting you have to work on a flat surface….or do you?
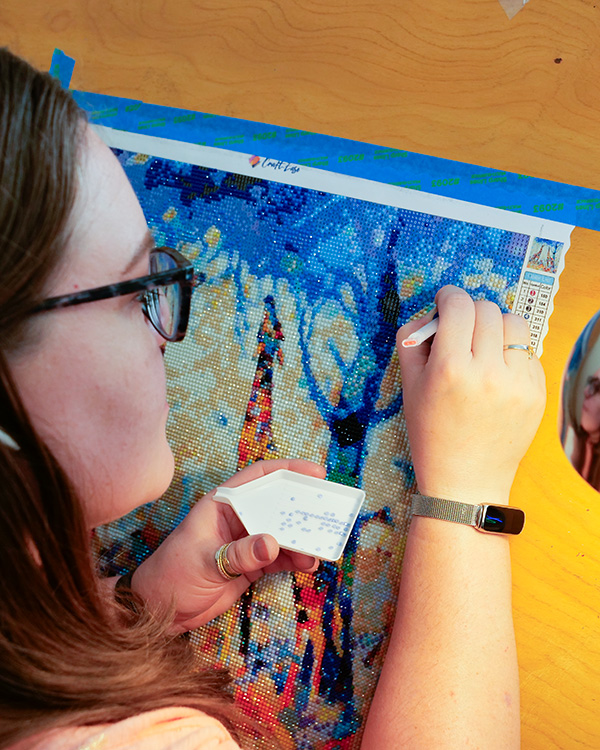
The Tabletop Easel
After about 20 hours of diamond painting, I knew the only way that I was going to get this project done was to find an alternative to a flat surface. Since I have a few tabletop easels, I tried using both my small easel and large easel for diamond painting. I would drape the diamond painting over the tabletop easel, this meant that I still had a sturdy surface to work on, but it wasn’t flat, it was at an angle so I could have good posture.
This was working really well. I found that it was easier to place diamonds on the painting on an angled surface over a flat surface. It caused less glare on the surface, so I could see the places that needed diamonds much easier.
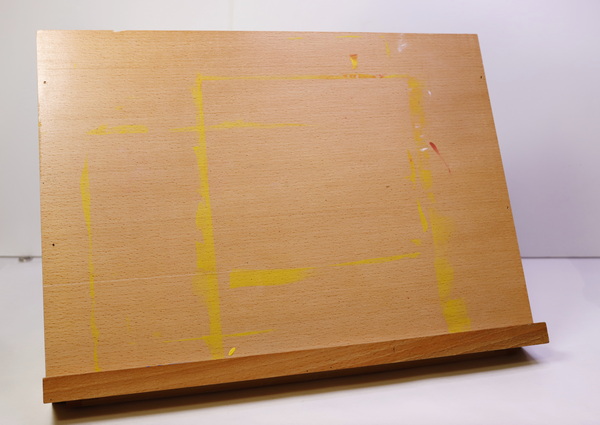
The Drafting Desk
I was finding the tabletop easel a great tool, but I’ve been contemplating getting a drafting desk for a few years. The problem is that many of them are too large to fit into my small office and creative space. But then I started hunting on Facebook Marketplace and I found a gem of a drafting table! A small vintage 4-foot-long drafting table that would fit into my space…and was only $75! The vintage look of this table with the wooden top was just what I was looking for! After getting it set up, I had the perfect surface for my diamond painting!
My Final Thoughts on Diamond Painting
Diamond painting isn’t a fast craft, but it is one that is very relaxing and fun. I would encourage everyone to try it at least once. But don’t start with a 100,000 diamond painting, start with a slightly smaller piece.
To give you a sense of how long it took, here’s some photos showing the progress and hours devoted to completing this piece.
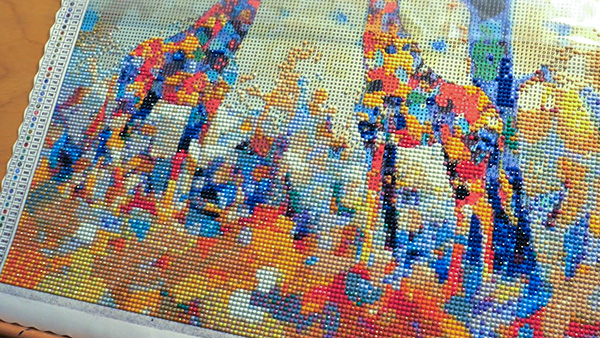
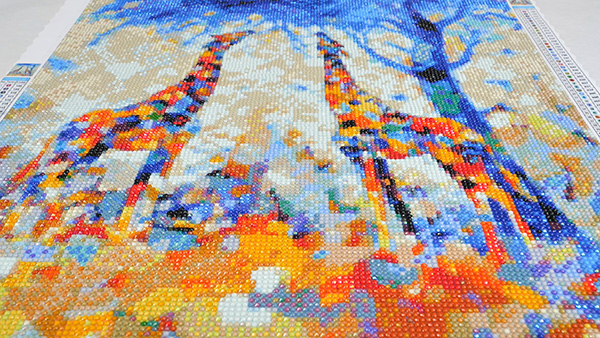
In total it took 42 hours and I placed 19,881 diamonds over a 10 week period of time. It was not a quick project, but what a feeling of accomplishment when I placed that last diamond! I hope that this inspires you to give diamond painting a try! You may find a new hobby that opens up a lot of creative energy for you!
Project Supply List
Quality diamond painting kits with poured glue backgrounds and sparkly AB diamonds for every skill level.
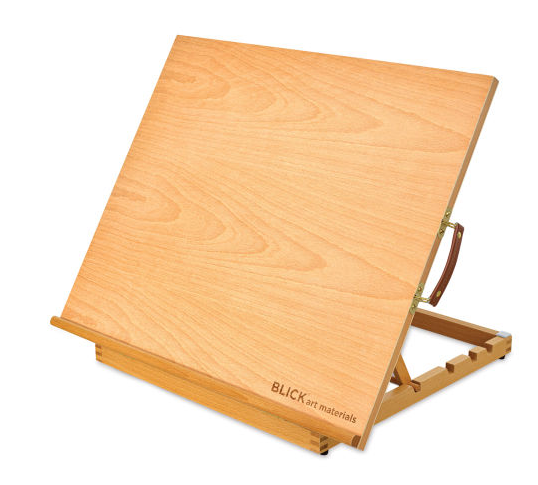
With the Blick Portable Drafting and Drawing Table, you can be ready to draft or draw just about anywhere! This handy plywood table with beech wood bars folds flat, closes with a latch, and has a leather handle for easy transport.
The table’s working surface is 24"W x 20"D (61 cm x 51 cm).

- This large, smooth drawing board turns any tabletop into a Professional drafting table
- The large integrated base Allows you to easily adjust the angle from flat to 80 degrees; 5 positions
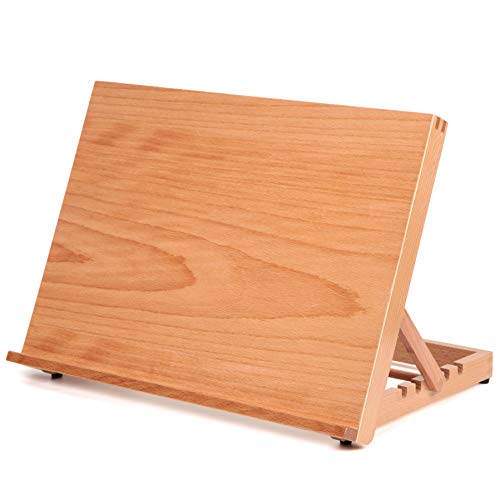
- Durable and Strong: Made of strong European beech wood, it's strong enough to make sure the standing base very stable
- Lightweight: Only 1.9 LB Weight for empty Board Easel with Non-slip rubber foot, easy to move to anywhere