How to Collage with Tissue Paper and Acetate
Are you looking for unique collage materials for your art journal? Today we’ll be talking about how to collage with tissue paper and acetate. These materials create beautiful, translucent layers in any art journal project.
Hop-A-Long Studio is reader-supported. When you buy through links on our site, we may earn an affiliate commission at no cost to you. Learn more.
Collaging with Tissue Paper
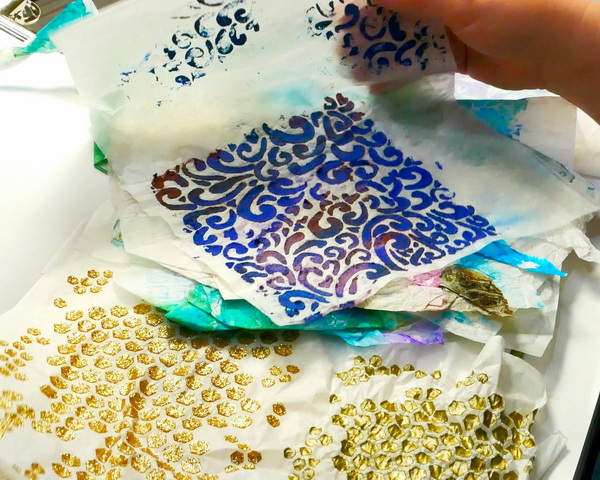
Tissue paper makes a great collage medium because of the colored but slightly transparent layers it creates.
For today’s project, I’m using a combination of altered tissue papers. These papers were created using acrylic paint and mediums, a gelli plate, and stencils.
To learn 3 different ways to alter tissue paper for the art journal, click here.
To learn how to use Gelli print on tissue paper to create beautiful tissue paper prints, click here.
You can also purchase a variety of commercially printed tissue papers which is an easy way to add color and design to your art journal pages.
Collaging with Acetate
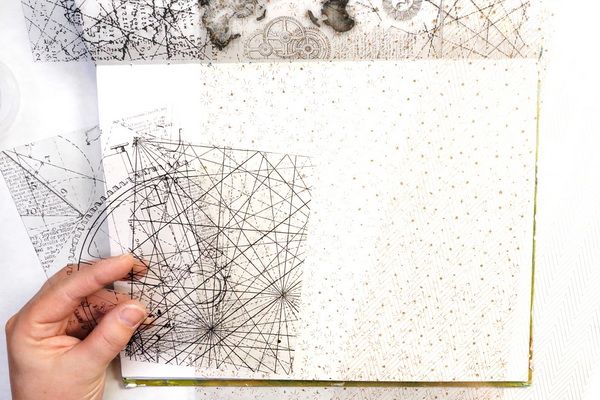
Acetate generally comes in clear sheets that can be altered for any project. But some companies, such as Stamperia and Spellbinders, sometimes carry limited run printed acetate sheets. I’m using both Stamperia printed acetate and the Spellbinders acetate in this week’s project.
To alter your acetate, use a rubber stamp and a multi-surface ink (such as StazOn Black Ink) to add pattern to your clear acetate.
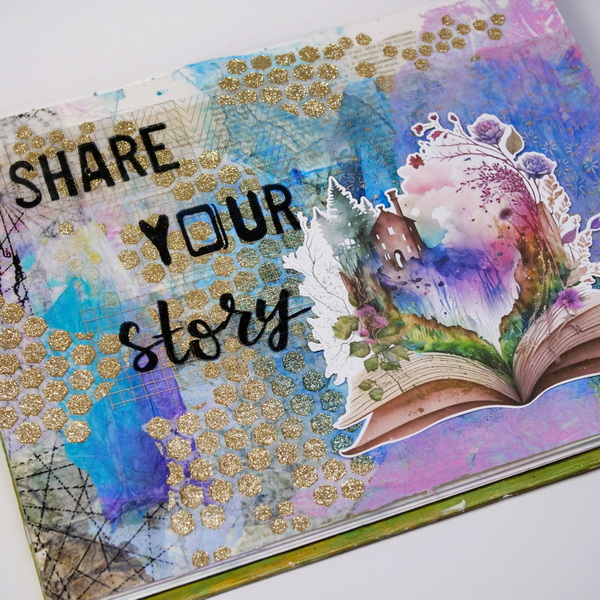
Share Your Story with Tissue Paper and Acetate Collage
Today’s Prompt: Share Your Story

Today’s project is called Share Your Story. This was inspired by some of my recent teaching experiences. You never know when sharing your story might touch someone else’s life, provide encouragement or perspective.
I recently started teaching at a non-profit organization whose mandate is “No one should have to face cancer alone.” Teaching for them has been one of the most rewarding experiences I’ve ever had. The students are optimistic, hopeful, and I’m so amazed by their resilience. By listening to them talk during class, I’ve realized how much a story can encourage and help another person.
My students are walking a difficult journey, but they are not alone. They have each other, they talk about their experiences, and support each other. It’s been a beautiful space to share stories and experiences where everyone is heard out. I’m just amazed by the hope and resilience I see in every art class I teach.
We have such a great time in these classes, and it has shown me a different side to critical illness. It can be a time of isolation, or a time to find community and healing not only for the body, but for the soul.
Even though I haven’t experienced cancer, I’ve been able to share my story about hitting burnout which led to a major health crisis for me. Even though it’s not the same experience, when I share my story about how art helped me heal, they can relate to my story.
“Share your story. You never know what impact your story might have.”
— Nadine Milton
So today, I’m encouraging you to share your story. You never know what impact your story might have. It might help someone feel safe enough to share their own story, to feel comfortable enough to be vulnerable. It’s amazing the connection and community that can be created by sharing our story and our experiences.
You never know what a positive impact you may have on someone’s life, either now or in the future.
Adding Book Paper
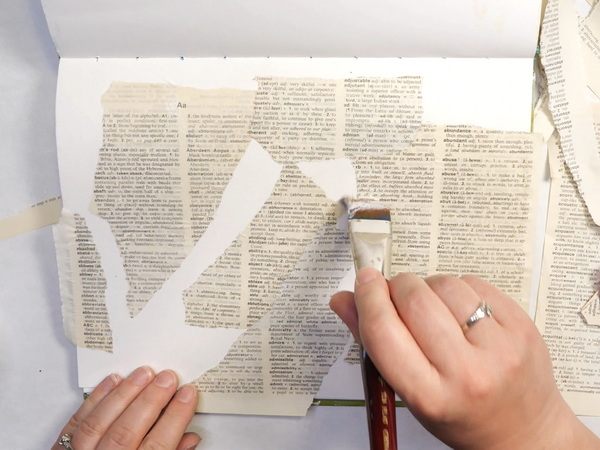
For this art journal project, I’m working in a handmade art journal using Strathmore 300 cold press watercolor paper. Using Liquitex Matte Medium, tear up old book paper and collage it onto the surface of the page. My book paper is from an old dictionary that I got at a thrift shop.
Adhere book paper randomly to the surface, but don’t cover the entire surface. You want to have some variation in that first layer. Let it dry fully before adding in the next layer of collage.
If you’re not familiar with how to collage in the art journal, check out this article: How to Decoupage in an Art Journal for step-by-step instructions.
How to Collage with Tissue Paper
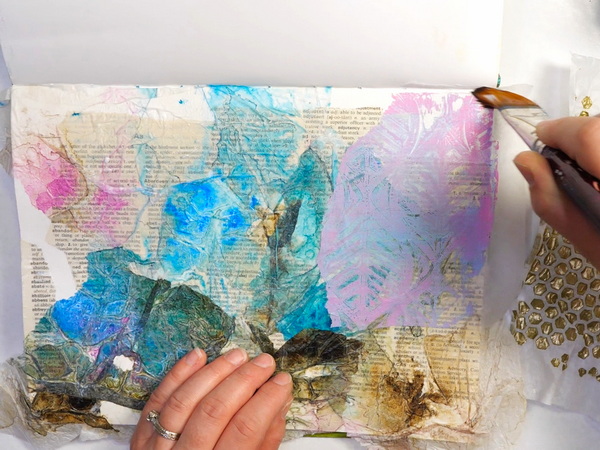
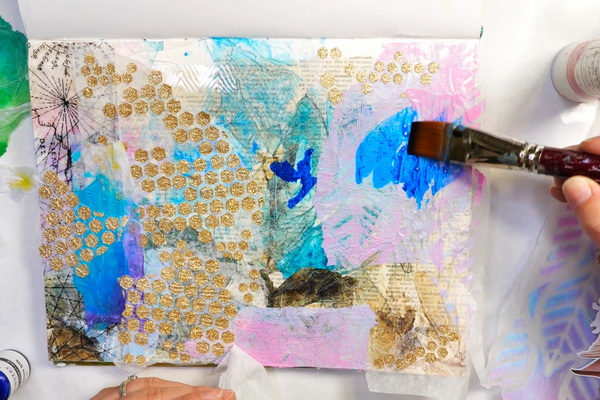
Tear up sections of colored or altered tissue paper and use Liquitex Matte Medium to add it to the page. For tissue paper, add a layer of matte medium to the page, press the tissue paper on top gently and add a layer of matte medium with a brush. You will need to work slowly and gently making sure not to pull too hard on the tissue paper. The tissue paper is delicate and might rip.
When you apply the tissue paper you may notice that some areas are opaque and other areas are translucent. This will let you see some of the book paper through the tissue paper pattern. This is what I love about tissue paper! It lets some of those beautiful complex layers peek through and creates beautiful texture!
Collaging with Acetate

I’m using a combination of gold and black printed acetate in today’s project. The gold acetate will create subtle shine and details while the black acetate will create more bold patterns. Acetate is fantastic for creating shine and transparent patterns where you can let the images below to shine through.
You could choose to use one large piece of acetate to cover the entire project. But today I’m choosing to use small pieces to add different textures and patterns to my art journal page.
To adhere the acetate, I’m using Art Glitter Glue. This glue dries clear and will keep the shine of the acetate. I apply the glue to the acetate about 1/8” away from the edges. Once you apply the acetate onto the page, the glue will spread out. I like to smooth out the glue that’s under the acetate as much as possible. It’ll look white for a bit, but once it’s dry, it’ll be clear.
Adding in Opaque Tissue Paper Layers

You can also use tissue paper that has had acrylic mediums applied to it. I’m using tissue paper from my collection that I created using Nuvo Glimmer Paste Glitterati Gold through a stencil. For details on how to create altered tissue paper with mediums, check out this article: Creating Mixed Media Tissue Paper.
Once the tissue is dry, tear up the tissue paper into pieces to add to you art journal page and apply with matte medium. The matte medium will dull the shine a little bit, but it’ll be less noticeable once it’s dry. I generally prefer to use matte medium in the art journal. Gloss medium has a tendency to make the pages of my journal stick together.
Generally when you add white tissue paper to collage, it becomes translucent as matte medium is added to it. But if you add it on top of acetate, you will see the white tissue paper. To prevent this from happening, tear carefully around the white so that it’s less noticeable. The other option is to add other tissue paper layers on top to cover the area.
Altering Collage with Inks
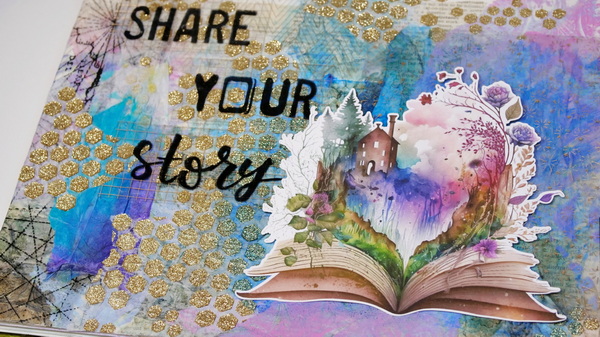
I love where this collage background is going, but I noticed that my focal image, is blending into the background. I’m trying out a new product (for me); Spellbinders Silks. These inks have beautiful shimmer that add intense color to the background.
These colors that I’m using are limited edition colors, but you can get a similar technique using watercolor paints, dye ink, or any other water-based color medium.
To darken the background, apply a bit of the Spellbinders Silks, wet an acrylic brush and spread the color out. I found the color was very intense and I was getting strong brush marks. To get rid of the marks, I used a baby wipe to spread and lighten the color. What was interesting about this medium is that it worked beautifully to color the acetate and the Nuvo Glimmer Paste.
Try working in multiple layers when you’re adding the watercolor pigment. I find it’s better to add a bit of color, let it dry, then add a bit more color. This way you can work up to the intensity that you want. If you feel like you have too much color, you can easily wipe it off and lighten it if it hasn’t fully dried.
Adding in Final Details
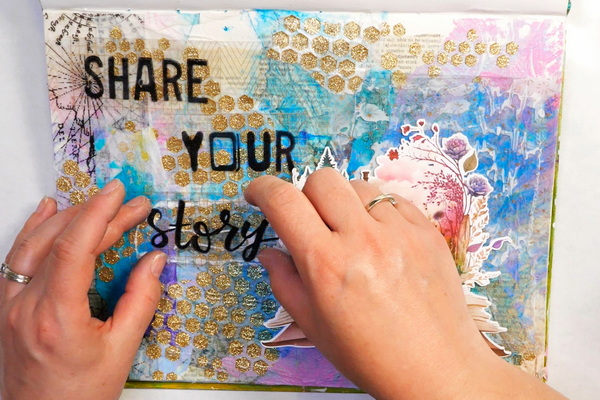
Finish off this page by adding in more acetate and your focal image (my image is ephemera from Simply Stated Design). Finish off with a few collage pieces around the acetate so that it creates softer edges. I used Art Glitter Glue to adhere each of these materials because it dries clear.
My journaling for this page was three words, “Share Your Story” which I thought went well with the book ephemera. I wanted my title to be front and center on this journal page.
Using acetate, I stamped my words using StazOn Ink and Wild Whisper Designs letter stamps. Make sure to let them dry for at least 5 minutes before adding them to your project. Inks take their time to dry on acetate as they don’t absorb into the surface.
Acetate works great for titles. It’s a nice option because it can be glued on easily and create shine without taking over the project.
Any Questions?
Any questions about how to use acetate and tissue paper in the art journal? Let me know if you are interested in seeing an article about how to create designs on acetate! Leave a comment below, I’d love to share my knowledge with you!
I’d also love to hear what you think of the art journal prompt and how you share your story with people around you! I hope that you have a great week and will take some time for creative self-care!
Project Supplies

- Acid-free
- Made in the USA
- Cold Press 140lb paperweight

Archival material created and made in USA. Lineco is a leading and trusted brand for archival quality art, photography, and framing supplies. 16 gm2 tissue allows for translucency and durability. Acid-free and lignin-free; PH Neutral and Non Buffered.
Spellbinders – Card Shoppe Essentials Collection – 8.5 x 11 – Clear Acetate Sheets – 10 Pack
from: Scrapbook.com

A dictionary is a must for any collage project! Use this or any other book for text paper for your next project.

Creates a matte, non-reflecting finish when added to acrylic colors. Lightweight, non-toxic; Opaque when wet, translucent when dry. Intermixable with Liquitex Professional Acrylic Paint Colors and Mediums


A quick and easy way to melt embossing powder this heating tool was specifically design for speed quiet and convenience. It can also be used to heat set or dry ink. It won't overheat and burn projects.

Art Glitter Glue is permanent and dries clear and adheres to a variety of surfaces. It's water based and acid free. Make sure to close lid to avoid drying of glitter glue. Bundle comes with one bottle of 8oz, one bottle of 2 oz and a metal tip for easy application.
Spellbinders – Silks – Gold
from: Scrapbook.com