How to Paint a Night Sky
This week we will be learning how to paint a night sky using watercolor paint. This is one of my favorite self-care exercises as it is simple and so relaxing. What makes learning how to paint a night sky so fun is this technique can be used with other colors and other applications. This provides practice and an understanding on what colors you can create from blending watercolor paints.
The Inspiration
The inspiration for this project was thinking about the warm summer days when I can get out of the city and see the stars. I love the night sky, there is something about the expanse of it that is so peaceful. Perhaps it is realizing how small we really are in comparison with the universe. Enjoying the night sky makes me pause, take a breath, and helps me find those precious moments of mindfulness.
Art Journaling Focus
With this night sky art journal page, I wanted to focus on more than just the technique. I believe that the journaling itself is just as important. Taking the time to slow down, and to write about the things that make us feel connected can be very therapeutic. The intention with this piece was to not only paint a night sky, but to include personal writing in the layout as part of the focus of this page.
Art Journaling Project
In this project we will be using watercolor paints, frisket (masking fluid) and salt to create a beautiful starry sky.
Adding Frisket to the Page
Before we add watercolor to the page, we will be adding frisket (also known as masking fluid) to the page. Frisket is used to seal areas of the watercolor paper so that it will resist watercolor paints. Once you have finished painting and the watercolor is dry, the frisket can be removed.
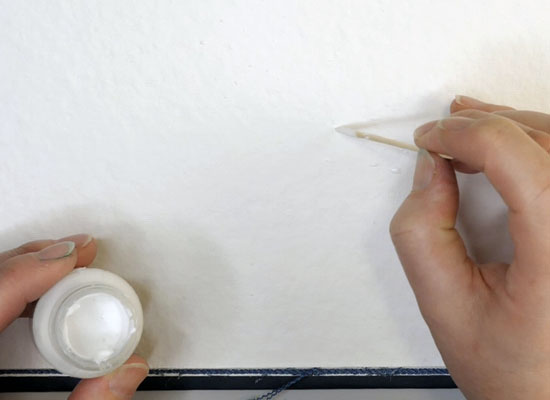
For this project, we will be adding small dots of frisket onto the watercolor paper to give the suggestion of stars in the sky. Be random in your application of frisket as stars in the night sky have a sense of randomness to them.
To apply frisket, use a toothpick to add dots of frisket to your layout. You can also use a dip pen to add frisket to the page. Be aware that frisket will dry quickly, so keep this in mind when choosing a tool to apply frisket.
Blending Watercolor
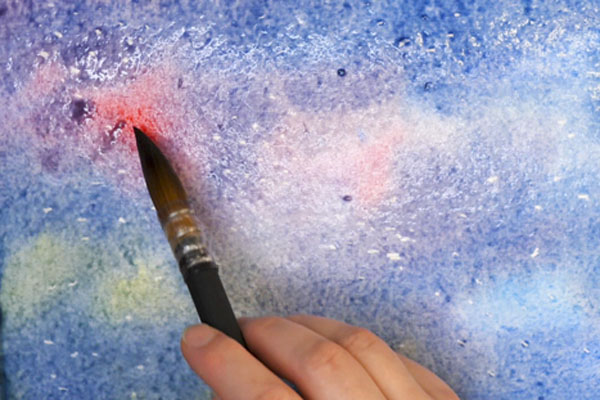
Add a water wash to your watercolor paper and start dropping in color in random areas on the page. Start with reds, greens, yellows, and other bright colors. Add them in random patches onto the page. While still wet, start blending in different values of blue throughout the page. This will mute the bright areas and make a mix of some darker black and blue colors.
Mix Ultramarine Blue and Cadmium Red together to get a very deep blue color, add in a bit of Payne’s Grey if the color is not a deep enough blue-black color. Add this around the brighter colors to highlight and mix into these colors. By doing this, you will have a blue-black sky that has brighter areas popping out to give brightness and variation to this page.
Adding Texture to the Watercolor
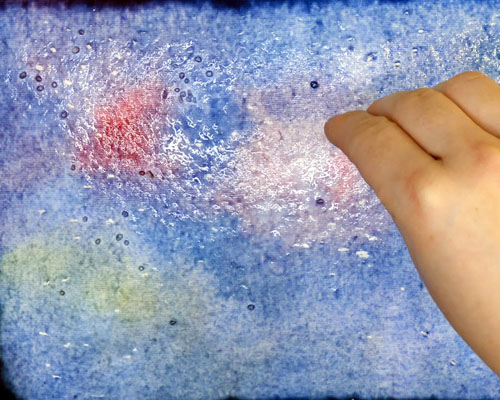
To add texture to the watercolor page, dip your brush into clean water and put small dots of water onto the wet surface. This will cause blooming and will add texture to the background. To add more texture, add coarse salt crystals and let dry
Removing Salt and Frisket
Once dry, you can remove the salt crystals by rubbing them gently off the page to release them. In some areas, the salt will have dissolved a bit making some interesting crystalline structures on the page.
At this point, if the color of the night sky is not as dark as you expected, add another layer of watercolor paint to the page. Be aware that the paint will rewet when more color is added. By using a similar shade to the original color, you will be able to darken the color without making muddy colors. Watercolor always dries lighter than the color that is applied. If you want a darker sky, make sure to add enough paint for the desired effect. You can also add more salt and water to bloom the paint and set it aside to dry.
Once the paint is dry and the salt removed, gently rub the frisket off with your finger. You can also use an eraser for this step, but I would recommend using your finger as it is a gentler way of removing the frisket.
Adding Embossing Paste Through Stencil

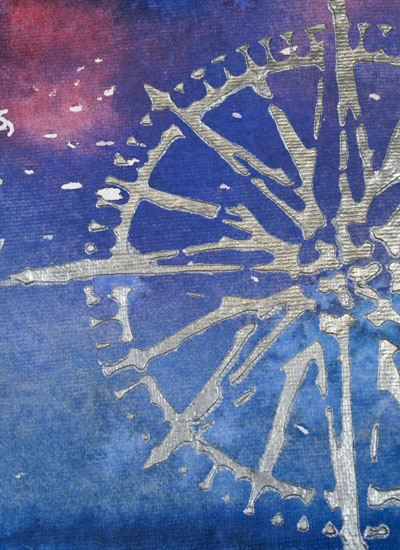
To add a focal image to this page, use silver embossing paste. Apply through a stencil using a palette knife. I used a compass because I love the symbolism of navigation. Set aside to let dry completely.
Add Journaling
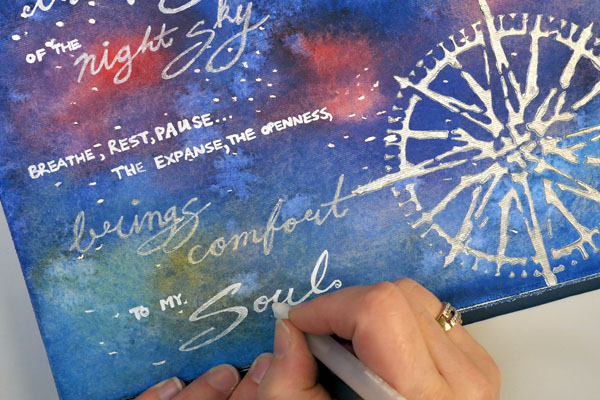
For this piece, I wrote down some of the feelings that I have when I get to enjoy a beautiful night sky. To help estimate the spacing, write your journaling on a piece of paper and cut out the words. Place the words on your layout to gauge the space that you will need for your writing.
Once you have a good idea of the writing size, using capital letters and handwriting, write your words on the page. In this example I used a Sakura Gelly pen, but there are a variety of pens that can be used for adding lettering.
If you would like to thicken the letters, add additional Gelly pen to the letters. For the cursive letters, adding additional thickness to the downstrokes gives variety to the writing style.
What Do You Think?
What do you think of this watercolor exercise on how to paint a night sky? I would love to know what you think of it or if you have any questions about the technique itself. I would love to see your work! If you are on Instagram, use the hashtag #hopalongstudio as I would love to see your projects. You can also write a comment below or contact me directly. I hope that you have a great week and have some time for creative self-care.
Project Supply List
- Dina Wakley Media Journal
- Winsor and Newton Cotman Watercolors: Ultramarine, Cerulean Blue Hut, Turquoise, D.S. Myan Blue Genuine, Viridian Hue, Dioxazine Purple, Cadmium Yellow Hue
- Mission Watercolor Permanent Deep Red
- Princeton Elite Quill Watercolor Brush Size 6
- Joggles Compass Stencil
- Sakura Gelly Roll Pens: Metallic Silver M553, Stardust Silver-Star XPGB744, Classic 10 White
- Other Materials: Water, Water Container, Palette Knife, Kosher Salt