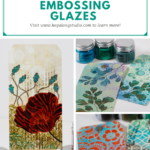
How to Use Distress Embossing Glazes
Today I wanted to share with you how to use Distress Embossing Glazes. The Tim Holtz Distress Embossing Glazes are a new product from Ranger for 2020. When I saw the original demo for this product, I had so many ideas on how I could use this in my own journaling and in my own projects.
I have spent the last 2 weeks since I received the Distress Embossing Glazes in the mail testing them to understand how I could apply them. There is something very freeing in taking the time to test something new. It forces me not to put on any constraints on how I think these products should be used. Instead, it gives me the freedom to try to see how I can use them in my art. This gives me confidence that when I try them in my journal that I can get consistent results.
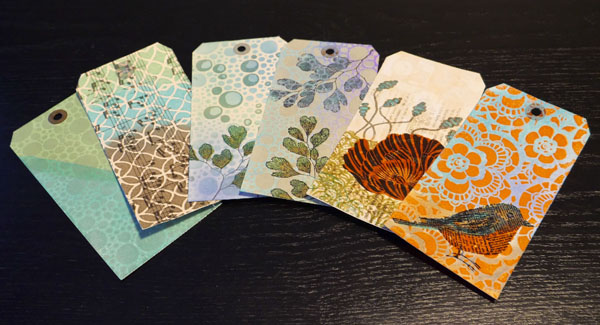
The Tags
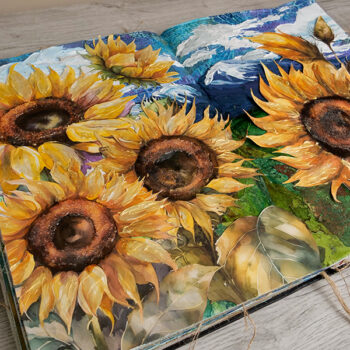
Tags are a wonderful medium for testing how to use Distress Embossing Glazes. They allow for a small project that can be an addition to a journal page, card, or be used as a bookmark. Tags are great because if I don’t like the final result, they are not in my journal. At the same time, if I love my tag, it can be adhered in my journal as part of my art to enjoy in the future.
I originally intended to only do a few tags, but by the time I was done testing this product for the first time, I had 6 different tags. These tags use a variety of techniques including how to create large areas of glazing, detail work with embossing glazes, and how to mix these glazes with stamps, inks and other mediums.
The Tutorial(s)
I was originally only going to do one tutorial for these tags, but I had so much content, I decided to split it into 3 videos.
How to Use Distress Embossing Glazes Part 1
In the first video on How to Use Distress Embossing Glazes, I demonstrated how to do large areas of embossing glazing and how to layer the glazes effectively. I also showed how to use these glazes through a stencil with multiple glaze colors. I then presented how to use these glazes with stamps to not only add layers, but how to effectively add multiple layers and use color mixing to get a variety of colors.
How to Use Distress Embossing Glazes Part 2
In How to Use Distress Embossing Glazes Part 2 I added some new ideas on how to use these glazes based off of what I demonstrated in the first video. My focus for this video was to take what I learned about glazing through stencils and with stamps and add a few of these techniques together. I wanted to show how the layers can be dominant or subtle and by the use of color they can be center stage in your project, or just a support to your main image.
I also wanted to show the versatility of the distress embossing pens, not just for coloring but for shading images and outlining images in a stencil.
How to Use Distress Embossing Glazes Part 3
In this final video, How to Use Distress Embossing Glazes Part 3, I wanted to demonstrate how these embossing pens are great for adding doodling and your own art to your projects. I used the pens to create a custom background using doodling and zentangle patterns with the embossing glaze to end up with a beautiful tag.
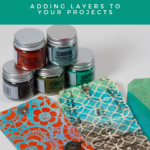
Project Supply List
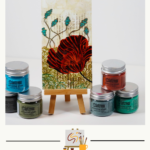
- Tim Holtz Distress Embossing Glazes: Peeled Paint, Hickory Smoke, Broken China, Cracked Pistachio, Fired Brick, Weathered Wood
- Tim Holtz Distress Oxide Inks: Blueprint Sketch, Vintage Photo, Gathered Twigs, Broken China, Mermaid Lagoon, Wilted Violet, Cracked Pistachio
- Inks: Ranger Archival Ink Jet Black, Tim Holtz Distress Embossing Ink
- Stamps: Hero Arts Bird Stamp, Maiden Hair Fern Stamp, Impress Flower Stamp
- Tim Holtz Distress Embossing Pens: Brush and Bullet
- Tim Holtz Layering Stencils: Bubbles, Lace, Latticework
- Copic Sketch Markers: BG72, BG71, B00
- Other Ranger Products: Tim Holtz Ideology Composer Tissue Wrap, Tim Holtz Distress Mixed Media Tags, Ranger Mini Round Ink Blending Tool and Foams, Tim Holtz Distress Sprayer
- Other Materials: Acrilex Gloss Medium, Heat Embossing Tool, Box, Scrap Paper, US ArtQuest PPA (Perfect Paper Adhesive) Matte, Baby Wipes, Patterned Cardstock
Any Questions?
I would love to hear if you have found these videos useful. If you have, please feel free to leave a comment below or contact me directly. Let me know if you have any questions, I would love to know how I can help you find some creative self-care this week.