Looking for an Easy Painting Exercise? How to Paint a Tree with Ink
Do you ever find yourself unsure of how to improve your painting skills? You may not know where to start and it may feel overwhelming. If that’s you, here’s a very simple project on how to paint a tree with ink that will help you improve your painting skills.
As a creator, I sometimes go through times where I’m not feeling inspired. I can feel like I’m out of ideas or am uncertain on where to start with a project. When this happens, I tend to simplify my process as this can help get the creative juices flowing.
For this project, you’ll need a piece of watercolor paper, ink and 2 brushes. I’ll be using black ink only on this project, so we don’t have to make color decisions. Learning to create with just a few materials can both challenge us and simplify our painting practice to prevent us from getting overwhelmed.
Hop-A-Long Studio is reader-supported. When you buy through links on our site, we may earn an affiliate commission at no cost to you. Learn more.
Choosing Your Ink
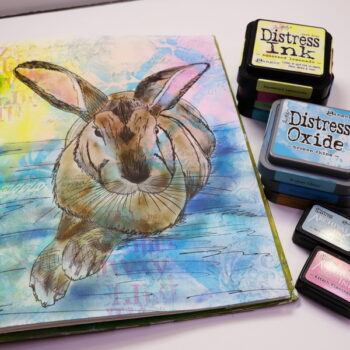
There’s a variety of inks that you can use for this technique, from stamp pad re-inkers to watercolor or India Inks. Use whatever ink that you have on hand. Recently I’ve been playing with a variety of Japanese and Chinese Inks which I will use in today’s project.
What I love about these Chinese and Japanese black inks is that they are so versatile. When wet they can be used for tinted washes, used to dye folded paper, and make beautiful art journal backgrounds. When fully dry they are permanent which makes them wonderful for dip pen and calligraphy work. What I love most about them is their saturated color which gives you a range of values to use in your art journal page.
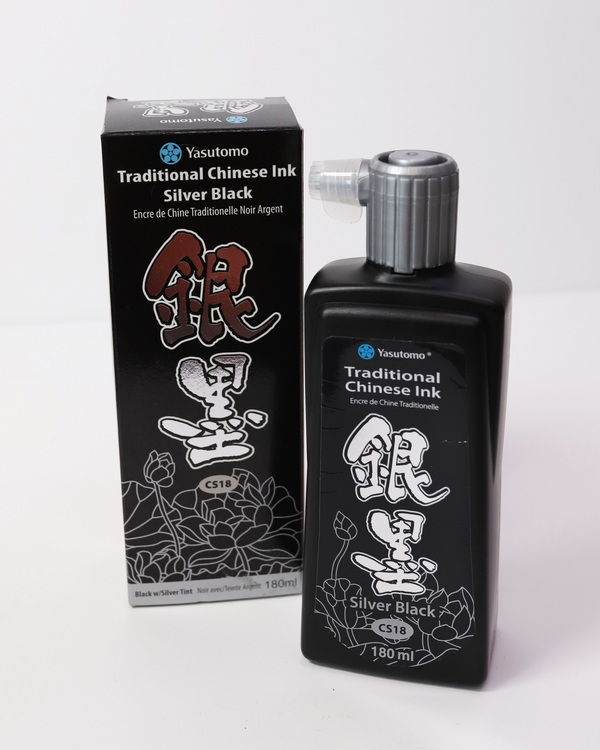
The ink that I’m using today is Yasutomo Traditional Chinese Ink Silver Black. This ink needs to be shaken before it can be used so that the silver mixes into the black ink.
Whatever ink you use, decant a small amount of ink into a bowl or small container so that it can be easily picked up and painted with for this project.
Choosing Your Brushes
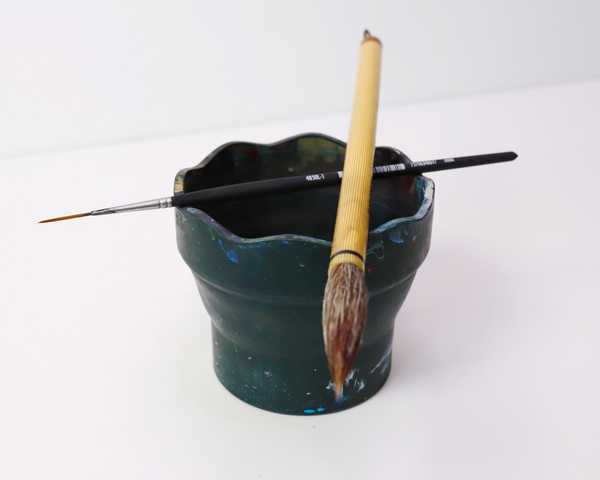
For today’s technique, I’m testing out a set of Chinese brushes made from goat’s hair. These are an interesting brush to use as they are much softer than watercolor brushes and absorb a lot more water. I will be using this type of brush for the wash step of this project and moving to a traditional watercolor liner brush for painting the tree.
But for this project, for the wash work, use a large brush that can hold a lot of water. This helps the ink react beautifully on the watercolor paper. For the tree, use the smallest round watercolor brush that you own. For this project, I’ll be using a liner brush.
Art Journal Project Using Ink
Prepare Your Watercolor Paper
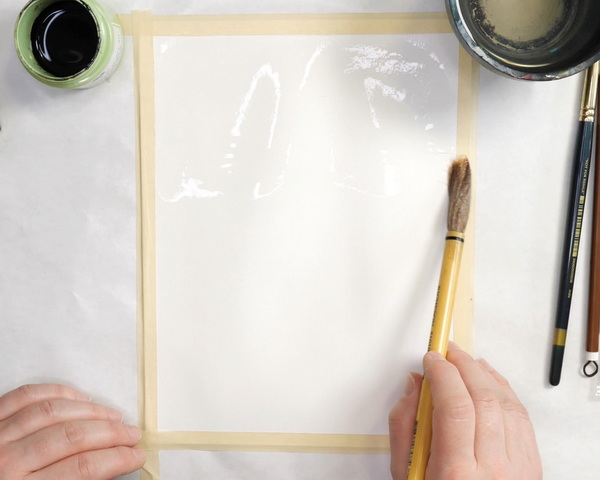
Before we start painting the tree, we’ll begin by creating an abstract background. Tape your watercolor paper to your surface with masking tape. By doing this, it prevents warping, buckling, and moving as we add water to the surface. I plan to add this page into my art journal. But for water intense techniques like this, I like to create them separately on watercolor paper, then add them into my journal.
Dip your brush into the water and working from top to bottom, add a layer of water across the entire page.
You may notice that once you’ve added some water, the page may not be evenly wet. Some areas of the paper will soak up water more quickly than others. If this is the case, add a second layer of water, more lightly than the first layer, to the page. The whole page should now be slightly shiny with water but there should not be pooling.
Add Ink

Dip your brush into the ink and start adding small brush marks of ink to the surface. The ink will react to the water, moving quickly across the wet surface creating an interesting background.
Now we can choose to have a variety of dark or light areas (or values) on our background. Along the side and the bottom of the project, add in more of the black ink. This will let the ink bleed into the page but not remove all the white areas.
Clean your brush. Add more clean water to the brush and touch it against the black ink. By adding in water, this will cause the ink to move and react. This will give you more light and dark values across the project.
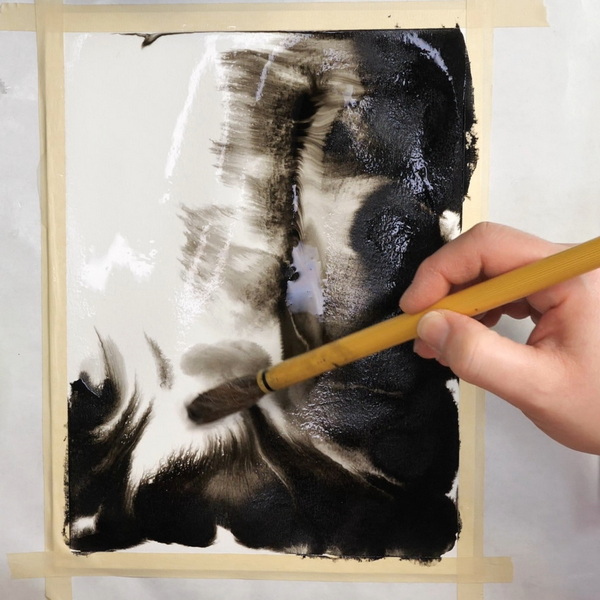
Adjust the color to the intensity that you would like by adding water or removing color with a paper towel. I would suggest not going too dark as you want to be able to see the image that you will be painting over top. You can always add more to lighter areas to darken, but once it’s black there’s no fixing it.
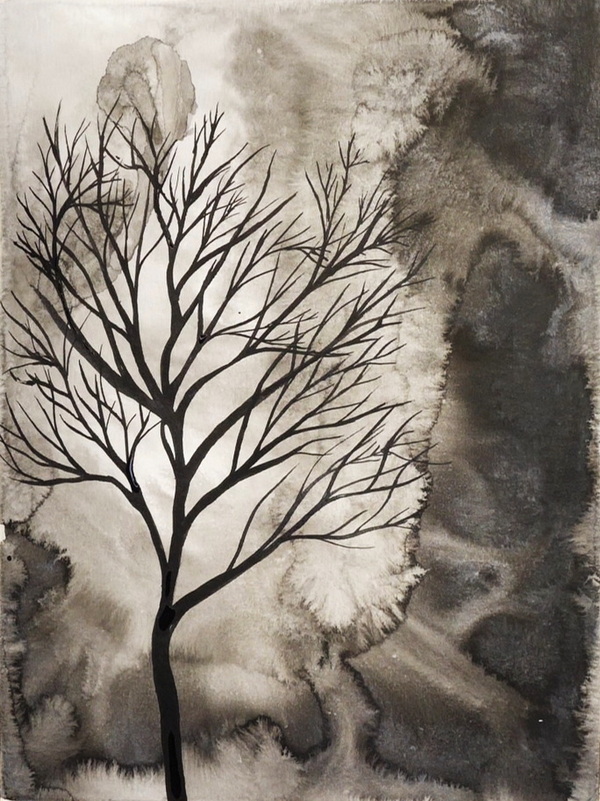
How to Paint a Tree with Ink
Once the background has fully dried, you’re ready to paint your tree with ink. You’ll notice that as the ink dries, it also lightens in color. As I used a silver black ink for this project, I also have a beautiful silvery sheen to some of my background areas.
When I paint trees, I don’t dilute my ink at all. I usually have a small amount in a well or a shallow bowl that I will dip into as I paint.
Add in Basic Form
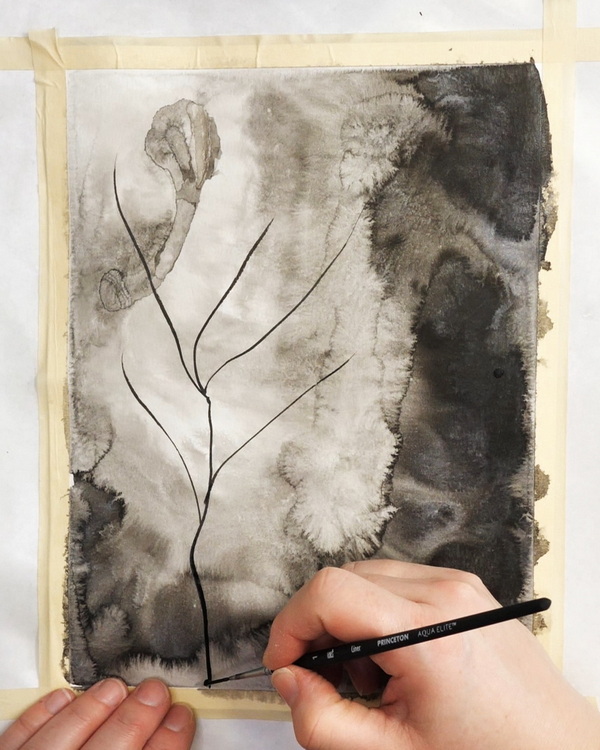
The first step for painting a tree with ink is figuring out the basic form of the tree. This doesn’t have to be complicated. Using a liner brush, start by drawing a line upward, then branching it off to the left and right as a “Y” shape. Add in a few more lines that will represent the general shape of the tree.
This doesn’t have to be photo realistic. But having a few photos to reference will be useful for determining your tree shape and size.
Thicken the Trunk and Main Branches
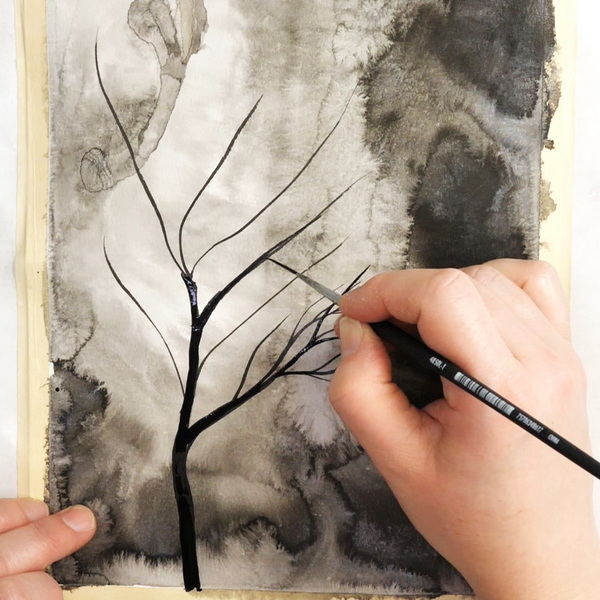
For the sake of simplicity, I’m using a liner brush throughout this entire tree painting. Use your brush to start thickening the line for the trunk of the tree.
Thicken up the main branches and trunk of the tree. Decide on which branches will be the main branches for the tree. If you look at trees in nature, the trunk will be the thickest part of the tree with several offshoots of larger branches. From there, they will branch off again to smaller branches, and then smaller branches from there.
For this step, I add some thickness to the trunk, but it’s not necessarily as thick as it will be at the end of the painting. I like to add thicker lines to the main branches and this will give me a better indication of how thick I want my trunk.
If you start out with lines that are heavy, this will affect the rest of your painting. I like to work up to the final shape over trying to get it perfect the first time around.
Adding in More Branches
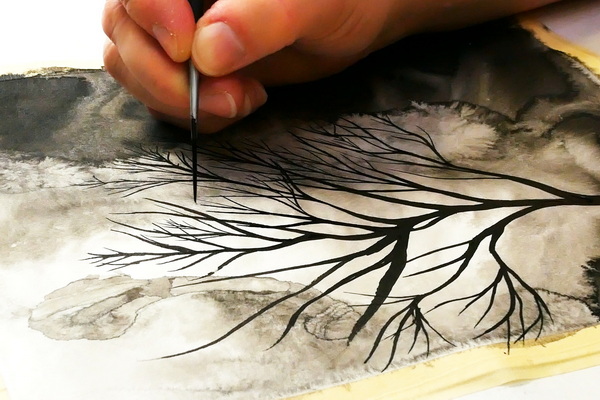
Start adding in more branches to your tree. This is where you can have fun with your tree shape. Make some of the branches more bent and meandering. You can also have branches cross other branches. Some areas can have more branches and other areas of the tree can be open with less branches.
Continue to add branches making sure that the further you go up the branch, the thinner and shorter the branches get.
Troubleshooting
If you find that the upper branches are much thicker than they should be, one way to compensate is to thicken the trunk of the tree and the main branches. This is why I tend to keep my trunk and main branches thinner. Once the small branch size is determined, I can easily thicken up the main branch and tree trunk.
To get fine and thinner branches, start with applying even pressure on the brush. As you paint the line, lighten up your pressure and flick the paintbrush with your wrist. This will give you a much thinner line. This technique works well for creating small branches at the end of a main branch.
This technique works well for creating small branches at the end of a main branch.
Evaluate and Adjust
When you’re painting trees with ink, make a point to take a step back and look at the painting as a whole. Is there a spot that has too many branches? Is one side of the tree much more heavy looking than the other side? Should you thicken up any of the branches? By taking a step back from the details and analyzing your painting, this can give you a much better sense of what you want your tree to look like.
Always remember, no tree is perfect. Make sure to add some fun and drama to your tree to give it a wild and free look!
Adding Journaling
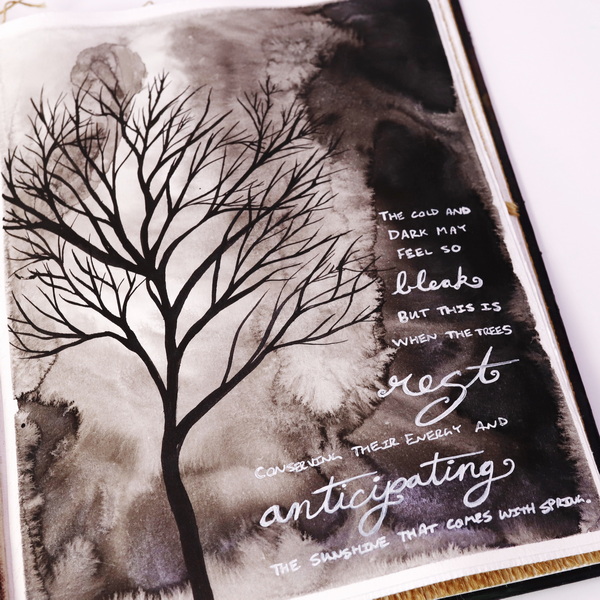
Once the tree painting is completed and dry, use your favorite adhesive to attach it into your art journal. I like to leave a small white border around the edge. Framing the piece makes the lights and darks pop on the page. Using a white Posca Paint Pen and Gelly Roll White Pen, add journaling to the page.
When I was making this page, I pictured a stormy or wintery sky with a tree at rest. Rest was the word I was ruminating on as I created this page.

Finding Rest
I love being a creator, but I find it hard to find rest in my day. It’s easy to work all the time, especially when working from home. When working on this page, I was asking myself this question:
“What can I do to find rest?”
It made me think about the winter trees and how they are in their time of rest. Here in Canada, we definitely get seasons, including earlier this week where we ended up with over 8 inches of snow! When digging my car out of the snow, I was looking at my trees and thinking about how it is their time to rest.
Life can get so busy it’s important to remember that every part of our life has seasons. Some are busier than others. Some require more and less rest. But the key is remembering to rest. Learning to rest can make a difference for us in the busy seasons. The trees are at rest right now, but in a few months they’ll be putting all their energy into growing, putting out leaves, fruit and flowers.
This is a reminder to pay attention to the seasons, embrace them for what they are, and find a way to find rest even in the busy. I am attempting to make Sundays my day of rest. It’s not always easy. I see my desk and all the undone things and it makes me want to get back to work. But then, I remember that rest is important. The more I rest, the more energy I’ll have for everything else.
What does rest look like for you? Is creative play part of your rest? I challenge you to take the time to explore rest in your own life. Give yourself the space to figure out the rhythms in life that are most helpful to your personal growth and happiness.
Any Questions?
Any questions about how to paint a tree with ink or create these soft backgrounds? I’d love to know what you think about this project or if you have any questions about how to paint a tree! Please leave a comment below, I’d love to start a conversation with you! I hope that you take time for self care this week and find time for rest!
If you’re looking for another ink project, check out this layered art journal tutorial using dye inks!
Project Supply List

Dina Wakley Media Journal
from: Ranger Ink Industries

- Acid-free
- Made in the USA
- Cold Press 140lb paperweight


The Ultra Fine to Fine Set of 3 from POSCA. This set includes the white PC-1MR, PC-1M & PC-3M.
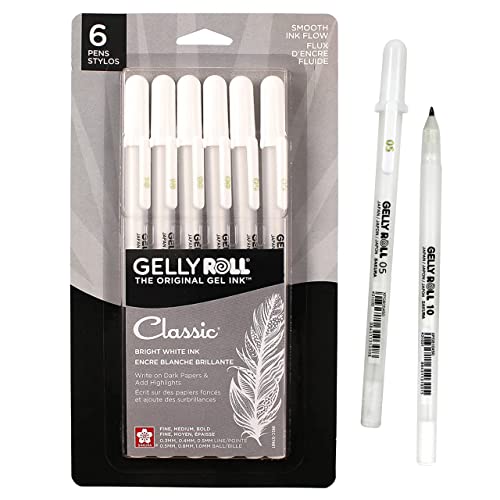
Bright, Opaque White Ink: Sakura Gelly Roll pens have vibrant white ink that flows creamy smooth onto paper.