New to Intuitive Collage? Start Here!
Are you looking for new ways to mix up your art journal practice? Intuitive collage is one of my favorite ways to create with paper in my projects. Let’s explore some easy and fun techniques to use paper in unique ways.
Hop-A-Long Studio is reader-supported. When you buy through links on our site, we may earn an affiliate commission at no cost to you. Learn more.
What Can We Use for Intuitive Collage?
We sometimes get stuck by creating too many rules of what we can and cannot use in our collage projects. Here’s a few of my favorite things that I reach for when I start working on my collage projects.
Scrapbooking Paper
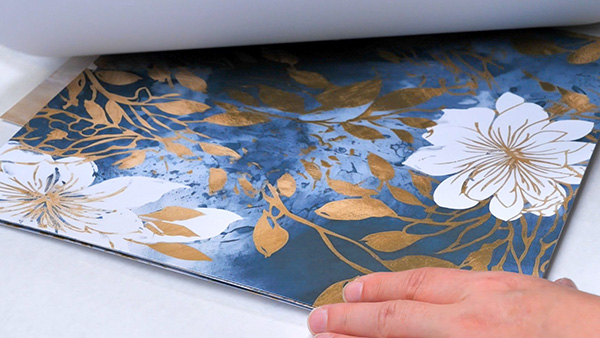
I love scrapbooking paper because there are so many beautiful designs by a variety of manufacturers. It’s easy to find and you can use it not only for collage art but cards, scrapbooking pages and DIY projects. Whenever I see an inspiring paper, I grab it! There is a great story that can be told through using designs that inspire us.
Magazines
Any magazines that you have make perfect collage fodder. You can use free magazines, National Geographics, and old calendars to name a few. These are gold for the intuitive collage process! My problem is that I often collect more than I have time to use on my projects. I try to keep these treasures in one bin so that I don’t have too many things hanging around. I find that there is a fine balance between having found treasures and hoarding!
Translucent Materials
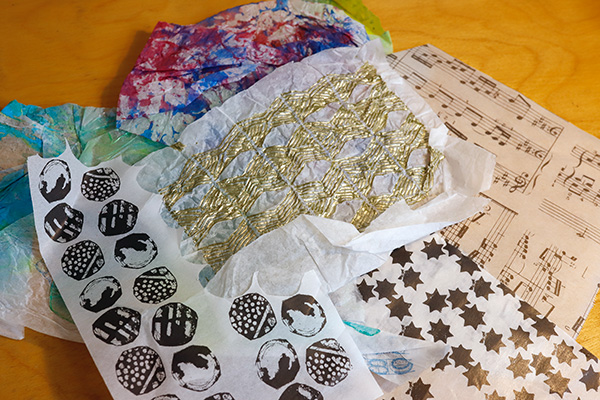
Translucent materials can be coffee filters, tissue paper, tea bags, deli paper and onion paper to name a few. I love printing and stamping on these semi-transparent layers as they add a very different look to a project. If you look around your home, you’ll find lots of interesting textures that can be used in your next art journal collage.
Handmade Papers
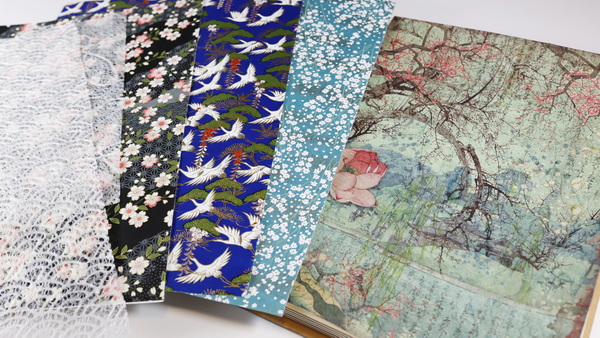
These can be handmade papers that you purchase (like Japanese papers and Tibetan papers) or papers you have made yourself using a gel plate, stamps or inks. These add a very interesting and personal look to any collage art journal page.
Creating Unique Backgrounds with Intuitive Collage
Earlier this year I had an opportunity to take an abstract collage class from artist Gloria Gelo. Even though my work isn’t abstract, I learned some unique lessons during this workshop that I could apply to my own work.
In the class we talked about using simple collages to tell our story. It was amazing how limiting my materials helped me to tell my story and made me feel more inspired and creative!
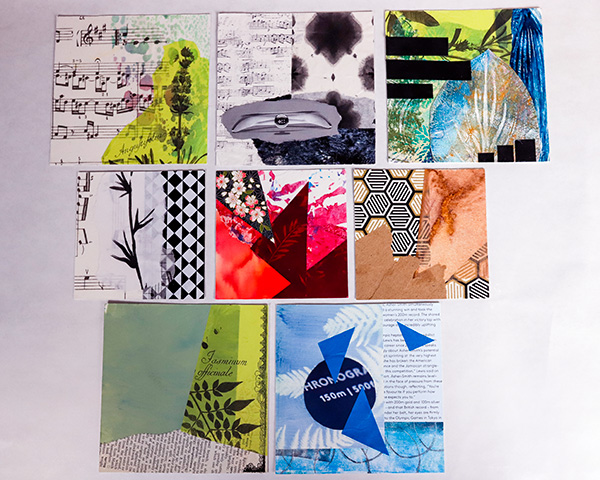
Here are some of the collage pieces that I created during that class:
- Black and white
- Neutral colors
- Using only one color
- Combining ripped and cut edges
It was an interesting process to play with papers focusing on what I would usually consider “the background” to tell the story. It’s made me look at paper in a different way. The background can complement and help tell the story that we are making with our main text and images.
Building an Intuitive Collage Design from the Ground Up
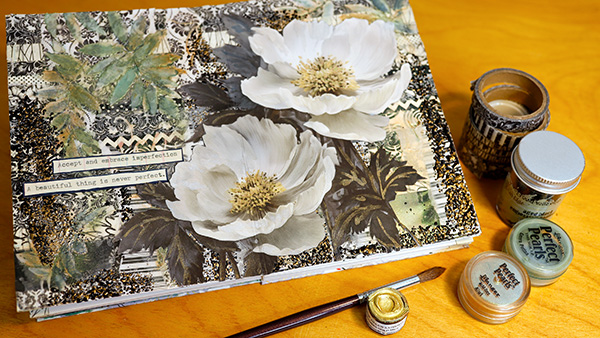
Let’s work through the process of building a intuitive collage from the ground up. As much as I’d like to start with the background, I tend to rely on my focal image for direction on how the art journal collage will be built.
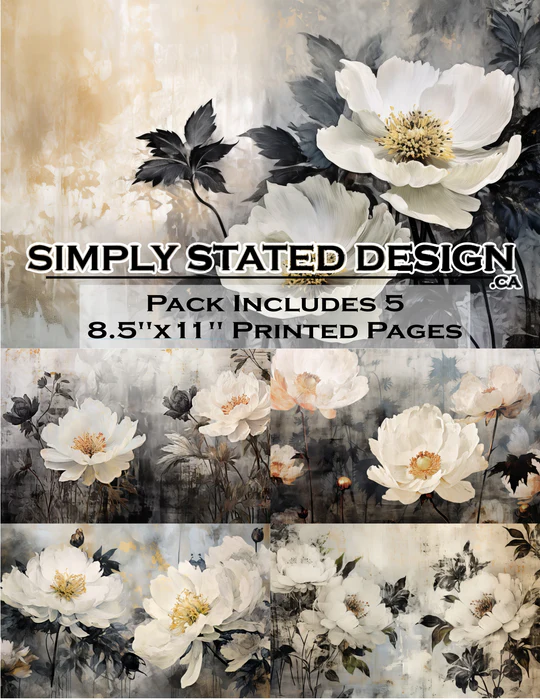
I’m going to start with a focal image from Simply Stated Design to be the focal point of this project. I love Simply Stated Design paper and imagery. The images are vibrant, there’s so many choices, and I love supporting small business here in Canada.
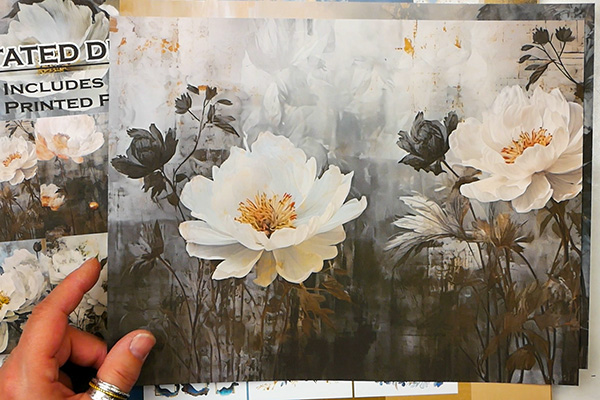
The Simply Stated Design images make it easy to get a page put together. If you’re not interested in coloring or drawing your own images, this is a company that you should check out!
Simply Stated Design gifted me with the focal paper for this project. They have also generously given me a discount code to share with you. If you’re looking for beautiful paper and focal images for your projects, check them out! When you use code nadine15 at checkout, you’ll get 15% off your first order!
A paper crafting company designing and creating products that inspire and excite the creative community!
Use nadine15 at checkout to get 15% off of your first order!
Start with Washi Tape
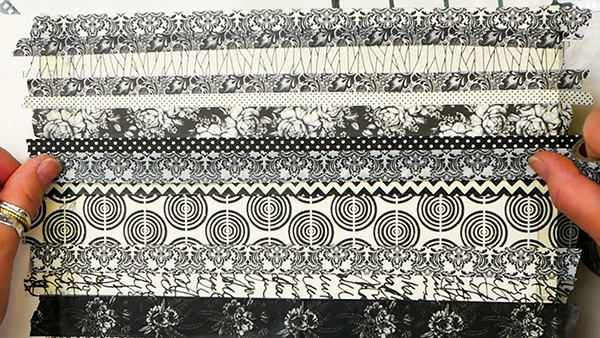
Now that I’ve decided on a beautiful focal image, which I have fussy cut out from Simply Stated Design’s Floral Shadows Paper Pack, I can determine where I want to start with my background.
I love the muted colors of these florals, so I wanted to make sure that the background didn’t compete with it. I thought a monochromatic scheme would be perfect for the first layer. Using my favorite black and white washi tape. Start by overlapping and adding layers of washi tape to the background.
I purposely chose a horizontal orientation because it’s considered more restful and less strong than a vertical orientation. But the choice is up to you. If you have older washi tape that’s not sticking, add a layer of matte medium to your surface first. Then add the washi tape followed by another layer of matte medium on top.
Add in Collage Papers
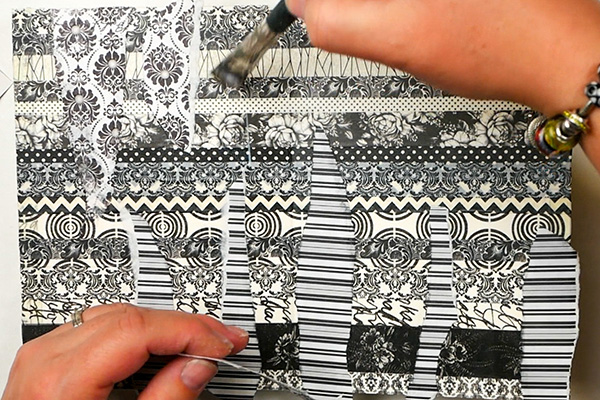
I didn’t want to leave the page as it was, so to soften some of the lines, I found my favorite black and white scrapbooking papers. To soften the page a bit, I tore the paper instead of cutting the paper. When you tear, this creates a softer line rather than the strong lines of cutting your paper.
Using matte medium and a brush, I brushed matte medium onto my project surface. Then I added the medium to the back of the paper so that it would adhere without wrinkles. I also added a layer of matte medium to the top of the paper to seal it in.
Creates a matte, non-reflecting finish when added to acrylic colors. Lightweight, non-toxic; Opaque when wet, translucent when dry.
This might seem like a busy page, but let’s keep going! There’s lots of ways to adjust this background to make it work with our floral image!
Adding Flexible Modeling Paste
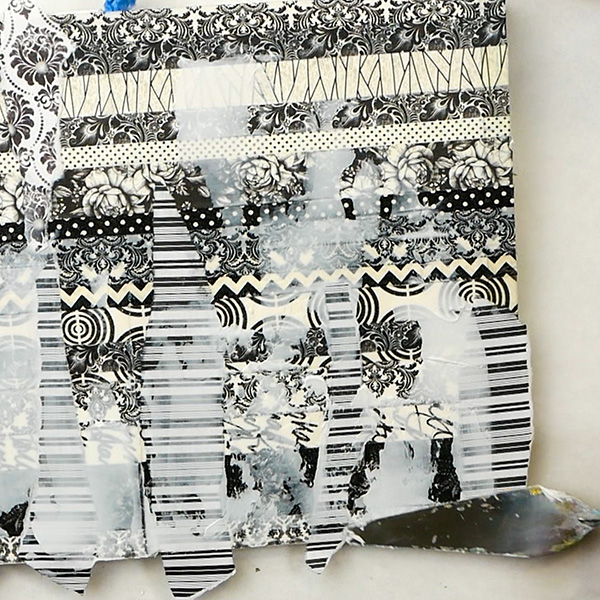
If you find that your page feels too busy, alter it with flexible modeling paste. This is a great way to tone down the colors and lines while adding in fabulous texture. Use a palette knife to swipe modeling paste onto the surface of the page. You can leave your page at this point, softened with a bit of modeling paste. Or you can take it a step further by adding modeling paste through a stencil.
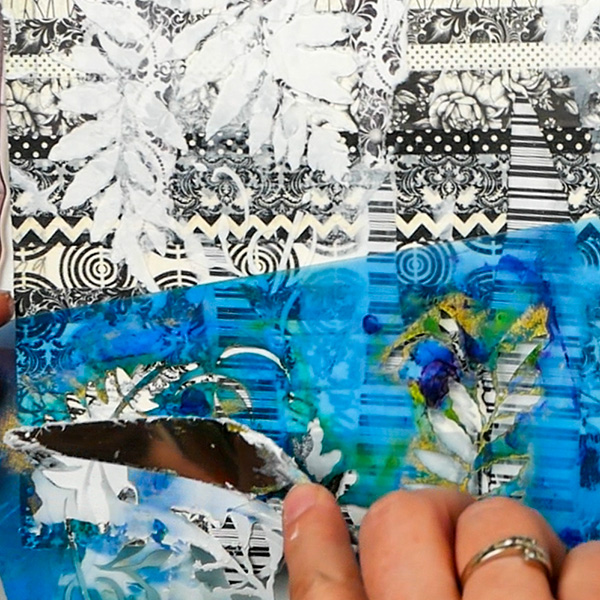
Using a leaf stencil, add modeling paste through the stencil with a palette knife. If you don’t know how to properly use paste through a stencil, check out this article.
Liquitex Modeling Paste is a thick, clay-like putty formulated with an acrylic polymer base and marble dust. Use alone or combine with acrylic colors to build forms and structures on rigid substrates.
Adding in Perfect Pearls
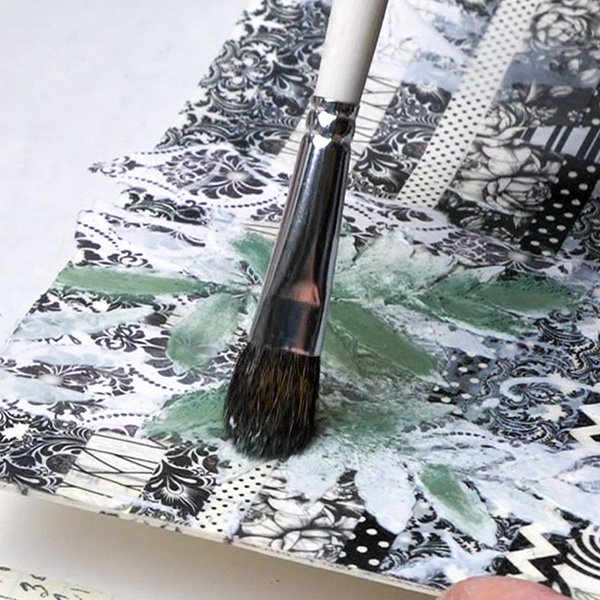
I recently re-discovered Perfect Pearls in my art studio. I thought it might be fun to add them directly to the paste. Using a soft brush, I added Perfect Pearls to the surface. But I found that the Perfect Pearls didn’t go on evenly or in the way that I wanted. Ideally, I should have waited for the paste to dry before adding color onto the page.
But this is the point of intuitive collage and art journaling. We try, we experiment, and we learn. At this point I left my project to fully dry before altering it further.
Use the Perfect Pearls Aged Patina Kit to create imitation hardware, metal embellishments, luminous stone effects and natural aged looks. Combine these soft, lustrous colors for time-worn looks on scrapbook pages, cards, clay and more.
Altering the Perfect Pearls
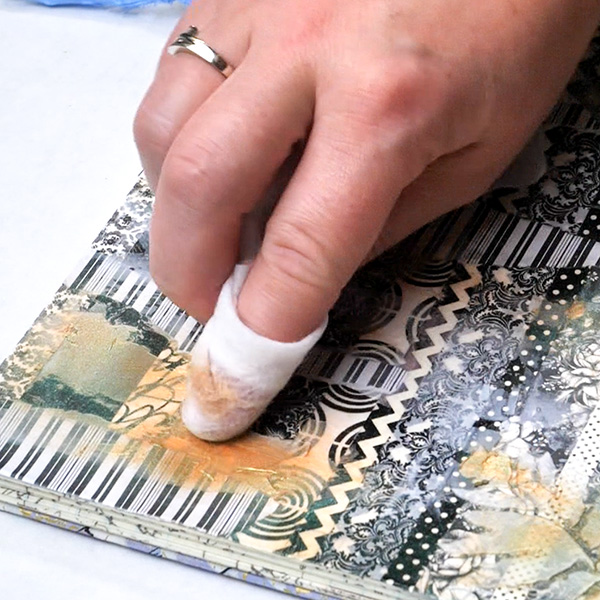
Once the paste was dry, I was able to go in with a baby wipe and wipe off some of the mica powder. This helped balance out the background a bit more. But I still wanted to add more color. This is where my Beam and Stoneground Paints come to the rescue!
Beam Paints and Stoneground Paint are Canadian companies that do small batch handmade watercolor paints. I love these brands especially for their metallic paints as they are much more pigmented and shinier than most other watercolor paints available.
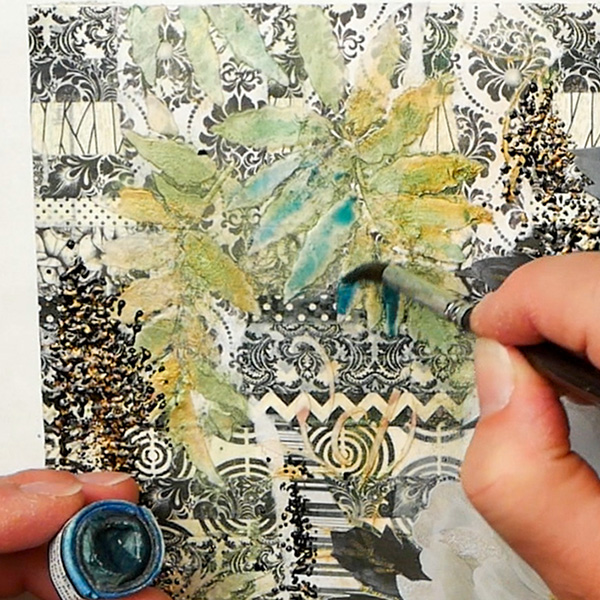
These paints can be applied to modeling paste with a watercolor brush. I was able to alter the color of the modeling paste images to make them darker and work better with Perfect Pearls. If you find that something doesn’t go according to plan, don’t despair! You may just need to try another medium on top and see what happens!
Adding in Embossing Powders
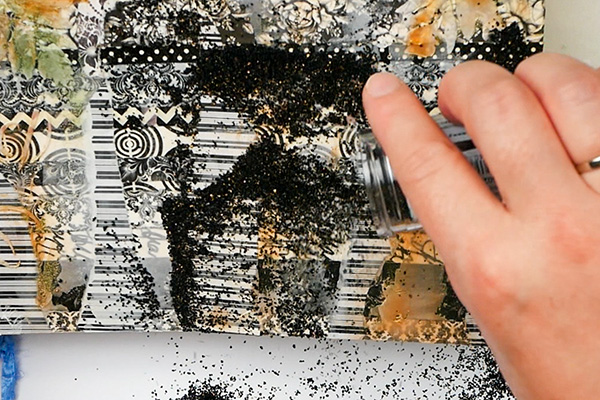
As I’ve been pulling out wonderful and random things from my art room, I found a bunch of chunky embossing powders. These will work perfectly with my focal image!
Use an embossing ink pad to swipe areas of ink along the page. Sprinkle the chunky embossing powder onto the page and then tip the page to let the excess fall off.
If you have areas of embossing powder that are too solid, or you’d prefer to alter the amount of powder on the page, use a soft brush to remove some of the embossing power.
When heat setting chunky embossing power, it’s going to want to fly off the page. To prevent this, make sure your heat embossing tool has been running for a minute or two and is very hot. Then use the embossing heat tool to heat set the paper from from underneath the project.
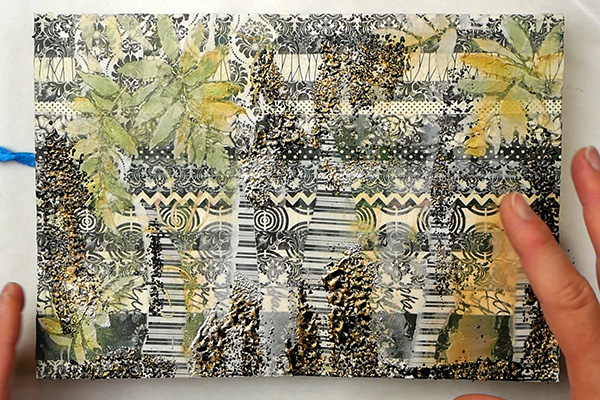
Once I’ve done this for a few minutes, then I’ll heat the top of the powder as well to make sure it’s fully melted. This way you’ll get a really beautiful black and metallic finish to the embossing powder.
Adding the Focal Image
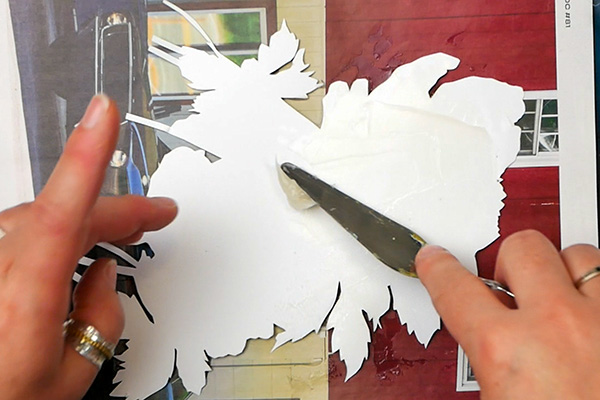
Use your favorite collage medium to add the focal image to the project. I like to use a palette knife and a custom collage medium that I mix as it’s super strong and easy to use. If you’re interested in seeing this custom mix, make sure to come back in a few weeks or subscribe to my newsletter to see that video!
You can use a gel medium or strong glue to adhere the focal image. I am using a custom collage glue as this paper will be bent when I fold up my accordion art journal and I want to make sure that the focal image doesn’t come off the page.
Adding Shimmer
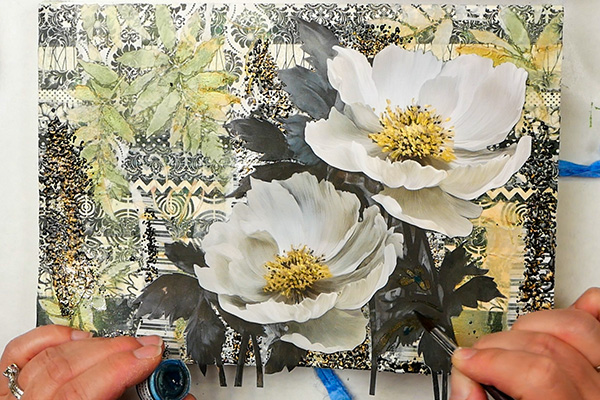
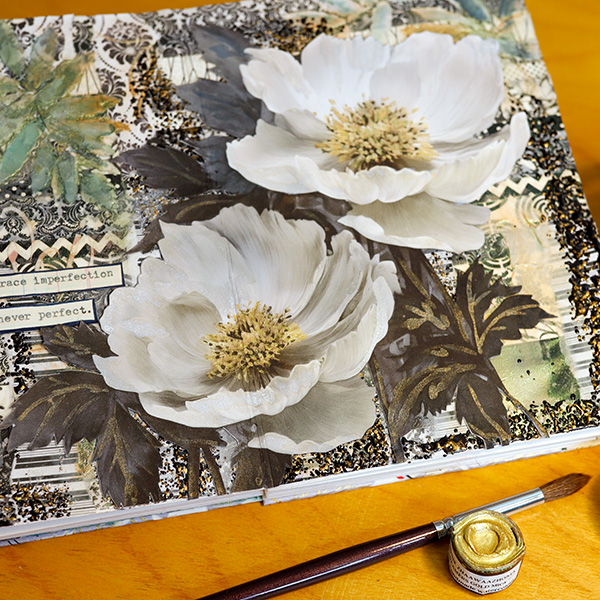
As much as I love this focal image as is, I always feel like a little shine just makes it that much better! Using my Beam Paint metallic colors, I added gold highlights to the center of the flowers, silver highlights to the flower petals and blue-gold metallic to the leaves. It created such a beautiful shine that added the perfect highlights to this project!
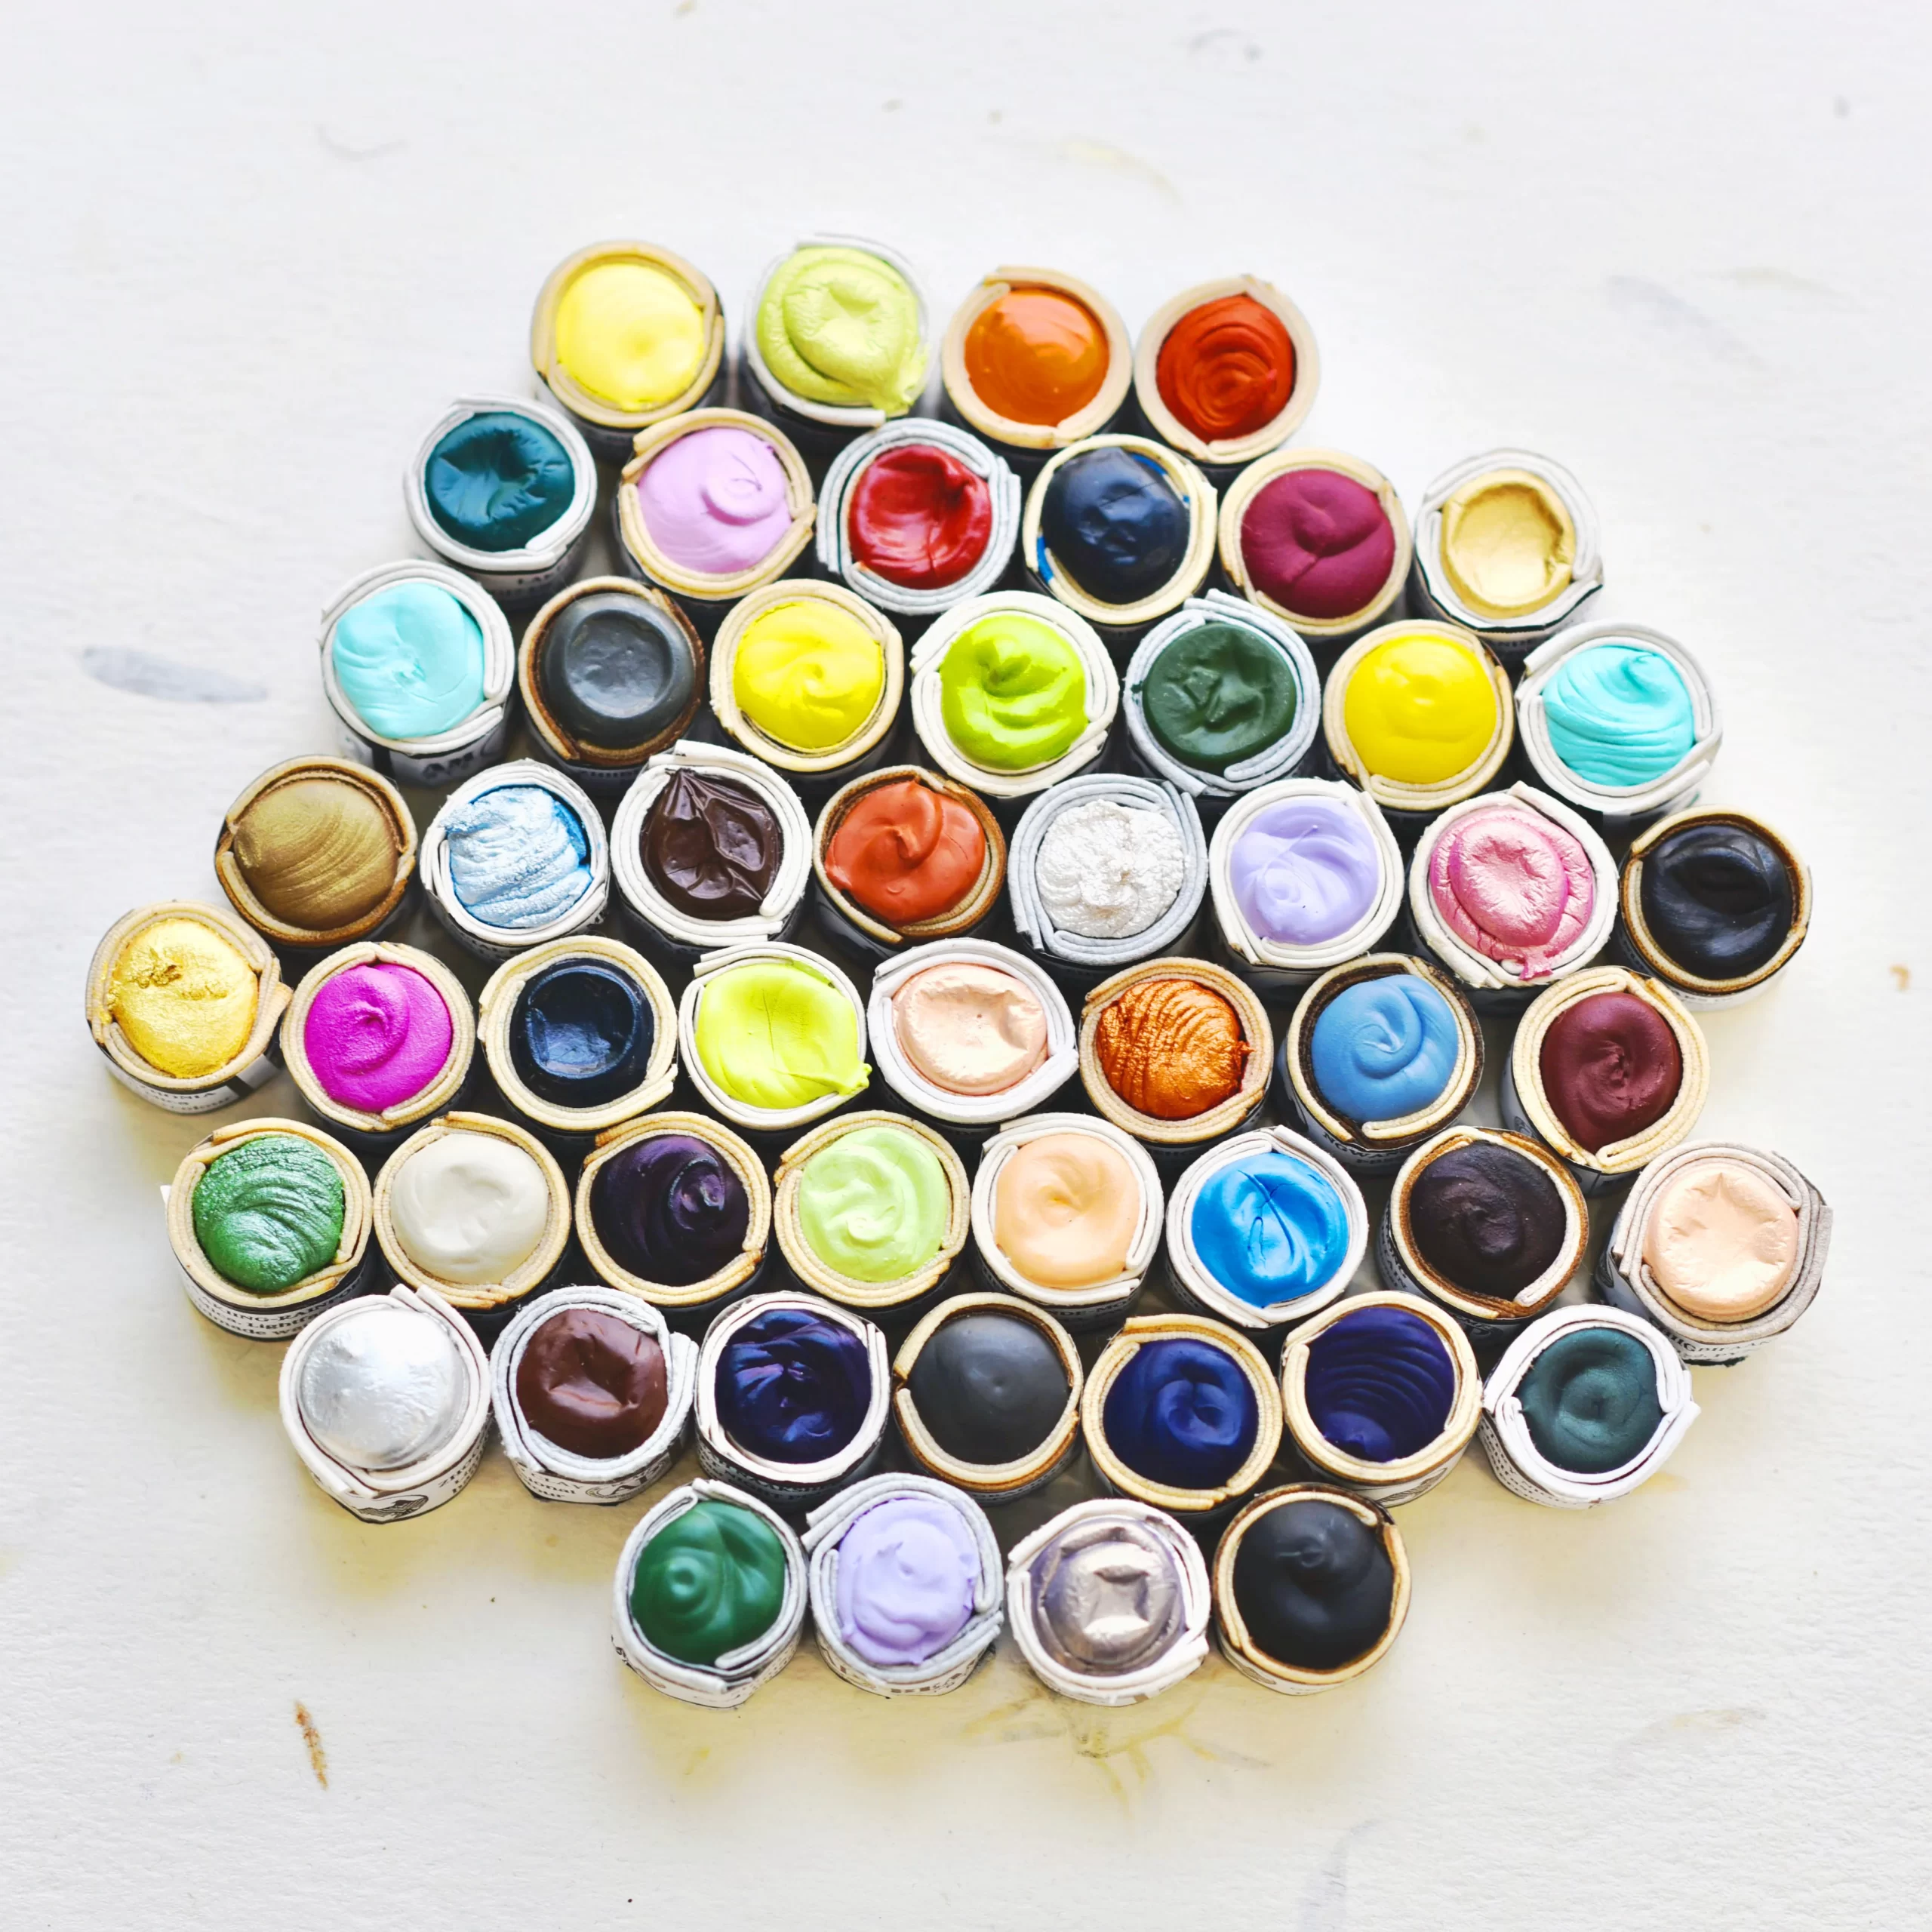
Paintstones are lightfast pigments, tree sap, and gum Arabic.
These little jewels are also about our values and support our respect for the earth and being plastic free. They are wrapped in beeswaxed cotton with paper labels identifying the color name and are our answer to halfpans!
Adding Words
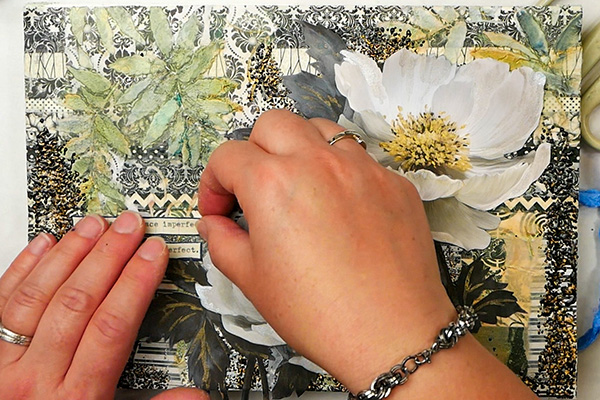
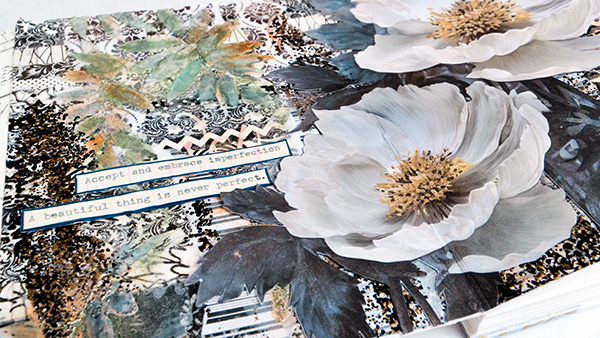
As with many of my art journaling pages, it’s not just about the art journal techniques, it’s also about how I’m feeling as I’m creating. I was flipping through the printed quotes from Dina Wakley Typed Ledgers and found this quote: “Accept and embrace imperfection. A beautiful thing is never perfect.”
This set of Typed Ledger sheets Set 02 is designed by Dina Wakley for Ranger Ink. These sheets vary in size, but measure approximately 8.5" x 11.25". These sheets look like aged notebook paper and contain typed quotes, phrases, and expressions that are perfect for mixed media projects.
That quote works perfectly with everything that went on with this project. The key to the intuitive art process is to create without too much of a plan. Some things went great, like the embossing powder and image. Some things went a bit sideways, like the Perfect Pearls. But overall, I have a piece that I’m so happy with and embracing imperfection is what this page was all about!
After cutting out this quote, I finished it off by adding a line around it with a blue-black Zebra Click Art pen. A bit of Art Glitter Glue adhered the quote to the page.
What is Your Intuitive Collage Process?
What is your intuitive art journal process? Do you start with a background or a focal image or do you do something completely different? This isn’t the way that I always create but is one of my processes for working from my gut and seeing what will happen. I hope that you have enjoyed this art journal process. Sign up for my newsletter to see my newest projects that I create with collage in the art journal. But in the meantime, here’s a few previous projects that I’ve done that I thought you’d enjoy!
How to Collage with Tissue Paper and Acetate
Unique Collage Techniques with Tissue Paper Gel Prints
Black & White Tissue Paper Collage
Project Supply List
Collection of coordinating single sided patterned papers printed on 8.5x11" high quality 80lb cardstock.
Use nadine15 at checkout to get 15% off of your first order!
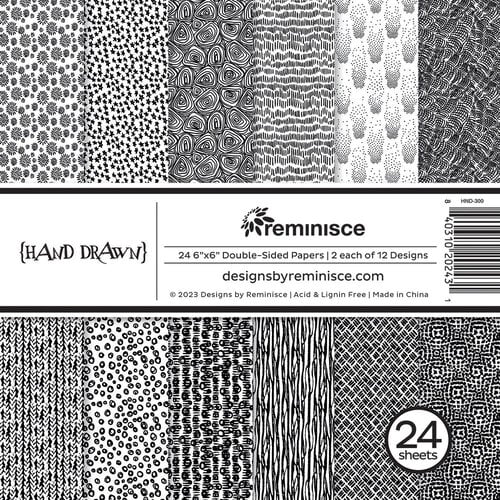
This 6" x 6" Collection Kit is part of the Hand Drawn Collection from Reminisce. This kit includes 24 double sided papers, in 12 designs, you get two each of 12 designs. These designs include many different black and white hand-drawn designs.
Liquitex Modeling Paste is a thick, clay-like putty formulated with an acrylic polymer base and marble dust. Use alone or combine with acrylic colors to build forms and structures on rigid substrates.
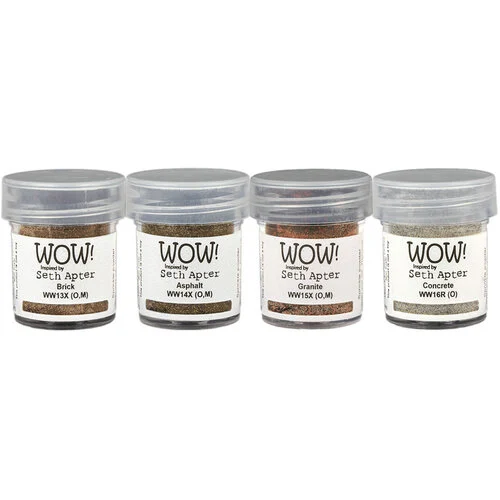
Introducing the Building Blocks Embossing Powders by Seth Apter for WOW!, part of the captivating Quad Collection. This set features four distinctive colors inspired by traditional building materials: Brick, Asphalt, Granite, and Cement. Each powder is crafted to resemble the textures and colors of these materials.
Use the Perfect Pearls Aged Patina Kit to create imitation hardware, metal embellishments, luminous stone effects and natural aged looks. Combine these soft, lustrous colors for time-worn looks on scrapbook pages, cards, clay and more.
Paintstones are lightfast pigments, tree sap, and gum Arabic.
These little jewels are also about our values and support our respect for the earth and being plastic free. They are wrapped in beeswaxed cotton with paper labels identifying the color name and are our answer to halfpans!
This set of Typed Ledger sheets Set 01 is designed by Dina Wakley for Ranger Ink. These sheets vary in size, but measure approximately 8.5" x 11.25". These sheets look like aged notebook paper and contain typed quotes, phrases, and expressions that are perfect for mixed media projects.
This set of Typed Ledger sheets Set 02 is designed by Dina Wakley for Ranger Ink. These sheets vary in size, but measure approximately 8.5" x 11.25". These sheets look like aged notebook paper and contain typed quotes, phrases, and expressions that are perfect for mixed media projects.
You're going to feel just like an expert when you're cutting the smallest of details with the Cutter Bee Scissors by EK Success. These un"bee"lievable compact scissors will have you feeling like a queen bee when you swarm right into your fine detail or fussy cutting projects.
Watercolor brushes are excellent both in attractive look and nylon brush hair quality. Good ideas of gift share or self use for Watercolor, Oil, and Acrylic Painting. The paint brushes offer great color control and paint long-wear by hair filaments that hold and release colors smoothly and evenly, making every details of your brush strokes perfect.
Perfect for adventurous artists, this water pot expands on site then collapses for transport. It's also easy to clean and store. Ridges around the rim keep brush handles separated and organized while you're painting.
Golden Extra Heavy Acrylic Gel Mediums holds peaks well and is ideal for impasto techniques. Along with the High Solid Gel, it's the thickest of the Golden gels.
Golden Acrylic Gel Mediums also act as adhesives in collage and mixed media projects that dry to form continuous films, offering excellent flexibility and resistance to chemicals, water, and ultraviolet light.
No more missing caps! Never worry about ink drying out with the new Zebra ClickArt marker pen. Featuring a capless design and new ink technology that absorbs the moisture in the air and keeps the ink flowing. Perfect for journaling, color coding, dawing, and everything writing.
This is an industrial strength, non-toxic, and water-based adhesive designed for glitter and paper applications. This adhesive is also strong enough to bond items such as cardboard, metal, wood, canvas, plastic, glass, and more. This glue is acid free and safe to use for any of your paper crafting projects.
Specially developed embossing ink stays wet for an extended period of time to allow you to stamp/prepare your design, sprinkle your embossing powder on the wet ink, tap off the excess, then heat emboss with the appropriate tool. Acid free. Loaded Pad is approximately 3x2 inches with a removable lid.


