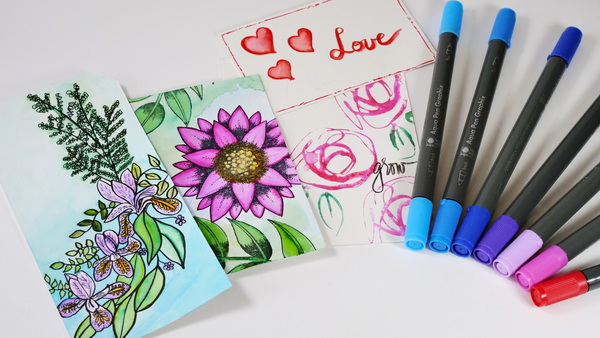
5 Creative Techniques with Watercolor Markers
Watercolor markers are a fun and easy way to add beautiful blends of color to your creative projects. Watercolor markers and pens are easy to use and work well on a variety of surfaces. Today I am sharing 5 easy techniques for using watercolor markers in your creative projects.
Hop-A-Long Studio is reader-supported. When you buy through links on our site, we may earn an affiliate commission at no cost to you. Learn more.
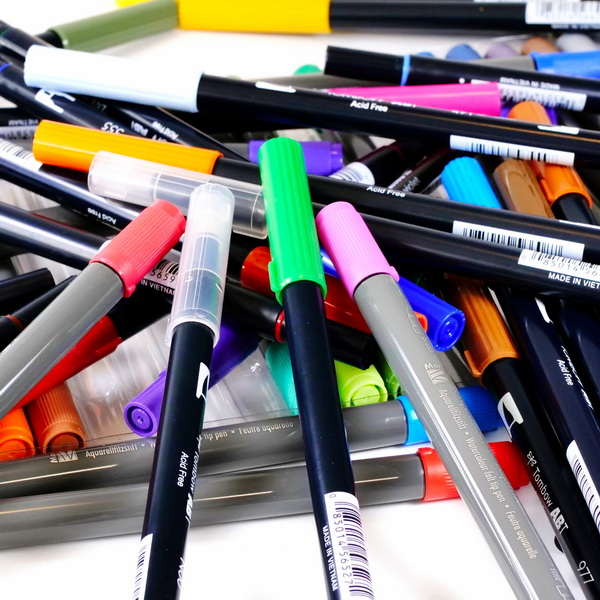
Watercolor Markers
Watercolor markers come in many brands and styles. These range from fine tip pens to dual brush markers in a variety of thicknesses and nib styles. If you are new to watercolor and watercolor painting, watercolor markers are a great option for experimenting with watercolor without a huge investment in materials.
Watercolor markers are so inspiring because of their beautiful intense colors and how the ink moves on the page. They can be used as a marker or blended with water to make beautiful color washes. The beauty of watercolor pens is that the watercolor pigment is in pen form instead of watercolor pans. This makes markers an easily portable option. When sketching, if you want to add colors and washes to a project, watercolor markers are an ideal tool.
- Versatile water-based colors
- Flexible brush tip and precise fine tip
- Easy blending with self-cleaning tips
- Odorless, non-bleed, acid-free ink

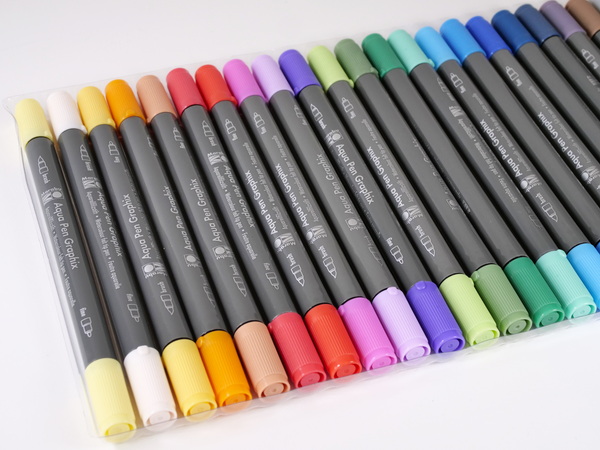
For watercolor painting on watercolor paper, Marabu Graphix Aqua Pens provide high-quality, lightfast, waterbased pigment ink in a range of brilliant colors. Use the two tips (one for contours and the other a flexible brush tip) to apply color, then use a wet brush to spread it.
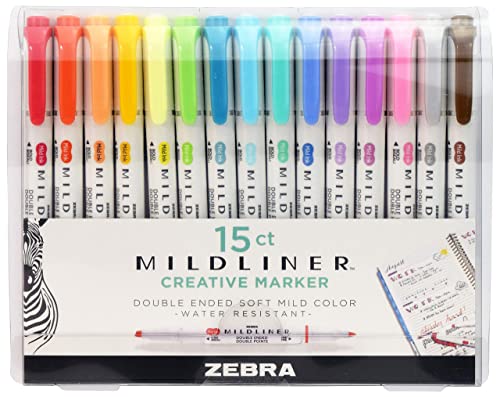
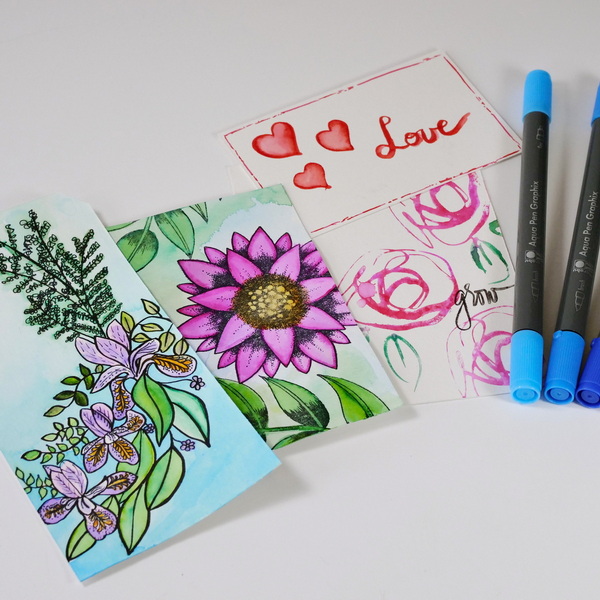
Draw, highlight, and hand letter with Zebra Mildliner Double Ended Creative Markers. These round barrel, double-ended markers have a bullet and chisel tip for adding details, filling in large spaces, and much more.
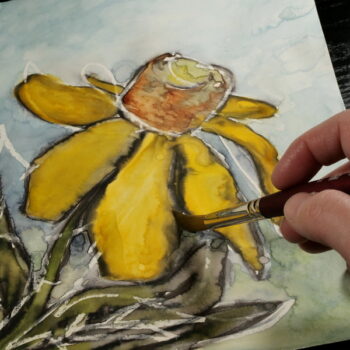
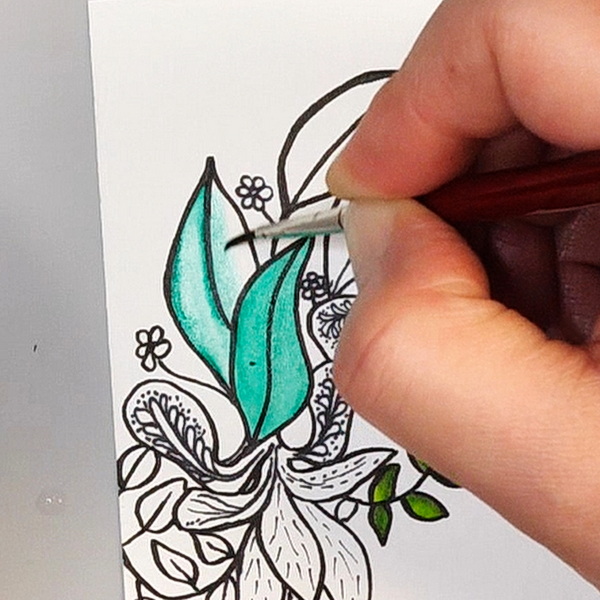
Technique 1: Drawing with Watercolor Markers
Watercolor markers and pens are very easy to draw and color with. I love using them on a variety of paper surfaces from smooth cardstock to watercolor paper. The markers are a great choice for planners and art journaling. Watercolor markers work well in these applications providing beautiful, vibrant color.

Watercolor pens that come with a brush tip are ideal for brush lettering and calligraphy. Each brand of pen is designed a little differently. Some have a harder brush tip while others have a softer tip. Depending on your preference, this will affect how you place thin and thick strokes.
To see a review of my favorite watercolor markers, check out this article: https://hopalongstudio.com/choosing-the-best-watercolor-marker/
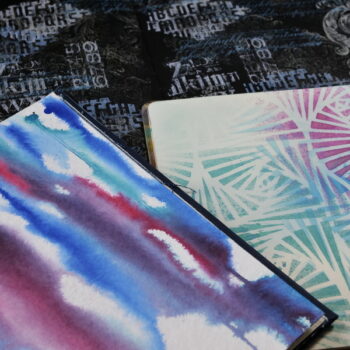
Technique 2: Blending with Water on a Surface
The best way to get beautiful results with watercolor markers is to use them with water on watercolor paper. Start by applying watercolor marker onto the watercolor paper. Dip a watercolor brush into water and blend the water with the ink. This creates beautiful blends and shading by adding water with the ink.
You can continue to add layers of color using this technique. Make sure to dry the paper between layers. Once the paper is dry, add additional marker to the area, add more water and blend. This will reactivate the color underneath creating a beautiful and consistent blend.
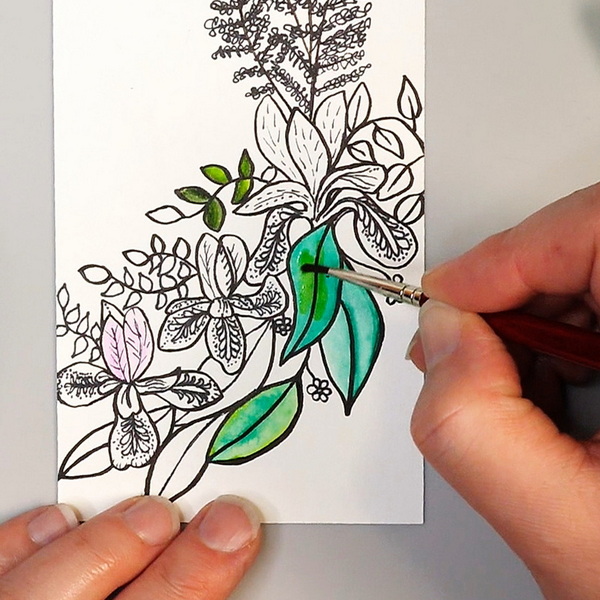
It is important that you use watercolor paper and not cardstock for this technique. Cardstock will immediately absorb the ink while watercolor paper will provide working time to create beautiful blends.

Technique 3: Using Markers as a Color Palette
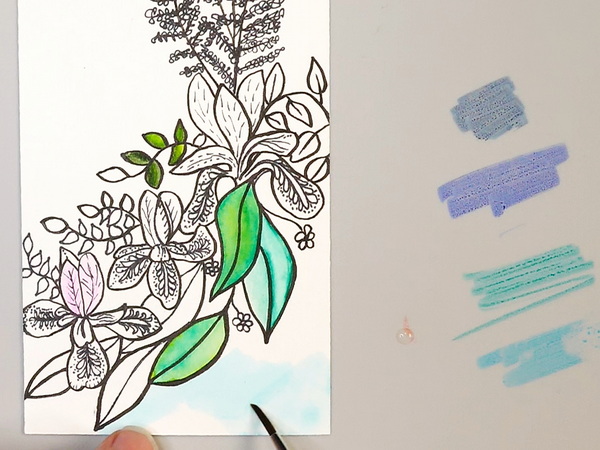
Watercolor markers can be used as a color palette by adding marker to a non-stick palette or craft mat. Scribble color onto a non-stick surface and add water with a brush. This dilutes the marker and creates a very soft watercolor blend.
By adding several marker colors together you can get a custom color blend. This is an easy way to mix a large variety of colors with only a few markers. Apply the watercolor to the surface with a brush as you would with regular watercolor paint.
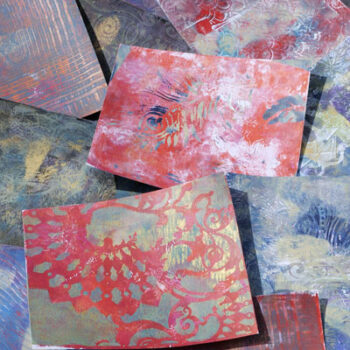
Technique 4: Creating Water Washes
You can take the previous technique a step further by using watercolor pens to create washes. Add a generous amount of marker to your non-stick surface and spritz with a water bottle. Take a piece of watercolor paper and drag it through the puddles of color. This will create a beautiful and random watercolor wash.
Let the surface dry and continue to add layers of color using this technique. Always make sure to dry between layers so that you don’t get a muddy blend.
If you want a softer effect, before swiping the paper through the color, spritz the paper with water. This adds more water to the surface and dilutes the watercolor marker.
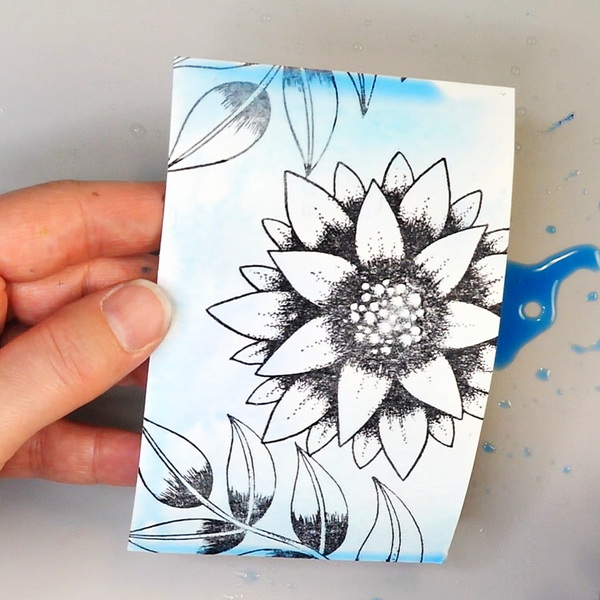
Layering Techniques
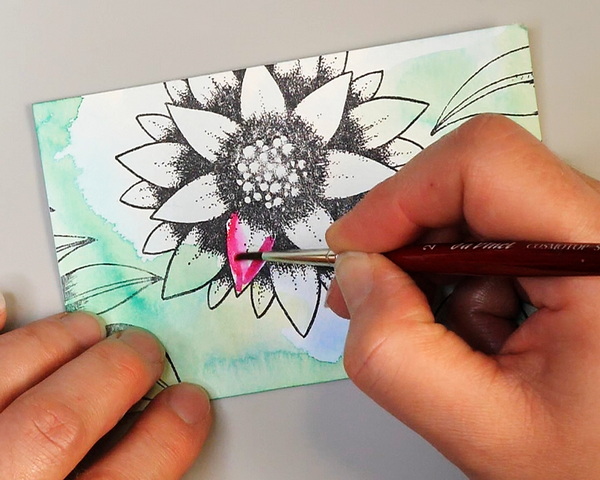
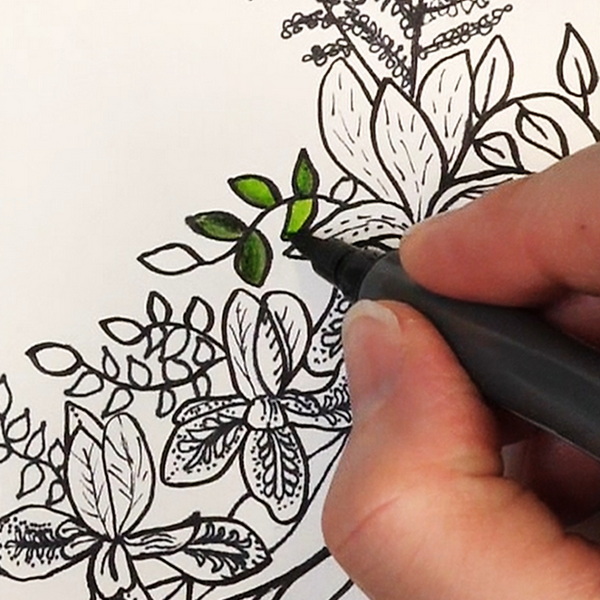
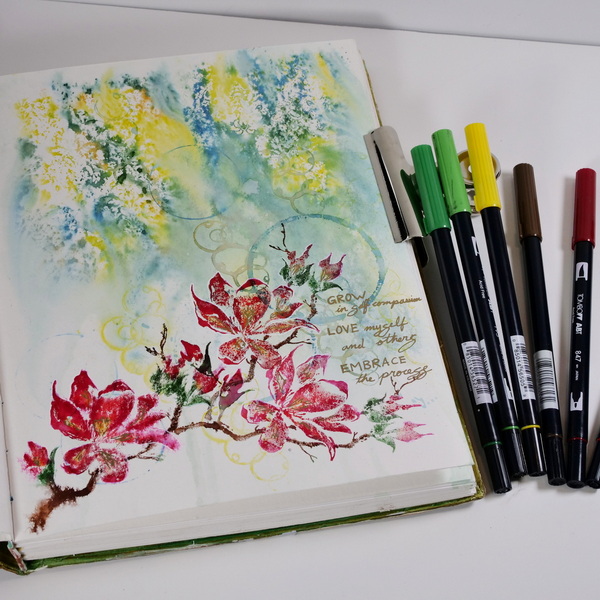
A different variation of the water wash technique is to start with a image already on the watercolor paper. Stamp or draw an image on the watercolor paper with permanent ink. Use the same swiping technique to add color to the surface in layers. Let it fully dry.
Add color to the edges of the focal image using watercolor markers. Take a brush and use the water on the brush to blend out color to the center of the image. This will give you a soft, watery background and create stronger color on the focal image.
Technique 5: Stamping with Watercolor Markers
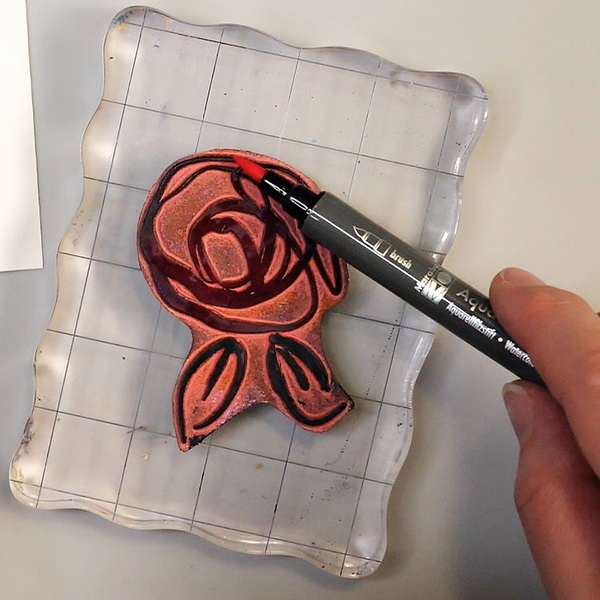
One of my favorite techniques is stamping with watercolor markers. Using a rubber stamp, add layers of marker to the surface of the stamp. Before stamping onto the paper, try spritzing the surface with water to activate the marker on the stamp. Depending on the amount of water you use, this can create a very soft or a very crisp image.
If this technique interests you, please view my tutorial where I go into detail on different techniques you can create with stamps and found objects.

Questions?
Any questions about the techniques I shared today? I hope that this gives you some new ideas on how to use watercolor markers in your creative projects.
By experimenting with watercolor markers in your projects you will discover many different techniques. Every time I use them I find a different way to add layers of color onto my projects. I would strongly suggest including watercolor markers as part of your essential mixed media kit.
Looking for More Inspiration?
If you’re looking for more inspiration about how to use watercolor markers or to choose the right marker for your creative project, check out these articles.
Choosing the Best Watercolor Marker
Creative Stamping with Watercolor Markers
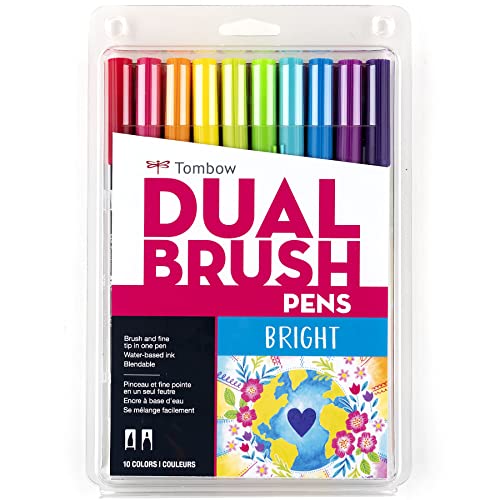
Project Supply List

This watercolor paper has a Cold Press surface and is ideal for working in all water-based media, including watercolor, tempera, acrylic, gouache, or poster paint.
For watercolor painting on watercolor paper, Marabu Graphix Aqua Pens provide high-quality, lightfast, waterbased pigment ink in a range of brilliant colors. Use the two tips (one for contours and the other a flexible brush tip) to apply color, then use a wet brush to spread it.

Create both thick and thin lines with Zebra Zensations Fude Brush Pens. These pens feature waterbased, water-resistant, archival pigment ink for a wide variety of techniques, including drawing, illustration, design, calligraphy, and hand lettering.

Every facet of fine-line detailing and permanence has been incorporated into the Microperm Pen by Sakura. For writing in micro-spaces or on unusual and challenging surfaces, the Microperm meets the challenge.
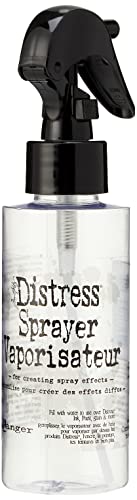
Add a distressed look to your projects with the Distress Sprayer by Tim Holtz for Ranger Ink. This distress tool is used to spray water over Distress Ink, Paint, Stain, and more to create a water-droplet look on your projects.

Perfect for adventurous artists, this water pot expands on site then collapses for transport. It's also easy to clean and store. Ridges around the rim keep brush handles separated and organized while you're painting.
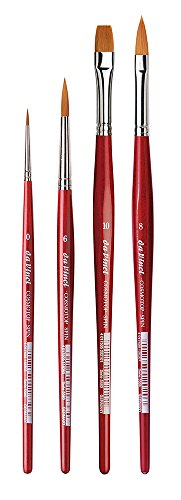
- Versatile brushes for all media
- Long-lasting synthetic filaments
- Lacquered brush handle
- Made by hand in Germany