Printing with Gelli Plate Minis
Are you looking for a new technique for your mixed media practice? Today I will be demonstrating printing with the Gelli plate minis and how these differ from larger Gelli plates. It is always nice to try new things and discovering these little plates has opened many creative doors in my art practice.
What are Gelli Plate Minis?
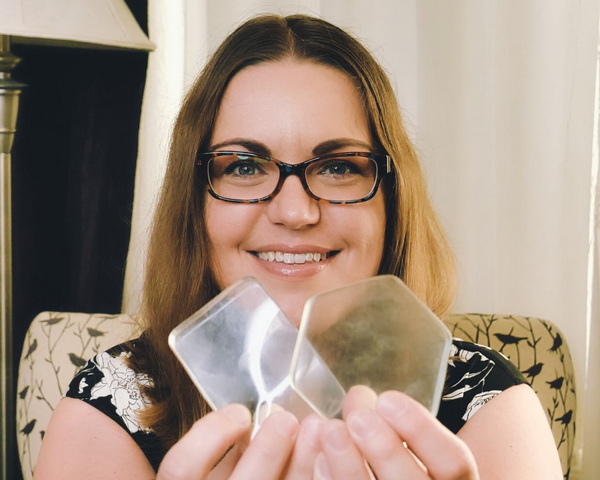
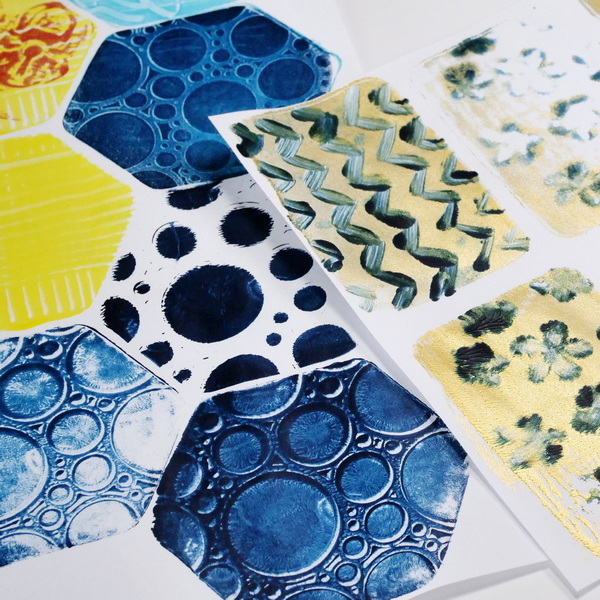
Gelli Arts Mini gel printing plates are smaller versions of the Gelli printing plates and come in a variety of shapes. The collection of Gelli plate minis I have are oval, rectangle, and hexagon but they also come in shapes including triangle, circle, octagon, and diamond.
The oval, rectangle, and hexagon Gelli plates range from 3” by 3” to 3” by 2” which makes their sizing much smaller than the standard Gelli plates. This also provides more options on how to use them in your creative practice.
Printing with Gelli Plate Minis
Printing with Gelli Plate Minis is different than using a conventional Gelli plate. When using a regular sized Gelli plate, the plate is placed on a flat surface. Paint is added to the Gelli plate, and a piece of paper is placed on top to create a print. To see more information on printing with a full sized Gelli plate, visit this article “How to Make Gelli Prints.”
When printing with Gelli plate minis, you can print the same way as a conventional Gelli plate. But what makes these plates fun to use is that they are small. This means that you can add them to a stamping block, add paint and texture, and apply them straight to your journal or project.
Because of their small size, this makes it very easy to create patterns and layer prints on a page. It opens so many more options for printing with the Gelli plate minis. The ability to apply the Gelli plate straight onto the canvas, journal or mixed media project allows you to use these plates in a different way.
How to Print with a Gelli Plate Mini
In this video, I share some of my favorite techniques for printing with the Gelli plate minis and how to successfully use them in a project.
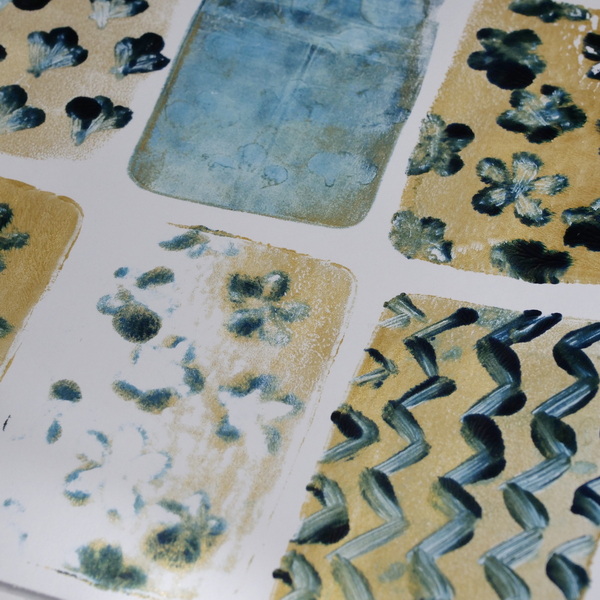
Mark Making
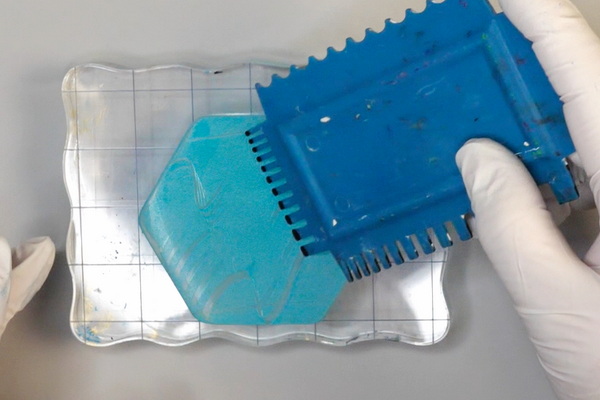
After adding paint with a brayer onto the Gelli plate, add mark making designs with a tool. Make sure that the tool is not sharp as the Gelli plate can be damaged by sharp objects. Once you have added your designs, apply the Gelli plate to the surface.
You can use a variety of surfaces including canvas and watercolor paper. For this demonstration, I am creating these prints using copy paper.
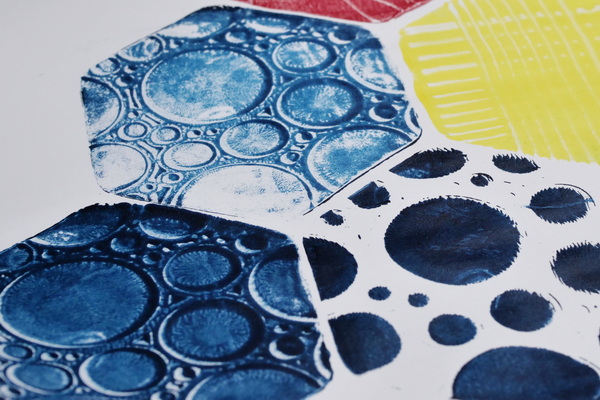
Once you complete your first print, if there is still a layer of paint on your Gelli plate, stamp a second print. It will be lighter than the first print, but these prints can also be layered to create beautiful overall images.
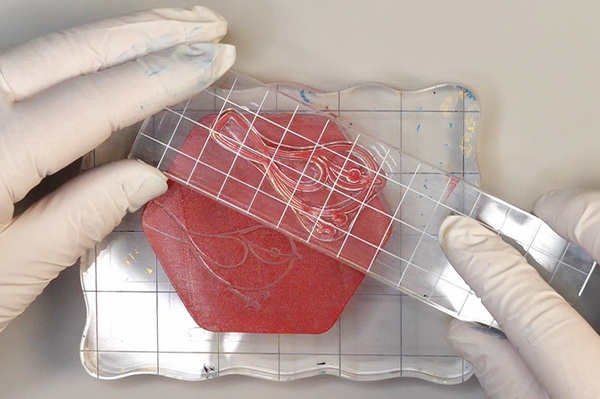
Printing with Stencils
One of my favorite ways of printing with Gelli plate minis is using stencils. You can a variation of bold to soft effects depending on how you use the stencil.
To do this, the stencil can be pushed into the Gelli plate to make marks and then removed the image is stamped onto the surface. This will create a very subtle effect.
To create a bold effect, leave the stencil on the surface and stamp the image with the stencil in place. My favorite way to stamp with stencils is to first make a print with the stencil on the surface. I will then remove the stencil, stamp a second image, and then often stamp a third. Doing this creates gives a lot of variation in look, texture and makes different color values.
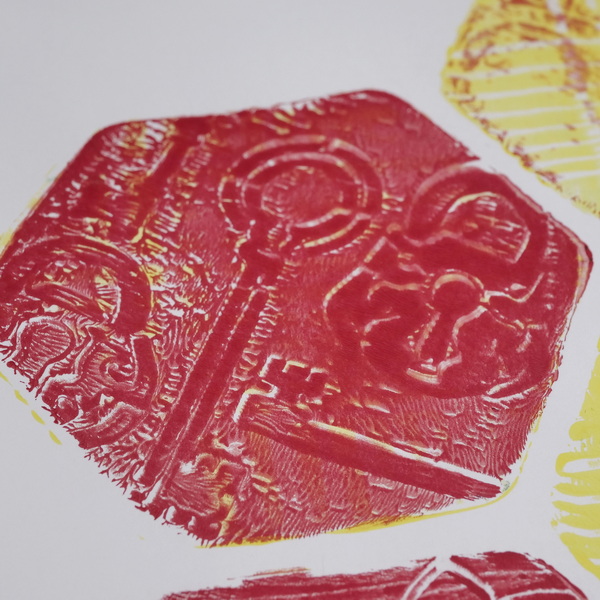
Gelli Printing with Stamps
I like to use stamps to add texture or repetitive patterns onto the Gelli Plate minis. Add a layer of paint with a brayer and stamp the deigns into the Gelli plate before adding it to the paper surface.
Another variation of this technique is to use the minis to create a scene. By adding strong images, like birds and branches, you can make a scene that will be printed on to the page. If you add doodles with paint pens or adding shading, this can be a great way of creating unique images for your projects.
Painting on the Gelli Plate
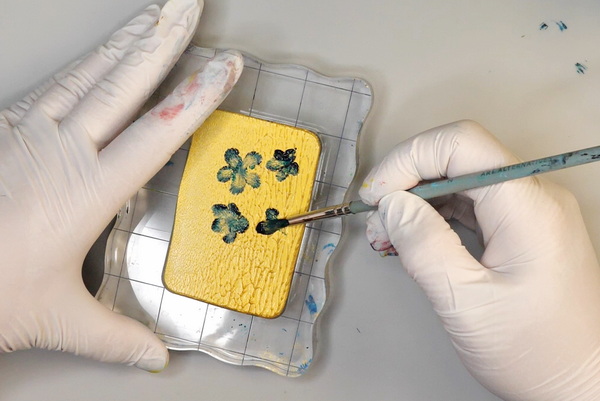
Recently I have been experimenting with painting on a Gelli plate with a brush instead of applying paint with a brayer. When trying this technique with a larger Gelli plate, it can be challenging. I have found that I either need to paint exceptionally quickly or use extenders to keep the paint wet long enough to take a print.
The benefit of working with a Gelli Plate mini is that the surface is small. This allows painting with a brush and being able to take a print before the paint dries. For these prints, I decided to start by adding paint with a brayer and then adding additional paint with a brush on top.
There are so many directions that you can take this technique. You could create landscapes, flowers or just simply make fun doodles with your paintbrush. In the video above I show you some simple ways to create patterns and flowers with a brush.
Printing in Layers
One the other fabulous things about the Gelli plate is the ability to print in layers. When using a stamping block, it is much easier to line up the images so that you can have defined edges to your prints. This can allow you to have multiple layers for each block that you create on your surface.
Questions?
Do you have any questions about printing with Gelli plate minis? I would love to hear about your experience with this technique and if you are getting good results with it. Remember that Gelli printing is fun, but it can take a bit of time to get the desired result. Too much paint, not enough or not having a steady hand can affect the prints.
I would love to answer any questions that you may have. Please comment below or contact me directly.
If you have never tried Gelli Printing before, check out my article “How to Make Gelli Prints”. There I have two videos with step-by-step instructions on how to do first and second layers to your prints. I hope that you give this technique a try and take some time for creative self care this weekend!
Project Supply List
- Gelli Arts Mini Plates: Oval, Rectangle, Hexagon
- Pebeo Studio Acrylics: Lemon Cadmium Yellow Hue, Iridescent Gold, Turquoise Blue
- Amsterdam Acrylic Prussian Blue Phthalo
- Cheep Acrylic Colors Crimson
- Stamping Block
- Brayer
- Copy Paper
- Simon Says Stamp sss302283c Spring Birds Stamp Set
- Art Alternatives Mark Making Tool
- Wild Whisper Designs NWD Circlet Stencil
- Ciao Bella Stencil
- Round Paint Brush Size 4
- Paper Towels
- Water Container and Water