Snowflake Christmas Card
As we are coming up to the Christmas season, I wanted to share this simple snowflake Christmas card project. Card making during the holidays can be a great self care practice. It is an opportunity to use our creativity to bless others through the gift of a beautiful and simple card.
Relaxation Through Creativity
The process of making Christmas cards is very relaxing and rejuvenating. I enjoy the process of coming up with simple card designs. Though I enjoy making cards, I also love my time in my art journal and painting canvases. This means that I usually do not spend hours and hours working on a single card. That amount of time I like devoting to my other artistic practices.
Instead I like to focus on coming up with simple designs that are easily replicated. This way I can create multiple cards in a short period of time. This enables me to give more of them away while still enjoying the process.
This process of creating cards, especially stamping images, can be very relaxing. I enjoy the instant gratification. I love tools like stamps and die cuts that aid in creativity. Even though it is a created design, how you use it in your projects is unique to you. Making cards is a great way to show our artistic self expression and sharing our creativity with those around us.
A Simple Snowflake Card
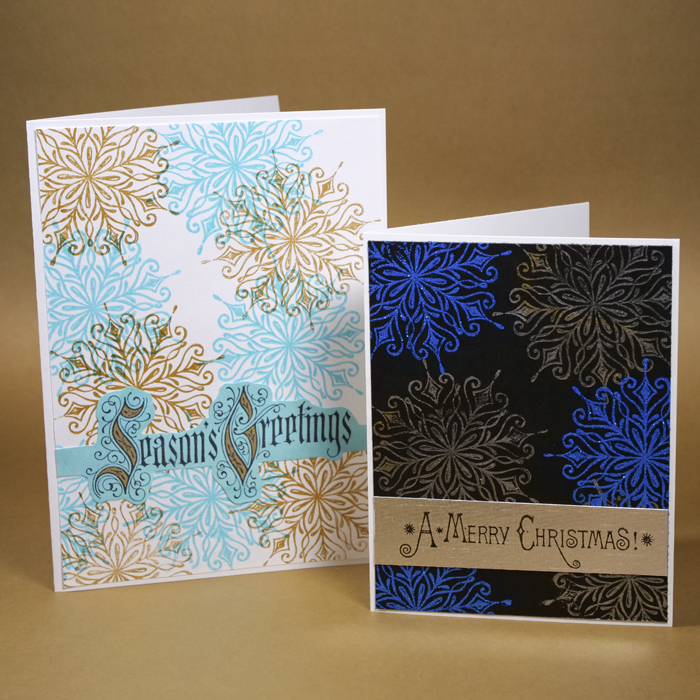
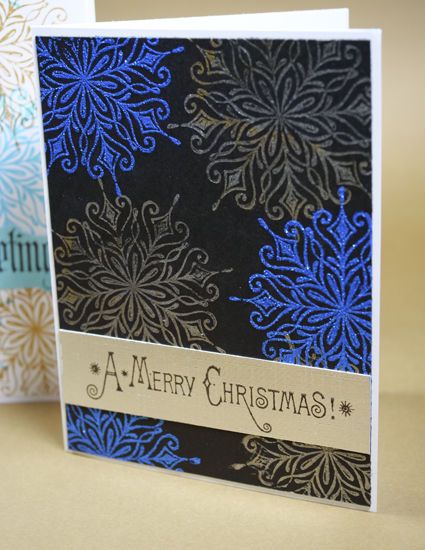
I created this simple snowflake Christmas card earlier this week when I was testing out some new stamps. My intent was to make a card that had several mediums in it. By using a combination of acrylic paint, embossing ink, and embossing powder I achieved this goal. To see the full video tutorial, please view the video below.
Stamping the Snowflakes with Acrylic Paint
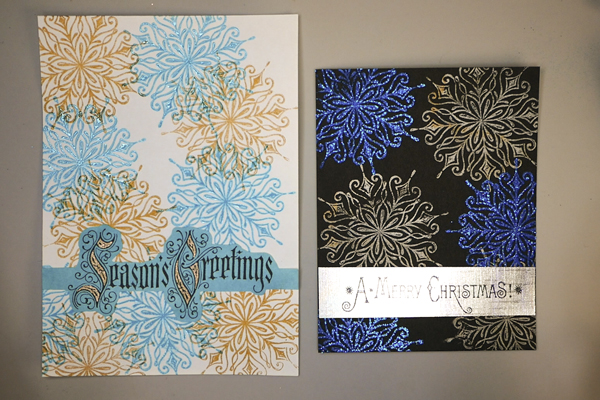
I started by cutting out black and white cardstock into rectangles measuring 4.25” by 5.5” and 5” by 7.” Using my Swirly Snowflakes stamp set, I stamped the snowflake image onto the card. By using a random pattern for the images, leaving white space, and stamping off of the side of the paper makes for a more interesting design.
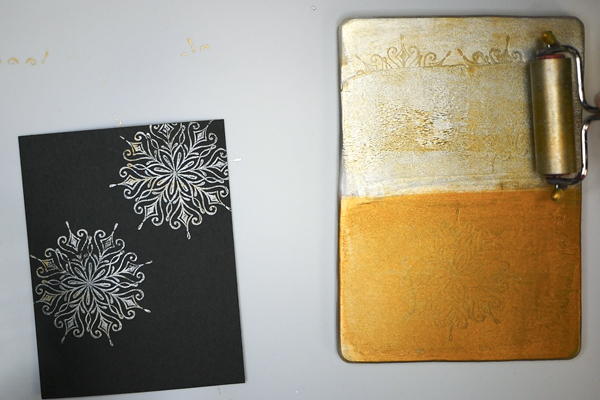
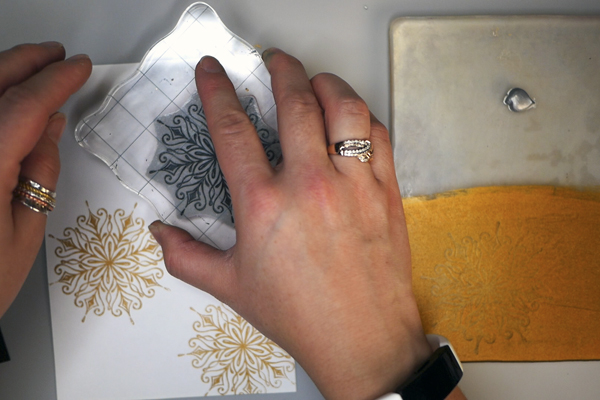
Using a Gelli Plate as a Stamping Tool
An easy way of stamping acrylic paint is by using a Gelli Plate. A Gelli plate is a great surface to use because you can use a brayer to spread your paint evenly on it. It works like a stamp pad where you can pick up an even layer of paint with your stamp and apply it to your card. If you need more paint, just re-distribute the paint with your brayer on the Gelli plate, or add more paint to stamp additional images.
If you do not have a Gelli plate, any surface that will work as a paint palette will do. It is important not to have globs of paint when you stamp. By smoothing the paint out on the surface before stamping you will get a better result.
Why I like using a Gelli Plate is after you finish stamping you can make a print with the excess paint on your plate. Making a print prevents wasting paint and it also give you a patterned print to use in another project. If you are interested in Gelli printing, please click here
Stamping Snowflakes with Embossing Ink
Once the acrylic paint has dried, add additional snowflakes onto your card surface with clear embossing ink. While the ink is still wet, add embossing powder and heat set. For a step by step process of heat embossing, please follow this link.
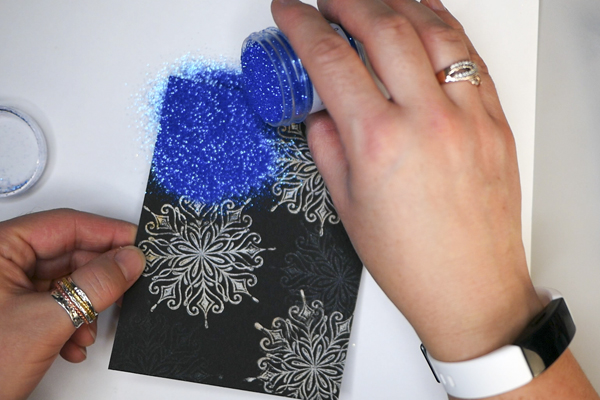
One thing to consider when stamping is deciding how much white space you would like on your card and how much overlap the snowflakes will have. On the black card I used opaque embossing powder which covered up the images below. On the white card I used Broken China Distress Glaze that is translucent. This allows you to see the snowflake that is underneath as well as the one on top.
Stamping the Sentiment
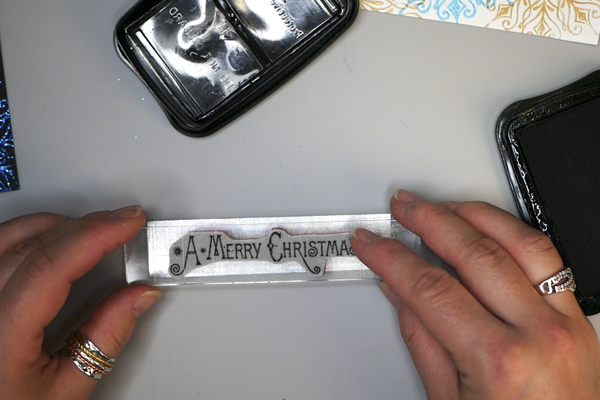
When stamping the sentiment, I like matching a color in the card to the background paper that I will stamp onto. For the smaller card, I used silver cardstock measuring 1” by 4.25”. This is a slightly more slippery surface to work on. To make sure that the ink dried properly, I used Staz-On Ink which I knew would dry on the surface. Use your stamping block to stamp the sentiment and adhere to the card
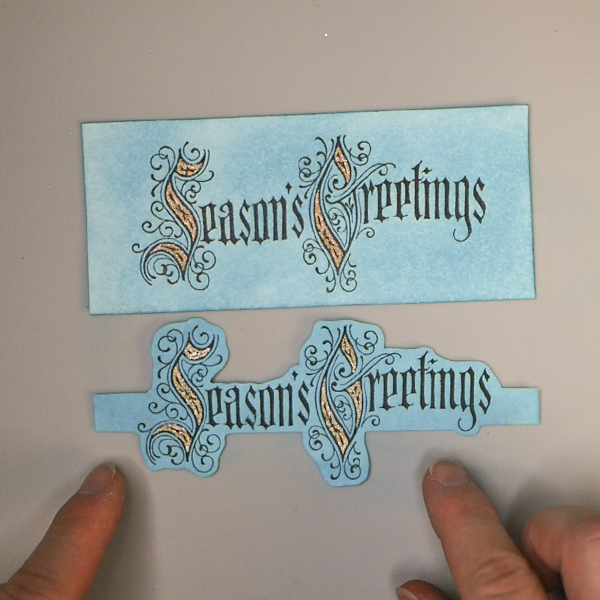
For the larger card, I used a 2.25” by 5” piece of white cardstock and ink blended Broken China Distress Ink onto the surface. Using the Seasons Greetings stamp and archival ink I stamped the image onto the surface. As the capital letters were done in an illuminated lettering style, I added in gold gelli pen ink to add accents to the lettering design. I fussy cut out the design leaving a band along the edges so that the sentiment stretched along the width of the card.
Finishing off the Card
As a rule, I usually cut out cardstock the size of the card or a bit smaller. Once I have finished completing the snowflake Christmas card, I adhere it to a card back. By leaving a border around the piece, it leaves a small frame to help highlight the design and provide contrast.
What Do You Think?
What do you think of this snowflake Christmas card design? Have you given it a try? If so, I would love to see it! Please tag @hopalongstudio in any of your Instagram photos so that I can see your work. Or feel free to contact me directly, I would love to start a conversation with you!
Project Supply List
- Paper: Staples 90lb black and white cardstock, Silver Cardstock
- Dina Wakley Heavy Body Acrylic Paint: Sterling and Gilt
- Gelli Arts Gelli Plate
- Tim Holtz Stampers Anonymous Stamp Sets: Swirly Snowflakes CMS 319 and Christmastime CMS352
- Inks: Top Boss Embossing Ink, Stazon Black Ink, Ranger Archival Jet Black Ink, Tim Holtz Distress Ink Broken China
- Embossing Powders: Tim Holtz Embossing Glaze Broken China, Ranger Blue Tinsel
- Sakura Gelli Roll Stardust Pen Copper Star XPGB#705
- Other Materials: Brayer, Stamping Block, Ranger Heat It Craft Tool, Ranger Blending Tool and Foam, Scotch ATG Gun