
Deco Foil all the Things! How to Use Deco Foil
Have you ever tried using Deco Foil or any other type of foil in your projects? Understanding a few fundamentals of how to use Deco Foil can help you get better results.
Today we will focus on how to use Deco Foil with Transfer Gel Duo, the Deco Foil Adhesive Pen and with laser prints in this post. To transfer the foil to your project, we will talk about how to use a laminator, iron and dry transfer to get consistent results.
Hop-A-Long Studio is reader-supported. When you buy through links on our site, we may earn an affiliate commission at no cost to you. Learn more.
What is Deco Foil?

Deco Foil transfer sheets are a colored foil that has been formulated to easily be added to projects using a variety of mediums and techniques. These foil transfer sheets come in a variety of colors and sizes. The most common sizes are 6 by 6 inch sheets and 12 by 6 inch sheets. They come in a range of colors and finishes including patterns, textures and color flipping variations. Deco Foil transfer sheets are also available with a flock finish makes adding flock to a project extremely easy.

Mix in some glamour with your projects when you use the Gold 6" x 12" Transfer Sheet Deco Foil by iCraft for Therm O Web. This package includes five sheets of foil for use on fabric, paper, wood and other porous surfaces.
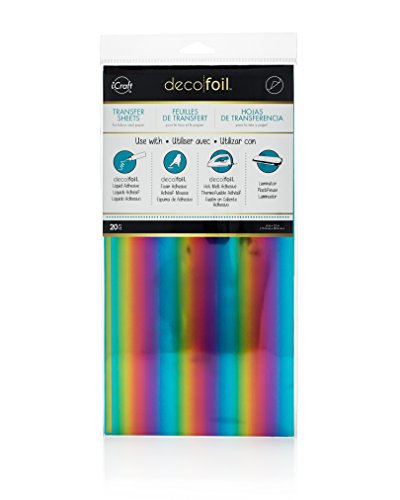
The Rainbow Deco Foil by iCraft for Therm O Web Transfer sheets are a great way to add brilliant colors accented with a metallic finish to your cards, pages, and mixed media art.
My Experience with Foiling
I had originally tried foiling many years ago and was very frustrated with the result. I was using sticky embossing powder with foil or loose gold flake. It was a disaster. I would only usually get part of the image transferred, the results weren’t consistent and after using a lot of time and materials I gave up.
Even though there has been a trend towards foiling I had no interest in trying it due to my previous experiences. I was also under the impression that you needed specialized machines to use foil. I assumed that it was just applicable to card making, so I didn’t investigate it any further.
More recently I was seeing many people using Deco Foil in their projects, so I decided to investigate it again. I was so surprised to find out how versatile this medium was! I love the strong adhesives for the foil, including a transfer gel and adhesive pen that could be used on any surface. This captured my interest because I could start using foil in journals, canvases and on a variety of surfaces.

Testing the Deco Foil
I like to go through a process of testing new products before I use them in my projects. I have used Deco Foil a couple of times in projects but up to today had not completed an extensive test of the medium.
Today I will be show how I go about testing a new product. I usually start with the more basic ways to use the product. Then I’ll experiment to see how far I can take it and different ways that I can use it. I try using it on journals, on top of paint and, on uneven surfaces just to see what will happen. I try to get as comfortable as I can with new mediums so I can use them in my projects with confidence.
Deco Foil Techniques
Deco Foil and Transfer Gel Duo
One of my favorite ways to apply Deco Foil transfer sheets is with Deco Foil Transfer Gel Duo. The transfer gel is a thick adhesive with a similar consistency to soft gel medium. By using a palette knife or other tool, the gel can be added directly to your page.

The new Deco Foil Transfer Gel Duo is specially designed to transfer foil or flock with or without a laminator.
How to Apply Transfer Gel Duo
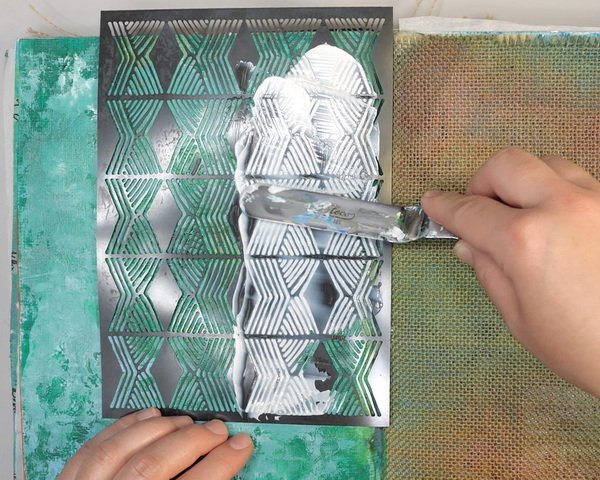
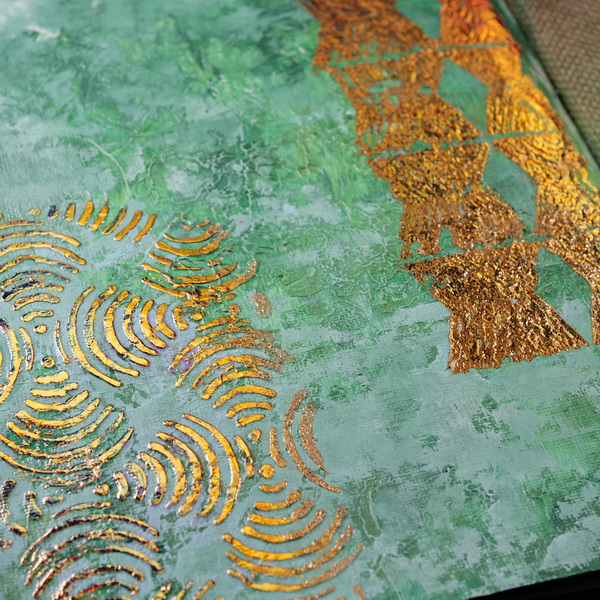
You can use the Transfer Gel Duo in a variety of ways, but my favorite technique is adding the gel through a stencil to get a beautiful design. To apply the gel, put a liberal amount onto the surface with your palette knife and spread it out to cover the stencil. Try to do it in as few passes as possible to not overwork the gel.
The intention is to get a thin, even layer across the stencil. This technique works better on stencils with larger holes over small detail stencils. As the adhesive is soft, small images and overworking sometimes means that the gel may end up under the stencil.
Set aside and let the transfer gel dry. The instructions on the container say an hour, but I find it takes several hours for the gel to set. If you don’t want to wait, you can use a heat tool on the cool setting. But be careful not to have the dryer too close to the medium, it can bubble if heat is applied!
You will know that the gel has set when it moves from a cloudy white color to clear and shiny. The surface will still be slightly sticky or tacky even after drying. This helps the foil stick to the stenciled image once it is applied.
3 Options for Applying Deco Foil
Once the Transfer Gel is dry, you have 3 options for applying deco foil to the transfer gel: a laminator, an iron, and by dry transfer.
Using a Laminator
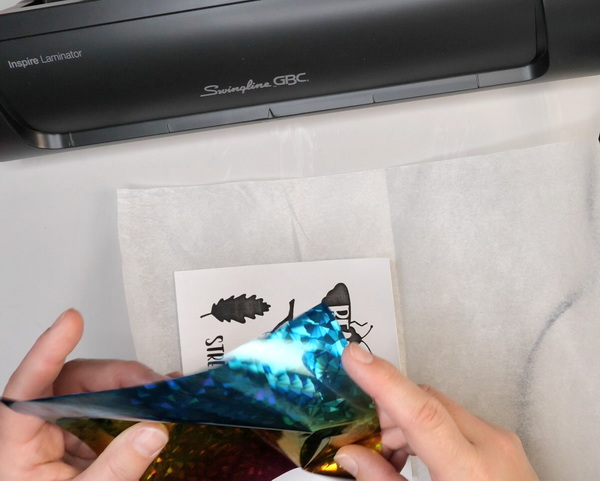
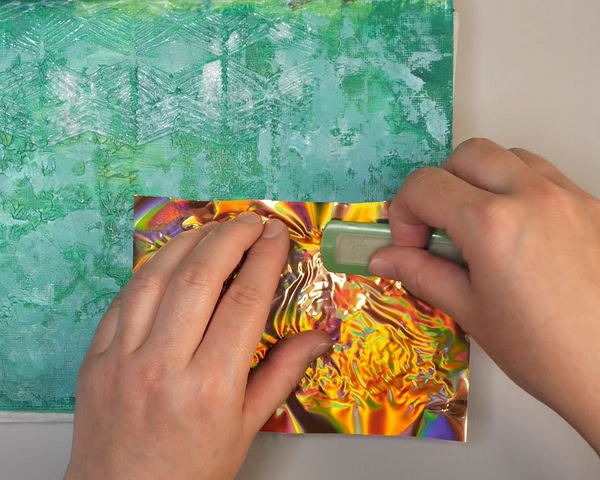
When using a laminator, make sure that it is fully up to temperature. Press the foil into the transfer gel with the colored side facing up. Try to smooth it out across the image as much as possible. This will give you better adhesion when put through the laminator.

Two heated rollers with two temperature settings create bubble- and wrinkle-free results that give your documents, photos and more a professional appearance.
Cut a piece of parchment paper (available at most grocery stores) and fold it in half. Insert the paper with the Deco Foil and transfer gel between the folded piece of parchment paper. With the folded end facing the machine, run the paper sandwich through the laminator.

Contains one roll of Reynolds Kitchens Stay Flat Parchment Paper with SmartGrid lines, measuring 15 inches wide x 36 feet long (45 square feet total). Finally, parchment paper that doesn’t curl or roll! Just use the reinforced panel to TUCK, PRESS and PULL.
Once it has been put through the laminator, let it cool for a few minutes. Slowly pull the foil off the top.
Using an Iron
The most consistent results using Deco Foil come from using a laminator. If you don’t own a laminator, an iron is a good option. An iron is very useful if you are working on a surface, such as a art journal or canvas, that can’t be put through a laminator.
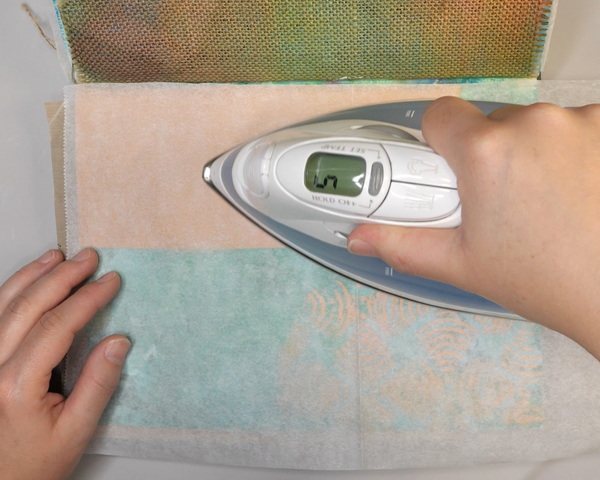
When using Deco Foil in my art journal, I set the iron to the wool setting. To protect your project, use a heat resistant mat under the page and lay parchment paper on top of the Deco Foil. When ironing the image, keep the iron moving until enough heat has been applied.
Figuring out how much heat to apply can be challenging. It will take a bit of experimentation, but I would suggest starting around 30 seconds and maybe up to 60 seconds. Keep an eye on the surface to make sure that you don’t overheat or burn the page.

This lightweight and compact iron is perfect for clothing and use in your arts & craft projects.
Using Dry Transfer Method
The Deco Foil Transfer Sheets can also be added to the gel using a dry transfer technique. The dry transfer method can be done two ways: a die cutting or embossing machine, and with hand pressure.
If you are using single sheets of paper that fit in a die cutting machine, place the paper between the plates and roll it through the machine. The pressure of the machine will adhere the foil to the gel.
If you are using a journal or large surface that cannot be used with a die cutting machine, rub the foiled surface with your fingers or a bone folder. With enough pressure you will be able to get the same effect as using a die cutting machine. I usually go over the area several times to make sure that I am getting consistent pressure. Peel off the foil to see the result, if the foil isn’t sticking to the gel, put the foil back down and add more pressure to transfer the foil.

The Big Shot Switch Plus in White from Sizzix features electric cutting, auto-reverse, and a 9" platform - all wrapped in a sleek, modern design. Includes dies, an embossing folder, and cutting pads to get you started. Compatible in the US and Canada only.

Get flawless folds every time with the CrafTreat Large Teflon Bone Folder! This Large 6.3" x 0.8" Bone Folder is smooth, strong, and non-stick, making it perfect for scoring, folding, and burnishing without leaving shine or marks.
Deco Foil and Adhesive Pen
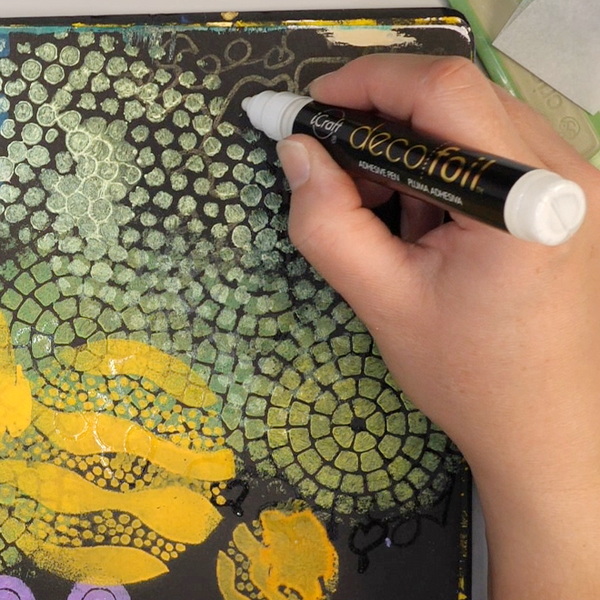
If you like adding your own doodling or writing to a project, the Deco Foil adhesive pen is a great tool. Shake the pen well to get the adhesive flowing and write and doodle to add designs. To get a consistent image, try to apply an even amount of adhesive on your surface. You may need to go over the area several times to get the coverage you desire. After writing, let the adhesive sit for a minute or two to cure. The surface should have a tacky feel but shouldn’t be wet.

Instantly add a foil finish to your project with Deco Foil Liquid Adhesive by iCraft for Therm O Web! The included bottle contains 2.1 fluid ounces of permanent transfer adhesive that works on porous surfaces like fabric and paper.
Add your foil onto the doodling and use a laminator or dry transfer technique to complete the foil transfer. You could also use an iron for this step, but the results are not as consistent as the other two transfer techniques.

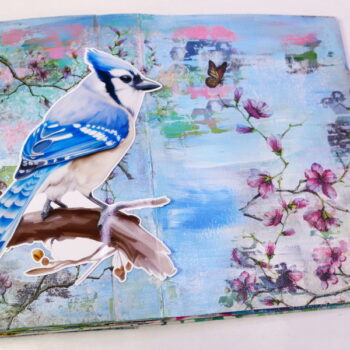
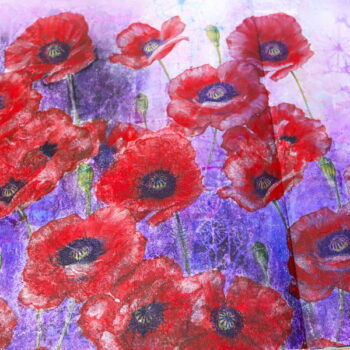
Deco Foil and Laser Prints

If you have access to a laser printer, almost any image can be foiled. I printed the image with my laser printer and cut the paper down to size.
The best way to foil these images is with a laminator. The process is the same as with the transfer gel and adhesive pen. Add foil on top of the laser print and insert it between the sheet of folded parchment paper. Run the paper sandwich through the laminator. Let it cool and remove the foil.
You can also use an iron to add foil to the laser prints. It may take some experimentation to get the right amount of heat for foil transfer. When I tried this technique some areas of the laser print foiled fully, while other areas had black spots showing through. This was based on heating the surface for 30 seconds. Using the iron will require more trial and error to get the right time for a full foil transfer.
What I Learned
What I learned from this Deco Foil testing session is that the Deco Foil seems to work best with heat and pressure making the laminator the best tool from transferring foil. If you are starting out, it is the best way to get consistent results.
But considering that most of my projects are usually in art journals, I was excited to figure out how to make the Deco Foil work without a laminator. It requires a bit more practice but is definitely worth it to be able to add foil on almost any surface.
Questions?
Have you played with Deco Foil and is this a material that you would add to your projects? I would love to hear what you think of it and if you have any questions about how to use it. Learning how to use products takes time and practice. I hope that showing you my process for testing products for project has been helpful to you. Please leave a comment below or contact me directly. I would love to hear from you!
I hope that you have a great week and take time for creative self-care!
Project Supply List
The new Deco Foil Transfer Gel Duo is specially designed to transfer foil or flock with or without a laminator.

A quick and easy way to melt embossing powder this heating tool was specifically design for speed quiet and convenience. It can also be used to heat set or dry ink. It won't overheat and burn projects.
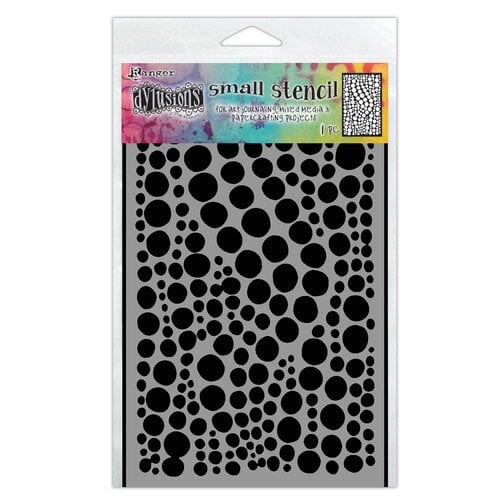
Create bold backgrounds with the Dylusions Drip Drops Small Stencil from Dyan Reaveley and Ranger Ink. This 5" x 8" stencil adds dimensional detail to cards, journals, and mixed media designs using a cascade of playful circular patterns that layer beautifully with your favorite crafting mediums.
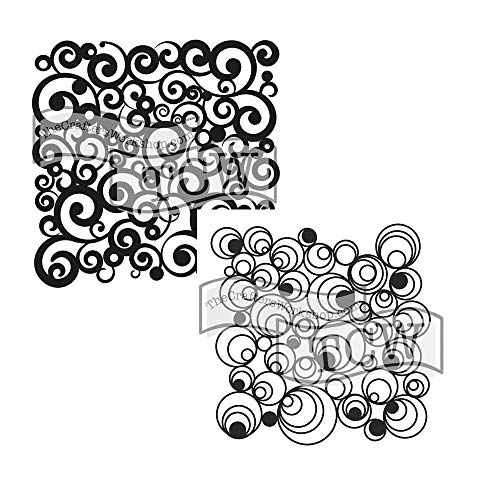
This 12" x 12" reusable Cosmic Swirl Doodling stencil is designed by Jaime Echt for The Crafter's Workshop

6 decorative feather stencils in different styles and 1 piece metal opening ring. The size of each feather stencil measures about 28 x 21 cm/ 11 x 8.3 inch.
Two heated rollers with two temperature settings create bubble- and wrinkle-free results that give your documents, photos and more a professional appearance.
Mix in some glamour with your projects when you use the Gold 6" x 12" Transfer Sheet Deco Foil by iCraft for Therm O Web. This package includes five sheets of foil for use on fabric, paper, wood and other porous surfaces.
The Rainbow Deco Foil by iCraft for Therm O Web Transfer sheets are a great way to add brilliant colors accented with a metallic finish to your cards, pages, and mixed media art.
Contains one roll of Reynolds Kitchens Stay Flat Parchment Paper with SmartGrid lines, measuring 15 inches wide x 36 feet long (45 square feet total). Finally, parchment paper that doesn’t curl or roll! Just use the reinforced panel to TUCK, PRESS and PULL.
This lightweight and compact iron is perfect for clothing and use in your arts & craft projects.
The Big Shot Switch Plus in White from Sizzix features electric cutting, auto-reverse, and a 9" platform - all wrapped in a sleek, modern design. Includes dies, an embossing folder, and cutting pads to get you started. Compatible in the US and Canada only.
Get flawless folds every time with the CrafTreat Large Teflon Bone Folder! This Large 6.3" x 0.8" Bone Folder is smooth, strong, and non-stick, making it perfect for scoring, folding, and burnishing without leaving shine or marks.
Instantly add a foil finish to your project with Deco Foil Liquid Adhesive by iCraft for Therm O Web! The included bottle contains 2.1 fluid ounces of permanent transfer adhesive that works on porous surfaces like fabric and paper.

Put the mix into mixed media with the Dina Wakley Media Journal. Includes a unique variety of surfaces ideal for mixed media & art journaling. Surfaces include burlap, canvas, cotton rag watercolor paper, and kraft surfaces.

Hammermill 8.5” x 11” Colored Cardstock 110lb Paper is a premium thick cardstock designed for print and copy use on copiers and printers. It’s heavy cardstock that’s ideal for heavy duty projects.

1 ream (500 sheets total) of 8.5 x 11 inch white copier and printer paper. Acid-free to prevent yellowing. Smooth 20 pound weight paper for consistent ink and toner distribution; dries quickly and resists paper jams.
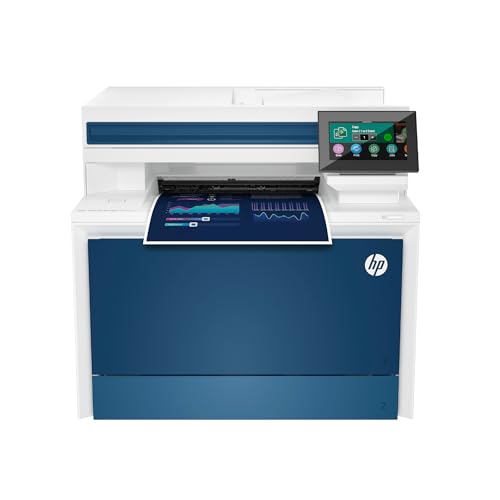
If you're an artist looking for a versatile laser printer, this is the one for you! This printer will print on acetate, watercolor paper, pastel paper and heavy cardstock.


4 Comments
Karen King Gonzales
I just bought Deco foil for the first time yesterday, for card making. I grabbed the last glue pen available, but did not see or buy the transfer gel duo . I am limited in finances and cannot buy a laminating machine. I do have spray adhesive, and another glue.
Also, I have a special iron for use with modeling films, to adhere plastic to model ships, etc. It was my Dad’s. So far, I have found the medium heat setting works!
But, I did notice a clear plastic film separates from the foil. Is this supposed to happen?
And, one more question. I saw several videos last night where people were cold pressing the foil over several types of adhesive. Not one person mentioned how long to leave the foil on before peeling off. Could you please tell me?
Nadine Milton
Hi Karen, I’m glad that you’re giving Deco Foil a try! To answer your question, yes, there is a clear plastic film that separates from the foil and that is supposed to happen. What’s nice about it is if you keep that backing foil, you can use the negative image on another project (which I haven’t done yet, but do plan to try at some point).
The laminator is a nice to have but not essential for heating the foil, it sounds like the tools you are using are working for you. The only reason I use a laminator is that I already had one, otherwise I would just use an iron to heat set.
Regarding cold pressing, it has more to do with pressure than anything else. The more you rub and add pressure, the better result you will get. This can be done with your fingers, a bone folder or anything hard that will help the foil to transfer.
I’m not sure if you had a chance to view my video. I go into detail on how to use the foil with a iron vs. laminator and how to get good results with cold pressing. You might find it helpful as you’re experimenting with the foil, and I shared some of the lessons I learned as I was trying to get the foil to transfer.
Brenda
I tried the decofoil transfer gel today for the first time. I don’t know what I did wrong but the foil transfered speckled effect on the cardstock where there was NO gel.
I have had the same problem when I used a laser printed image.
I can’t heat emboss either my image always looks gritty……..just wtfudge..
Any suggestions
Nadine Milton
I’m sorry to hear that you’re not getting good results, that’s so frustrating! I haven’t had that issue with my foil, but here’s some ideas that might help. First of all, what type of cardstock are you using? I wonder if it’s something about the cardstock that is attracting the foil to the surface. I wonder if using a stamping anti-static pouch on the surface before adding gel might help. Maybe that will help the foil from sticking to the places that you don’t want it to. Foil can be a bit finicky. I’m not sure if it’s weather, humidity or other factors. Some days I find it works well and other days I fight with it a bit. Let me know how it goes and I hope that you can find a way to get consistent results!