How to Stamp on Acetate Sheets with Inks and Paints
Are you looking to add pattern and interest to clear acetate or plastic sheets for use in your creative projects? Today I’ll be sharing with you how to stamp on acetate sheets and get great results every time.
There’s a variety of mediums that will work for stamping on acetate, but today I’ll be focusing on three mediums that I’ve found work the best: acrylic paint, StazOn ink, and archival ink.
Hop-A-Long Studio is reader-supported. When you buy through links on our site, we may earn an affiliate commission at no cost to you. Learn more.
Why Stamp on Acetate Sheets?
If you have been following me for a while, a few weeks ago I shared with you how to incorporate acetate and tissue paper into art journal collage. In that article, I was using printed acetate from my art stash. When I was looking online, I noticed that very few companies sell printed acetate.
Acetate can add beautiful, translucent layers to any art journal project. It’s a medium that works well for art journaling that isn’t used often enough in projects in my opinion. By understanding a few fundamentals about acetate and the correct mediums to stamp acetate sheets with, we can make custom acetate for our projects.
What Should I Use? Plastic, Acetate, Mylar?
There are many clear plastic sheets available for arts and crafts. It can be confusing to know the best product to use for stamping in your art journal. What should we look for in clear plastic and what’s the difference between these products?
Acetate
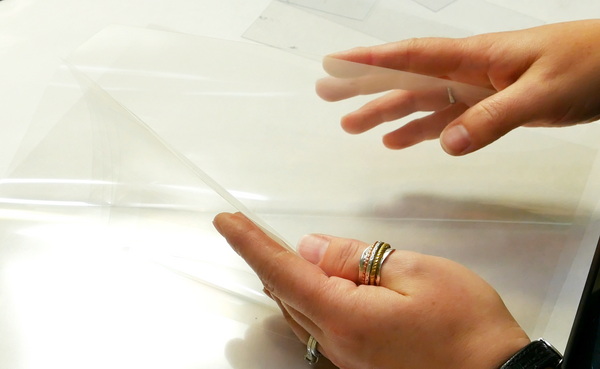
Acetate is a plant based nylon-type material (also known as cellulose). This is a great choice for any project because of the transparent, strong nature of the material. I will be using 4 mil (0.1mm) acetate today. As it is lightweight and flexible, these acetate sheets will work perfectly to create layers on any project.
Mylar
The difference between Mylar and acetate is that mylar is synthetic and is made from a polyester material instead of a nylon-based material. Mylar is a brand name for one of the manufacturers of these clear, polyester sheets. Mylar will work just as well as acetate for stamping.
Plastic
You can also use clear household plastic that you have upcycled from packaging. I tend to save a lot of the packaging from art and craft products to use on my projects. This packaging is generally more scratched and scarred than acetate sheets or mylar because it’s usually seen more abuse. But if you want to try this acetate stamping technique, find some flat, clear packaging to give this technique a try!
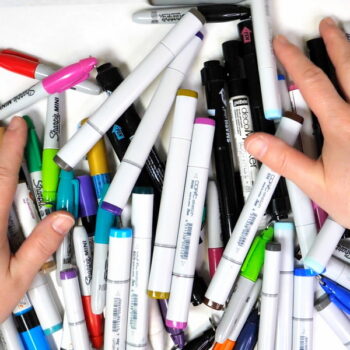
Stamping Inks and Paints
Not all inks and paints will work on acetate sheets. Acetate is a non-absorbent surface which means inks and paints that require a porous surface will not work on acetate.
Here are the three inks and paints that I recommend that will work well on acetate sheets or other plastic surfaces.
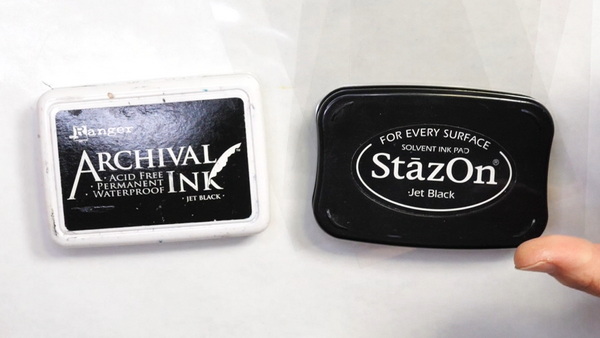
Archival Ink
Archival ink is an oil-based ink that will dry on acetate. As it is oil-based, you need to give this ink extra drying time to cure on a non-absorbent surface. Archival ink can be purchased in a variety of colors and are available from companies such as Ranger Ink and Tsukineko to name a few. For today’s project I’ll be using Ranger Jet Black Archival Ink.
StazOn Ink
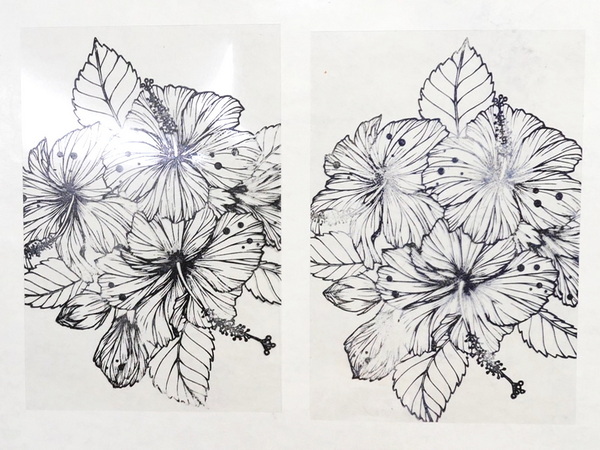
StazOn ink is a solvent ink that is designed to work on non-absorbent surfaces. It stamps well on acetate and dries in only a few minutes, which is why this is the ink I highly recommend for stamping on acetate sheets.
Acrylic Paint
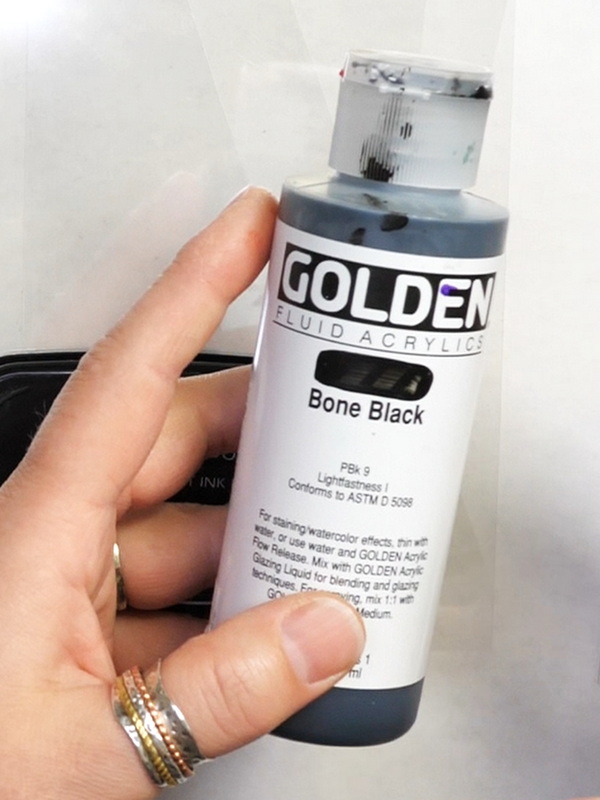
Acrylic paint is a fantastic medium for acetate as it will stamp easily onto the surface and will be permanent when dry. If you are using a thicker, heavy body paint, I would suggest either thinning down with a bit of water or using a Golden Fluid acrylic for best results.
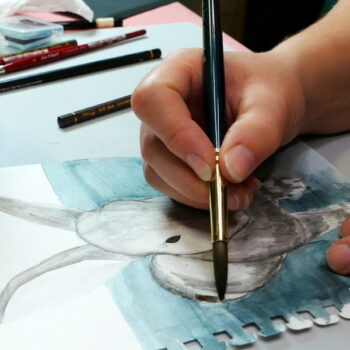
Stamping on Acetate Sheets
You can use both clear and rubber stamps for stamping on acetate sheets, the type of stamp doesn’t make a big difference. The type of ink and paint used is more important to get success with this technique. But I do find that clear stamps will stick to the acetate even after paint or ink is applied, where rubber stamps will release much more easily.
Stamping with Ink
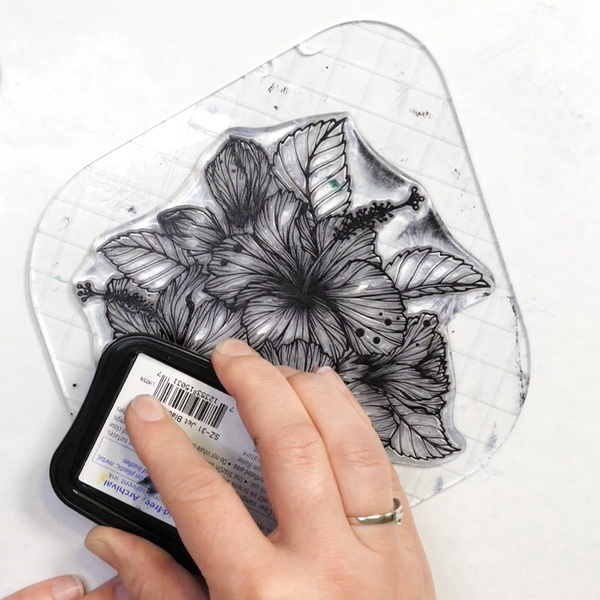
When stamping with ink on acetate, make sure that your ink pad is well inked and not dry. As the acetate isn’t absorbent, if there’s an inconsistent layer of ink on the stamp, it will be obvious in the stamped image.
Add the ink to the stamp and then stamp onto the acetate. Make sure to press down firmly and apply pressure to get an even image transfer. The acetate is a slippery surface, so when applying pressure, press down evenly. If you press down at an angle, your image could slide giving you a blurry image.
Stamping Tips
You can also use a stamping pressure tool to apply pressure to the stamp. This way you can make sure you have even pressure on your image before removing the stamp.
Because of the surface tension between the acetate and the stamp, when you lift the stamp off, you may find that the acetate will stick to the stamp. Carefully peel it off without smudging the image.
After stamping your image, leave it for at least 3-5 minutes before using the image or adding any color to the image. StazOn solvent ink will dry fairly quickly, but oil-based ink tends to dry slower, especially on non-absorbent surfaces. Let it dry fully before moving on.
If you’re new to stamping, check out my stamping tips and techniques article for more information on how to get great results with stamping.
Stamping with Acrylic Paint
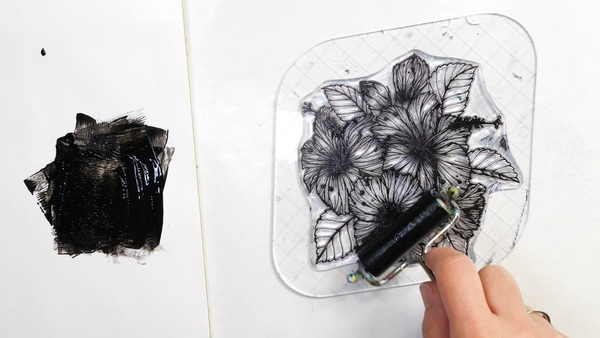
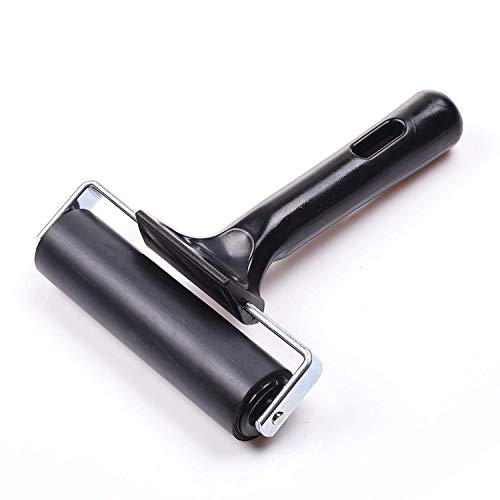
Start by adding acrylic paint to a palette. If you are using a thick, heavy body paint, dilute the paint with water and mix the paint with a palette knife. You want the paint to be a consistency where it can be added evenly to a brayer, then onto the stamped image.
Apply paint to the brayer making sure to have an even coat along the brayer surface. Brayer the paint onto the stamp. I tend to apply 2 thin layers in different directions to make sure that the stamp is evenly coated.
When stamping onto acetate, the paint will want to slide on the surface. I place my stamp gently onto the surface as squarely as possible. Once it’s on the surface, I’ll then apply even pressure. You want to be very careful to make sure the stamp doesn’t slip. Remove the stamp from the surface.
Tips for Stamping with Acrylic Paint
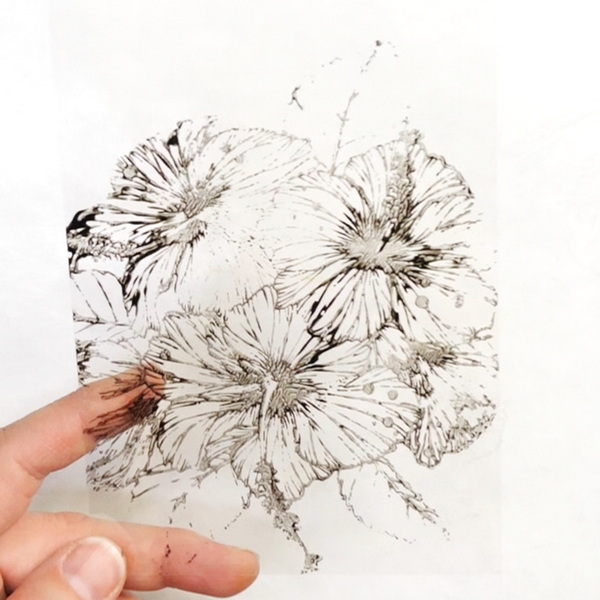
Acrylic paint is a challenging medium to use with acetate. The surface tension between the non-absorbent surface and the acrylic paint can create interesting and unexpected texture.
Depending on how much pressure you apply, this will affect the image. You may end up with a thin image or a thick image from where the paint has been displaced by the stamped image. It will take a little practice to get good results, but I like the effect that I get when stamping in acrylic paint.
You’ll notice that you get a little less fine detail than you do with inks. This is to be expected due to the paint being thicker. The level of detail can be achieved by playing around with the pressure and amount of paint.
Stamping Words
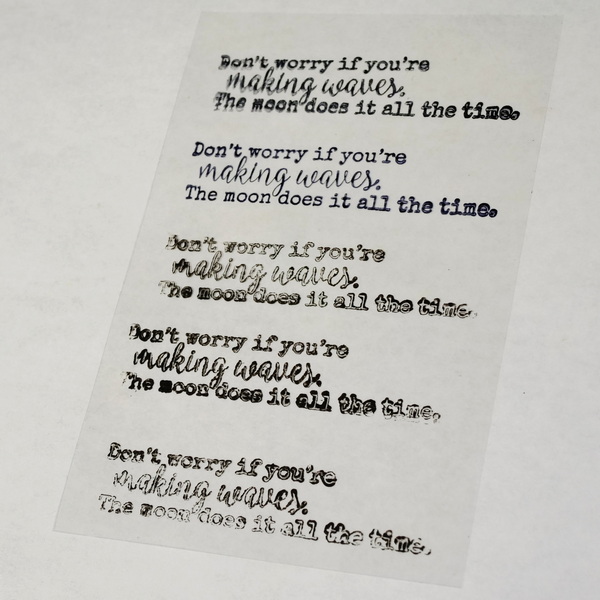
When stamping words, depending on the detail of the stamps, it can create interesting effects. When stamping with acrylic paint, you can press gently and end up with a detailed image, or you can press harder which can displace the paint enough to create a hollow area within the words. This can create an range of unique effects.
Drying Acetate
When using inks and paints on acetate, let them dry naturally. Do not heat set acetate! Being a plastic, it will easily warp and could melt. Which means that you will have to throw out your project and create your design again.
Adhering Acetate
When adhering acetate, I like using Art Glitter Glue. This glue looks white but will dry clear. This means that the pieces will look transparent while still have excellent hold.
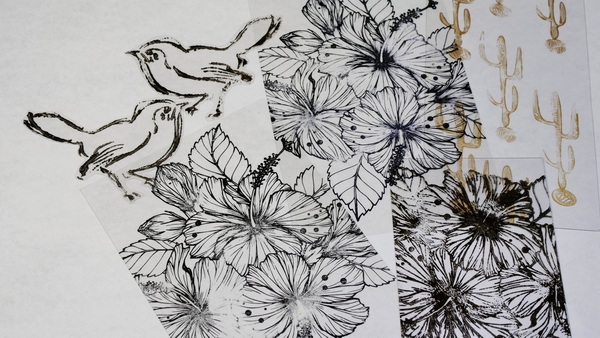
Ideas For Using Stamped Acetate Sheets

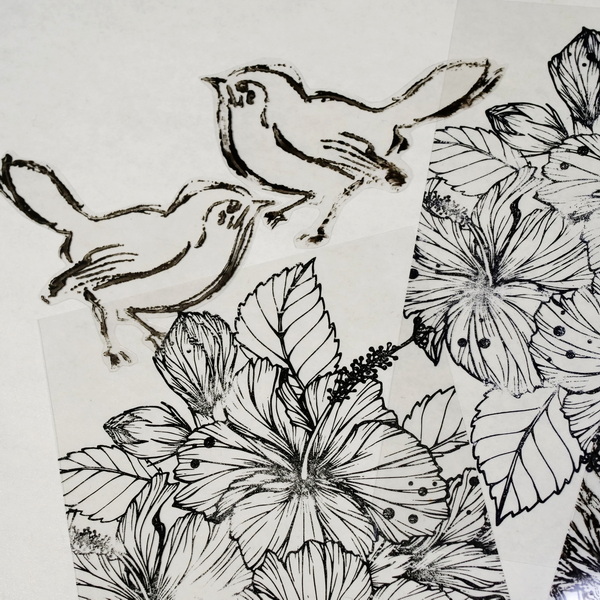
I love using acetate for stamping words onto my art journal pages. It also works well for creating patterns and designs that can be layered on any project.

Here is another example from a little anniversary journal that I created. You can use the acetate to be part of the background layers, but you can also fussy cut out your images to create ephemera for your art journal. For this book, I didn’t want to cover up the beautiful foiling, so using acetate was a fun way to create extra design without detracting from the background.
Questions?
Any questions about how to stamp on acetate sheets? Do you use acetate regularly in your projects? I’d love to hear how to use acetate in your projects or if you have any questions. Leave a comment below and I’d love to start a conversation with you! Stay tuned for next week’s article where I share with you how you can color your stamped acetate images with a variety of coloring mediums!
Project Supply List

Golden Fluid Acrylics – Bone Black, 1 oz bottle
from: Blick Art Materials


The Jet Black Archival Ink Pad by Ranger Ink is acid-free, non-toxic, water-resistant, and fade-resistant, and provides lasting results. This ink will not deteriorate paper and does not bleed when inks, paints, or markers are used over it.

Ideal for spraying, brushing, and staining. Excellent for fabric application. Result offers fine dispersion, high tinting strength, durability and flexibility.
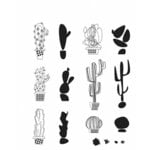
Stampers Anonymous – Tim Holtz – Cling Mounted Rubber Stamp Set – Mod Cactus
from: Scrapbook.com

Art Glitter Glue is permanent and dries clear and adheres to a variety of surfaces. It's water based and acid free. Make sure to close lid to avoid drying of glitter glue. Bundle comes with one bottle of 8oz, one bottle of 2 oz and a metal tip for easy application.
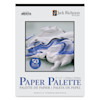
Richeson Disposable Palette Paper Pad – 9′ x 12′, 50 Sheets
from: Blick Art Materials


2 Comments
Nancy
I’m new to stamping and on acetate. I have Stazon ink. How hard/gentle am I supposed to add pressure? The image never really stamps clearly. The harder I add pressure, it becomes lighter. Am I taking off the ink by pushing too hard? I would appreciate any suggestions… p. s. I am using a Misty.
Nadine Milton
Hi Nancy, that’s a great question. I use StazOn quite a bit in my art projects, especially on non-porous surfaces. Generally when it comes to acetate, you want to stamp lightly on it. The more pressure you add the less clear your image will be. This is because the ink does not absorb into the surface, instead it sits on top and dries. Because of this, the more pressure you stamp with, the less clear your image gets due to the ink and the surface tension. If you are stamping lightly and still not getting a good impression, try reinking your stamp pad. This way you can make sure that you are getting vibrant color on your stamp and you should be able to get a great image by stamping once, especially since you’re using a Misti. I hope that helps!