Mixed Media Found Object Art Panel
Have you ever had objects that you wish you could incorporate in your art? Today we will be creating a mixed media found object art panel which includes these found objects into your art. By adding dimension to your projects, it can be very inspiring and is a great way of mixing up your creative practice.
Found Object Art and Assemblage
If you are new to found object art, it often goes by another name, assemblage. The dictionary definition of assemblage is “a work of art made by grouping found or unrelated objects.” This is exactly what found object art is.
Where to Find Found Objects
Found objects can be found anywhere. They can be old pieces of jewelry that are broken, little figurines, charms, old keys, or containers. I often use bottle caps, pop can tabs, and other objects that I would usually recycle. I also purchase metal keys, clocks, paper flowers and other ephemera at scrapbooking stores, dollar stores and online.
The Intention for the Mixed Media Found Object Art Panel
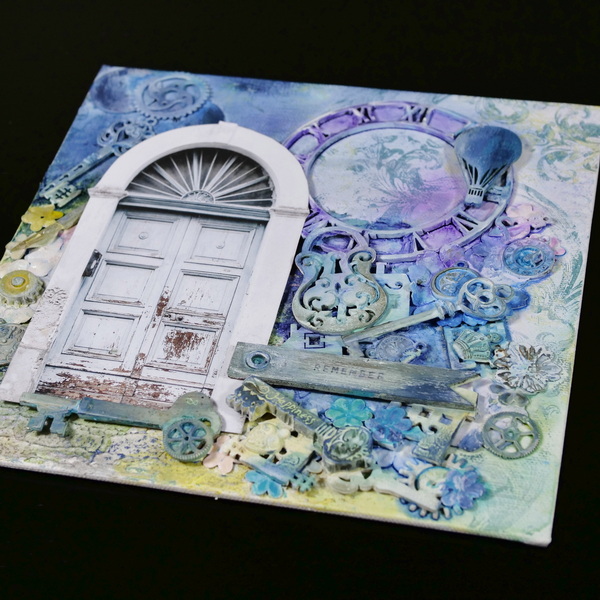
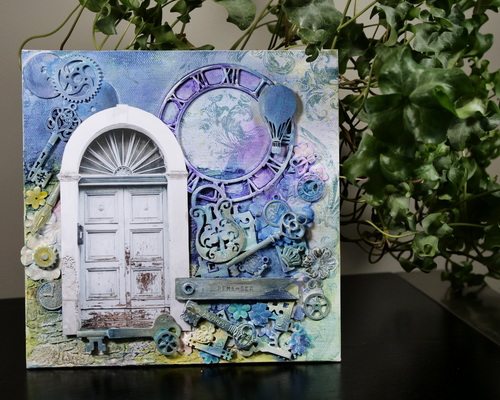
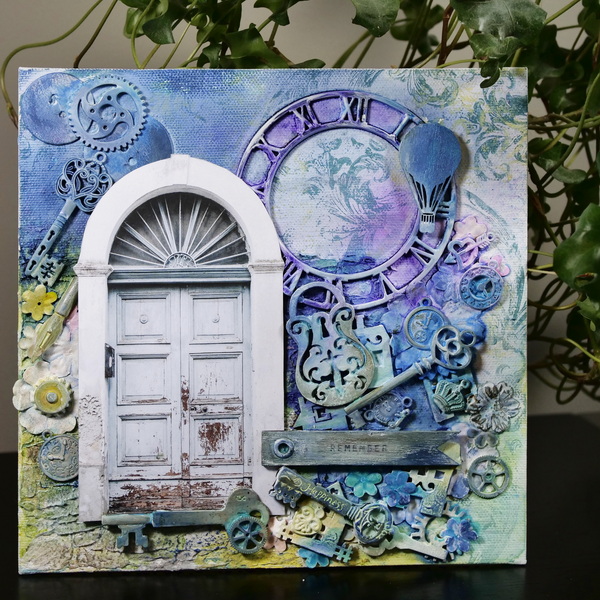
For this mixed media found object art panel, I chose an image as my focal point and intention. In this case, it was an image of a door that came out of the Mintay Papers Door Book. I love the variety of doors and how well they fit into my mixed media work.
It made me think about the doors in our lives. Through the choices that we make, this means that some doors in our lives open and others close. I paired this with a wooden banner that said remember, because I believe it is important to remember these moments. When we have the courage to step through a door, often when we look back, it can be one of the best decisions we have ever made.
With this mixed media found object panel, I wanted it to be more than a pretty panel. I also wanted it to be a reminder not to live in regret, but in memory. Remembering the choices and moments that led to the best decisions in our lives that helped us grow.
How to Create a Mixed Media Found Object Art Panel
In the video below I walk you through each step to create this beautiful mixed media found object art panel. The intention is to use what you already have on hand for found objects, stamps, paints, and sprays.
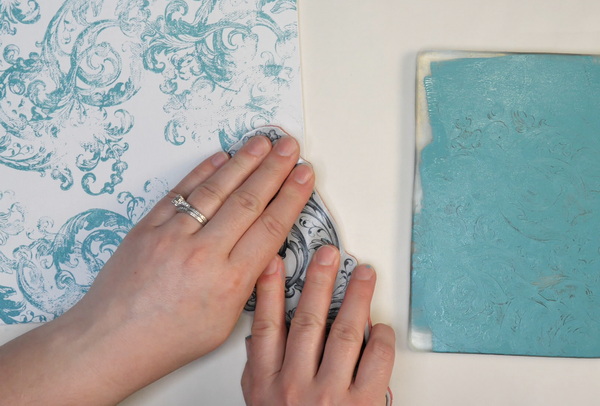
Step 1: Adding Stamping to the Panel
For this project, I am using an 8 inch by 8-inch art panel. Most art panels come pretreated with gesso, if your panel is not pretreated, add a layer of gesso before you start.
Add stamping to the panel using acrylic paint and your favorite stamp. Add stamping all over the art panel with blue and yellow paint, overlapping and layering until you are happy with the result. You can also use ink for this step, but please be aware that it will not be as color fast and waterproof as the acrylic paint. For more information on how to stamp consistent images, click here.
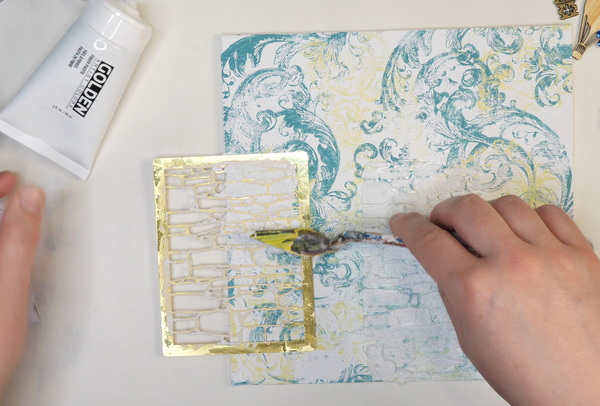
Step 2: Adding Fiber Paste through a Stencil
Decide on a focal image and where you would like to place it on your panel. For this mixed media found object art panel the image will be added to the bottom left-hand corner.
Once you decide on the placement of your image, add fiber paste through a stencil to this area of the panel. The intention is when it has dried, the focal image will be framed by the fiber paste. Set aside to dry completely.
For this step, if you do not have fiber paste, any other paste medium will work, such as molding paste or modeling paste.
Step 3: Adding White Paint through a Stencil
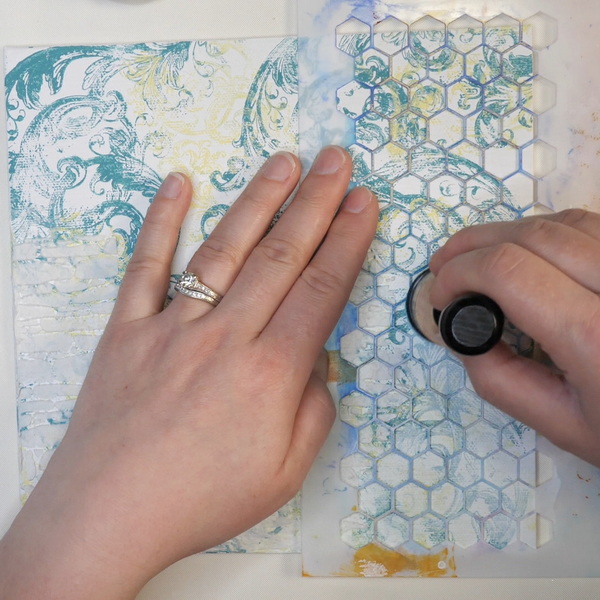
To add variation and soften the color in areas of the panel, add white paint through a stencil. Apply it lightly so that it does not completely cover the stamped images below. Add it in areas around the project, but not covering the entire panel.
Step 4: Adding Paint and Waxes to the Fiber Paste
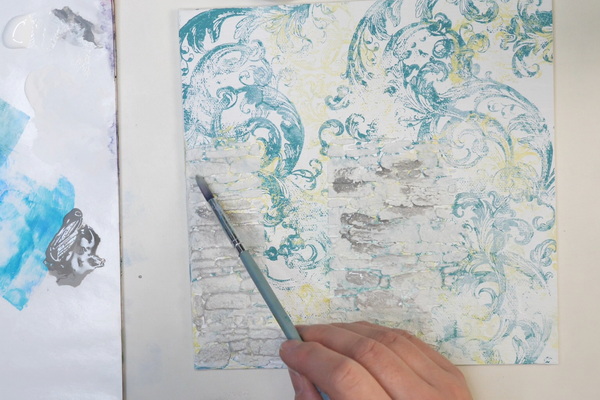
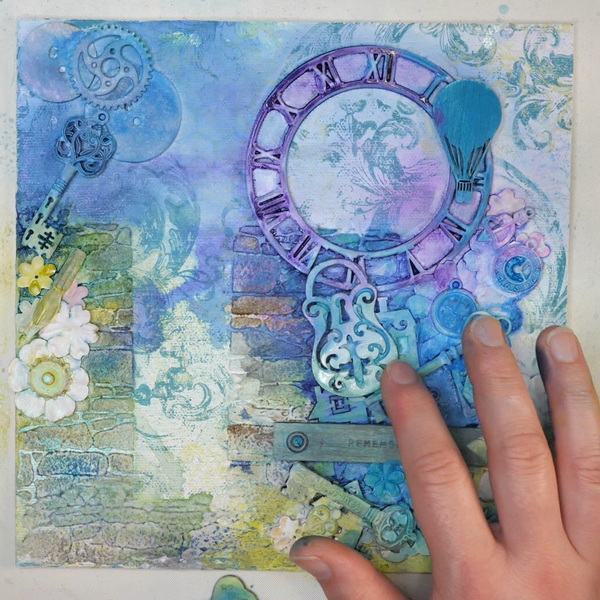
When the fiber paste is dry, add acrylic paint and waxes randomly to the fiber paste. By adding a wash of grey paint to the bricks, this brings out the detail in the image. By adding beeswax art paste on top of the fiber paste, this shows more of the texture that is created by the fiber paste.
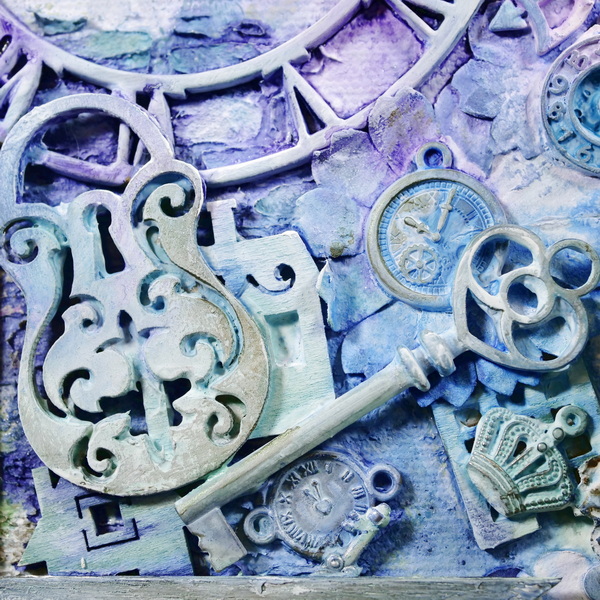
Step 5: Adding Found Objects
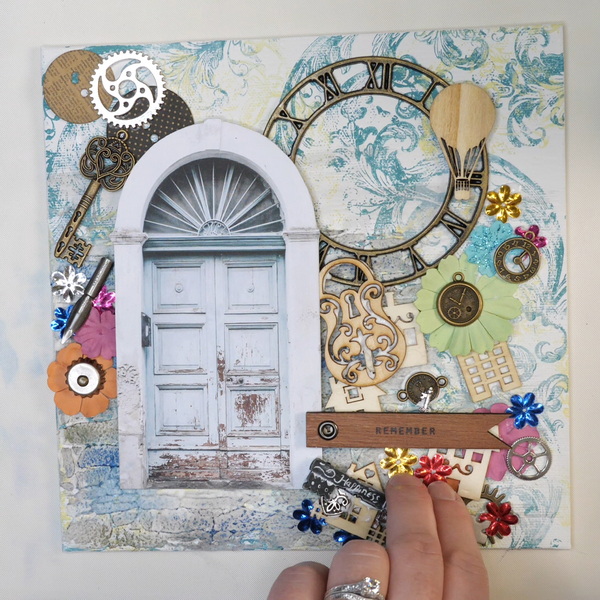
Arrange your found objects onto the project and start adhering them to the panel with glue or gel medium. Use a fabric glue or mixed media glue that is meant for uses other than adhering paper together. My favorite medium for gluing is extra-heavy gel medium applied with a palette knife. Whatever glue you decide to use, make sure that it dries clear.
For heavier items, add a bit of glue to the panel as well as the back of the object to get good adhesion. If some of the glue seeps around the found object, use a wet paper towel or baby wipe to remove the glue while it is still wet. The glue will dry clear if you are using the appropriate glue, so even it if it looks a bit messy once applied, it will not be noticeable once dry.
Step 6: Adding White Paint to Found Objects
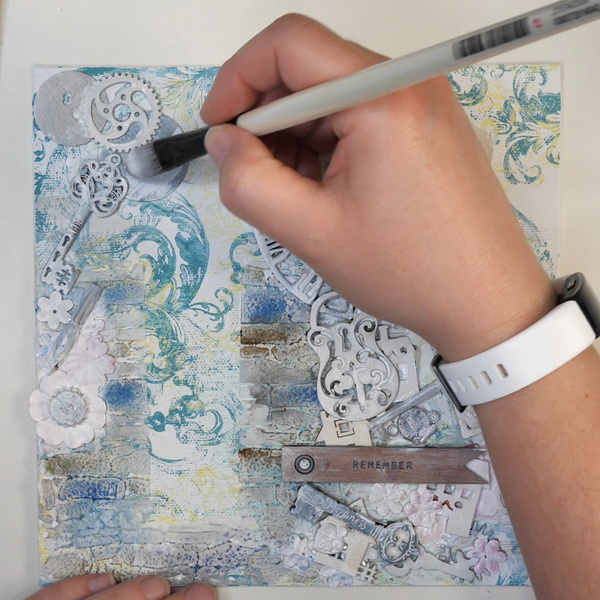
Once the glue has fully dried, add a wash of white paint on top of the found objects. This will bring cohesion to the found objects that you have added to your project. By varying the amount of water, you use with the white paint will provide variation in the opacity of the wash.
Step 7: Adding Acrylics and Inks to Found Objects
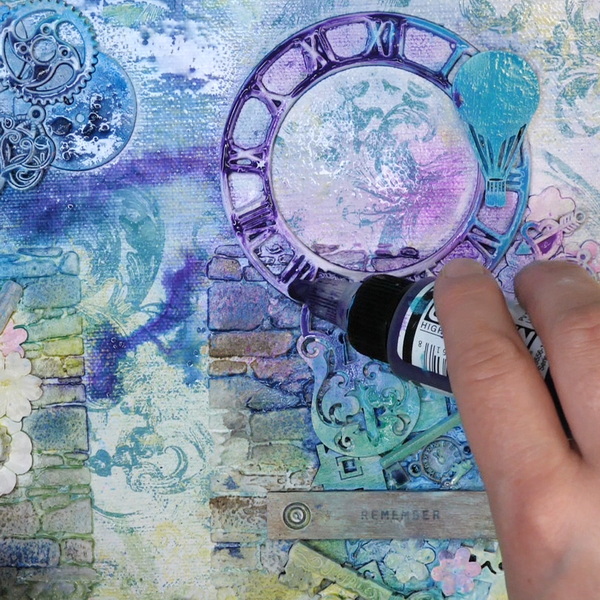
Start applying color to the found objects using a variety of spray inks and acrylic inks. Spritz the color onto the surface and lift the panel to let it move around the project. If you would like to soften the color or get more movement, add water. Continue to add layers of color to the found objects.
You can also use fluid acrylics and a paint brush to get a similar effect. If you only have acrylic paint on hand, water down the paint and apply it to the project with a brush. This look will be a bit less random but is also effective.
Step 8: Adding Highlights with White Paint
Once you have added your color and it has dried, use your finger to add small highlights with white paint onto the found objects. This is a way to pull out textures and details and add variation. You can also use a drybrush technique instead of using your finger for this step.
Step 9: Adding Shadow with Beeswax Paste
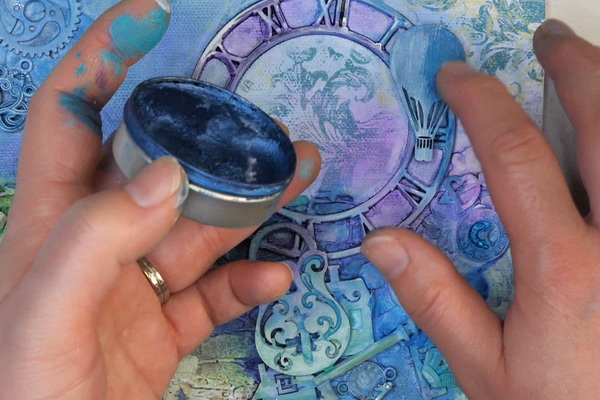
To create additional depth, using your finger add beeswax art paste to the found objects. This will add shadow and will add contrast to the highlights.
Step 10: Add Focal Image
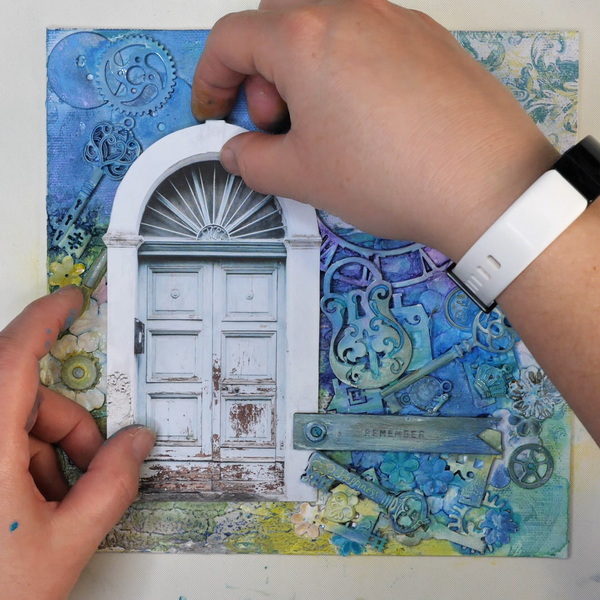
Once you are happy with the color of your found objects, add in your focal image. I used foam adhesive dots as this creates dimension and stability in behind the image.
Step 11: Sealing the Panel
Sealing the panel is an optional step to the project. If you have used primarily inks on your project, they will fade over time when exposed to sunlight. To prevent fading, spray with an archival varnish with UV protection or another spray sealant that works well for mixed media applications.
Other Surfaces for Found Object Art
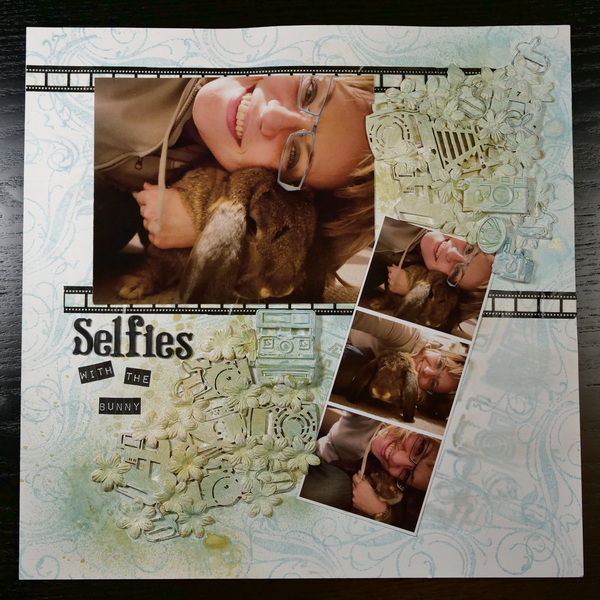
The inspiration for this panel was a found object scrapbooking page that I completed several years ago. This was inspired by a class that I had taken with Christy Riopel. For today’s project, I used a panel, but this technique works well on a scrapbook page or a card. I would suggest using a heavy weight cardstock if using on a paper surface instead of an art panel or canvas.
Questions?
I hope that you have learned something new today with this project. If you have any questions, please comment below, or contact me directly. I would love to start a conversation with you. If you give this project a try, I would love to see the result! If sharing on Instagram, please use hashtag #hopalongstudio on your post so that I can view, comment and like it. Have a great weekend and I hope that you take time for creative self-care!