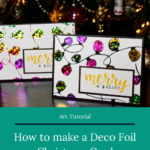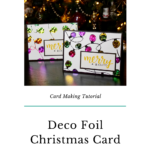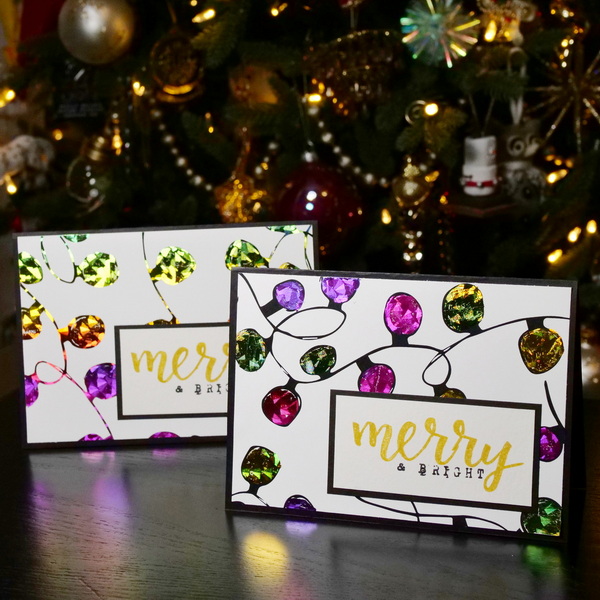
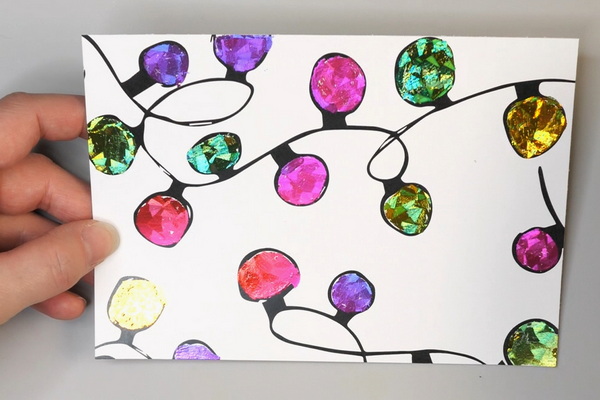
Deco Foil Christmas Card “Merry and Bright”
One of my favorite parts of the Christmas season is making beautiful Christmas cards. The technique that I am sharing today is how to make a Deco Foil Christmas card that uses patterned paper, Deco Foil transfer sheets and the Deco Foil adhesive pen.
Mastering Deco Foil
I love Deco Foil. This is a fun medium that you can get beautiful results with. But I find so many of the videos and projects I see only show the perfect results. Deco Foil is fairly easy to use, but there are times when I don’t always get a perfect foil transfer. Mastering Deco Foil takes practice and a bit of patience.
When I was originally designing this Deco Foil Christmas card, I was getting beautiful foil transfers without any problems. But a week later when I was filming this video, I was struggling with getting a good result.
There always seems to be a few factors to consider when you are not getting a good foil transfer. It might be because the adhesive pen wasn’t working correctly or how much adhesive the paper absorbs. It could be the heat of the laminator or how much pressure was being applied when using the cold transfer method. There can be a bit of trial and error to get a great foil transfer.
Deco Foil Christmas Card Tutorial
In today’s video I will be sharing with you not only how to make this beautiful card but how to trouble shoot and correct foil adhesion problems with this Deco Foil Christmas card.
Adding Deco Foil Adhesive Pen
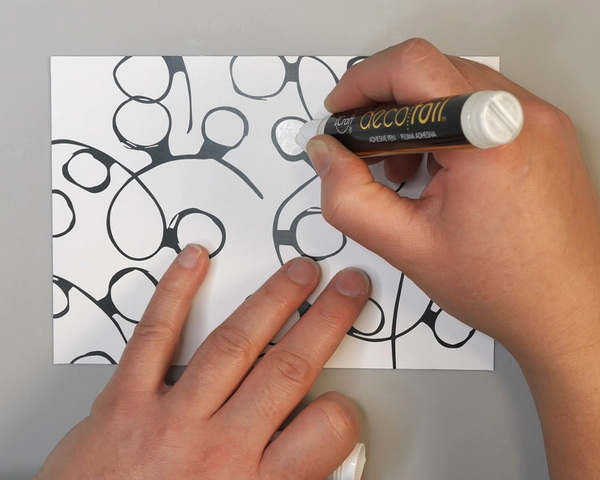
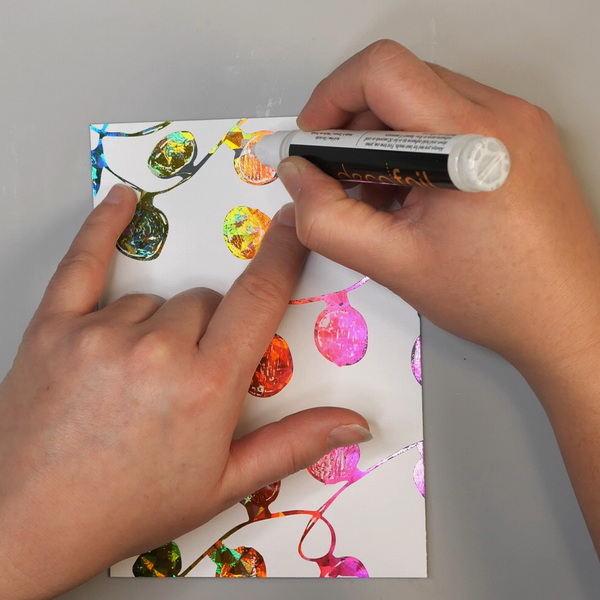
Cut a piece of Baubles and Bows cardstock to 4.75 by 6.75 inches. Using the Deco Foil adhesive pen, add adhesive to the Christmas lights on the patterned paper. When applying the adhesive pen, add adhesive in circular motions to create an even coat on the surface. Let the adhesive set for a minute or two until the surface is tacky.
For best results with the adhesive pen, add a second layer of adhesive to the lights before adding foil. Every paper is different and will absorb more or less adhesive depending on the surface. A second layer will create a more even surface and generally give you a better foil transfer.
Adding Deco Foil Transfer Sheets
After you have applied the adhesive, set the card aside for a minute or two to dry. Make sure that the adhesive is tacky, not wet before adding foil.
Add a Deco Foil Transfer sheet face up with the design and color facing you. At this point you can adhere the foil in two ways: with a laminator or by cold transfer.
Transferring Deco Foil with a Laminator
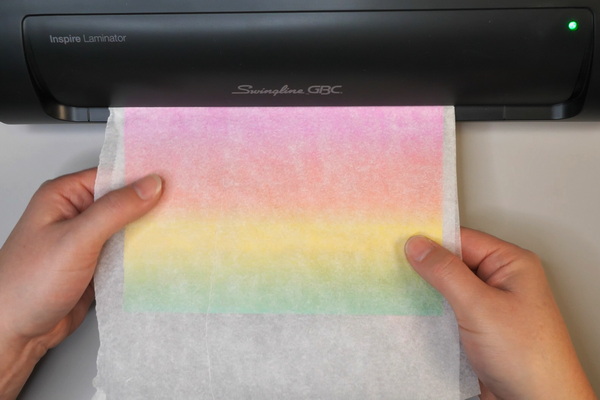
A laminator is the recommended way of transferring Deco Foil onto your project. Sandwich your Deco Foil and paper between two pieces of parchment paper and run through a hot laminator. Let it cool for a minute and pull the Deco Foil off to see the final image.
This step could also be done with an iron. To see my Ultimate Guide to Deco Foil where I show many different ways to transfer Deco Foil, please follow this link.
If your patterned paper is a laser-based print that uses toner ink, you may find that areas with toner ink will also transfer the foil. This technique only works with heat and will not work with a cold transfer.
Transferring Deco Foil by Cold Transfer
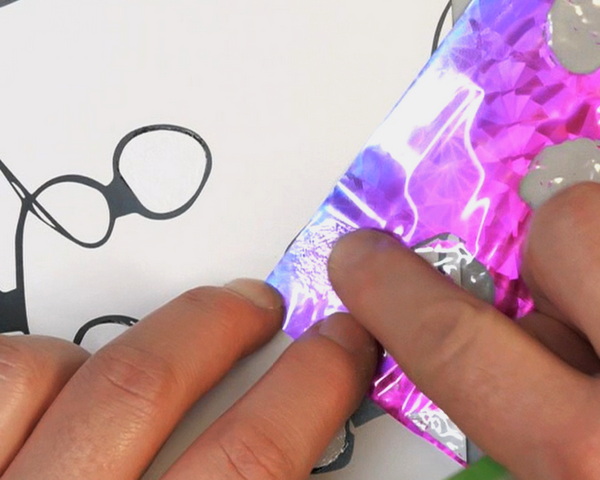
Deco Foil can also be transferred without heat as a cold transfer. This can be done with a die cut machine which applies pressure to the surface. You can also use a bone folder or your finger to transfer the foil onto the surface. The key is to use consistent pressure to transfer the Deco Foil to the adhesive.
A cold transfer is also a great way to use up the small pieces of foil that are left over from previous projects. Especially if you are working with foil in small areas like we are with this Deco Foil Christmas card.
Uneven Foil Transfer
What happens if you end up with an uneven foil transfer? Just add more adhesive pen and add additional foil to the surface.
For a good transfer, I would highly recommend two layers of adhesive when using the Deco Foil adhesive pen. But if you still have an uneven foil transfer, add adhesive to the areas that did not transfer correctly, let dry and add more foil.
The other option is to add adhesive again over the entire area, including on top of the foil, let it dry and add more foil on top. Both ways work for fixing the uneven foil transfer that happens from time to time.
Adding the Sentiment
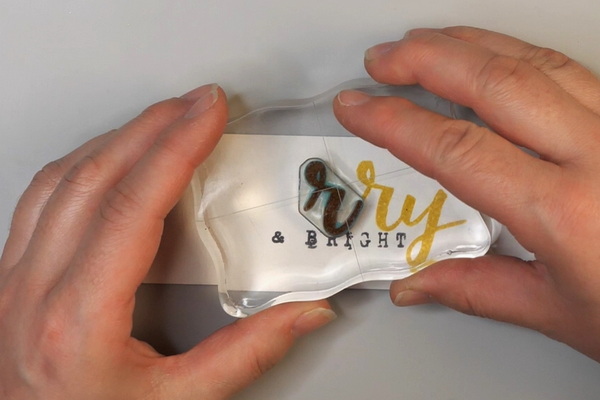
As a finishing touch to this card, stamp a sentiment using the Wild Whisper Designs Ledger & Script and Brush Script stamp sets.
Stamp the “& bright” sentiment first with Jet Black Archival Ink. Then stamp the “merry” with Distress Oxide Mustard Seed ink one letter at a time starting with the letter “y”. By stamping the last letters first, it can help you keep the cursive letters a bit straighter and makes for a stronger design.
Assembling the Card
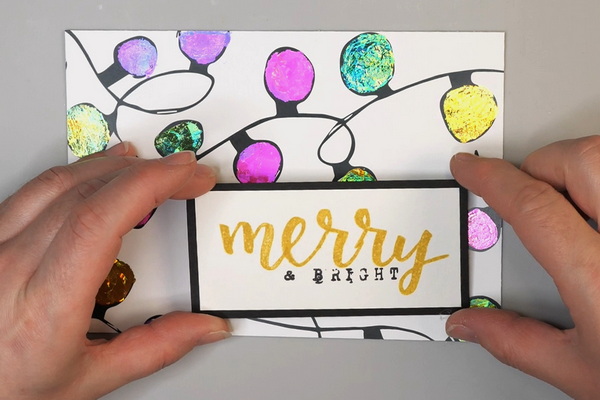
Cut a piece of black cardstock ¼” larger than the sentiment and mat the sentiment. Place it in the lower left-hand corner to create a strong composition. Adhere the foiled paper to a black 5“ by 7” card back. This will create a black frame around the card and make for a strong finished project.
Questions?
Do you have any questions about this Deco Foil Christmas card? Have you tried Deco Foil on a project before? I would love to hear what your experience with this product has been. I would also love to see your comments and answer any questions you may have! You can leave a comment below or contact me directly. I hope that you have a great week and spend some time playing with this fun medium.
Project Supply List
- Wild Whisper Designs Bauble and Bows Paper Pack
- Deco Foil Rainbow Shattered Glass
- Deco Foil Adhesive Pen
- Bone Folder
- Swingline Laminator
- Parchment Paper
- Staples 110lb Black Cardstock
- Strathmore Cold Press Watercolor Paper
- Scrapbook Adhesives E-Z Runner
- Ranger Jet Black Archival Ink
- Tim Holtz Distress Oxide Mustard Seed Ink
- Wild Whisper Designs Ledger and Script Stamp Set
- Wild Whisper Designs Brush Script Stamp Set